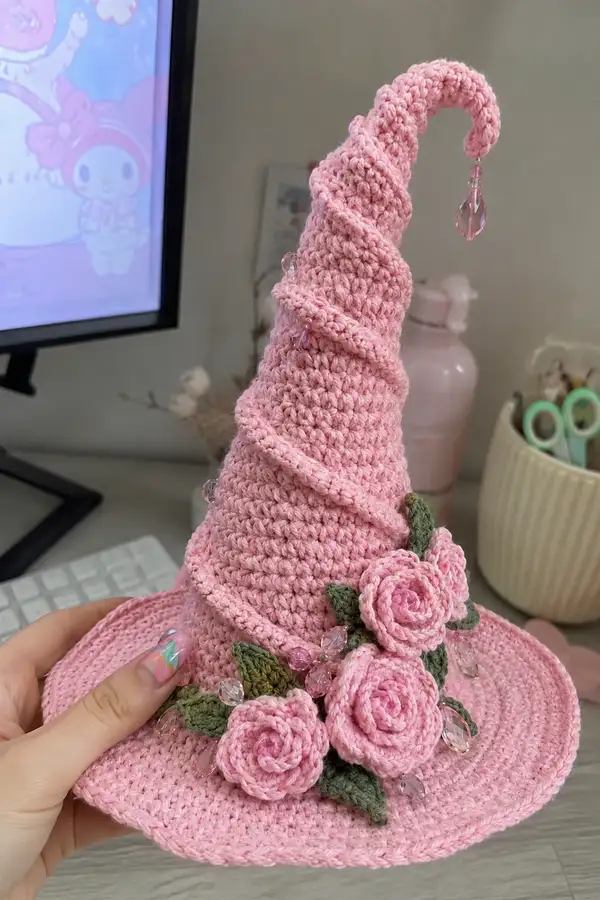
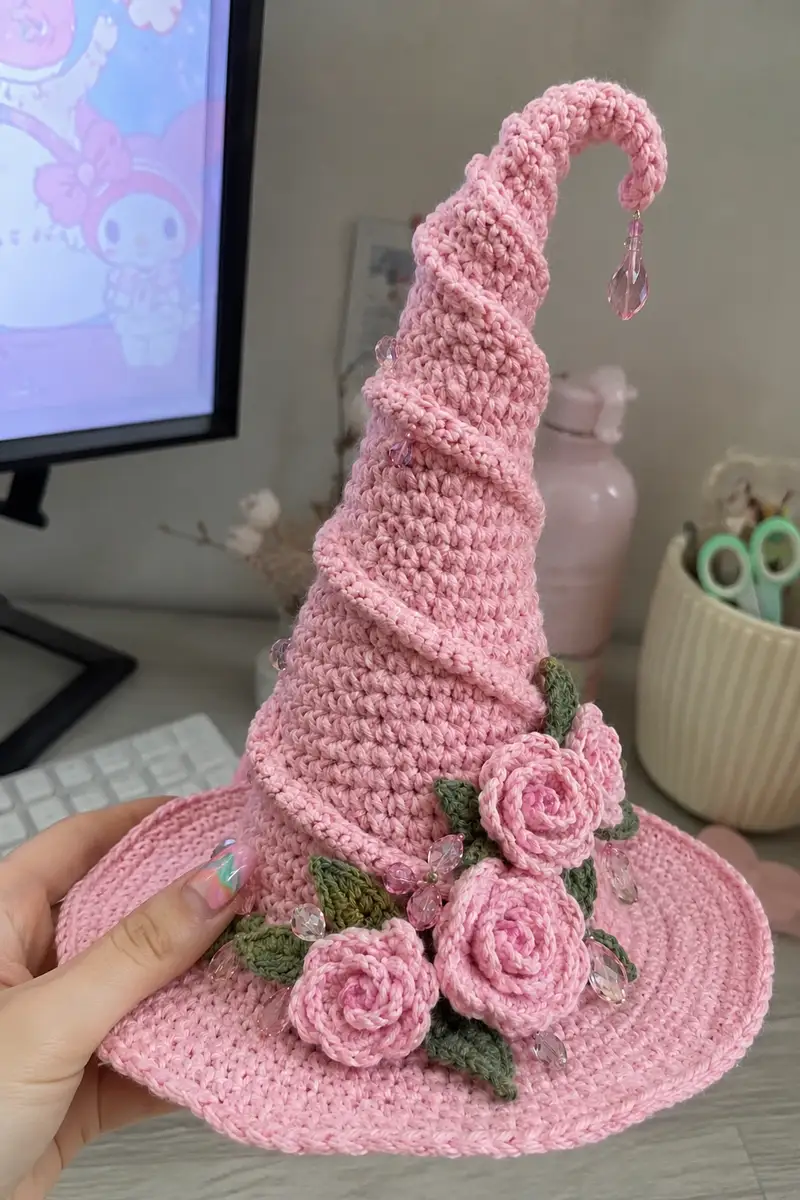
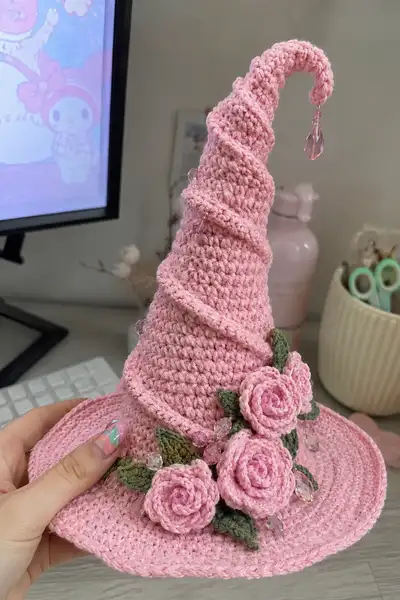
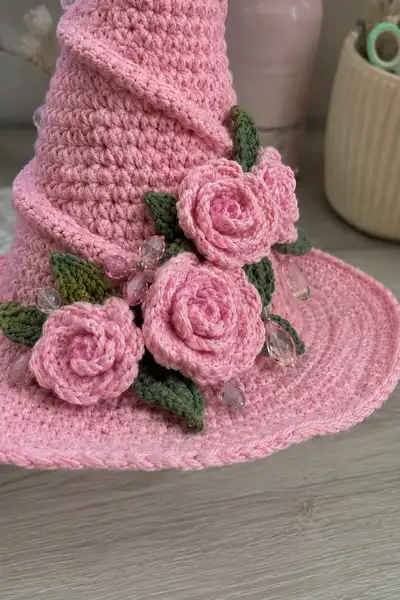
A whimsical tall witch hat crocheted in a soft baby pink with a dramatic spiral ridge, curled pointed tip, and a wide brim. Adorned with three dimensional rolled roses, olive-green leaves and sparkling crystal bead drops for a fairy-tale finish. Works up sturdy yet slightly flexible so it holds shape and the tip can be wired for a curl. Perfect as a decorative prop, costume accessory, or display piece.
Progress Tracker
0% Complete
— Notes & Gauge :
Info :
Gauge is not critical for shape but affects final size. Using US worsted (#4) yarn with 3.5mm hook, finished hat measures approximately 13-15 inches tall (measured to tip before curl) and brim diameter about 12-13 inches. Adjust yarn weight and hook for different sizes.
Info :
Work in continuous rounds (spiral) for the crown to avoid visible seams unless otherwise noted. Use stitch marker to mark round start. When a round says '1 sc in each st (48)' the number in parentheses is the total stitch count for that round.
— Crown (base shape of the tall hat) :
Round 1 :
6 sc in magic ring (6)
Round 3 :
(1 sc, 1 inc) x 6 (18)
Round 4 :
(2 sc, 1 inc) x 6 (24)
Round 5 :
(3 sc, 1 inc) x 6 (30)
Round 6 :
(4 sc, 1 inc) x 6 (36)
Round 7 :
(5 sc, 1 inc) x 6 (42)
Round 8 :
(6 sc, 1 inc) x 6 (48)
Round 9 :
(7 sc, 1 inc) x 6 (54)
Info :
At this point you have an even circular base that will become the bottom circumference of the crown. Check number of stitches (54). If your circumference is smaller or larger, you can add/subtract one increase round to reach comfortable fit for the wearer.
Rounds 10-20 :
1 sc in each st (54)
Info :
Work these rounds even to build height of the crown. Place safety or position marker at beginning of Round 10 to keep track. The hat pictured has a tall slender profile; feel free to lengthen this even section by adding 2-6 more rounds if you want a taller crown.
Round 21 :
(7 sc, 1 dec) x 6 (48)
Round 22 :
1 sc in each st (48)
Round 23 :
(6 sc, 1 dec) x 6 (42)
Round 24 :
1 sc in each st (42)
Info :
Start shaping the cone gradually. These subtle decreases keep the crown tapered without a sharp waist. Begin stuffing the crown lightly if you want it slightly padded; for a hollow, wearable hat skip stuffing. If you plan to insert wire for the tip, leave a long tail at the top to close after wire insertion.
Round 25 :
(5 sc, 1 dec) x 6 (36)
Round 26 :
1 sc in each st (36)
Round 27 :
(4 sc, 1 dec) x 6 (30)
Round 28 :
1 sc in each st (30)
Info :
If you want a stiff crown, you can insert a lightweight hat stiffener/fabric before closing or work internal rows in a cotton that blocks stiff. For a wearable hat, keep the interior soft and unstuffed so it fits comfortably on the head.
Round 29 :
(3 sc, 1 dec) x 6 (24)
Round 30 :
1 sc in each st (24)
Round 31 :
(2 sc, 1 dec) x 6 (18)
Round 32 :
1 sc in each st (18)
Round 33 :
(1 sc, 1 dec) x 6 (12)
Round 34 :
1 sc in each st (12)
Info :
Fasten off leaving a 20-30cm (8-12in) tail if you intend to insert wire and close after. If you prefer a hollow tip for curling, do not fasten yet; instead insert a short length of wire or pipe cleaner and continue. Stitch top closed around inserted wire if used.
— Curled Tip & Internal Wire (optional) :
Info :
To create the curled tip as in the photo, use an 18-22 gauge floral wire approximately 10-12 inches long. Fold in half to double strength and taper ends by wrapping a small piece of yarn around the ends to avoid sharp points. Push the wire down through the center of the crown before final closure.
Round 36 :
After inserting wire, sc evenly around opening of tip to secure wire: 6 sc in remaining loop (6)
Info :
Bend the wire gently to create a spiral curl. Test shape and adjust. Wrap some yarn around the wire inside the crown if you want a smoother, padded interior. Finish by sewing the final stitches closed and weaving end into interior to hide.
— Spiral Ridge (raised decorative swirl running around the crown) :
Info :
The spiral ridge is created with a separate crocheted cord worked in rounds then sewn in an ascending spiral around the crown, or created in-situ by working a row of single crochet in the FLO along a tall cord. Below are two options; choose one. Option A: Crocheted cord sewn in a spiral; Option B: In-place ridge using FLO slip stitches.
Option A - Cord Round 1 :
Ch 4, sl st to first ch to form tiny ring, ch 1, 6 sc into ring (6)
Option A - Round 2-40 :
1 sc in each st (6) - continue until cord measures approx same length as spiral path needed (about 70-90 inches depending on crown height). Fasten off leaving long tail for sewing.
Info :
For a wider raised ridge, use 2 or 3 strands held together or make slightly larger cord. Sew the cord onto the crown in a spiral moving up from base to tip, spacing each spiral about 6-10 rows apart depending on desired look. Use mattress stitch to secure with small, invisible stitches.
Option B - In-Place Ridge Row 1 :
Attach yarn at base of crown where you want spiral to begin, ch 1, work 1 sc in next st, then every 2nd round work 1 sc in FLO around a single round to form a ridge. Repeat this pick-up pattern and use a stitch marker to track spiral ascent.
Info :
The hat pictured shows a smooth, low-profile spiral ridge about 6-8 sts wide formed by a crocheted cord sewn in place. Sewing gives the most consistent sculpted look and allows for bead attachment between ridge and crown.
— Brim (worked flat to create wide circular brim) :
Info :
Attach to base of crown where round 9/10 meeting point is (or wherever crown base meets brim). Brim is worked in continuous rounds to ensure flatness. Check flatness frequently; if it ripples, reduce increases next round; if it cups, add increases.
Round 1 (Brim) :
Join yarn to base stitch of crown, ch 1, evenly sc around base (54) - this forms the brim starting round
Round 2 :
(1 sc, 1 inc) x 27 (81)
Round 3 :
(2 sc, 1 inc) x 27 (108)
Round 4 :
(3 sc, 1 inc) x 27 (135)
Info :
At this point the brim will already be broad. If you prefer a smaller brim, stop increasing earlier. If the edge waves, you can work one round in BLO to stabilize the edge.
Round 5 :
1 sc in each st (135)
Round 6 :
1 sc in each st BLO (135)
Round 7 :
1 sc in each st (135)
Round 8 :
(4 sc, 1 inc) x 27 (162)
Round 9 :
1 sc in each st (162)
Round 10 :
1 sc in each st BLO (162)
Info :
To create a crisp brim edge like in the photo, you can finish with a round of slip stitch in the back loop only with a slightly smaller hook (3.25mm). This tightens the edge and gives a neat rolled border.
Round 11 :
1 sl st in each st BLO (162)
Round 12 :
Fasten off and weave in ends. Block brim flat if necessary by pinning to blocking surface and lightly steaming or misting, then allow to dry.
— Tip Curl Detail (final shaping) :
Info :
Wrap the top of the tip in yarn to keep wire concealed and soft; create a small covering spiral by working 1 sc in each remaining top opening rows around the wire to shape into a tapered curl. Bend carefully to shape the final curled point as pictured.
— Rose Embellishments (make 3) :
Rose A - Foundation Row 1 :
Using baby pink, ch 60 (or ch length of approx 12-16 inches depending on desired rose size)
Rose A - Row 2 :
Sc in 2nd ch from hook and in each ch across (59)
Rose A - Row 3 :
Ch 3 (counts as dc), turn, *skip 1 st, 5 dc in next st, skip 1 st, sl st in next st* rep across to create a scallop ruffle; finish with sl st, fasten off leaving long tail for sewing
Info :
This method creates a ruffled strip that you then roll from one end into a rose and sew down through the center to secure. Use smaller hook for tighter petals or larger hook for looser petals. For a fuller rose, increase starting chain to 80 and repeat Row 3 for more ruffles.
Rose A - Assembly :
Roll the scalloped strip tightly from one end, using the long tail to tack the base of the rose in several places with whip stitch or ladder stitch. Sew base securely to brim/crown seam where desired.
Rose B :
Repeat Rose A with ch 48 for a slightly smaller rose (sc 47, ruffle round), roll and secure (smaller rose)
Rose C :
Repeat Rose A with ch 40 for smallest accent rose (sc 39, ruffle round), roll and secure
Info :
Arrange roses in a cluster as pictured: two larger roses side-by-side with one smaller rose tucked below. Pin positions before sewing to check composition; stitch through brim and the crown seam for best anchoring.
— Alternative Layered Rose (optional, each) :
Round 1 :
mr, 6 sc in mr (6)
Round 2 :
(1 sc, inc) x 3 (9)
Round 3 :
(2 sc, inc) x 3 (12)
Round 4 :
(3 sc, inc) x 3 (15)
Round 5 :
Fold and shape petals: work 5 dc into one st for raised petal, sl st in next; rep around to create petals. Fasten off and shape into a small blossom by sewing center closed.
Info :
The rolled scalloped strip method gives the soft spiral petals seen in the photo; the layered petal method creates more structured individual petals. Both can be combined for variety.
— Leaves (make 6-8) :
Leaf Row 1 :
Ch 10, sc in 2nd ch from hook, hdc in next, dc in next 2, hdc in next, sc in next 2, sl st in last (this forms one side of leaf)
Leaf Row 2 :
Turn along foundation ch and work opposite side symmetrically: sc in next 2, hdc in next, dc in next 2, hdc in next, sc in next 2, sl st to join at base. Fasten off leaving long tail for sewing (approx 8-10 sts across leaf)
Info :
For a more sculpted look, work Row 1 in BLO for one side and FLO for the other; block leaves with a little starch or glue to hold shape. Make 6 leaves to tuck under and between roses as in the picture.
— Beaded Crystal Drops & Butterfly Accent (make 4-6) :
Bead Drop 1 :
Cut 6-8 inches of thin beading wire, thread on a teardrop crystal bead, secure by twisting wire twice below bead, then thread small seed beads above bead and form a small loop at top. Repeat for each drop.
Beaded Chain Crochet (optional) :
Using yarn, ch 12, thread 1 small bead onto yarn and slide down to a chosen position, sc in each ch across, fasten off leaving tail. Sew ends to brim near roses for decorative dangles.
Butterfly Accent :
String four small pink teardrop beads into a '+' shape on thin wire, twist center and wrap with a small bead for abdomen; attach to hat near roses to mimic the crystal butterflies pictured.
Info :
Secure all bead wires by sewing and wrapping around sturdy stitches on the brim/crown seam. Use clear nail glue at attachment points for extra security if the hat will be handled frequently.
— Finishing & Edge Details :
Round 1 :
If you prefer a decorative brim edge, join yarn with sl st, ch 1, work 1 sc into each st to create a rounded edge (162)
Round 2 :
For a faux-rolled edge, work 1 sc in BLO for one round, then finish with 1 sl st in FLO for a tidy curl. Fasten off and weave in ends.
Info :
Block the entire hat lightly: pin brim to flat surface and steam or mist from a distance. Shape the crown and spiral ridge before drying to maintain the sculptural lines and ensure the roses sit correctly on the seam between crown and brim.
— Assembly & Placement of Embellishments :
Info :
Lay the hat on a flat surface. Position roses where crown meets brim on the front-right side to match the pictured placement. Arrange largest rose center-right with medium and small clustered slightly below and to the left. Tuck leaves between roses and secure with pins to test placement.
Info :
Sew roses down through base and into brim/crown seam using yarn tail; take small stitches into the hat fabric to anchor each rose firmly. Sew leaves in behind and stitch bead drops through hat fabric making sure twisted bead wire ends are wrapped and hidden inside.
Info :
Trim all tails and weave ends into the brim interior. Add a couple of reinforcing stitches at each embellishment base for security. Optionally attach a small internal ribbon band if wearing to help fit on head.
— Care & Storage :
Info :
Spot clean with gentle soap and water; remove beads if possible before washing. Store hat on a flat surface or hat stand to avoid flattening the brim and to maintain the curled tip shape. Avoid heavy crushing or prolonged direct sunlight to preserve yarn color.
This enchanting baby pink witch hat brings together classic crochet shaping with feminine rose details and sparkling crystals for a magical finished piece. Each step celebrates texture and color while allowing you to customize tip curl and embellishment placement. Enjoy the meditative process of crocheting spirals, making roses, and assembling a piece that feels like a miniature work of art. 🧶💖 The result is a hat that doubles as decor and costume—a perfect weekend project to delight a friend or yourself. ✨