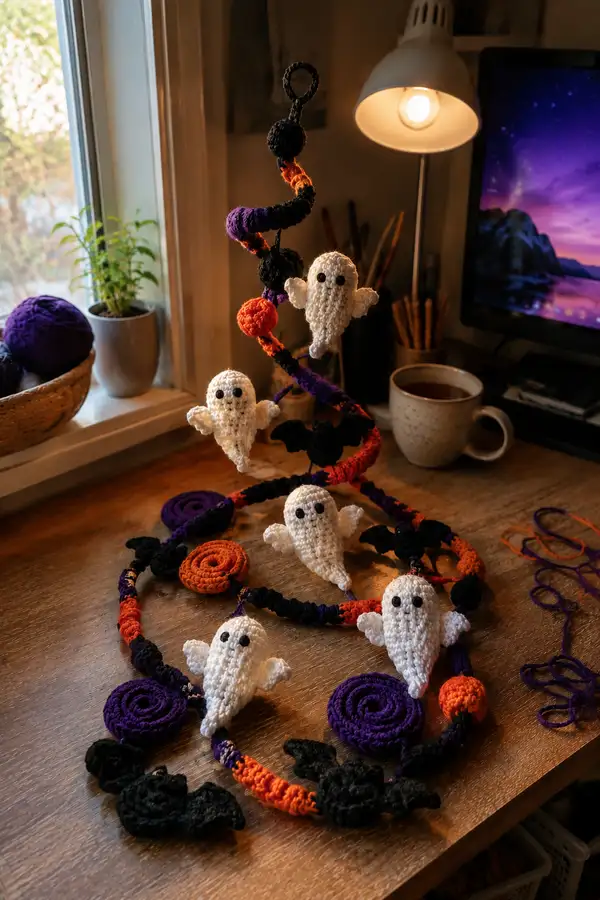
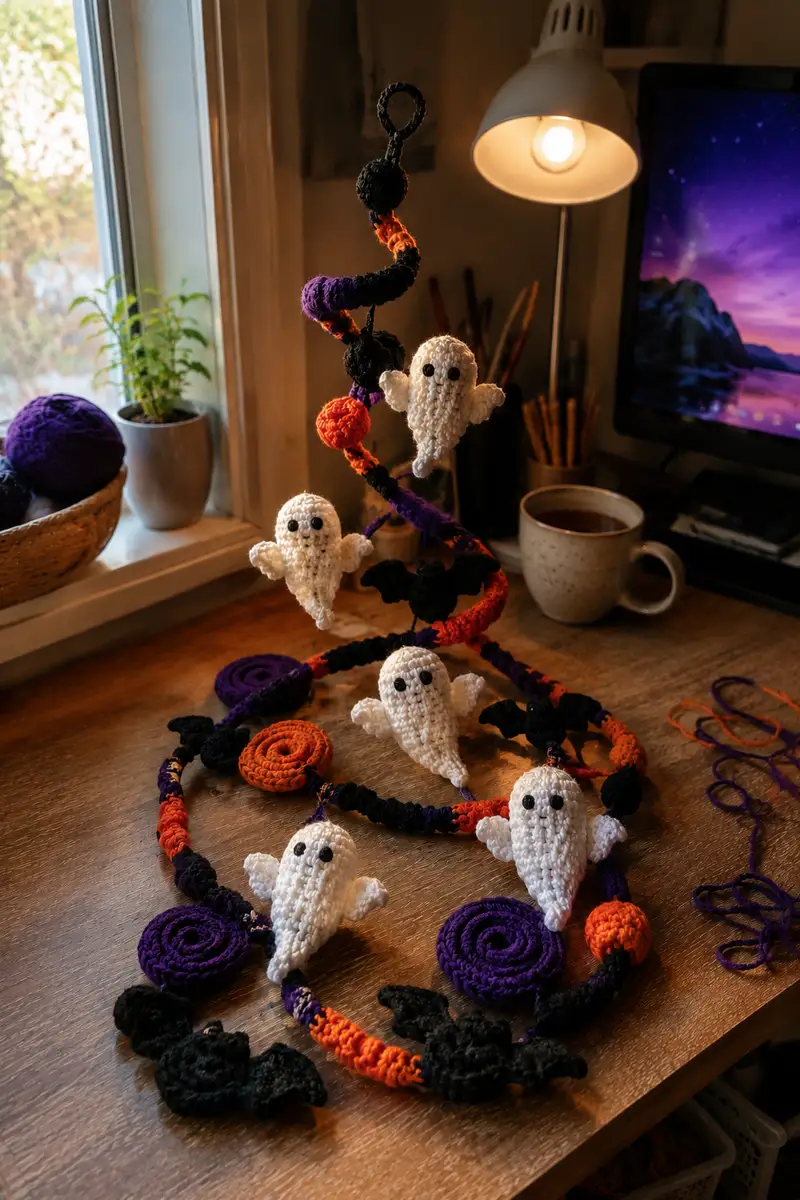
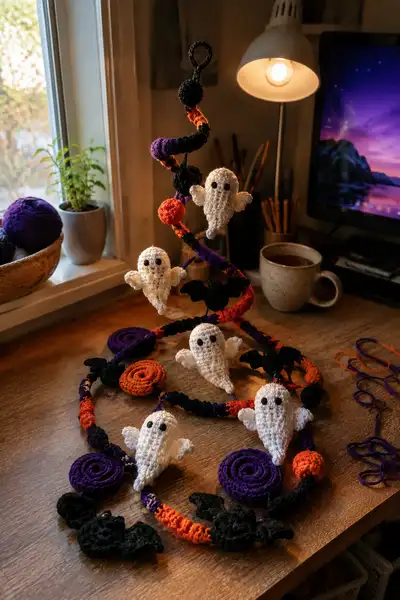
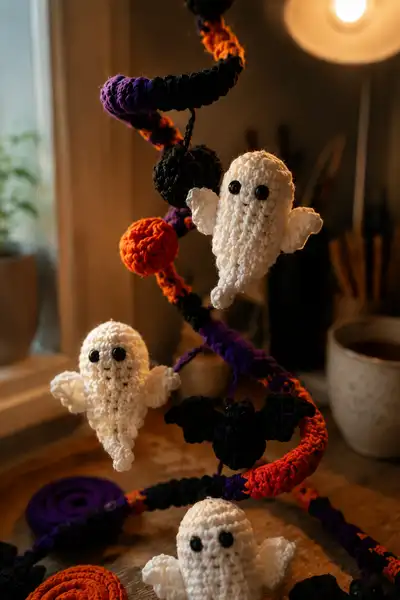
Create a whimsical Halloween spiral garland decorated with floating little phantom amigurumi, bats, and coiled candy spirals. This project features a wrapped spiral core you can hang, accented with purple, orange, black and cream motifs. The ghosts are small, textured and stuffed lightly so they appear to float—perfect for table displays, doorways, or mantel decor.
Progress Tracker
0% Complete
— Notes & Overview :
Info :
This pattern set covers: small phantom (ghost) amigurumi (make 4-6), small bat amigurumi (make 3-4), spiral coil discs (make 4-6), wrapped spiral core (one long spiral wrapped around craft wire), and small solid balls for spacing (optional). Stitches use US terminology. Work tightly for amigurumi so stuffing does not show through. The pattern below provides a full stitch-by-stitch breakdown for each element and frequent Info notes for assembly and stuffing.
— Phantom (Ghost) - Head :
Round 1 :
6 sc in magic ring (6)
Round 3 :
(1 sc, 1 inc) x 6 (18)
Round 4 :
(2 sc, 1 inc) x 6 (24)
Round 5 :
(3 sc, 1 inc) x 6 (30)
Round 6 :
(4 sc, 1 inc) x 6 (36)
Round 7 :
(5 sc, 1 inc) x 6 (42)
Round 8 :
(6 sc, 1 inc) x 6 (48)
Round 9-12 :
1 sc in each st (48)
Info :
Place safety eyes between rounds 11-12, 8-10 sts apart for the friendly look in the photo. Use stitch markers to identify positions. If embroidering eyes, wait until later to position to allow facial placement flexibility.
Round 13-16 :
1 sc in each st (48)
Info :
Work even to form a rounded head. If you want a slightly taller head, extend even rounds to round 18. Add a small nose/dimple by embroidering a short vertical stitch between the eyes if desired.
Round 17 :
(6 sc, 1 dec) x 6 (42)
Round 18 :
(5 sc, 1 dec) x 6 (36)
Info :
Begin gentle decreases to create a soft neck. Do not stuff the head yet — we will start stuffing when joining to the body to ensure an integrated shape.
Round 19 :
(4 sc, 1 dec) x 6 (30)
Round 20 :
(3 sc, 1 dec) x 6 (24)
Round 21 :
(2 sc, 1 dec) x 6 (18)
Round 22 :
(1 sc, 1 dec) x 6 (12)
Info :
Fasten off leaving a long tail (~20cm/8in) for sewing to the body or to continue into the body if you choose to work the ghost as one piece. If finishing head separate, embroider or attach eyes now and secure them firmly. Stuff head lightly—just enough to round it without making it hard to shape the body below.
— Phantom (Ghost) - Body / Tail Cone :
Info :
You can either sew the head to a separately crocheted cone body or continue in the round from the head tail. Below we show a separate cone body so you can make multiple ghosts and mix heights. Use same white/cream yarn as head.
Round 1 :
6 sc in magic ring (6)
Round 3 :
(1 sc, 1 inc) x 6 (18)
Round 4 :
(2 sc, 1 inc) x 6 (24)
Round 5 :
(3 sc, 1 inc) x 6 (30)
Round 6-8 :
1 sc in each st (30)
Info :
The cone will be elongated to create the ghostly tail. Keep fabric relatively loose compared to the head so the tail has some drape but still holds shape — moderate stuffing later.
Round 9 :
(4 sc, 1 inc) x 6 (36)
Round 10-12 :
1 sc in each st (36)
Info :
These rounds add a slightly wider midsection to give the ghost a rounded belly under its face. Stuff lightly through the opening as you work; use small amounts of fiberfill periodically to avoid lumps.
Round 13 :
(4 sc, 1 dec) x 6 (30)
Round 14 :
(3 sc, 1 dec) x 6 (24)
Round 15 :
(2 sc, 1 dec) x 6 (18)
Round 16 :
(1 sc, 1 dec) x 6 (12)
Round 17 :
(1 sc in each st) x 12 (12)
Info :
Now shape a tapered tail by decreasing in small steps. Work the next rounds to create a curved or spiraled tail tip; we will use short decreases to form a wavy tip like the photos.
Round 18 :
(1 sc, 1 dec) x 4, 4 sc (8 + 4 = 12)
Round 19 :
1 sc in each st (12)
Round 20 :
(2 sc, 1 dec) x 4 (8)
Round 21 :
1 sc in each st (8)
Round 22 :
(1 sc, 1 dec) x 2 (6)
Round 23 :
1 sc in each st (6)
Round 24 :
6 sc, tighten center, fasten off leaving long tail to sew to head (6)
Info :
Finish stuffing the body until slightly firm but still soft to mimic the slightly floppy phantom in the image. Use the long tail to sew the cone securely to the head opening; insert some stuffing between the head and body so the join looks seamless.
— Phantom (Ghost) - Arms/Wings (Make 2 per ghost) :
Info :
These small winged arms are shaped like rounded teardrops. Make two and sew to the sides of the body just under the head. Use the same cream yarn.
Round 1 :
6 sc in magic ring (6)
Round 3 :
(1 sc, 1 inc) x 6 (18)
Round 4 :
1 sc in each st (18)
Round 5 :
(2 sc, 1 dec) x 4, 2 sc (14)
Round 6 :
1 sc in each st (14)
Round 7 :
(1 sc, 1 dec) x 3, 5 sc (11)
Round 8 :
1 sc in each st (11)
Round 9 :
(1 sc, 1 dec) x 2, 7 sc (9)
Round 10 :
1 sc in each st (9)
Round 11 :
6 dec (3) - fasten off leaving a long tail for sewing, do not overstuff (3)
Info :
Sew arms to rounds 10-12 of the cone body on either side, curving slightly forward for a welcoming 'flying' look. Use a few reinforcing stitches to keep the small arms secure.
— Bat - Body (Make 3-4) :
Info :
Bats are made in two parts: a small rounded body and two flat wings attached to the sides. Use black yarn. The body is a small sphere that will be sewn into the wing seam.
Round 1 :
6 sc in magic ring (6)
Round 3 :
(1 sc, 1 inc) x 6 (18)
Round 4 :
1 sc in each st (18)
Round 5 :
(1 sc, 1 dec) x 6 (12)
Round 6 :
1 sc in each st (12)
Round 8 :
1 sc in each st (6)
Round 9 :
6 dec and close leaving long tail to sew into wings; lightly stuff sphere before closing (6 -> closed)
Info :
Set bat bodies aside while you crochet wings. You will sew the body between wing centers to make the bat appear as a single silhouette.
— Bat - Wing (Make 2 per bat) :
Info :
Wings are worked flat in rows; counts below give a stylized bat wing with scalloped lower edge. Work two mirror wings for each bat.
Row 1 :
Ch 9, sc in 2nd ch from hook and across (8)
Row 2 :
Ch 1, turn, sc across (8)
Row 3 :
Ch 1, turn, sc2tog, sc x4, sc2tog (6)
Row 4 :
Ch 1, turn, sc across (6)
Row 5 :
Ch 1, turn, sc2tog, sc x2, sc2tog (4)
Row 6 :
Ch 1, turn, sc across (4)
Row 7 :
Ch 1, turn, sc2tog twice (2)
Row 8 :
Ch 1, turn, sc across (2)
Row 9 :
Fasten off leaving long tail. Make a second wing and mirror it.
Info :
With wrong sides together, position the two wings and sandwich the small bat sphere between their centers. Sew through the center of the wings into the sphere to attach and hide the seam. Curve the wing tips slightly upward while sewing for a lively silhouette.
— Spiral Coil Disc (Make multiple in purple and orange) :
Info :
These flat spiral discs mimic the candy coil shapes in the image. You will make a flat spiral by increasing consistently in the round. Use a slightly larger hook (3.5mm) for a looser, visible spiral texture.
Round 1 :
6 sc in magic ring (6)
Round 3 :
(1 sc, 1 inc) x 6 (18)
Round 4 :
(2 sc, 1 inc) x 6 (24)
Round 5 :
(3 sc, 1 inc) x 6 (30)
Round 6 :
(4 sc, 1 inc) x 6 (36)
Round 7 :
(5 sc, 1 inc) x 6 (42)
Round 8 :
(6 sc, 1 inc) x 6 (48)
Round 9 :
1 sc in each st (48)
Round 10 :
Sl st to next st, do not fasten off; pull tail to the back and flatten spiral. Fasten off leaving long tail for sewing.
Info :
To achieve the pronounced spiral seen in the photos, after finishing the rounds, roll the disc gently inward and secure with a few whip stitches along the spiral to keep it flat and compact. Make discs in purple and orange for variety.
— Wrapped Spiral Core / Garland Tube :
Info :
Cut a length of craft wire about 60-90 cm (24-36 in) depending on how tall you want the spiral to be. The wire will form a helix; you will cover it by crocheting tubes and then wrapping those tubes around the wire. The pattern below creates a tubular strip that you will seam into a long snake and wrap spirally. Work several tubes in alternating colors and seam them end-to-end for visual breaks like the reference.
Tube Round 1 :
6 sc in magic ring (6)
Tube Round 3 :
(1 sc, 1 inc) x 6 (18)
Tube Round 4 :
(2 sc, 1 inc) x 6 (24)
Tube Round 5-8 :
1 sc in each st (24)
Info :
To make a longer tube segment, continue even rounds until you reach approx 18-22 cm (7-8.5 in) length for each segment. For the photo look, mix segment lengths: short (6-8 cm), medium (12-18 cm), and long (20-25 cm). Seam tube edges with slip stitch or whipstitch so it becomes a squishy tubular cord that slides over the wire.
Tube Round 9 :
BLO 1 sc in each st for one round (24)
Tube Round 10 :
FLO 1 sc in each st for one round (24)
Info :
Using BLO and FLO occasionally will create slight ridges that add texture when the spiral is wrapped. Create multiple segments in purple, orange and black and join them end-to-end changing colors with an invisible join or a tidy knot inside the seam.
Tube Round 11-20 :
1 sc in each st (24)
Tube Round 21 :
Fasten off leaving long tails for seaming. Slide tube over wire and shape wire into a spiral helix. Use pliers to make a loop at top for hanging, then continue sliding and positioning covered tubes along the helix in desired order. Close gaps by sewing adjacent tube ends together on the wire.
Info :
For extra security, stitch through the wire twice at invisible points (wrap yarn around wire and secure on the inside of the tube). If using thick wire, you can wrap a thin strip of yarn around the wire before sliding on the crocheted tube to increase grip.
— Small Solid Ball Spacer (Make several) :
Round 1 :
6 sc in magic ring (6)
Round 3 :
(1 sc, 1 inc) x 6 (18)
Round 4 :
1 sc in each st (18)
Round 5 :
(1 sc, 1 dec) x 6 (12)
Round 6 :
6 dec and close - lightly stuff before final closure (6)
Info :
These small solid balls are used to add visual rhythm along the spiral between discs and ghosts. Make in black or orange to match the photos.
— Assembly Preparation :
Info :
Decide on placement of discs, ghosts, bats and small spacers along the spiral. Use pins or bobby pins to temporarily tuck the pieces into place so you can view composition before sewing. Hang the spiral loosely from the top loop to see how it naturally falls and adjust positions; gravity will help you place hanging lengths for an appealing cascade.
— Attaching Ghosts, Bats and Discs to Spiral :
Info :
Use strong yarn tails or short chains to create hanging loops for each motif. Leave a 6-8cm (2.5-3in) tail when finishing each motif. Sew or tie the tail to the wrapped tube at desired position. For floating look, hang ghosts so they dangle off the spiral by about 3-10cm depending on placement level.
Attach :
Sew the long tail of each ghost's cone to the tube, but before tightening, position ghost so it hangs outward. Reinforce with 6-8 stitches around the neck seam through the tube fabric to secure.
Attach Bat :
Sew the bat's small sphere body center to the tube so the wings sit naturally on either side of the spiral. Use invisible stitches and hide knots in the wing center.
Attach Disc :
Sew spiral disc by sewing through its long tail into the wrapped tube and tack at several points so the disc sits flat along the spiral curve.
Info :
Vary hanging lengths with short jump chains or thread. For the look in the reference, alternate small ghost and bat placements around each coil tier so elements appear evenly distributed.
— Final Touches & Reinforcement :
Info :
Weave in all yarn tails neatly. Add a small dab of fabric glue to the underside of safety eyes or to secure knots inside tubes for extra safety. Use extra stitches to tack heavier pieces (discs or clusters) in place so they cannot slide along the wire when hanging. Curate the spiral by hand-bending the wire at the base loop to fine-tune balance.
Info :
If you want lights, weave a battery-powered micro LED string inside the spiral before closing all tube seams. Tuck the battery pack at the top loop and secure it inside a wrapped tube segment for invisibility.
— Variation Tips :
Info :
To make smaller ghosts, use 8ply sport yarn and 3.25mm hook and reduce even rounds by 2-4. For larger dramatic garlands, use bulky yarn and a 5.5mm hook—adjust safety eye size accordingly.
This festive Halloween garland brings crafty charm and delightful motion to any space—perfect for mantels, doorways or as a tabletop centerpiece. Each stitched ghost, bat and coil adds personality and playful movement to your decor. Enjoy making this pattern at a relaxed pace and savor how the simple shapes combine into a whimsical seasonal piece. 🧶🎃 Share your finished spiral for a little Halloween cheer — I can't wait to see how your version turns out! 👻