🧶 Beautiful ✨ Detailed 💝 Adorable

Midnight Spiral Halloween Garland with Smiling Ghosts and Pumpkins Amigurumi Pattern

Midnight Spiral Halloween Garland with Smiling Ghosts and Pumpkins Amigurumi Pattern
4.0★ Rating
5-7 Hours Time Needed
2.9K Made This
✂️

Intermediate Level

Ideal for those with basic crochet experience, featuring slightly more advanced stitches and techniques to expand your skills.

⏱️

Weekend Treat

Takes 5-7 hours, making it an enjoyable project to finish over a couple of days.

🍂

Autumn Vibes

Earthy tones with cozy textures inspired by falling leaves and the rich, warm colors of harvest season.

🧶 Jump to Pattern ↓

About This Midnight Spiral Halloween Garland with Smiling Ghosts and Pumpkins Amigurumi Pattern

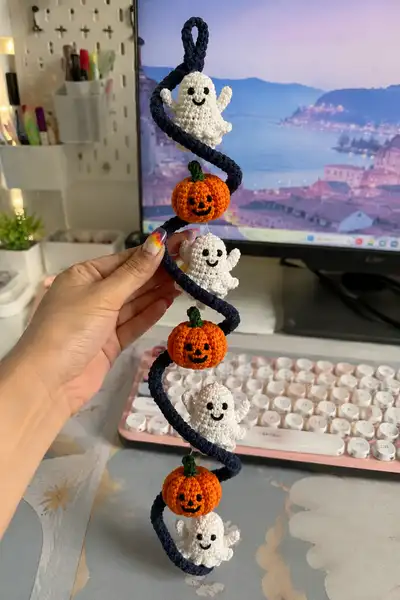
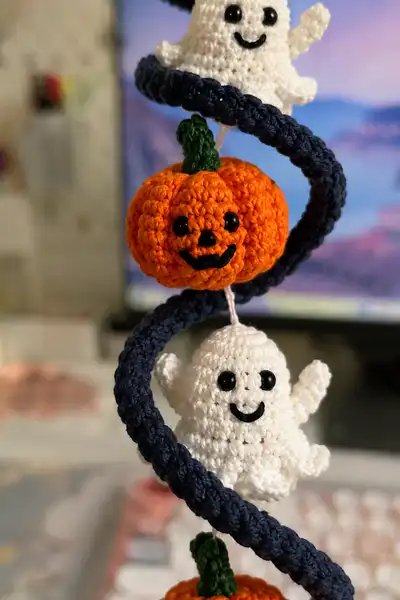
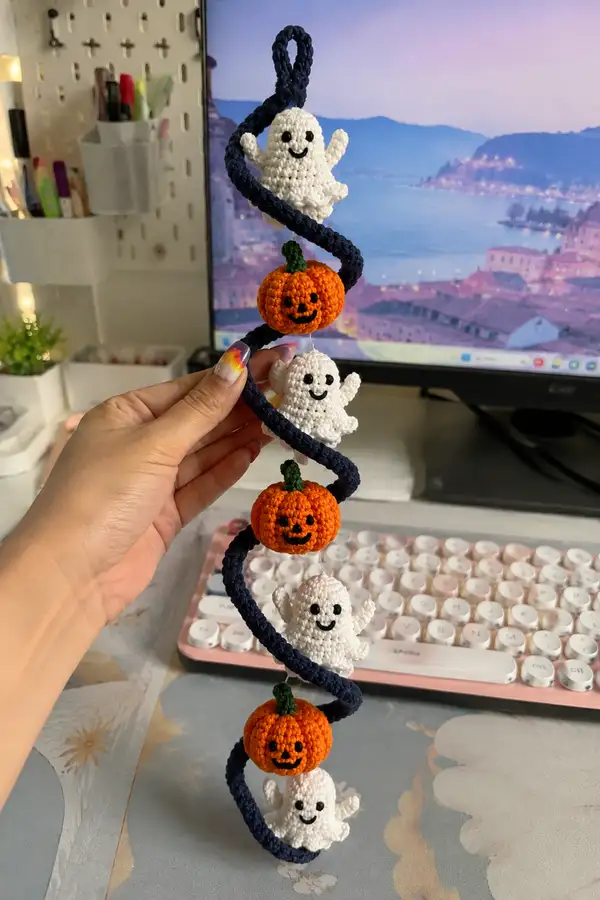
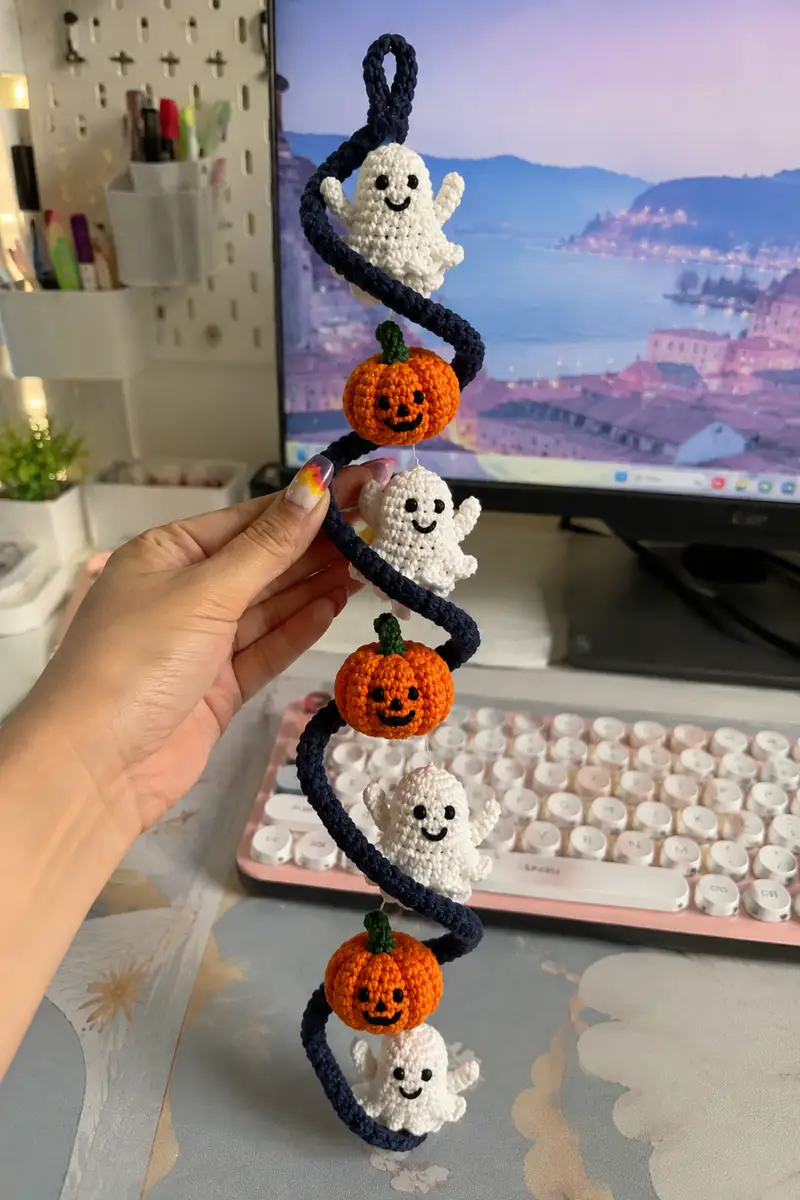
This pattern recreates a handcrafted navy spiral rope garland threaded with three little white ghosts and three bright orange pumpkins, each with cheerful faces. The ghosts have flared skirts and tiny waving arms, while the pumpkins are rounded with embroidered grooves and a short green stem. The spiral is slightly stiffened with an internal wire or cord and covered with dense single crochet rounds for a neat rope effect.

Midnight Spiral Halloween Garland with Smiling Ghosts and Pumpkins Amigurumi Pattern crochet pattern - detailed view of completed project

The finished garland hangs nicely and holds a spiral shape for display. The pieces are small (3-4 cm for ghosts, 3-3.5 cm for pumpkins) and lightweight, making this a perfect Halloween accent or gift.

Why You'll Love This Midnight Spiral Halloween Garland with Smiling Ghosts and Pumpkins Amigurumi Pattern

I love this pattern because it combines quick amigurumi shapes with an eye-catching spiral display that’s both decorative and playful. I enjoy the tiny expressions — the little smiles and jack-o-lantern faces make every piece feel like it has personality. The construction is satisfying: make small motifs quickly, then assemble into a charming hanging garland that transforms a space instantly.

Midnight Spiral Halloween Garland with Smiling Ghosts and Pumpkins Amigurumi Pattern step 1 - construction progress Midnight Spiral Halloween Garland with Smiling Ghosts and Pumpkins Amigurumi Pattern step 2 - assembly progress Midnight Spiral Halloween Garland with Smiling Ghosts and Pumpkins Amigurumi Pattern step 3 - details and accessories Midnight Spiral Halloween Garland with Smiling Ghosts and Pumpkins Amigurumi Pattern step 4 - final assembly and finishing

Switch Things Up

I absolutely loved creating this garland idea because it’s flexible — you can make it playful or spooky depending on the face details and colors you choose. Try paler pastels for a sweet, not-scary version or deep jewel tones for a richer look.

I often customize the rope color to match my decor; try cream, black, or even metallic yarn for a different finish. You can also space motifs more closely for a dense look or further apart for an airy, minimalist effect. Swap safety eyes for embroidered expressions for a softer look that’s perfect for families with little ones.

I recommend experimenting with the spiral core: a flexible wire gives the best long-term shape, while a craft cord is simpler and safer. I also like making extra pumpkins or ghosts to mix & match on multiple garlands — it’s a perfect small-batch gift idea!

Common Mistakes & How to Fix Them

✗ Skipping stitch markers at round starts can cause misaligned features and uneven shaping; always mark your first stitch of each round. ✗ Inconsistent tension between rounds creates lumpy or uneven surfaces; practice maintaining steady, even tension throughout the entire project. ✗ Not stuffing gradually as you work causes difficulty reaching inside later; stuff the bodies as you complete the wider points for best results. ✗ Using too large a hook for amigurumi will show stuffing and create floppy pieces; go one or two hook sizes smaller than yarn label for a tight fabric. ✗ Attaching pieces without pinning first often results in lopsided placement; pin everything and check in natural light before sewing. ✗ Forgetting to secure safety eyes before stuffing can lead to locking them incorrectly; install and secure eyes while the head is open enough to reach. ✗ Overstuffing small details like arms and stems will distort shape; use smaller quantities and shape with a yarn needle as you go.

Midnight Spiral Halloween Garland with Smiling Ghosts and Pumpkins Amigurumi Pattern

A whimsical spiral garland that alternates tiny smiling ghosts and jolly jack-o-lantern pumpkins along a navy spiral rope. This pattern uses small amigurumi shapes, simple facial embroidery, and an internal wire or cord for a stable hanging spiral. Perfect for seasonal decor, door frames, mantels, or spooky cute displays.

Intermediate 5-7 Hours

Materials Needed for Midnight Spiral Halloween Garland with Smiling Ghosts and Pumpkins Amigurumi Pattern

— Main Fabric

  • 01
    Worsted weight yarn (#4) approximately 60g navy (spiral rope)
  • 02
    Worsted weight yarn (#4) approximately 90g white (ghosts - enough for 3 ghosts with arms and skirts)
  • 03
    Worsted weight yarn (#4) approximately 80g orange (pumpkins - enough for 3 pumpkins)
  • 04
    Worsted weight yarn (#4) 15-25g green (pumpkin stems)
  • 05
    Small amounts (5-10g) black for facial embroidery and detail
  • 06
    Optional: matching thin cotton thread for invisible hanging line (white or clear)

— Tools Required

  • 01
    3.5 mm (E) crochet hook for main work (use smaller if using lighter yarn, 3.25mm recommended for tighter fabric)
  • 02
    2.75 mm (C) hook for tiny details (optional)
  • 03
    6 mm safety eyes (or 5 mm depending on desired look) — small size for mini amigurumi
  • 04
    Polyester fiberfill stuffing
  • 05
    Yarn needle/tapestry needle for sewing and embroidery
  • 06
    Stitch markers (at least 3-4)
  • 07
    Scissors
  • 08
    Pins for assembly
  • 09
    Thin flexible wire or heavy craft cord (12-16 gauge) for spiral core, or a wooden dowel if you prefer a rigid spiral
  • 10
    Optional: fabric glue for securing knots and safety eyes (use sparingly)

Progress Tracker

0% Complete

— Notes & Gauge :

Info :

This pattern is written in US terms. Gauge is flexible for decorative garland; however, for tight amigurumi fabric, work with a firm tension so stuffing does not show through. Using 3.25–3.5mm hook with worsted yarn will create small motifs similar to the photos. Measurements: each ghost is approximately 3.0-3.5 cm tall; pumpkins approx 3.0-3.5 cm diameter; spiral rope diameter approx 1.0-1.4 cm. Make one ghost and one pumpkin to practice before making the full garland.

— Ghost (Head & Body) :

Round 1 :

6 sc in mr (6)

Round 2 :

6 inc (12)

Round 3 :

(1 sc, inc) x 6 (18)

Round 4 :

(2 sc, inc) x 6 (24)

Round 5 :

(3 sc, inc) x 6 (30)

Round 6 :

(4 sc, inc) x 6 (36)

Round 7 :

(5 sc, inc) x 6 (42)

Round 8 :

(6 sc, inc) x 6 (48)

Round 9-12 :

1 sc in each st (48)

Info :

Place safety eyes between rounds 10-11, approximately 8-10 stitches apart depending on how wide you want the face. For a cute look use 6-8 stitches apart for smaller eyes. Use stitch markers to mark the center front for facial placement.

Round 13 :

(6 sc, dec) x 6 (42)

Round 14 :

(5 sc, dec) x 6 (36)

Info :

Begin check-fitting eyes and embroider smile now if using black yarn for the mouth. If using safety eyes, secure their washers now but do not fully stuff until you confirm placement and expression.

Round 15 :

(4 sc, dec) x 6 (30)

Round 16-18 :

1 sc in each st (30)

Info :

Start stuffing the body firmly but not overly tight. The ghost should be soft and slightly squishy; add fiberfill a little at a time to avoid lumps and to keep the round dome smooth.

Round 19 :

(1 sc, inc) x 15 (45)

Round 20 :

1 sc in each st (45)

Info :

Round 19 creates extra flare to form the ghost's skirt. Adjust the number of increases if you want a wider or narrower skirt; keep stitch counts consistent in following rounds.

Round 21 :

1 sc in each st (45)

Round 22 :

1 sc in each st (45)

Info :

For a slightly ruffled edge without changing stitch count, make picot loops on the next round by chaining 2 and slip stitching back into the same stitch after each sc. This keeps counts the same but produces a pretty wave.

Round 23 :

(sc in next st, ch 2, sl st in same st) x 45 (45)

Round 24 :

FO leaving a 15-20 cm tail for sewing and attaching to hanging cord; weave tail into last round and knot if desired (45)

Info :

Finish stuffing as you close; the skirt should be lightly stuffed (a little fiberfill inside the flare) but the main fullness is in the dome. Weave tail through front loops of the last round and pull to close slightly if you want a flatter bottom edge before sewing onto the hanging line.

— Ghost Arms (Make 2) :

Round 1 :

6 sc in mr (6)

Round 2 :

6 inc (12)

Round 3-5 :

1 sc in each st (12)

Info :

Arms are tiny and slightly curved. You can insert a small piece of wire to pose the arm if you want it to wave; wrap the wire in a little fiberfill before continuing to avoid poking through the yarn.

Round 6 :

(2 sc, dec) x 3 (9)

Round 7 :

1 sc in each st (9)

Round 8 :

FO leaving a long tail for sewing (9)

Info :

Stuff the arm lightly; the fingers on this ghost are suggested by a slight flattening or an embroidery line rather than separate tiny fingers. Sew arms to the sides of the ghost body between rounds 12-15 of the head/body section so they sit about one third down from the crown.

— Pumpkin Body :

Round 1 :

6 sc in mr (6)

Round 2 :

6 inc (12)

Round 3 :

(1 sc, inc) x 6 (18)

Round 4 :

(2 sc, inc) x 6 (24)

Round 5 :

(3 sc, inc) x 6 (30)

Round 6 :

(4 sc, inc) x 6 (36)

Round 7 :

(5 sc, inc) x 6 (42)

Round 8-14 :

1 sc in each st (42)

Info :

These even rounds create a full, rounded pumpkin. Work tightly and keep consistent tension so the pumpkin holds shape. If you'd like a slightly smaller pumpkin, stop increases earlier and proceed to even rounds sooner.

Round 15 :

(5 sc, dec) x 6 (36)

Round 16 :

(4 sc, dec) x 6 (30)

Round 17-20 :

1 sc in each st (30)

Info :

Begin to stuff the pumpkin firmly at this point. Small amounts of stuffing will create a nice firm ball; avoid overfilling, you want some give so the embroidered grooves can pull the fabric in slightly to mimic pumpkin segments.

Round 21 :

(3 sc, dec) x 6 (24)

Round 22 :

(2 sc, dec) x 6 (18)

Round 23 :

(1 sc, dec) x 6 (12)

Round 24 :

6 dec (6) — leave a 20-25 cm tail for closing and for sewing to the hanging line; do not completely close before attaching stem (6)

Info :

After stuffing and before completely closing, insert a short loop of thin cord or hanging thread through the top center to secure the pumpkin on the hanging line. Also, to create pumpkin grooves, embroider 6 vertical lines from top to bottom using doubled black or deep orange yarn and a yarn needle, then pull gently and tie off inside to create segmenting. Alternatively, use a thin green/brown embroidery to accent segments very lightly.

— Pumpkin Stem :

Round 1 :

6 sc in mr (6)

Round 2 :

6 inc (12)

Round 3-6 :

1 sc in each st (12)

Round 7 :

(2 sc, dec) x 3 (9)

Round 8 :

(1 sc, dec) x 3 (6)

Round 9 :

FO leaving a 15 cm tail for sewing (6)

Info :

Sew the stem to the top center of the pumpkin before fully cinching the top closed if possible. Stuff the stem very lightly or leave unstuffed to keep it short and upright. You can create a slightly twisted stem by crocheting one or two extra rounds FLO for texture.

— Spiral Rope / Cord (Make 1 long spiral) :

Info :

This spiral forms the visible navy rope that wraps in a helix. Use a thin flexible wire (12-16 gauge) or heavy craft cord as a core and crochet a tight tube around it. The tube is worked as continuous rounds of the same stitch count to create a consistent diameter. Gauge: 12 sc around produces a rope approx 1.0-1.4 cm diameter depending on yarn; increase to 16 sc for thicker rope.

Round 1 :

6 sc in mr (6)

Round 2 :

6 inc (12)

Round 3-6 :

1 sc in each st (12)

Info :

After round 6 you will have a small cylinder. Begin inserting your wire/core through the center before continuing the long even rounds. If you prefer a removable core, push the wire through after about 10 rounds when the tube is stable.

Round 7-120 :

1 sc in each st (12) — continue for desired length (recommended 110-130 rounds depending on how many spirals you want). For the project in the photo, make approximately 110–125 rounds to allow three ghosts and three pumpkins spaced comfortably in a spiral.

Info :

To make a long rope manageable, work in continuous rounds (do not join) and use a stitch marker to mark every 20 rounds for counting. You may prefer to crochet multiple shorter tubes and seam them together inside the core if your wrist prefers shorter sessions.

Round 121 :

FO leaving a long tail for wrapping the ends and creating a hanging loop (12)

Info :

If your core is wire, bend one end into a loop for hanging. Wrap the yarn tail around the loop and sew into place to hide the core. If using craft cord, make a small loop at the top by folding the cord and sewing a few passes with yarn.

— Eyes, Mouths & Facial Details :

Info :

Choose 5–6 mm safety eyes for the pumpkins and ghosts. For child-safe toys you may prefer to embroider eyes using black yarn. The mouths on the ghosts in the photo are embroidered with black yarn into a broad smile; pumpkins show small triangle or curved mouths. Attach or embroider while the head is still open enough to reach inside for securing washers and ensuring stitches are hidden.

Round 1 :

For embroidered mouth: use tapestry needle and black yarn, stitch two small straight stitches for the corners then a curved backstitch across to make a smile. Secure ends inside and knot, then weave in tails.

Round 2 :

For pumpkin face: position safety eyes between round 9-11 and embroider a small nose and mouth with black yarn (or use 3 mm safety nose if you have one). Leave a small negative space between eyes and mouth to keep the face centered.

Info :

Placement tip: measure 4–6 stitches from the center front for each eye and ensure the same spacing top to bottom. Use pins to test look before securing eyes or embroidery.

— Assembly & Hanging Line Attachment :

Round 1 :

Decide spacing: for 3 ghosts + 3 pumpkins alternating, allow 12-15 rounds of rope between each motif for looping into the spiral. Mark these positions on the rope with removable pins or stitch markers before sewing.

Info :

To achieve the spiral look in the photo, wrap the rope around the core gently into a helix; if your core is wire you can bend into a spiral and then slide the rope into the coil pockets so motifs sit centered between coils. Use thin fishing line or sewing thread to hang each motif from the core through the center of the rope for an invisible look.

Round 2 :

Sew pumpkin and ghost tops to a short length of hanging thread (approx 10-15 cm each) before attaching to the rope. Thread the hanging line through the top center of each motif and knot securely at the top inside the motif to hide the knot. Leave the other end of the hanging line free for attachment to the rope.

Round 3 :

At each marked rope position, pierce the rope core carefully with a tapestry needle and bring the hanging line through from inside the rope to the outside. Adjust motif height so it sits centered within the spiral coil and tie the hanging line inside the rope or secure with a few tight mattress stitches. Trim excess thread and hide by weaving back into rope.

Info :

Alternate ghost and pumpkin as you go: the photos show ghost above each pumpkin. Make sure motifs face outward when rope is hung; rotate slightly as you secure each hanging loop to orient faces correctly.

Round 4 :

Finish the top loop: fold rope end around itself to create a hanging loop and whipstitch it in place with the tail end; hide the wire inside and secure with a few wraps of yarn. Optionally add a final decorative bow or bead at the top loop.

Info :

When completing the garland, hold it up and check overall balance. Move motifs slightly along the rope if necessary to even out spacing before permanently securing knots. For extra durability, add a dab of fabric glue to hidden knots inside the rope core.

Assembly Instructions

  • Attach the top hanging loop by folding the rope end and sewing the tail through several times to secure. Create a reinforced loop at the very top with a few extra stitches around the base of the loop.
  • Pin each motif in place on the rope at evenly spaced marker points (approx 12–15 rounds apart). Use a ruler or counting method to ensure spacing is consistent down the garland.
  • Sew hanging thread through the center top of each motif and pierce the rope with a tapestry needle to pull the hanging thread through; tie the thread inside the rope and weave the tail to hide the knot.
  • For pumpkins: position the stem at the top center and sew it securely before fully closing the top. Make sure the hanging line runs under the stem if you want the stem to show at front.
  • For ghosts: sew arms to the sides at approximately rounds 12-15 of the ghost body; angle slightly upward to create a waving look. Secure with backstitches and weave tails inside.
  • After all motifs are attached, shape the spiral by gently curving the rope along its wire core. Secure the wire with a tiny dab of glue at the top loop if needed, then adjust motif rotation so faces are outward.
  • Weave in all loose ends into the rope and motifs, knot and trim close. Add small dot of fabric glue on knots hidden inside rope for long-term stability.
  • Optionally, attach a small tag or ribbon at top loop and hang the garland. If the garland seems heavy at one side, reposition motifs slightly for balance and secure with extra stitches.

Important Notes

  • 💡Use stitch markers consistently at the beginning of each round to avoid counting errors and maintain proper shaping.
  • 💡Stuff body parts gradually as you work rather than waiting until the end, especially for narrow openings like the ghost skirts and pumpkin tops.
  • 💡For safety eyes, position and secure before stuffing head fully - they cannot be repositioned once washers are locked in place.
  • 💡Maintain consistent tension throughout the project; too tight creates stiff, small pieces, too loose creates floppy, holey fabric.
  • 💡When sewing pieces together, use yarn slightly thinner than working yarn for neater, less visible seams.
  • 💡Pin all pieces in position before final sewing to ensure proper placement and symmetry on the spiral rope.
  • 💡For amigurumi, work tightly enough that stuffing doesn't show through stitches. If using cotton yarn, consider one hook size smaller than recommended.
  • 💡If using a wire core for the spiral, fold and tape the wire end before inserting into the tube to avoid sharp points piercing the yarn.

This charming garland combines tiny amigurumi pumpkins and ghosts with a bold navy spiral to create an instant Halloween display. Each motif is small, quick to make, and full of personality with smiling faces and playful arms. The spiral rope holds shape beautifully when given a wire core and becomes a dramatic backdrop for the happy motifs. 🧶 Hang it across a mantle, doorway, or windowsill and enjoy the handmade holiday cheer it brings. 🎃👻
You ask,

we answer.

FAQs

What is the finished size of this amigurumi?

Based on the specified materials and hook size, each ghost and pumpkin will measure approximately 3.0–3.5 cm across. The completed garland length depends on rope length; using the recommended rope (110–125 rounds) the garland will be roughly 60–75 cm long when straight and slightly shorter when hung in a spiral.

Can I use different yarn weights for this pattern?

Yes! You can use any yarn weight, but adjust your hook size accordingly (generally 1–2 sizes smaller than yarn recommendation for tight amigurumi fabric). Thicker yarn will make larger motifs and a thicker rope; thinner yarn will make daintier motifs.

Do I need to use safety eyes or can I embroider them?

Both options work beautifully! Safety eyes give a professional look and are very secure, perfect for gifts. Embroidered eyes are ideal for young children as they have no small parts, and allow for more expression customization.

How much stuffing will I need?

For this size project, approximately 50–80 grams of polyester fiberfill should be sufficient. Stuff firmly but not overly tight, allowing the pieces to maintain their shape while still being cuddly.

Can I make the arms and legs poseable?

Absolutely! Insert pipe cleaners or floral wire before stuffing limbs completely. Bend wire to desired shape, ensuring ends are folded over safely, then continue stuffing around the wire for poseable limbs.

What if my stitch count is off?

If you notice a counting error, it's best to unravel back to where the count was correct. Trying to compensate later often creates visible distortions. Using a stitch marker at round starts helps prevent counting mistakes.

How do I prevent holes when stuffing?

Work with tight, consistent tension throughout, using a hook slightly smaller than yarn recommendation. When stuffing, distribute fiberfill evenly in small amounts rather than large chunks.

Can I customize colors and details?

Definitely! Feel free to use any color combinations you love. You can also add accessories, change facial expressions, or adjust proportions slightly to make your creation unique while following the basic structure.