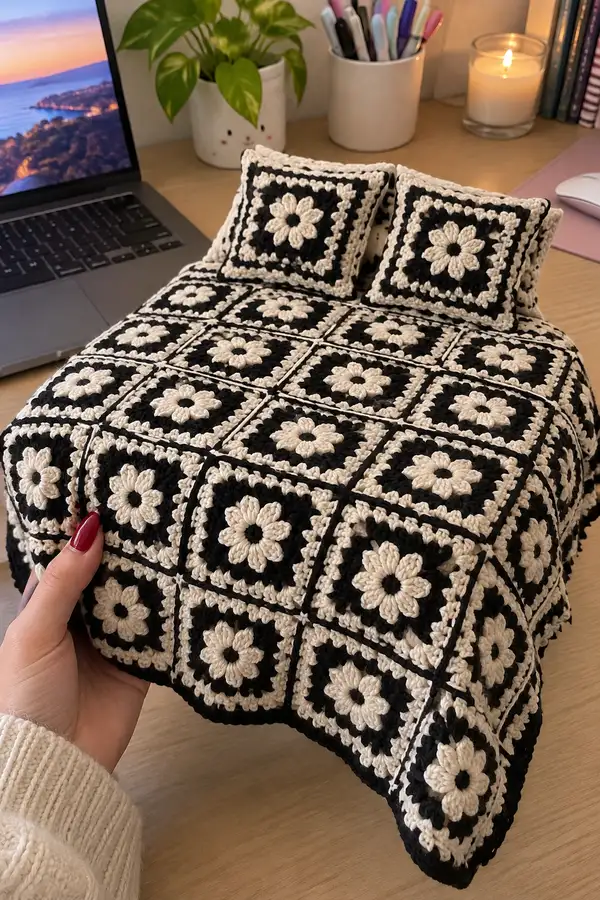
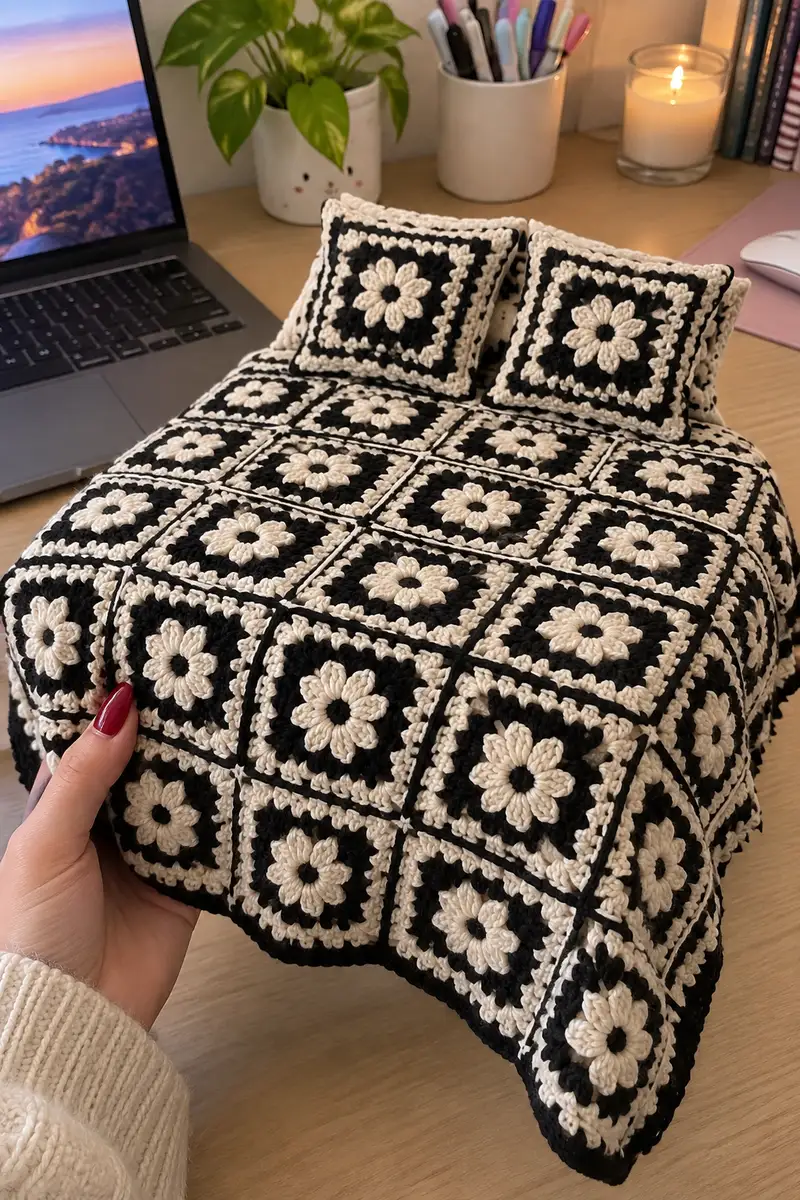
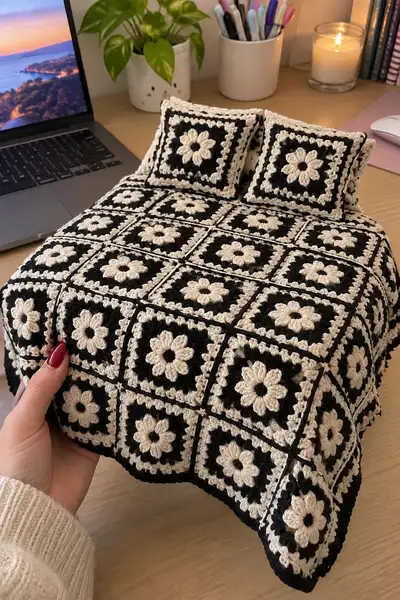
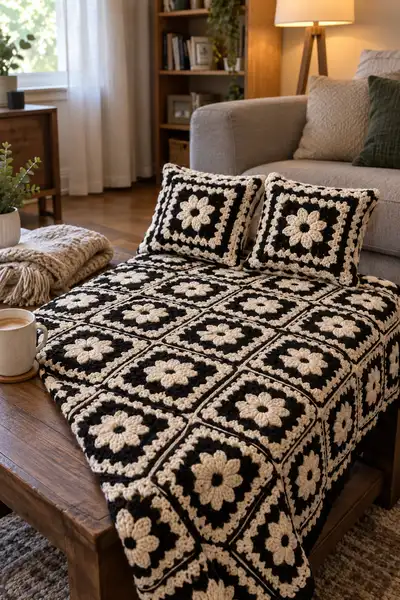
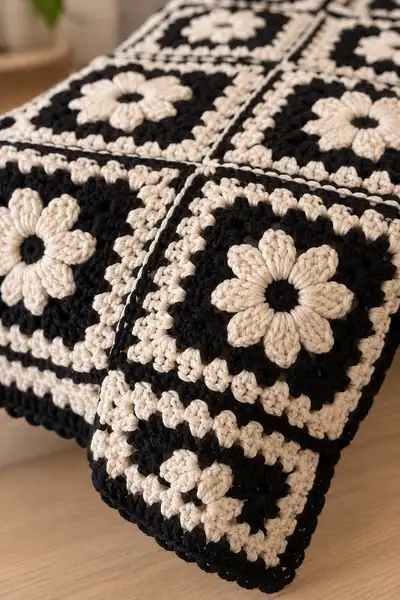
Create a striking black-and-cream bedspread made from daisy-centred granny squares. This pattern features 8-petal puff-style daisies in cream set on a bold black square with a textured cream border. Includes full instructions for squares, join-as-you-go assembly, wide border and matching pillow covers.
Progress Tracker
0% Complete
— Motif: Daisy Center and Petals (Make one motif square front) :
Round 1 :
With Cream, make a magic ring. ch1, 8 sc into ring. Pull ring closed. Join with sl st to first sc. (8)
Info :
This compact round forms the central ring for the daisy petals. Keep tension firm so petals sit neatly on top of the base.
Round 2 :
Ch4, *sl st into next sc, ch4; rep from * around to form 8 ch-4 loops. Join with sl st to first ch. (8 loops)
Info :
These ch-4 loops are the foundation for the puff/cluster petals. Keep loops even — count to ensure there are exactly 8 loops spaced evenly around the center.
Round 3 :
Join Cream in first ch-4 loop. Into each ch-4 loop work: (sc, hdc, 3 dc, hdc, sc). Sl st to join; repeat in all 8 loops to make 8 petals. After working all petals fasten off cream. (8 petals; 7 stitches per petal, total 56 petal stitches)
Info :
Puff-look petals are created here by working cluster-heavy petals into each loop. Work petals loosely enough to be puffy but not so loose petals flop; avoid tight tension or petals will be compressed.
Round 4 :
With Black, join with sl st in the space between any two petals. Ch3 (counts as dc), 2 dc in same space, ch2; *3 dc in space between next two petals, ch1; rep from * around placing ch2 at the corner after every second petal to create future corner ch-2 spaces. You will form 4 corner ch-2 spaces and evenly spaced 3-dc groups between. Join to top of ch3. (4 corner ch-2, 8 side 3-dc groups; working stitch count around: 4 corners x (3dc+ch2+3dc)=24dc+ch2s and 4 side clusters of 3dc=12dc; total dc approx 36 plus chain spaces)
Info :
This round transforms the circular petal motif into a squared foundation. Aim to place corners evenly at the compass points (top, right, bottom, left) so subsequent rounds create straight sides.
Round 5 :
With Black, ch3, 2 dc in same space, ch1, (3 dc, ch1) in each side 3-dc group across; in each corner work (3 dc, ch2, 3 dc). Join to top of ch3. After working this round you will have extended each side with two 3-dc clusters between corners and distinct ch-2 corners. (4 corners + 8 side 3-dc groups; total dc around approximately 60 depending on exact side cluster counts)
Info :
Count the 3-dc clusters across each side to ensure symmetry. If you have more or fewer clusters, lightly adjust by placing additional ch-1 spaces between clusters to even sides before joining.
Round 6 :
With Black, ch1, sc in same st, *skip to next ch-1 sp, (sc, ch3, sc) in ch-1 sp across each side to make small picot-like spaces between groups; in ch-2 corner work (sc, ch3, sc). Join with sl st. This creates decorative little arches that will be highlighted in cream on the next round. (4 corner ch-3 arches; side ch-3 arches across sides)
Info :
This round is decorative and prepares the square for the cream contrast rounds. Work sc evenly and keep arch chain heights consistent (ch3 recommended) for a tidy look.
Round 7 :
Fasten off Black. With Cream, join in any ch-3 arch on a side. Ch3 (counts as dc), 2 dc in arch, ch1, 3 dc in next arch; repeat across each side and in each corner work (3 dc, ch2, 3 dc). Join with sl st to top of ch3. (This produces a visible cream round forming a square frame around the petals; corners have ch-2)
Info :
The cream here contrasts strongly with the black. Carry yarn minimally between small sections if working multiple motifs in a strip; otherwise fasten off and weave in ends for a clean finish.
Round 8 :
With Cream, ch1, sc in same st, *work (ch2, sc) between the 3-dc clusters down each side to create an open lacy line; in corners work (sc, ch3, sc). Join with sl st. (This adds a delicate textured frame around the square.)
Info :
If petals or the cream frame look uneven, lightly block the motif now before proceeding to solid black rounds. Pin to a square shape and spritz; allow to dry.
Round 9 :
With Black, join in any side space between corner clusters. Ch3 (counts as dc), work (2 dc, ch1) into same space; across each side work 3-dc clusters into the ch-1 spaces created by the cream frame so each side now has 4 clusters between corners; in corners work (3 dc, ch2, 3 dc). Join to top of ch3. (Result: 4 corners, each side with 4 clusters. Approx dc count per side 16; total around 84 dc)
Info :
This round builds density and a strong black background that visually frames the cream petals. Maintain even tension to keep sides straight.
Round 10 :
With Black, ch1, sc in same st, then sc evenly across each 3-dc cluster (1 sc into top of each cluster and sc into corner ch-2 spaces). Join with sl st. (Count: sc across top of each 3-dc cluster and corner scs approx 44 sc; adjust based on your cluster counts)
Info :
The sc round evens the surface and gives a base for the cream final border. Keep scs snug but not tight so the front stays flat.
Round 11 :
With Cream, ch3 (counts as dc) in any sc, *skip one sc, (3 dc) in next sc, ch1; rep across sides placing (3 dc, ch2, 3 dc) in corners. Join to top of ch3. This round creates a cream granny-like shell around the black center.
Info :
At this stage each motif reads as a flower within a black square framed with cream shells. If you prefer a thicker cream border, repeat a similar granny round once more in cream before proceeding.
Round 12 :
With Cream, ch1, sc in same st, sc evenly around working 1 sc in each dc and 1 sc in each ch-1 space and 2 sc in corner ch-2s. Join with sl st. Fasten off and weave in ends. (This secures the outer cream shells and prepares the motif for joining.)
Info :
Measure your finished motif. Expect approximately 6.5 - 8 inches square depending on yarn and hook. Light blocking now will bring all motifs to a uniform size for joining.
— Alternate Version: Motif Petal Puff Detail (Optional) :
Round 1 :
With Cream, mr, ch1, 8 sc into mr, join. (8)
Round 2 :
*Ch5, sl st into next sc; rep around to form 8 ch5 loops. Join to first ch. (8 loops)
Round 3 :
Into each ch-5 loop make a puff-petal: Yarn over, insert hook, pull up loop; yarn over, insert, pull up; (repeat 4 times) yarn over, pull through all loops, ch1 to close petal. Sl st to next loop and repeat to make 8 puff petals. Fasten off. (8 puff petals; each puff counts as one petal)
Info :
For a taller, chunkier petal use 5 loop puff stitch (yo/insert 5 times) per petal. This gives the highly textured petals pictured. Work consistently for uniform height.
— Square Final Rounds (Unify Motif to True Square) :
Round 1 :
With Black, join in any outer sc. Ch3 (counts as dc), 2 dc in same st, ch1, *3 dc in next space between cream shells, ch1; rep to corner; in corner (3 dc, ch2, 3 dc). Repeat around. Join. (Creates firm black field around motif.)
Info :
These rounds expand the motif to a consistent square. Make sure to keep corners at the same rotational position on each motif for matching when you layout the blanket.
Round 2 :
With Black, ch1, sc in same st, sc evenly across each dc cluster top and in chain spaces, placing 2 sc in each corner ch-2 space. Join. (This evens the round and readies for the decorative cream join round.)
Round 3 :
With Cream, join in any side sc. Ch3 (counts as dc), 2 dc in same st, ch1, skip one sc, 3 dc in next sc, ch1; continue along side, and in corners (3 dc, ch2, 3 dc). Join. (This becomes the decorative inner border that visually separates motifs when joined.)
Info :
If you find motif sizes inconsistent, add or remove a small sc round either before or after this cream round to equalize motif dimensions before joining.
Round 4 :
With Cream, ch1, sc around working 1 sc in each dc and chain space, and 2 sc in each corner ch-2. Join and fasten off. Weave in ends neatly on the wrong side. (Motif complete.)
Info :
Make the required number of motifs. For the bedspread shown (an approximate full/queen throw), plan for 5 squares across by 6 squares down = 30 motifs. Adjust for your bed size: twin 4x6, full 5x6, queen 6x7, king 7x8 motifs depending on motif size.
— Join-as-You-Go (JAYG) Method: Joining Squares in Rows :
Info :
Join-as-you-go is used to produce the neat black joins visible in the photos. You will join new motifs to the preceding row(s) on the final cream sc round. Work across one row at a time: join motifs horizontally, then join rows vertically.
Round 1 :
Place two motifs Right Sides together with the final cream sc round facing. With Black, join at the corner sc of motif A using sl st through corner sc on A and corresponding corner sc on B, then continue with (sc in next sc of A, sl st into next sc of B) across the side to create a tight whip-like seam. Work until side is fully joined. Fasten off. (This forms a black ladder join linking motifs along one edge.)
Info :
Use a contrasting stitch marker on the central stitch of each side to keep motifs aligned. Join firmly but do not pull the seam too tight or the square edges will pucker.
Round 2 :
Repeat joining along the entire first row until all motifs in that row are joined horizontally. Then start the second row: join the second row motifs horizontally first, then align the completed second row under the first row and with Black, join vertically by working sl sts through the corresponding outer sc of motifs on top and bottom row. (As you join vertically, perform sl st into the same stitches where the horizontal join attaches to maintain a single continuous join line.)
Info :
Work carefully at corners where four motifs meet. The join should form a neat, flat seam visible as the thin black channel in the photos. If needed, add a single sc over the seam to bulk it slightly for a more pronounced black line.
Round 3 :
Once all rows are joined horizontally and vertically with Black, inspect the blanket for gaps. If any small openings remain at three- or four-way joins, use Black to sl st across those little holes or insert 1 sc in the visible gap, then weave in ends. (This ensures a continuous black join line.)
Info :
JAYG keeps the back neat and eliminates bulky seams. If you prefer a sewn-together look, you can instead whip stitch motifs together using a yarn needle and Black yarn; the visual result will be similar but the back will carry more yarn tails.
— After Joining: Leveling and Blocking Before Border :
Info :
Once all motifs are joined, lay the blanket flat and measure across several points. If edges ripple or teeth appear, lightly spray with water and pin to a rectangular shape on a blocking mat. Allow to dry for at least 6 hours to set the shape before working the outer border.
— Outer Blanket Border (Creates pictured scalloped textured edge) :
Round 1 :
With Black, join in any seam or corner sc. Work 1 round of sc evenly around the entire blanket working 3 sc in each seam junction where four motifs meet to stabilize, and 2 sc in each corner seam to allow for turning. Join with sl st. (Count will vary with blanket size; this round evens the edges and creates a firm base for the scallop rounds.)
Info :
This sc round is essential: it tidies all motif edges into an even line so the decorative outer rounds sit flat and neat. Keep tension even and place extra scs at any spots that appear loose.
Round 2 :
With Cream, ch3 (counts as dc), *skip 1 sc, 3 dc in next sc, ch1; rep around. In corners work (3 dc, ch2, 3 dc) to maintain corners. Join. (This produces a classic granny-like shell line in cream surrounding the whole blanket.)
Info :
If your blanket edge is large (many motifs wide), you may prefer two rounds of this cream granny to enlarge the border proportionally. Repeat this round if a thicker cream band suits your aesthetic.
Round 3 :
With Black, ch1, sc in same st, sc in each dc and ch space across, placing 2 sc in each corner ch-2. Join. (This adds a thin black line to define the cream shells.)
Info :
A single sc round in black gives the clean, bold separation seen in the photos. Use this to sharpen the contrast between the cream border and blanket body.
Round 4 :
With Cream, ch3, work (2 dc, ch1) in same st, *skip one sc, 3 dc in next sc, ch1; rep to corner; in corner work (3 dc, ch2, 3 dc). Join. Repeat this round to build a fuller scalloped cream edge (perform 2 to 3 repeats depending on desired border width). (After 2 repeats you will have a prominent scalloped cream border.)
Info :
Work repeats until you reach your preferred border width — pictured bedspread shows two full scallop repeats plus a finishing black line. Keep corners proportional by adding ch-2 corners in every repeat.
Round 5 :
With Black, ch1, sc evenly around working 2 sc in corner ch-2s to square corner. For a crisp finish work 1 sc in each top of the cream shells and 2 sc in the gap between shell groups to create the small black ridged line shown. Join and fasten off. Weave in ends. (Final edging round solidifies the border.)
Info :
For a slightly thicker black outline similar to the photos, work this final black sc round twice. The first secures the shells; the second deepens the visual line.
— Decorative Ridge Round (Optional for more texture) :
Round 1 :
With Cream, join in any black sc of the last round. Work (ch2, sc) into the gap between shell peaks to create a lively ridge. Repeat around and join. This yields a textured raised ridge seen in close-up photos.
Info :
This decorative ridge is optional but adds visual interest and a tactile element when draped on the bed. It is worked quickly across the final black round and requires only moderate counting.
— Matching Pillow Covers: Front Panel (Make 2) :
Info :
Pillow covers are made of 9 motifs arranged 3x3 to create a square pillow front using the same motif instructions above. Each motif follows the same rounds; join-as-you-go is recommended for neat seams.
Round 1 :
Make 9 motifs as described previously. Join them in 3-motif rows using the JAYG method on the final cream sc round as you did for the blanket. Then join the three rows vertically to create the 3x3 front panel. Fasten off and weave in ends.
Info :
Pillow finished size depends on motif size—three motifs across should be around 18-22 inches depending on yarn/hook. Adjust motif count for your desired pillow dimension.
Round 2 :
With Black, work 1 round of sc evenly around the entire 3x3 panel, placing 2 sc in corner ch-2s. Join. (This firms up edges and prepares the panel for a backing.)
Round 3 :
With Cream, work 1 round of ch3 granny shells (3 dc groups) across sides placing corner (3 dc, ch2, 3 dc). Join and fasten off. Weave in ends. The front panel is complete.
Info :
If you prefer a sewn seam look for the pillow, whip stitch the backing and front panels together with Black yarn leaving a small gap for the insert.
— Pillow Cover: Back Panel (Make 2) :
Round 1 :
Option A (Motif Back): Make 9 motifs and join as front for a reversible pillow. Option B (Solid Back): With Black, ch40 (or adjust to match width of 3 motifs), join to work in rounds to create a rectangle the same size as the front. Work rows of dc or hdc until the piece measures the same size as the front panel. Fasten off.
Info :
I recommend Option A for a fully coordinated look; Option B will be faster and still looks great if you prefer a solid backing to reduce bulk.
Round 2 :
Place front and back right sides together. With Black, seam three sides using whip stitch or sc through both layers; insert pillow form (approx 18-20" insert depending on motif size), then close final side. Fasten off and weave in ends. Block lightly if needed.
Info :
Insert should be slightly larger than the cover to produce a firm, plump pillow like the ones pictured. If using a pillow form, select one with hidden zipper or insert through open seam and close securely.
— Finishing Touches, Weaving and Blocking :
Info :
Weave all ends on the wrong side, using mattress stitch or tapestry needle to hide tails. After finishing, block the entire blanket (spritz and pin to measurements) to set stitches and create an even, flat surface. Dry fully before use.
Round 1 :
Trim any excess yarn and inspect joins; run a final row of subtle back-loop-only sc around the full blanket in Black to create a neat frame if desired. Join and fasten off.
Info :
For durability, secure any ends that meet at junctions by weaving them in across several motifs on the back. Consider a light steam from a distance to relax yarn if your yarn allows it (check yarn label).
— Puff Stitch Technique (Detailed Info) :
Info :
Puff stitch: yarn over, insert hook, pull up loop (repeat set number of times), yarn over and pull through all loops on hook, ch1 to close. Common counts: 4 or 5 loops for large petal puff; 3 loops for smaller puff. Work puff stitches loosely to keep the petal height.
Info :
Secure each puff by finishing with a ch1 and sl st into the next space; this both closes the puff and secures position. For extra definition, block slightly with pins under each satin-like puff once motif is finished.
This black-and-cream daisy granny bedspread brings bold contrast and handmade warmth to any bedroom. Each daisy motif shines against a rich black background and the scalloped cream border finishes the piece with elegant texture. The modular construction makes the project easy to scale for any bed size, and the matching pillows tie the look together beautifully. 🧶 Cozy up with this timeless classic and enjoy every stitch of the process. 🌼✨