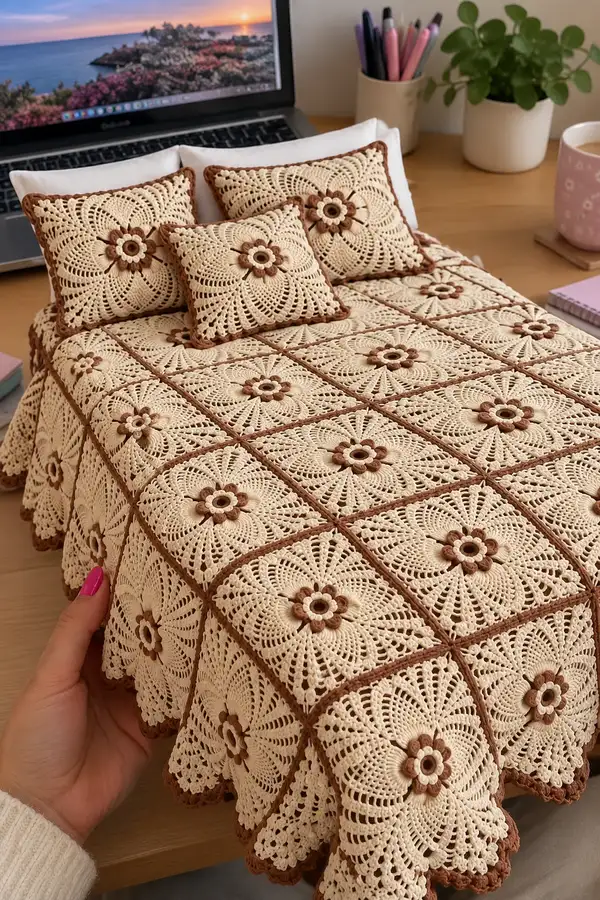
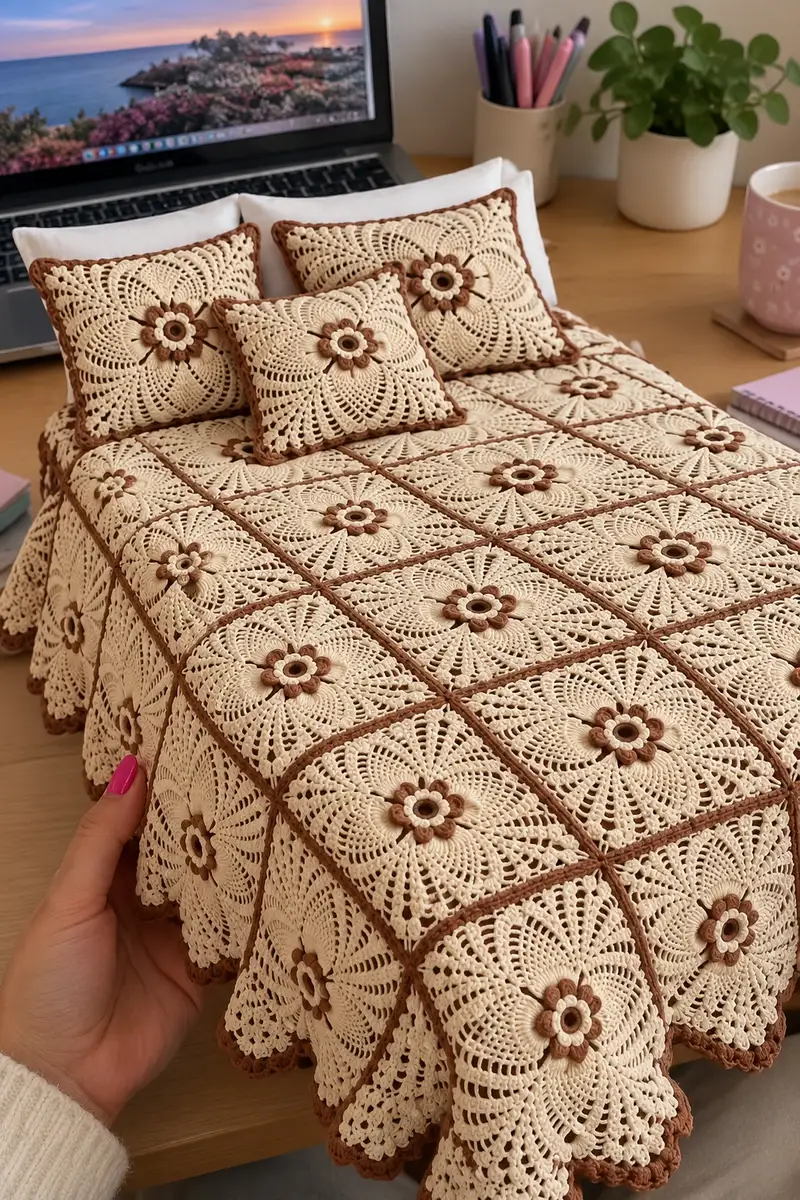
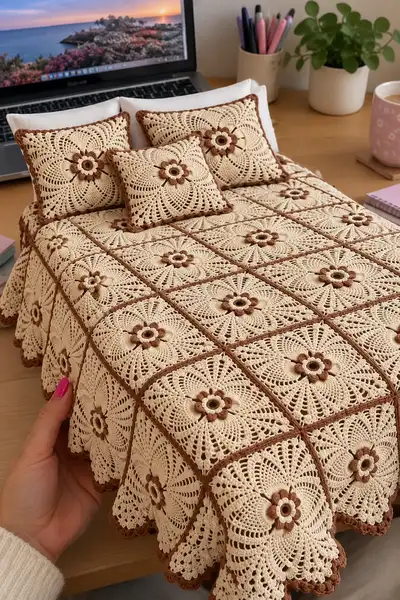
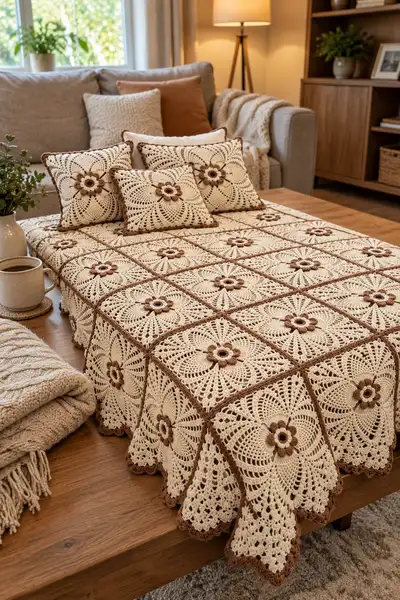
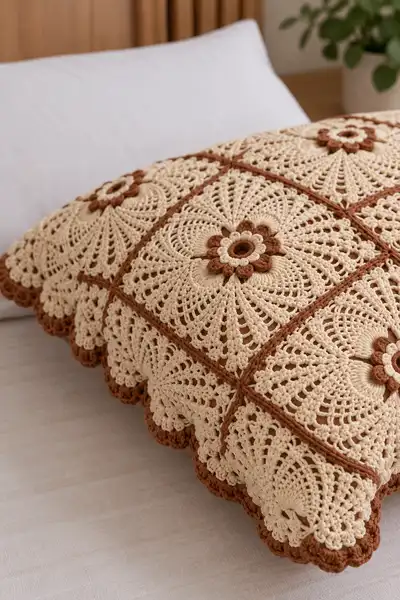
Create a timeless, neutral lace bedspread woven from delicate floral squares and a scalloped border. This pattern uses a soothing cream main color with warm brown accents to highlight the raised flower centers and join lines. Each square is a lacy, radiating motif that joins seamlessly to form an elegant bedspread with draping scallops. Detailed instructions guide you through every round, join and finishing touch so you can recreate this beautiful heirloom piece.
Progress Tracker
0% Complete
— Overview & Gauge :
Info :
This bedspread is made from repeating 18 cm (approx 7") square motifs worked in rounds and joined to form a full spread with scalloped edging. Gauge: One finished motif block measures approximately 18 cm square after blocking when worked with cotton DK and a 3.5 mm hook. Each motif uses a raised flower center worked first in accent brown and the body worked in cream. The sample layout pictured is 6 motifs across by 6 motifs down (36 motifs), but you can scale up or down.
Info :
Notes on sizing: 36 motifs in the sample produce an approximate finished spread of 108 cm x 108 cm (42.5" x 42.5") drape shown on a coffee table/throw. For a twin bed coverage increase to 8 x 10 motifs; for a full/queen adjust accordingly. Each additional motif adds one motif width (including seam). Plan yarn quantities accordingly.
— Motif — Flower Center (Make 36 motifs for sample) :
Round 1 :
With accent brown yarn, make a magic ring, ch 1, work 8 sc into ring. Pull tight and join with sl st to first sc (8)
Round 2 :
Ch 1, (1 sc in next st, inc) x 8 — work this sequence around to create a gently increased center (16)
Info :
The small brown circle forms the raised center base. Keep tension even and do not pull too tight on round 2 so the subsequent petals can sit flat. Join with a sl st and fasten off accent yarn if you prefer to change colors for petals; alternatively carry yarn up to next round if you will not cut.
Round 3 :
Join cream yarn in any stitch with a sl st, ch 1, sc in same st, *ch 2, sk 1 st, sc in next st* repeat around to create 8 ch-2 spaces (16 sc and 8 ch-2 spaces total); join with sl st to first sc (16 sc)
Round 4 :
Ch 1, sc in same st, *into ch-2 sp: (ch 2, 5-tr puff cluster, ch 2) sl st into next sc* repeat in each ch-2 sp. The puff cluster is formed by: yarn over, insert hook, pull up loop; repeat 5 times (5 loops on hook), yarn over and pull through all loops, ch 1 to close puff. You will have 8 raised puff petals sitting on the cream round; join with sl st. Maintain 16 anchor sc points overall
Info :
Puff stitch technique: keep all loops even and pull through with one final yarn over. After creating the 5-tr puff for each petal, gently shape each puff so petals are evenly spaced around the center. Do not pull solidly tight — the center should retain a slight raised ring.
Round 5 :
Ch 3 (counts as dc), into each sc around work (1 dc, ch 2, 1 dc) in the top of each sc to form small arches between petals: *(dc in sc, ch 2, dc in same sc)* x 16 around; join with sl st to top of starting ch-3 (32 dc with 16 ch-2 sps)
Info :
Round 5 begins the radiating framework for the larger petal fans. Keep ch-2 spaces uniform to accept cluster work in later rounds. If you prefer a more raised center, use a heavier puff cluster on Round 4 (7 loops) but adjust tension for even spacing.
— Motif — Expanding to Radiating Disk :
Round 6 :
Ch 1, sc in same st, *work (2 dc, ch 2, 2 dc) into each ch-2 space from previous round to form elevated fans* repeat around; join with sl st (each fan occupies the prior ch-2 space; stitch count increases as fans add height — maintain 16 fan groups)
Round 7 :
Ch 1, sc in same st, *(sc in next 3 dc, ch 3, sk next 2 dc, sc in next 2 dc)* across each fan group to create chain lacy arches from fan to fan. Repeat around keeping the spacing consistent; join with sl st
Round 8 :
Ch 3 (count as first dc), dc in next 4 sts, *(ch 2, sk 2, 2 dc in each of the next 5 sts)* repeat creating a broad radiating band. You should aim for an approximate total of 48 dc across this round (48)
Info :
R9 and R10 below use the 48-st base to form the lacy spokes visible in the motif. The number 48 is chosen because it divides evenly into 8 petals (48 / 8 = 6), giving 6 base stitches per petal which is useful for later turning the circular disk into a square with corner increases.
Round 9 :
Ch 1, 1 sc in each dc around (48). Join with sl st. This even round stabilizes the previous increase and sets the base stitch count (48)
Round 10 :
Ch 3 (counts as dc), *dc in next 2 sts, ch 2, sk 2 sts, dc in next 4 sts* repeat around to form 8 open lacy spokes. Keep stitch count constant at 48 where dc are counted; join with sl st
Info :
At this stage you will see 8 distinct radiating lacy sections — these will become the eight 'petal' wedge shapes that will be squared off at the corners in later rounds. If your circle is slightly off-center, gently stretch and pin the motif flat and check spacing before moving on.
— Motif — Turning Circle into Square (Corner Formation) :
Round 11 :
Ch 1, sc in same st, *(sc in next 5 sts, [2 sc, ch 3, 2 sc] in next st to form a corner) repeat 7 more times* — you are creating 8 corner-capable points. After completing sequence you will have increased stitch count by 8 corner groups (56 sc total)
Info :
The bracketed [2 sc, ch 3, 2 sc] forms an initial corner chain-3 point which will become a proper corner as you convert the motif to a square. Place a stitch marker in the first corner as it will be helpful later to align edges with adjoining squares.
Round 12 :
Ch 3 (counts as dc), in next 5 sts work (dc, ch 2, dc) into each of the corner ch-3 sps; in the linear sides work (2 dc, ch 2, 2 dc) in the centre of the side to begin flattening the petal into an arched edge. After working around you will have 8 corners and the motif will begin to take a square-ish shape. Approx stitch count 72 (counts vary due to chain spaces)
Round 13 :
Ch 1, sc evenly across each side section to fill in gaps: work sc across the arcs between corner groups and in corners work (sc, ch 2, sc) to maintain a defined corner point. Aim to maintain symmetry on each side.
Info :
If spots appear too open or lacy for your taste, substitute sc for hdc across the side fills to tighten the look. Keep consistent treatment on all four sides to maintain a true square shape.
Round 14 :
Ch 3, *(dc, ch 2, dc) in corner ch-2 space, dc in each side stitch across until next corner; repeat* This round completes the basic square outline and sets the base for lacy side panels. Count rounds carefully — motif should be roughly square and measure near the target motif size before proceeding (approx 18 cm after blocking)
Round 15 :
Ch 1, work (sc) around the entire square working (sc, ch 3, sc) in each corner. Join with sl st. This neat sc round creates a stable ridge used later for the brown join seam. Total sc count will vary depending on how many sc were needed along sides (typical range 80-100 sc)
Info :
Measure across diagonal and straight sides. If edges are uneven, block motif now: dampen lightly and pin to a true square, stretching the lacy fans as needed. Correct blocking ensures easier consistent joining during assembly.
— Motif — Final Lacy Rounds & Decorative Edge on Square :
Round 16 :
Using the cream main color, ch 1, *(sc in next 3 sts, ch 3, sk 1 st, sc in next 3 sts, ch 1, sc in corner)* around to add a decorative picot-like repeat on each side. Join to first sc. This creates a small scallop template for the final joining
Round 17 :
Ch 3, dc in each sc across until a corner, in corner work (2 dc, ch 3, 2 dc) to keep the corner full-bodied. Repeat on each side and join with sl st. Count will depend on previous sc counts; keep symmetry consistent on all four sides.
Info :
At this point finish off the cream if you need to change back to the brown accent for the accent ridge seam. For exact motif consistency, block every motif after Round 17 to final dimensions then add final accent seam in brown for neat joins.
Round 18 :
Fasten off cream. With brown accent yarn and a small hook (3.0 mm if desired) join in any side sc and work 1 round of sc around the entire square, placing (sc, ch 3, sc) in corners and sc into side scs to create a continuous accent ridge. This brown ridge will serve as the visible seam when joining squares (approx stitch count mirrors previous sc round)
Info :
We perform this final contrast round before joining as it gives each motif a finished framed look and simplifies the join-by-seam method. If you prefer an invisible join, omit this brown sc round and use a joining method described later.
— Joining Motifs — Join-as-you-go (JAYG) option and Seaming :
Info :
You may join motifs using either a visible brown seam (as pictured) or an invisible mattress stitch. The photos show a brown seam; below we describe both methods. For a bedspread that shows the seam, we recommend Join-As-You-Go on the last brown round of each motif to create a continuous raised ridge.
JAYG Round 19 (when joining) :
On the last brown round of a motif, work sc along two sides only until you reach the corner where you will join to the already completed neighboring motif: for each sc across that meets an adjacent motif, instead of sc in ch-space, sl st into corresponding stitch on neighbor and then sc in next st of working motif to create a continuous seam. Continue across the side, joining stitch-for-stitch. Complete unjoined sides normally and fasten off when complete.
Info :
When joining, always pin motifs in place and join from the center outwards so tension is even and motifs sit flat. Take care to match corners exactly — place stitch markers at corner points before joining.
Alternate Seaming :
If preferring a neat, flat seam, use a whip-stitch with the brown yarn on the wrong side of squares, sewing through the back loops only so the front retains an unbroken textured ridge. This produces a slightly lower profile seam than the JAYG method.
Info :
For the sample 6 x 6 layout, work motifs row by row. Join horizontally across the row first then join rows vertically. Press lightly with steam over a towel after all joins to refine shape.
— Border and Scalloped Edge (After all motifs are joined) :
Round 1 (Border Setup) :
With brown yarn and a 3.5 mm hook, join in any corner ch-3 space on the assembled blanket. Ch 1, sc in corner, *work sc evenly across the side edge placing (sc, ch 3, sc) in corner ch-spaces* repeat around entire outer edge. This creates a sturdy rim for the scallop rounds.
Round 2 :
Ch 3, (counts as first dc), work (dc, ch 2, 2 dc) in each corner ch-3 to emphasize corners; on each straight edge work (dc in next 2 sts, ch 2, sk 2 sts) repeat to create regular ch-2 spaces along the perimeter. Join (stitch counts will vary with size)
Info :
Spacing on edges: aim for an even number of ch-2 spaces across each side so scallops land neatly between seam ridges. Use stitch markers to mark corner centers and side quarter points before starting scallops to help with visual symmetry.
Round 3 (Scallop Foundation) :
Switch to cream yarn (optional for contrast) or remain in brown for a unified border. Ch 1, 1 sc in same st, *skip 2 sts, (5 dc shell) in next ch-2 space, sk 2 sts, sc in next st* repeat all around so each shell sits in a ch-2 space and sc separates shells. Join with sl st.
Round 4 (Deep Scallop) :
Ch 2 (counts as hdc), hdc in next 2 sts, *(3 tr popcorn in next dc of shell, ch 1, 3 tr popcorn in same shell), hdc in next 3 sts* repeat across. Popcorn: 5 dc worked into same st then drop loop and pull last loop through to form a popcorn (or use cluster method). This creates a deep scallop with strong 3D texture similar to the photo edge.
Round 5 (Edging Finish) :
Ch 1, sc around entire border working (sc, picot, sc) at the peak of each scallop if desired: picot = ch 3, sl st into 3rd ch. Fasten off and weave in all ends. This final round produces the finished scalloped silhouette and small picot points visible in the sample.
Info :
Blocking the finished border is crucial: dampen and pin each scallop to create even wave and allow to dry fully. For large bedspreads you may want to block in sections to maintain even tension and drape.
— Pillow Covers (Make 3 as shown) :
Info :
Each pillow cover uses a single motif for the front and a plain square back or multiple motifs for a fully enclosed square. The sample shows 16 cm motifs with a solid fabric backing and brown border piping. The pillow size sample is 30 cm (12") square using a 2-motif by 2-motif join or one large motif stretched; here we will make a 1 motif front and solid fabric back method for a 12" insert.
Pillow - Front (1 motif) :
Work one motif as per motif instructions through Round 18 including brown accent ridge. Block motif to 30 cm if required. This will be the front panel.
Pillow - Back (Option A: Solid Lace Panel) :
Make a complimentary square using rounds 1-15 but omit raised flower center for a flatter back. Alternatively use two motifs joined together for a more intricate back.
Pillow - Back (Option B: Fabric Back) :
Cut a fabric square 1 cm smaller than the blocked motif. With brown yarn whip-stitch the fabric to the wrong side of the motif around three sides leaving one open to insert the pillow form; then fold and stitch closed after inserting the form.
Info :
Edge piping: add a brown sc round around the pillow seam to form neat piping. Position motifs carefully to ensure the flower center sits centered on the pillow surface.
— Finishing Touches, Weaving & Blocking :
Info :
Weave in ends with a yarn needle using duplicate stitch techniques where possible so ends lie flat and invisible on the motif backs. After finishing joins, lightly steam-block the complete bedspread on blocking mats using rust-proof pins. Check for even scallops around the border and adjust pins as needed.
Info :
Storage and care: Handwash the spread in cool water with mild detergent and lay flat to dry. Avoid harsh wringing. For occasional freshening, use a gentle steam and air out in shade to prevent color fade of natural cotton yarn.
Final Assembly Info :
Arrange blocks right-side-up (flower centers facing up) before the final border. Use photos or place markers for orientation so that all floral centers face the same direction and the seam ridges align for a consistent grid look as pictured.
Completing this stunning lace bedspread is a wonderfully rewarding experience — each square is like a tiny motif of care and creativity! The raised flower centers and scalloped border combine to form a cozy, elegant accent for any room. Share the joy of a handmade heirloom or keep it as a luxurious personal treat. Every stitch tells a story — enjoy the process and show off your finished piece with pride! 🧶🌼