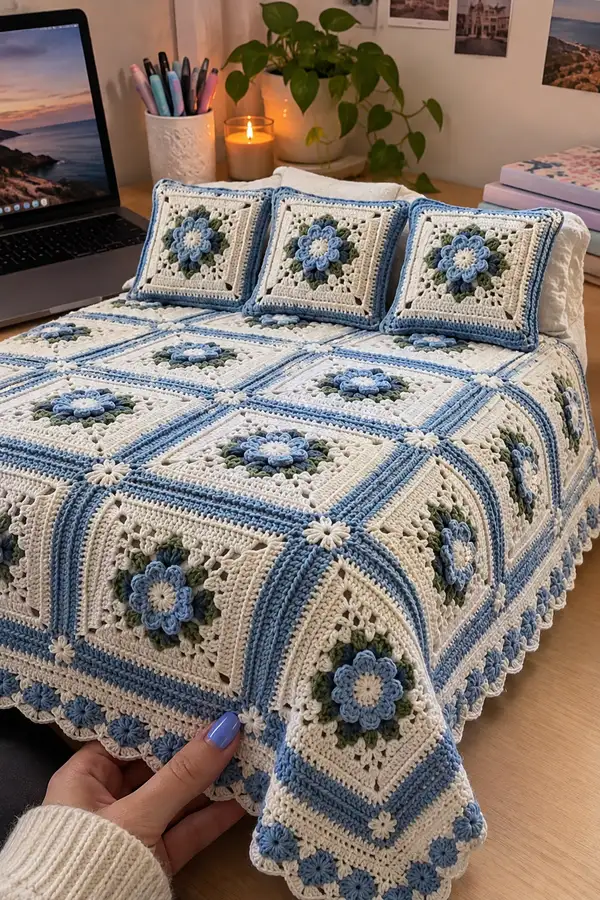
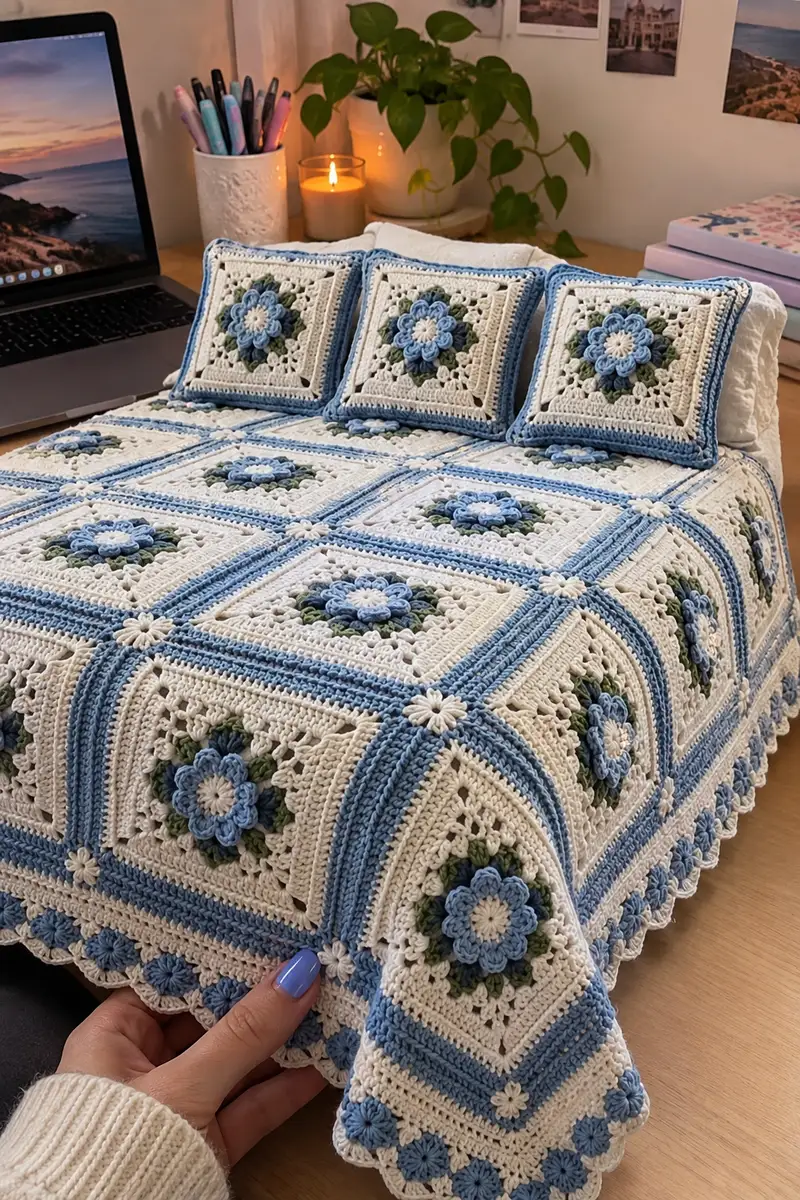
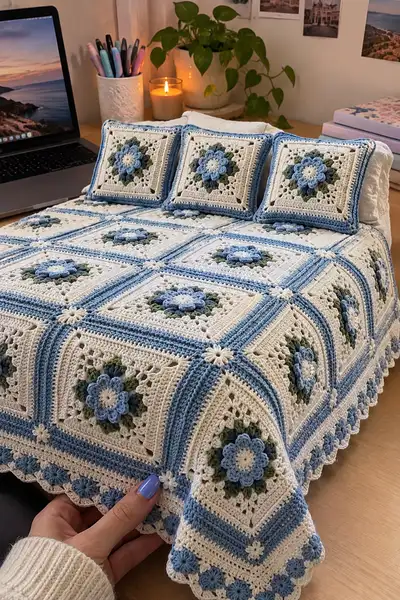
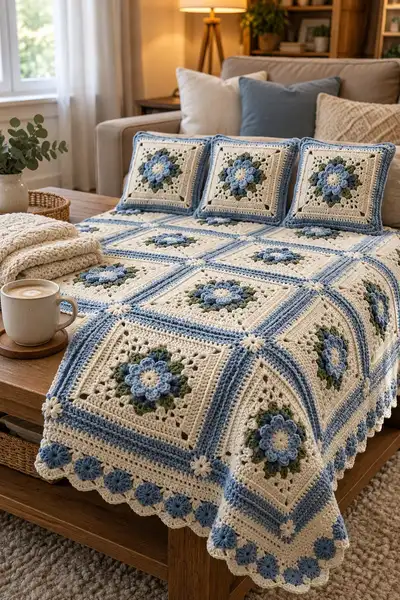
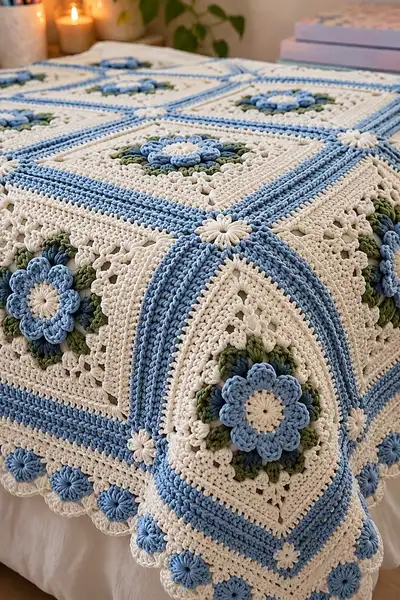
A timeless soft-blue bedspread made from large floral granny squares, featuring raised 3D petals, sage green leaves, and a scalloped shell border. This cozy blanket uses cream, dusty blue and muted green yarns with textured ridges and floral join-details for a cottage-inspired finish. Includes full square, joining and border instructions to recreate the bedspread and matching pillow covers.
Progress Tracker
0% Complete
— Notes & Gauge :
Info :
Gauge isn't critical for the modular bedspread but consistency across all squares is important. With worsted weight yarn and 4.0 mm hook, one completed flower square (after border rounds) should measure approximately 12 x 12 inches. Adjust hook size for a tighter or looser fabric. Block each square before joining for even edges.
— Abbreviations & Stitches Used :
Info :
“Puff stitch” = yarn over, insert hook, pull up loop (repeat 4 times total), yarn over, draw through all loops on hook, ch 1 to close puff. Counts assume a ch-1 after puff unless noted. Invisible join and join-as-you-go (JAYG) techniques are used for joins; instructions provided in joining section.
— Square Motif (Flower Center + Square Expansion) :
Round 1 :
6 sc in magic ring (6)
Round 3 :
(1 sc, inc) x 6 (18)
Round 4 :
(2 sc, inc) x 6 (24)
Info :
Change to pale sky blue yarn now for the first petal round. Carry the cream tail under or fasten off previous color and weave later.
Round 5 :
*ch 1, puff in next st, ch 1, sk 1* around to make 6 puff petals anchored into the round; join with sl st to first puff (24 visible anchor sts, petals do not change counted stitch total) (24)
Info :
Make sure each puff is plumped evenly by pulling the loops to the same height before finishing the puff. Ch 1 between puffs keeps petals defined.
Round 6 :
Switch to dusty blue (main blue). Ch 1, sc in same st, ch 2, *sc into base between puffs, ch 2* repeat around to create 6 ch-2 loops for the next petal round (24)
Round 7 :
Into each ch-2 loop: (make 3 puff stitches worked into same loop with ch1 between each puff) x 6 loops to form an outer petal ring; join with sl st to first puff (petal clusters added; stitch total remains 24 anchor points) (24)
Info :
After petal rounds, weave tails and block lightly to flatten center. Petals will sit raised above subsequent rounds. Keep petals even by evening out loops before completing puffs.
Round 8 :
Change to sage green. Working in the spaces between petal clusters, *(ch 3, 2 dc, ch 3, sl st) into each interspace forming 6 small leaf arches* to create leaf bases around petals (24)
Round 9 :
With sage green, ch 1, sc evenly around working 1 sc in each previous stitch and 1 sc into each ch-3 loop to stabilize leaf arches (48)
Info :
Round 9 increases stitch total because you’re working sc into each ch space. Keep count consistent by marking every 12th stitch if helpful.
Round 10 :
Change to cream. Ch 3 (counts as dc), 1 dc in same st, *ch 1, skip 1, (2 dc, ch 1, 2 dc) in next st* repeat to form a round of shell-like clusters to begin squaring the motif (72)
Round 11 :
Ch 3, dc in each st around remembering to place 3 dc in corner spaces where there are larger ch-1 spaces to create corners - work (2 dc, ch 2, 2 dc) in four equally spaced corner points (76)
Round 12 :
Ch 2, hdc in each st around working 3 hdc into each corner chain-2 space to maintain corner structure (76)
Round 13 :
Change to cream: ch 1, sc in each st BLO for one round to create a defined ridge on the square face (76)
Info :
Working in the BLO (back loops only) for this round creates a subtle frame that makes the later blue ridge stand out. Place a stitch marker at the start of this round.
Round 14 :
Change to dusty blue. Ch 2, hdc in each st around working 3 hdc into each corner space (increase at corners only) (84)
Round 15 :
Ch 2, hdc in each st around (84)
Round 16 :
Repeat Round 15 (84)
Info :
These blue rounds create the raised ribs between squares later when joined. Work tightly to keep ridges even; use the 4.0 mm hook. If your blue ridge is loose, switch to 3.5 mm for these rounds next time.
Round 17 :
Change to cream. Ch 1, sc in each st around working 3 sc in the corner chain-2 spaces to prepare the square face (84)
Round 18 :
Ch 3 (counts as dc), dc in next 3 sts, *(ch 1, sk 1) across a set of 3-4 sts to form airy clusters, dc across next series* repeat around to form decorative lacy points inside the square (84)
Round 19 :
Ch 1, sc in each st around to tidy the lacy round (84)
Info :
At this point one complete floral square has a defined 3D flower in the center, leaf ring, and a cream field framed by a dusty blue ridge. Block lightly to square the piece. Final square size should still be approximately 12 inches; adjust rounds to suit if necessary.
Round 20 :
Change to dusty blue. Ch 1, sc in BLO for two rounds to create a strong ridge edge that will become a join surface later. Round 20: 1 sc BLO in each st (84)
Round 21 :
Repeat Round 20 (84)
Round 22 :
Change to cream. Ch 3, dc in each st around working extra dc sets into corner spaces so corners remain boxy: (3 dc, ch 2, 3 dc) in four corner spots (92)
Round 23 :
Ch 1, sc in each st around to firm the corner areas and even the count (92)
Info :
If you prefer a slightly smaller square, stop after Round 21 and start joining. These extra cream rounds create the larger field seen in the photographs.
Round 24 :
Change to dusty blue. Ch 2, hdc in each st around to thicken the ridge outwards; place 3 hdc in corner ch-2 spaces (100)
Round 25 :
Repeat Round 24 (100)
Round 26 :
Change to cream. Ch 1, sc across each st working *2 sc in each corner cluster* to square and stabilize the motif (100)
Round 27 :
Ch 3, dc in next 8 sts, *(ch 2, sk 2) for a small lacy space, dc across next 10 sts* repeat around accenting the cream field (100)
Round 28 :
Ch 1, sc in each st around to tidy the lace (100)
Info :
At completion of Round 28, the motif has a substantial square body with a decorative inner lace and a raised blue ridge. This is a good stopping point for an individual square if you plan many squares for a larger spread.
— Corner Flower Join Motifs (Small Floral Medallions for Joins) :
Round 29 :
For the small join flowers (make 1 per square corner): mr, 6 sc in mr (6)
Round 31 :
Change to pale sky blue: *(puff, ch1) around to create 6 tiny puffs as a miniature flower; join with sl st (12 anchors, puffs create petals) (12)
Round 32 :
Change to cream: ch 1, sc around working two sc in corner loop to firm (16)
Info :
These small medallions are used at square intersections to form the pretty little cream stars seen in the assembled bedspread. Make one per corner or more as needed for your layout.
— Join-As-You-Go (JAYG) Method - Joining Squares Together :
Info :
Squares are joined using a combination of slip-stitch join in the round and later reinforced by a thick blue ridge worked over join seams. The JAYG here uses matching cream join-sc rounds, with corner medallions worked into intersection points.
Round 33 :
Lay two squares right sides together and align edges. With cream yarn, join at corner and work sl st through front loop of both squares across edge: sl st across corresponding st count to seam the side (use 92-100 sl st depending on your current stitch count)
Round 34 :
After joining squares in strips, lay strips together and join the perpendicular seams the same way. Place small corner medallions between joins: sew or sl st the medallion at the intersection of 4 squares, aligning its back to the join point (use whip stitch to secure) (medallion placement only)
Info :
When doing JAYG, keep tension relaxed at joins and match stitch counts exactly. If one square is slightly larger, adjust by skipping or adding a few sl sts in the join so edges lie flat. Block after joining a few squares to prevent accumulating distortion.
Round 35 :
Once all squares for one section (e.g., the central 3x4 arrangement) are joined into the full bedspread top, work a round of cream sc all around the entire perimeter to tidy join edges and create a base for the outer border: sc evenly around, adding 3 sc in corner ch-2 spaces (total will vary by number of squares; for a 4x4 layout expect approx. 400 sc) (estimated)
Round 36 :
Ch 1, sc in each st around to firm the perimeter (same count as Round 35)
Info :
Because the bedspread in the photos is constructed from many squares (example shown is 3x4 for a small coverlet), you must scale the perimeter rounds to your layout. Mark the total number of stitches per edge so border rounds have predictable counts.
— Raised Ridge Panels (Thick Blue Crosses Between Squares) :
Round 37 :
Change to dusty blue. Work a ridge row by working 2 rounds of hdc in BLO across the seams on the front side: Round 37: ch 2, hdc BLO in each st around where the join seams are located (estimated 420)
Round 38 :
Repeat Round 37 to build a third-dimensional ridge (estimated 420)
Info :
To build the substantial blue rib between squares, work the hdc rows over the previously joined seams. Use a slightly tighter tension to make ridges stand up; blocking afterward will allow the ridges to relax to a neat finish.
Round 39 :
Change to cream. In the crossing points of the blue ridges, attach a small cream medallion (the small corner flower previously made) by sewing through the ridge center and blanket body to form the star join seen in the photo (one medallion per intersection)
Info :
Secure medallions with several passes of yarn and weave ends into the ridge for stability. These small stars give a refined, finished look at intersections.
— Main Outer Border (Deep Cream Band + Blue Ridge) :
Round 40 :
Change to cream. Ch 3, dc in each st around working extra dc sets into corners: (3 dc, ch 2, 3 dc) in four corner spots to square out the blanket edge (estimated 420 + corner increases)
Round 41 :
Ch 1, sc in each st around (same count as Round 40)
Round 42 :
Change to dusty blue. Ch 2, hdc in each st around to create a wide blue band; add 3 hdc into each corner space for a boxed effect (estimated 440)
Round 43 :
Repeat Round 42 to thicken the blue band (estimated 440)
Info :
These two blue rounds form the substantial outer ridge seen in the bedspread. They echo the ridges between squares and visually tie the design together; keep tension consistent and use the same hook used for square ridges.
Round 44 :
Change to cream. Ch 1, sc in each st around (estimated 440)
Round 45 :
Change to cream: ch 3, dc in next 2 sts, *ch 2, sk 2* around to create an airy field that will be the base for scalloped edging (estimated 440)
Round 46 :
Ch 1, sc in each dc and 1 sc into each ch-2 space to tidy (estimated 440)
Info :
Make sure corner spaces retain an even number of sts so that scallops later land evenly across the edge. Count your stitches across a single side and multiply by number of sides to estimate total.
— Scalloped Flower Shell Edge (Final Decorative Border) :
Round 47 :
Change to dusty blue. Along the perimeter, *work 8 dc into every 10th stitch (approx) to form a shell, skip 8 sts between shells* repeat around adjusting spacing so shells land evenly; corners: space shells to maintain curve (approx count variable)
Round 48 :
Change to cream. Work a small cluster between each blue shell: *make a small 6-dc puff cluster (puff=3 loops) in the center between shells then sc into adjacent stitches* repeat around forming small cream flowers between shells
Round 49 :
Change to dusty blue. Ch 1, sc around to finish edge and tuck ends; add a second row of shells if you want a fuller border (optional) (final edge tidy round)
Info :
Spacing is the key for a neat scalloped edge. If one side has extra or fewer stitches, distribute or reduce spacing slightly when placing shells to avoid bunching at corners. Block again after edging for a smooth drape.
— Additional Decorative Details (Optional Small Flowers Along Lower Edge) :
Round 50 :
Along the very bottom, you may add additional blue mini flowers: mr, 6 sc into mr; Round 2: *(puff, ch1) around to create mini flower* Fasten off and sew every 10th stitch along border to match photo placement
Info :
These small flowers add the dotted blue edge motif seen near the scallop. Attach using yarn needle and place evenly along the bottom edge. For a balanced look, attach them after blocking and edging.
— Matching Pillow Cover (Make 2 or 3 Covers) :
Round 51 :
Make one full floral square as per Rounds 1-28 but stop after Round 28 to create a 12-inch square (use same color sequence) (100)
Round 52 :
With dusty blue, ch 1, sc in each st around in BLO to create a crease for pillow flange (100)
Round 53 :
Change to cream. Ch 3, dc in each st around for two rounds to thicken flange (100)
Round 54 :
Fasten off. Make a second identical square for back or create a simple cream square for back cover. Join three sides by whip stitch leaving one side as an envelope opening, insert pillow form then close.
Info :
Use the same blocking and ridge technique on the pillow squares so the finished set matches the bedspread perfectly. If making an envelope back, make the back slightly smaller by 1/2 inch for overlap.
— Finishing Touches & Weaving Ends :
Round 55 :
Weave in all ends along the wrong side using a yarn needle. Reinforce join seams with a couple of mattress stitches through the ridge if the blanket will get heavy use.
Round 56 :
Block entire bedspread: steam lightly or wet-block, pin to shape and allow to dry fully. Pay special attention to scalloped edge to set shells evenly.
Info :
Final blocking ensures drape and even corners. Use rust-proof pins and block on a flat surface large enough for your final spread size. If space is limited, block in sections and seam them after drying.
Info :
Notes on repeats: This pattern is intentionally modular. The detailed rounds above describe one fully finished square plus instructions for joining and edging. For a full bedspread similar to the photos (example 3x4 layout shown), make 12 squares. For larger beds increase square count proportionally (e.g., queen sized often uses 4x5 or 5x5 depending on desired drape).
This bedspread brings a classic vintage charm to any bedroom with its soft blue petals, sage leaf accents, and scalloped shell edge. Each square is a little piece of handmade joy, so assembling the full spread is like watching a garden bloom stitch by stitch. I hope you enjoy the meditative rhythm of making flowers and joins — every square becomes part of a treasured family heirloom. 🧶🌸