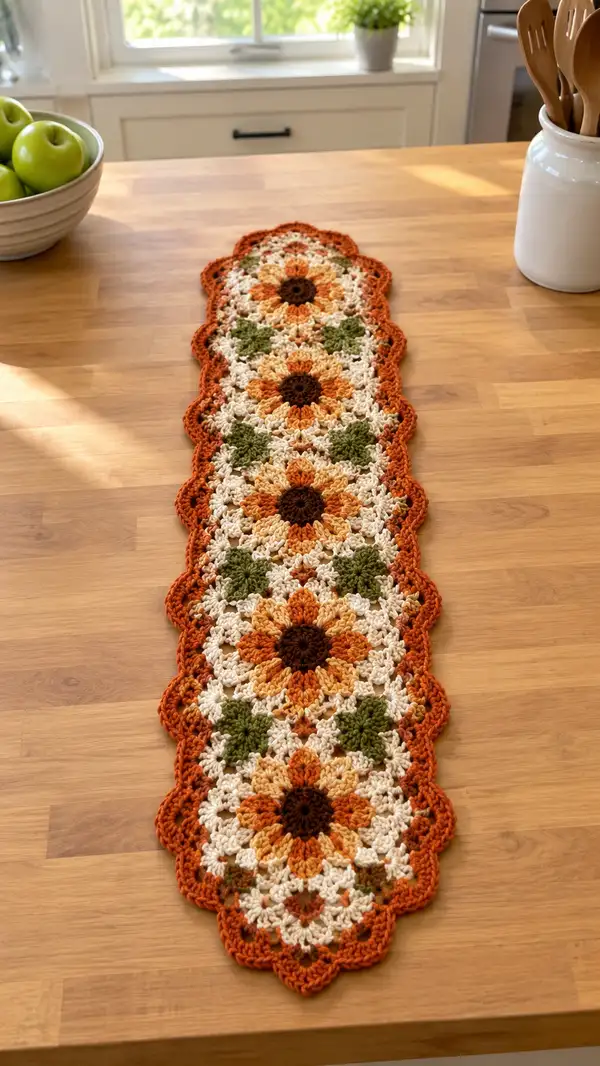
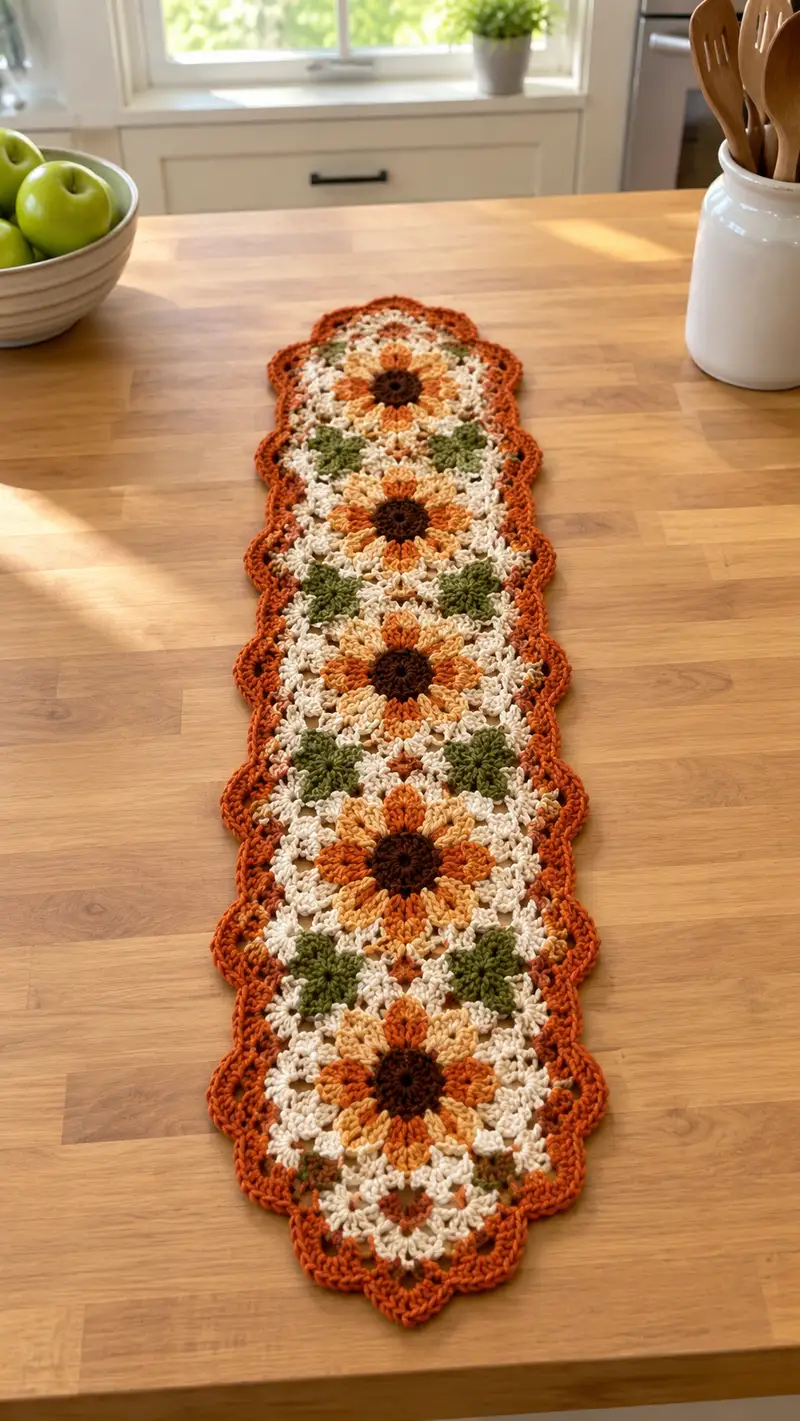
Create a warm, sunflower-inspired table runner made from joined granny sunflower motifs with leafy green connectors and a scalloped rust border. This runner features rich autumn tones—deep brown centers, layered orange petals, soft cream background and olive-green accents—finished with a bold rust scallop that frames the piece beautifully. Perfect to brighten a kitchen table or dresser with handmade charm and texture.
Progress Tracker
0% Complete
— Notes & Gauge :
Info :
This pattern is written in US terms. The runner pictured is made from worsted weight yarn using a 5.0 mm hook. Gauge is not critical for motifs, but one sunflower motif in the pattern should measure approximately 7.5-8 inches across after blocking. Adjust hook size to match desired motif size. Work tightly enough that background stitches do not gape between clusters.
— Sunflower Motif (Make 4) :
Round 1 :
With Color A (deep chocolate brown), make a magic ring, ch 2 (counts as first hdc), work 11 hdc into ring, pull tight and join with sl st to top of ch2 (12 hdc) (12)
Round 2 :
Ch 2, hdc in same st, *2 hdc in next hdc; rep from * around, join with sl st to top of ch2 (increase round) (24)
Round 3 :
Change to Color B (burnt orange). Ch 3 (counts as dc), dc in same st, *ch 2, sk 1 hdc, 2 dc in next hdc; rep from * around; join with sl st to top of ch3 — you will have 12 small dc pairs separated by ch-2 sps (12 pairs + ch-2 spaces)
Info :
Round 3 forms the base points for petals; ensure your ch-2 spaces are even. Use a stitch marker to mark the first pair if you need to identify petals later.
Round 4 :
Switch to Color C (light peach). In each ch-2 space from previous round work: (ch 1, 5 dc) all in same ch-2 sp to create petals; sl st to next dc pair base to position for next petal. Complete 12 petals and join to first petal with sl st (12 petals)
Round 5 :
Ch 1, sc in same st, *ch 2, sc between petal clusters (into the top of the dc pairs), ch 2, sc at tip of next petal (sl st area); rep around to form small open mesh between petals; join with sl st (12 sc + mesh)
Info :
After Round 5 the motif will look like a sunflower with a round brown center and 12 puff-like petals. Keep tension consistent—petals should sit neatly without pulling the center in.
Round 6 :
Change to Color B (burnt orange). Ch 3 (counts as dc), *sk next sc, dc shell (5 dc) in next ch-2 sp between petals, ch 1, dc in next space between shells; rep around to create a scalloped petal-lift (12 shells) ; join with sl st (12 shells)
Round 7 :
Ch 1, sc in same st, *ch 3, sk to next shell, sc between shells; rep around. This adds a small lacy spacer (12 sc + ch-3 loops)
Round 8 :
Change to Color D (soft cream). Into each ch-3 loop work: (sc, ch 1, 3 dc, ch 1, sc) to create a rounded petal ring and begin the background round; join with sl st (12 shell anchors)
Info :
Round 8 is your first background round. Work loosely enough to let petals relax outward. This round begins to form the flat granny-style background that will allow motifs to join together seamlessly.
Round 9 :
Ch 3, dc in same st, *ch 2, sk to next sc anchor, 2 dc in same anchor; rep around making 12 dc pairs separated by ch-2 sps; join with sl st (12 pairs)
Round 10 :
Ch 1, sc in same st, *ch 2, sc in next ch-2 sp; rep around (creates mesh of ch-2 spaces for join points) ; join with sl st (24 mesh points)
Round 11 :
Ch 3, dc in same st, *(2 dc, ch 2, 2 dc) in next ch-2 sp (shell), ch 1, sc in next ch-2 sp; rep around to form alternating shells and sc anchors; join with sl st. You will have 12 shells around (12 shells)
Info :
Place a temporary stitch marker at the top of any shell that will align with the long axis center of the runner—this helps orient motifs when joining.
Round 12 :
Change to Color D (soft cream). Ch 3, *(2 dc, ch 2, 2 dc) in each shell across, ch 1 between shells for a continuous granny-like ring; join with sl st — 12 large shells (12)
Round 13 :
Ch 1, sc in same st, *ch 2, sc in ch-2 sp of large shell; rep around to create evenly spaced ch-2 holes that will be used to join connector motifs later; join with sl st (24)
Round 14 :
Ch 3, dc in same st, dc in next sc, *ch 1, sk 1, dc across next 4 anchors (or as counts allow), repeat around forming a moderate shell-stitch expansion that smooths motif edge; join with sl st (approx. 48 dc anchors)
Round 15 :
Ch 1, sc in each st and ch-space around to tidy edges; join with sl st (48)
Info :
At this point the sunflower motif is approximately 7.5-8 inches across. If making a smaller or larger motif, adjust hook or yarn weight. Block motifs lightly to flatten petals and even out stitches before joining.
Round 16 :
Ch 3, *(dc, ch 2, dc) in next shell base to form corner-style shells at the cardinal points and additional dc between shells to create 12 broad anchors; join with sl st (12 larger shells)
Round 17 :
Ch 1, sc in same st, *ch 3, sc in next shell valley; rep around to create larger open spaces for decorative join; join with sl st (24)
Info :
Decide which two opposite shell valleys will be the long ends of the motif (top and bottom) — these are the points where motifs will be joined end to end. Mark them with scrap yarn for accurate alignment when assembling the runner.
Round 18 :
Change to Color B (burnt orange). Ch 2, hdc in each st and ch-space around to begin solidifying the background and provide a stable join line; join with sl st (approx. 72 hdc)
Round 19 :
Ch 1, sc in each st around to even out texture; join with sl st (72)
Round 20 :
With Color D (soft cream), ch 3, *2 dc in next st, ch 1, sk 1, repeat around creating an open lacy edge ; join with sl st (approx. 96 dc clusters)
Round 21 :
Ch 1, sc in each st and ch-space around to tidy the edge; join with sl st (96)
Info :
Fasten off leaving a 10-12 inch tail if this motif will be joined to the next motif later. Make four identical sunflower motifs. When making the second, third and fourth motifs, you will join along the long axis using specified join-as-you-go instructions in the Connecting Motifs section. Block each motif before assembly for the neatest join.
— Green Connector Motif (Make 3) :
Round 23 :
With Color E (olive green), make a magic ring, ch 3 (counts as dc), work 11 dc into ring, pull tight and join with sl st (12 dc)
Round 24 :
Ch 3, dc in same st, *ch 2, 2 dc in next dc; rep around to form 6 shell clusters separated by ch-2 spaces; join with sl st (6 shells)
Round 25 :
Ch 1, sc in same st, *ch 2, sc between shells; rep around to form small mesh square center; join with sl st (12 mesh anchors)
Info :
These small green motifs act as diamonds/squares sitting between sunflower motifs. They provide both color contrast and structural join points. Keep them flat and even by blocking.
Round 26 :
Ch 3, *2 dc in next ch-2 space, ch 1, sk to next mesh anchor; rep around forming 6 broader shells; join with sl st (6 shells)
Round 27 :
Change to Color D (soft cream). Ch 1, sc in each st and ch-space around to tidy the motif; join with sl st. This creates a neutral frame around the connector (approx. 36 sc)
Round 28 :
Ch 3, 2 dc in next st, *ch 1, sk 1, 3 dc in next anchor; rep around forming a larger square-ish motif; join with sl st (approx. 24 anchors)
Round 29 :
Ch 1, sc in each st around to even the edge; join with sl st (approx. 24)
Info :
Fasten off leaving long tails for sewing or joining as you go. Make three green connector motifs to sit between the four sunflower motifs. You may also make one or more extra connectors to test placement before joining full runner.
— Joining Motifs (Join-as-you-go instructions) :
Info :
We will assemble the runner by joining sunflower motifs end-to-end with green connectors placed in the diamond positions visible between petals. Orientation note: identify the top and bottom shell valleys marked earlier on each sunflower motif. Align motifs so centers line on the long axis and petals nest visually. Join using whip stitch or sl-st join; I prefer a slip-stitch join-as-you-go using the ch-2 join holes created in Round 13 of the sunflower motif and Round 27 of the connector motif.
Round 32 :
Position Motif 1 (Sunflower) RS up. Position Motif 2 RS up adjacent so that a side ch-2 hole on Motif 1 aligns with a corner hole on a connector motif (or with Motif 2 directly if you are joining only two at one time). Insert hook through both motifs and sl st with Color D (soft cream) into both holes to join, working sl sts across 6-8 matching join points along the long edge. Fasten off. (Join length approx 6-8 sl sts)
Round 33 :
Repeat to join Motif 2 to a green connector by aligning a diagonal ch-2 hole of the green motif to the ch-2 hole of Motif 2 and sl st to secure. Continue this sequence: Sunflower - Connector - Sunflower - Connector - Sunflower - Connector - Sunflower. Use consistent spacing and keep tension loose enough to allow motifs to sit flat. (3 connectors, 4 sunflowers joined)
Info :
If you prefer, sew motifs together with mattress stitch/wool sewing using the long tails left earlier for a nearly invisible join. Try one join method on scrap to determine how it lays before joining everything.
Round 34 :
After joining, run a round of single crochet in Color D (soft cream) around the entire perimeter of the assembled runner to even out edges and create a stable base for the scallop border: sc evenly around all motif edges, working 3 sc in each corner-like shell to maintain shape. Join with sl st. (stitch count will vary by assembled width, approximate 420-480 sc)
Info :
This single crochet round helps standardize spacing between motifs and makes the scallop border easier to work. Count and place extra sc at places that look loose or gappy to produce a smooth edge.
— Scalloped Border (Rust) :
Round 35 :
Change to Color F (rust). Ch 3 (counts as dc). *Work 5 dc in next 2 stitches to begin a scallop, sk 2 sc, sl st into next sc to anchor the scallop, sk 2 sc; rep along the long edges and continue around ends to create full scalloped shell repeats. Join with sl st (approx. 60-72 scallops depending on runner length).
Round 36 :
Ch 1, sc in same st, *ch 2, 7 dc in top of next scallop (work into the midpoint of the scallop cluster), ch 2, sc in next anchor; rep around to enlarge scallops; join with sl st.
Info :
Work scallops loosely to create rounded edges. If scallops flare outward too much, reduce cluster size (for example use 5 dc instead of 7 dc) on subsequent rounds.
Round 37 :
Ch 1, sc in same st, *ch 3, sc in middle of scallop (approx. after 3 or 4 dc), rep around to create a picot-like accent between scallops; join with sl st.
Round 38 :
Ch 3, *(2 dc, ch 2, 2 dc) in the apex of each scallop to create a defined shell peak, sc between peaks to stabilize; rep around; join with sl st.
Info :
Try the runner on your table now to ensure scallop placement complements table edges. Adjust scallop frequency if necessary by adding or removing repeats at the ends for symmetric shape.
Round 39 :
Ch 1, sc in each st around to tidy and firm the scalloped edge; join with sl st. This final tidy round provides a neat finishing line and helps scallops hold their shape (approx. 300-360 sc).
Round 40 :
Fasten off and weave in all ends using a yarn needle. Trim tails close after weaving at least 1.5 inches into the fabric to secure.
Info :
Blocking: Gently block the finished runner on a flat surface, pinning the scallops and petals to open them slightly and to flatten the runner. Steam or wet-block according to yarn manufacturer recommendations. Allow to dry fully before use.
— Alternate Join-as-You-Go Method (Detailed joins per motif) :
Info :
If you prefer to join while making the second motif: on the final round of Motif 2 (Round 21 equivalent for that motif), do not fasten off. Instead, orient Motif 2 adjacent to Motif 1 and with RS faces matching, sl st through the ch-2 hole of Motif 2 and corresponding ch-2 join hole on Motif 1. Work sl st joins every 2-3 shells to secure firmly. Continue to finish the round after joining and then fasten off. This creates a seamless seam with matching thread color.
Round 42 :
Repeat this join-as-you-go approach for all subsequent motifs: when reaching the round that creates ch-2 join holes, join to the adjacent motif before closing the round. This requires keeping motifs aligned; use pins or stitch markers if necessary.
Info :
Joining with sl st uses less yarn and forms a flatter seam than sewing with a yarn needle in many cases. Choose the method that gives the appearance you prefer.
— Optional Decorative Embellishments :
Info :
Optional: Add a row of small bobble clusters in Color B (burnt orange) spaced evenly inside each scallop to echo the sunflower petals. To make bobbles: (yo, insert hook, pull up loop) x 5, yo and pull through all loops on hook, ch 1 to close bobble and sc to space. Attach bobbles evenly—test on scrap to place nicely.
Round 44 :
Optional: For a slightly stiffer runner, work a very loose fabric stiffener onto the underside after blocking (test on yarn scrap first). Avoid stiffening the scallops too much or they may become brittle.
Info :
Care: Hand wash cold and lay flat to dry to maintain shape. Avoid machine washing which can flatten petals and distort scallops.
— Pattern Summary & Adjustments :
Info :
To lengthen or shorten: add or remove sunflower motifs and connector diamonds. Each additional sunflower motif plus a connector adds roughly 7-9 inches to the total runner length depending on blocking and motif spacing. To make the runner wider, change the motif stitch counts in rounds 14-16 to add more shells per motif and adjust joining points accordingly.
Info :
To change the look: swap the green connectors for a neutral cream to create a subtler contrast, or use a bright color to make the diamonds pop. Use variegated yarn for the petal rounds to create multi-tonal petals similar to the photo sample which uses mixed warm peach/orange shades.
Info :
When making multiple runners as gifts, photograph your motif arrangement before joining—this helps re-create color placement consistently across multiple pieces.
— Finishing Checks :
Info :
Check for stray loops or loose ends under the scallops. Weave ends into the body of the runner, following the direction of stitches, and then trim closely. If you notice small gaps at joins, add a few invisible whip stitches with matching yarn to pull edges neatly together.
Info :
Lay the runner flat and re-pin after washing if it becomes slightly misshapen. Gently re-block and reshape scallops with steam from an iron held above the fabric (do not press) for final smoothing.
This sunflower granny table runner brings handmade warmth to any surface—each motif is a little celebration of texture, color and craftsmanship. The layered petals and scalloped border create depth and movement, while the olive-green accents add a pleasing contrast. Whether for everyday charm or seasonal decor, this runner is a joyful piece to crochet and display. 🧶🌻✨