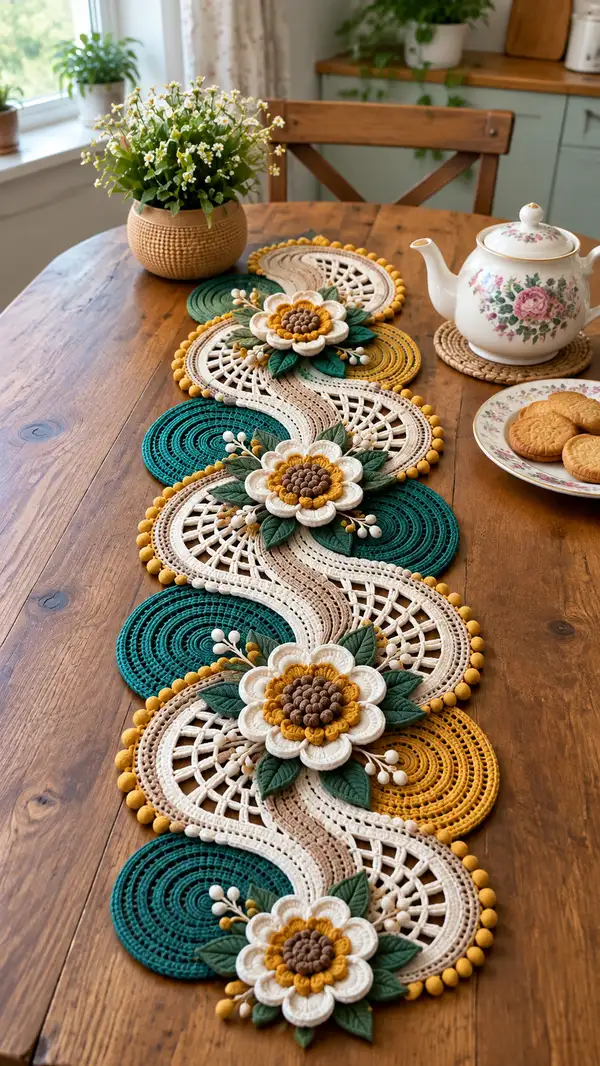
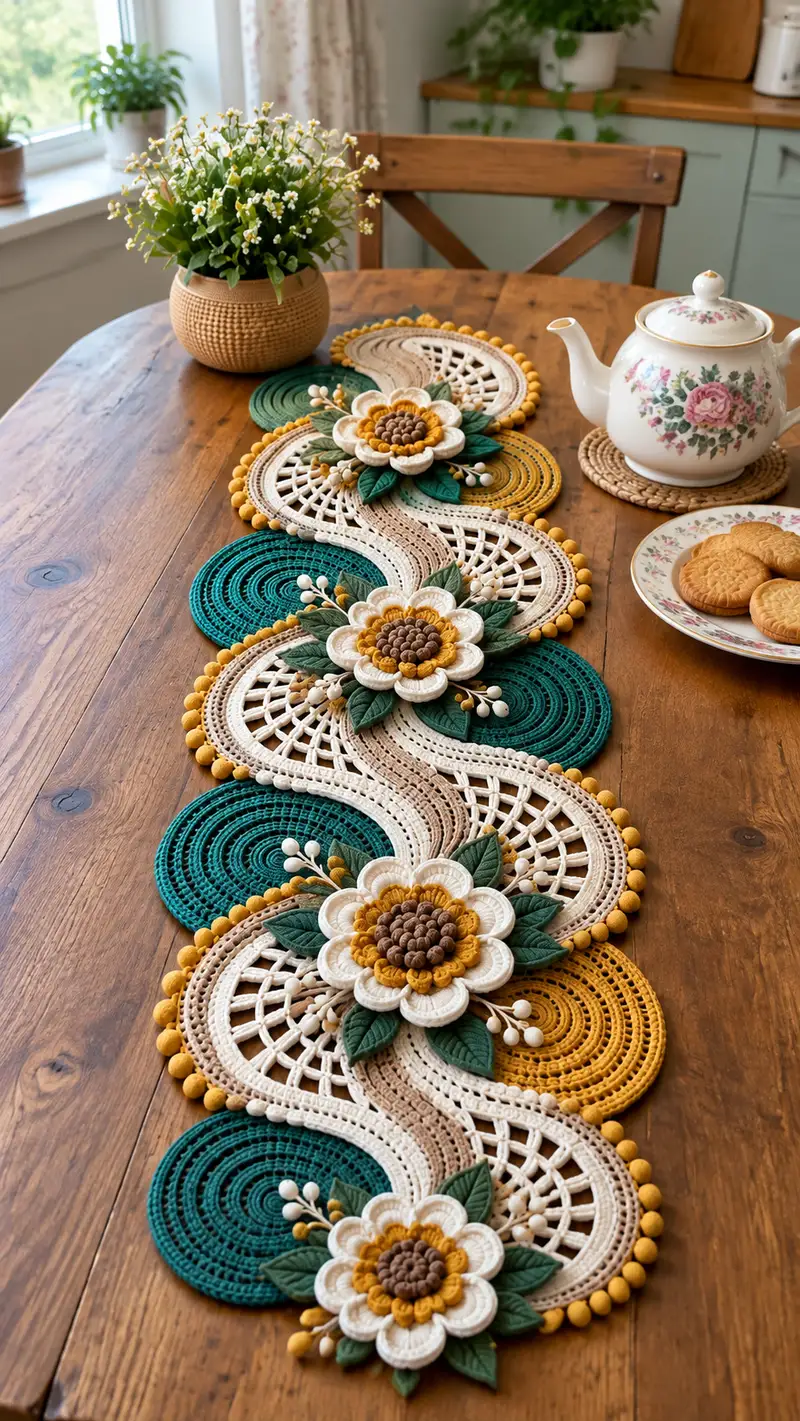
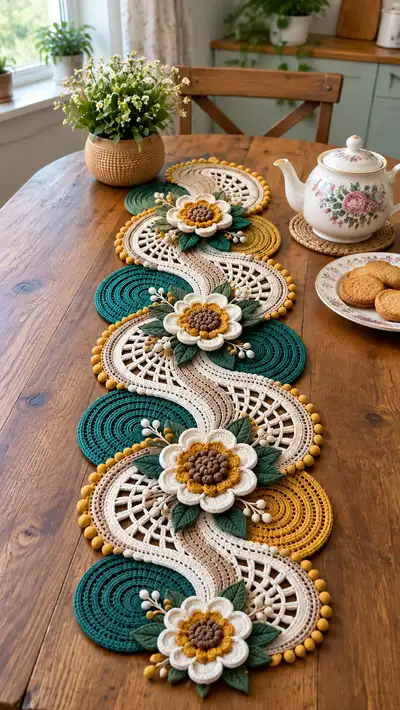
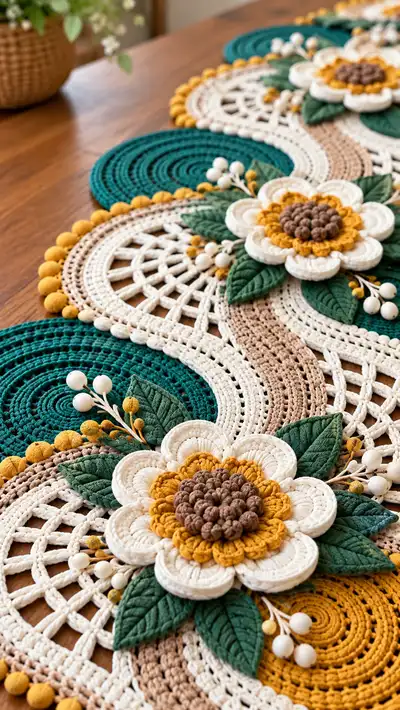
This elegant S-wave table runner combines lacy openwork, textured concentric round motifs and layered sunflower appliques for a warm, boho-chic centerpiece. The design features deep teal, mustard, warm cream and earthy tan with sculpted leaves and pompom edging. Perfect for dining tables, console tops or seasonal displays — this pattern walks you through every stitch, color change and assembly step to recreate the look shown.
Progress Tracker
0% Complete
— Materials & Gauge :
Info :
Use worsted weight cotton (#4) and a 3.5mm hook for crisp stitches and good structure. Gauge is not critical for table runner width, but each large circle should measure approximately 12-13cm (4.75-5 in) across after blocking when worked with specified hook and yarn.
— Large Concentric Circle (Teal) - Make 4 :
Round 3 :
(1 sc, inc) x 6 (18)
Round 4 :
(2 sc, inc) x 6 (24)
Round 5 :
(3 sc, inc) x 6 (30)
Round 6 :
(4 sc, inc) x 6 (36)
Round 7 :
(5 sc, inc) x 6 (42)
Round 8 :
(6 sc, inc) x 6 (48)
Info :
Keep tension even; for a perfectly flat circle avoid too-tight increases. If the circle cups, move to a slightly larger hook for the next few rounds.
Round 9 :
1 sc in each st (48)
Round 10 :
1 sc in each st BLO (48)
Round 11 :
1 sc in each st (48)
Round 12 :
(7 sc, inc) x 6 (54)
Round 13 :
1 sc in each st (54)
Round 14 :
1 sc in each st BLO (54)
Round 15 :
(8 sc, inc) x 6 (60)
Round 16 :
1 sc in each st (60)
Round 17 :
1 hdc in each st (60)
Round 18 :
1 dc in each st (60)
Round 19 :
1 sc in each st BLO (60)
Info :
Measure diameter now. Adjust one extra round of even stitches if you need the circle slightly larger. Block round flat and set aside to dry. Make four circles in teal for the layout shown.
— Medium Concentric Circle (Mustard) - Make 3 :
Round 3 :
(1 sc, inc) x 6 (18)
Round 4 :
(2 sc, inc) x 6 (24)
Round 5 :
(3 sc, inc) x 6 (30)
Round 6 :
1 sc in each st (30)
Round 7 :
(4 sc, inc) x 6 (36)
Round 8 :
1 sc in each st (36)
Round 9 :
1 sc in each st BLO (36)
Round 10 :
1 hdc in each st (36)
Round 11 :
1 dc in each st (36)
Info :
If you want a more delicate mustard circle, skip the dc round and finish with hdc. Block and set aside. Make three mustard circles for the alternating layout.
— Neutral Lace Circle (Cream) - Make 4 :
Round 3 :
(1 sc, inc) x 6 (18)
Round 4 :
(2 sc, inc) x 6 (24)
Round 5 :
(3 sc, inc) x 6 (30)
Round 6 :
1 sc in each st (30)
Round 7 :
(4 sc, inc) x 6 (36)
Round 8 :
1 sc in each st (36)
Round 9 :
Work lattice row: ch1, *skip next st, dc in next, ch2; rep from * around to form even ch2 loops; sl st to join (36 dc, 18 ch2s)
Info :
This lace circle will be the motif that visually breathes and pairs with the S-spine. Make four and block with pins pulling the ch2 loops open so lattice sits even.
Round 10 :
Working into the dc spaces: join yarn in first dc; *(3 dc, ch1, 3 dc) in each dc of previous round to create small arches; rep around; sl st to join (36 arches)
Round 11 :
1 sc in each st and ch space (approx 72 sc)
Round 12 :
1 sc in each st BLO to create a crisp edge (72)
Round 13 :
(6 sc, inc) x 9 (81)
Round 14 :
1 sc in each st (81)
Info :
These cream lace circles form the open frames the flowers sit upon. Block precisely; flatten arches and ensure spacing matches the adjacent solid circles before joining.
— S-Shaped Lace Spine (Make 1 long piece to connect motifs) :
Info :
This long S-spine is worked as a wide laddered strip with alternating open arches that curve to create the sinuous line. Work in warm cream, changing to tan for two central rounds for a warm contrast.
Round 1 :
Ch 140, join with sl st to first ch to make a long ring (do not twist) — this length creates an S long enough for the photographed runner; adjust chain length for shorter/longer versions
Round 2 :
Ch1, sc in each ch around (140)
Round 3 :
1 sc in each st BLO around (140)
Round 4 :
Ch3 (counts as dc), *skip 2 sc, dc in next 4 sc, ch2; rep across creating arch spaces — end with dc, sl st to join (approx 35 arches)
Round 5 :
Join in cream into first ch2; *(3 dc, ch1, 3 dc) in each ch2 across to form open arch windows; sl st to join
Round 6 :
1 sc in each st and space around (approx 140-150 sc depending on counts)
Round 7 :
Change to tan yarn — 1 sc in each st for 6 rounds to create the curved center stripe (140)
Round 8-12 :
1 sc in each st (140)
Info :
Use blocking here to shape the S curve: pin the strip into an S on blocking board and steam lightly (safe for cotton). The long chain/joined rounds allow you to weave the spine in an S path between circles.
Round 13 :
Return to cream yarn: 1 sc in each st (140)
Round 14 :
Edge shaping: *(5 sc, dec) repeat around to subtly narrow the strip edges, creating a slight taper that makes the spine look hand-built and delicate (approx 117)
Round 15 :
Work fpdc and bpdc alternating across the long strip to add texture: *fpdc around next st, bpdc around next; rep across (approx 117)
Round 16-20 :
1 sc in each st (117)
Info :
When joining to circles later, lay the spine on the table and pin precisely where it intersects each circle edge. The S path will be trimmed to fit between round centers. Keep long tails for sewing.
— Sunflower Center (Brown) - Make 4 :
Round 3 :
(1 sc, inc) x 6 (18)
Round 4 :
Work bobble clusters: *puff in next st, leave last loop on hook; rep 3 times in each st, then draw through all loops and ch1 to secure; create 6 clusters around (18 bobble clusters)
Info :
Each bobble cluster is made of 3-4 yarn-over insert and pull-ups (puff) completed together. Keep bobbles compact for a tight sunflower center; sew centers to the inner petal rounds later.
Round 5 :
1 sc evenly around the outside of the bobble ring to create a base (approx 36 sc)
Round 6 :
1 sl st in each st to tidy edge, fasten off leaving long tail for sewing
— Inner Petals (Mustard) - Make 4 sets :
Round 1 :
Join mustard in a ring around the brown center with sl st; ch1, *[sc, ch3, sc] in next space to create petal foundation; rep around making 9 petal foundations; sl st to join
Round 2 :
In each petal foundation: (sc, hdc, 3 dc, hdc, sc) in same space to form a raised petal (9 petals)
Round 3 :
Work a second round of petals behind the first for thickness: join yarn at base of petal, (sl st, sc, hdc, 2 dc, hdc, sc) repeat for each petal (9 petals)
Info :
Use front loop joins and work petals slightly offset from the brown center to build a dimensional sunflower. Press petals gently during blocking so they sit neatly under the outer cream petals.
Round 4 :
Fasten off and weave tails towards center for sewing.
— Outer Petals (Cream) - Make 4 sets :
Round 1 :
Make 9 ch5 loops around the mustard petal ring, evenly spaced; sl st to join
Round 2 :
In each ch5 loop: (sc, hdc, 5 dc, hdc, sc) to create large outer petal; rep around (9 petals)
Round 3 :
Work an additional sc round around the petal bases to tidy (approx 72 sc)
Round 4 :
Work 1 sc BLO around bases to create a sculpted ridge which helps petals lift away from lace circle (72)
Info :
Sew the mustard inner petal ring centered over the brown bobble center first, then add the cream outer petals on top so the layering matches the photo. Use blunt needle to avoid splitting yarn when sewing heavy petals.
— Leaves - Make 6 :
Round 1 :
Ch8, sc in 2nd ch from hook, hdc, (dc) x3 across to last ch, hdc, sc; turn to work on opposite side of foundation chain: hdc, (dc) x3, hdc, sc in last ch; do not join — this creates a single leaf worked flat
Round 2 :
Along one side of the leaf: sl st, sc, hdc, 3 dc, hdc, sc; across the tip: sc; along other side: sc, hdc, 3 dc, hdc, sc (approx 18 sts)
Round 3 :
Shape with fpdc down the leaf center to create vein: *fpdc in central stitches for 4 rows, sl st; fasten off with long tail (veined leaf)
Info :
Block leaf with a little steam and pin the central vein to create a crisp shape. Make six leaves of varying sizes by using ch7 for small leaves and ch10 for larger ones if you prefer variety.
— Berry Sprigs & Accents - Make multiple small clusters :
Round 1 :
For each berry: ch3, join into a small ring; in ring make 6 sc, tighten and leave long tail; cover small wooden bead or make a tiny puff; make 10-14 berries total
Info :
Sew berries onto small wired stems or stitch directly into the runner between petals for the little white berry clusters shown. A dab of glue can help secure berries to wire.
— Pompom Edge (Mustard) - Work along alternating circle edges :
Round 1 :
Join mustard yarn to an edge stitch where you want pompom spacing. *(sc, ch3, 6 sc in next st to create a bobble loop), ch2; rep across edge spacing every 6-8 sc depending on motif size
Round 2 :
In each 6-sc loop work 6 sl st to create a tight pompom bead; fasten off and shape pompom by trimming if necessary
Info :
Alternatively make 1cm handmade yarn pompoms and sew them along the edge with whipstitch for a soft, full pompom border. Space them evenly for visual rhythm.
— Decorative Spiral Detailing on Circles :
Round 1 :
After blocking circles, with matching yarn join in center of circle and work continuous spiral of sc, hdc and dc rounds without joining to create concentric texture: sc x2 rounds, hdc x1, dc x1; repeat until desired texture achieved
Info :
Continuous spiral avoids a seam line and creates a smooth concentric look. Use a stitch marker to mark every 10th stitch if needed to keep count.
— Joining Motifs to S-Spine (Join-as-you-go & Sewing) :
Info :
Lay all circles and lace spine on a blocked flat surface, following the S layout in the photographs. Pin each motif in place. Marks indicate where each circle overlaps the spine and neighboring circle by approximately 6-10 stitches depending on motif size.
Round 1 :
Using a long tail from the lace or circle, whipstitch through the back loops of the circle edge and into the spine sc row every 3rd stitch to create a secure join. Use small, even stitches and pull tight to remove gaps.
Round 2 :
Where two circles meet, overlap edges by 4-6 stitches and sew through the edges and corresponding foundation round of adjacent circle to create a seamless contact point.
Info :
Use extra reinforcement stitches at high-stress seams (where tableware will sit). Weave many long tails inside seams and knot securely; hide ends between motifs.
— Final Assembly of Sunflower Clusters onto Runner :
Round 1 :
Position sunflower (brown center + mustard inner petals + cream outer petals) over a cream lace circle. Pin so petals rest naturally on the lattice openings; ensure center aligns with the circle center visually.
Round 2 :
Sew brown center in place using long tail, then tack inner mustard petal ring in a few places, finally stitch the cream ring around the base, catching the lace under the petal bases for stability.
Round 3 :
Sew leaves and berry sprigs under each sunflower cluster, hiding stems and tails between the circle and spine seams. Make sure each leaf points outward to mimic the organic photograph layout.
Info :
Positioning is everything: pin each cluster, then step back and check the visual flow along the runner before committing to final stitches. Make micro-adjustments now for best results.
— Edge Finishing & Reinforcement :
Round 1 :
Work a tidy sc round around the entire assembled runner edge to hide raw seams and create a clean border: sc evenly around, making 2 sc in the inside curve of any sharp turn (approx count depends on final assembled piece)
Round 2 :
For a sturdier edge, work a second round of sc in BLO to create a defined rim. Fasten off and weave all ends securely.
Info :
Final blocking: lightly mist runner and pin into final S shape on blocking board. Allow thorough drying to ensure the runner lies flat on your table.
— Final Care & Notes :
Info :
Machine wash gentle in a mesh bag on cool if yarn permits; reshape while damp and block. Avoid high heat drying to preserve shape and pompom texture. Use felt protectors under hot teapots.
Completing this runner will give you a striking centerpiece that reads like art on your table—textured sunflowers, sculpted leaves, and rhythmic circles combine into a timeless piece. Each stitched flower and carefully blocked lace adds handcrafted heart to your home. 🧶 Spread it under a teapot or candles and enjoy the warm, handmade charm it brings to every meal. 🌻