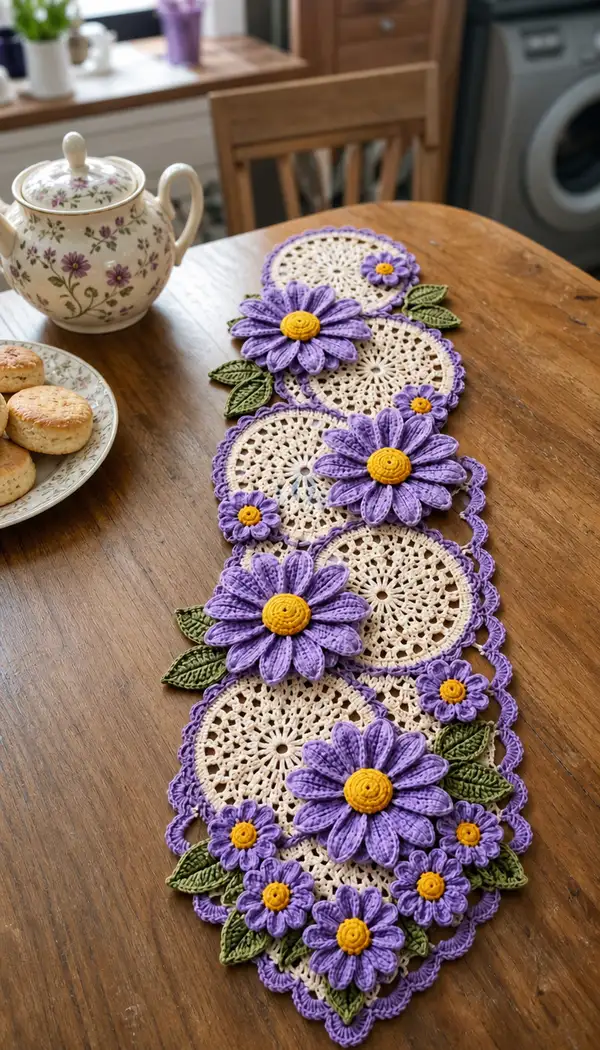
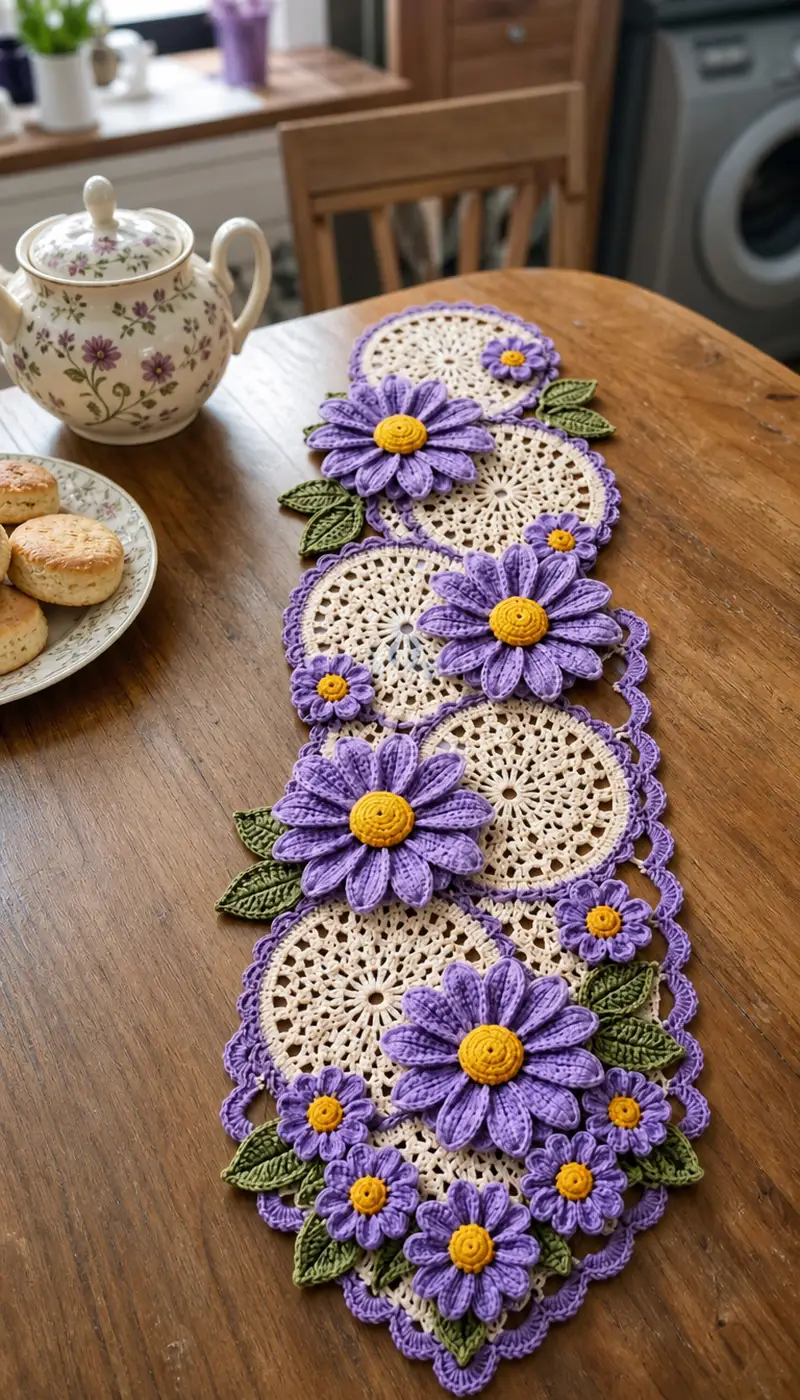
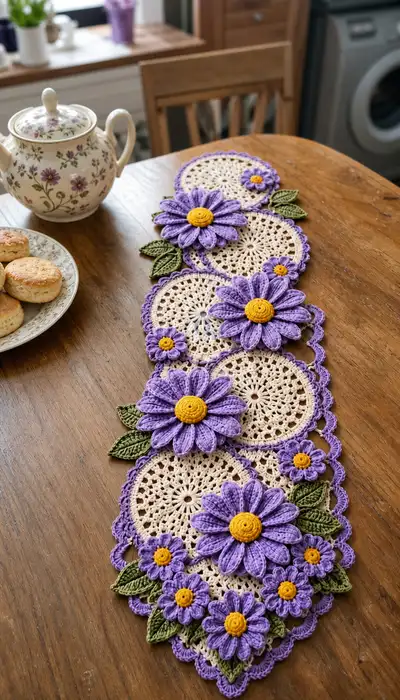
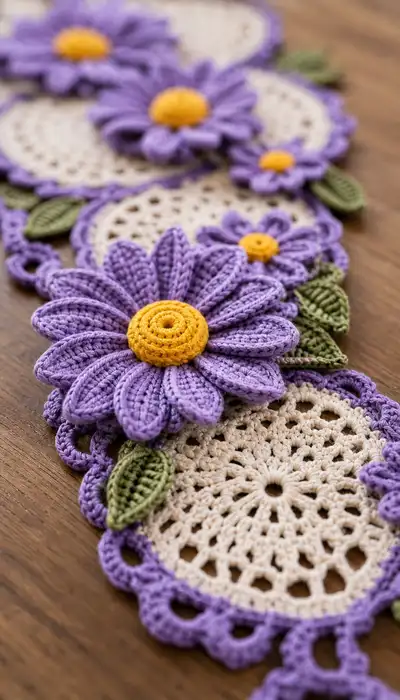
Create a stunning floral table runner featuring five lacy cream doilies joined with scalloped purple edging and layered lavender daisy appliques with sunny yellow centers and green leaves. This elegant centerpiece uses cotton yarn for crisp stitch definition and flat, structured motifs that sit beautifully on a wooden table. The design includes large daisies, small blossoms and textured leaves that are sewn onto the doilies for a dimensional, heirloom look. A satisfying project that elevates any tea or dining table with charming cottage-style blooms.
Progress Tracker
0% Complete
— Materials & Gauge :
Info :
Use mercerized cotton or cotton-blend yarn for crisp stitch definition. Gauge is not critical for function but affects final runner width and motif size. Each cream doily measures approximately 11.5-12 cm (4.5"-4.7") across before blocking when using DK/light worsted cotton and a 3.5mm hook. Adjust your hook if you need a tighter or looser fabric.
— Make the Lacy Doilies (Make 5) :
Round 1 :
Start with cream yarn. 8 dc in magic ring (8)
Round 2 :
(1 dc, inc) x 8 — work each repeat as (1 dc, 2 dc in next st) (16)
Round 3 :
(2 dc, inc) x 8 — (2 dc, 2 dc in next st) (24)
Round 4 :
(3 dc, inc) x 8 (32)
Info :
Keep stitches evenly spaced and avoid twisting the ring. After round 4 open the work and press lightly with fingers to check for a flat center; if cupping appears, add extra increases in the subsequent round.
Round 5 :
(4 dc, inc) x 8 (40)
Round 6 :
Ch1. *1 sc in next 4 dc, ch3; rep from * around, sl st to first sc. (This forms 8 ch3 loop spaces) (40 sc, 8 ch loops)
Round 7 :
In each ch3 space: (sc, ch2, 3 dc, ch2, sc) — creates 8 fan petals around (40 sc equivalent plus fans)
Round 8 :
Between fans, ch4 and sl st into center dc of next fan to create extra loop spacing; work sl sts to secure so you have 8 ch4 loops (This round sets up the lace rings)
Round 9 :
Using dc clusters: *(ch3, 3 dc) in ch4 loop, ch3, sl st in next fan top; rep from * around to form radial spokes (creates airy pattern) (work will have 8 spokes)
Info :
If your doily wants to curl, block gently. This is a good point to lightly wet-block each doily to the 11.5-12 cm diameter and allow to dry flat before continuing to edging. Blocking ensures consistent join and flatness when sewing petals on later.
Round 10 :
Ch1. 1 sc in each st and into each ch3 space evenly around to smooth the edge (approx 48 sc total depending on tension)
Round 11 :
*(ch4, sl st in next sc) around to form open picot loop border — 12 spaced loops around (adjust so loops sit evenly).
Round 12 :
Switch to purple/lavender yarn (Info before round: change color here). Join yarn into any ch4 loop, ch1, then work 7 sc into each ch4 loop, sl st to next loop. This produces a neat purple ring framing the doily (approx 12 x 7 = 84 sc total)
Info :
Carry the cream yarn to weave in later or fasten off. Work the lavender rounds tightly enough to create a defined edge that will show under the flowers.
Round 13 :
1 sc in each st around in lavender (maintain same stitch count). (approx 84 sc)
Round 14 :
*Ch5, sl st into every 7th sc to create scallop openings around the circle; rep until circle edge has 12 scallops (This round creates decorative openings for joining and overlaying petals)
Round 15 :
In each scallop: (sl st, ch1, 7 dc, ch1, sl st) to form rounded scallops — 12 scallops total.
Info :
At this stage your doily should be a well-defined circle with scalloped lavender edge. Make five identical doilies. Pin them lightly overlapping in the layout shown in the photo before sewing to ensure correct spacing.
Round 16 :
Optional tightening round: 1 sc in each dc of scallop and slip st in join points to neaten (approx 84 sc)
Round 17 :
Finishing trim: *sl st into next 2 sts, ch3, sl st into next 2 sts; rep around to create a delicate looped edge; finish with sl st and fasten off. Weave ends into the back of the scallops.
Round 18 :
Info: Make any minor adjustments or small blocking tweaks so each doily is identical in diameter. Label them L1-L5 for assembly reference.
— Large Daisy Center (Make 4) :
Round 1 :
Using mustard/yellow yarn. 6 sc in magic ring (6)
Round 3 :
(1 sc, inc) x 6 (18)
Round 4 :
(2 sc, inc) x 6 (24)
Info :
These rounds create a low dome center that looks like the raised eye of a daisy. Work the last round tightly and use a smaller hook (3.0mm) for crisper spirals if desired.
Round 5 :
(3 sc, inc) x 6 (30)
Round 6 :
1 sc in each st around (30). Fasten off leaving a 20-25 cm tail for sewing to petals and to the doily.
Round 7 :
Info: Optionally, to create a very raised center, work a spiral: join yarn and work 1 sc evenly around the top of the dome adding 6 sc evenly spaced to give an approx 36 sc round. This is optional and increases the center diameter slightly.
Round 8 :
Finishing: Fasten off and weave in a short tail to the inner rounds. Reserve tails for sewing the center to the petals and then to the doily.
— Large Daisy Petals (Make 12 petals per large flower; assemble 4 flowers) :
Info :
Each large flower has 12 elongated, textured petals. Petals are worked individually and then joined around the center. Use lavender/purple yarn and a 3.5mm hook. Petals are worked in rows attached to a small ring of chs and then gathered to the center. Work petals so the ridge faces outward; keep consistent orientation for all petals on every flower.
Round 1 (Petal Foundation) :
Ch8, sl st to form a small loop or start from magic loop equivalent (foundation for single petal). (8 ch loop)
Round 2 (Petal Row 1) :
Work into the loop: sc in each ch across (8 sc). Ch1, turn. (8)
Round 3 (Petal Row 2) :
1 hdc in first st, 3 dc in center sts for height, 1 hdc in last st (approx pattern: hdc, 3 dc, hdc) to create a rounded tip. Ch1, turn. (approx 6 stitches worked but height varied)
Round 4 (Edge Reinforcement) :
Work 1 sc evenly around the petal perimeter into the ends and sides to create definition; this leaves a firm petal edge for shaping. Sl st to join, fasten off leaving a long tail for joining to center.
Info :
Make 12 petals per large flower. Block petals lightly to open the ridges. When joining the petals to the center, place each petal slightly overlapping its neighbor by about 1-2 stitches and sew using long tails for a secure, invisible join.
Round 5 (Petal Texturing - Optional) :
To add more texture: join yarn at petal base and work 1 sc, 1 hdc in next, 3 dc in center ridge, 1 hdc, 1 sc at the tip row in FLO to make a raised central ridge; repeat on each petal. This creates the visible ribbed petal seen in the photos.
Round 6 (Attach to center) :
Place 12 petals around the mustard center. Using tail from center or petal tails, sew petals to center: sew through the petal base and several stitches of the center in a circular pattern. Adjust petals to sit slightly forward and layered for dimension.
Round 7 :
Info: When positioning, arrange petals so that pairs of petals overlap to create depth. Stagger petal bases if adding a second petal layer (optional). Use pins to position petals before sewing fully.
Round 8 (Layering) :
If adding a second layer of 12 petals (for extra fullness) offset the second layer by half a petal to fill gaps. Sew the second layer to the underside of the first petal bases and secure through the center.
Round 9 :
Info: Weave in all long tails beneath the flower center and tidy the back so the sewn flower sits flush on the doily surface.
— Small Daisy Motifs (Make 6-8) :
Round 1 :
Using mustard: 6 sc in magic ring (6)
Round 3 :
Switch to lavender. In each st around: sc, ch2, sc to create 12 tiny petals (use ch2 loops then work 3 sc into each ch2, forming 12 small petals). Fasten off leaving tail for sewing. (12 small petals)
Info :
Small daisies are used to fill gaps and join points between large flowers and doilies. Make at least 6 and up to 8 depending on your final layout.
— Leaves (Make 12-14) :
Round 1 :
Using olive/leaf green. Ch9. Row 1: sc in 2nd ch from hook and across (8 sc). (This is petal-style leaf foundation)
Round 2 :
Ch1, turn. 1 sc in first st, 1 hdc, 2 dc in next 2 sts, 1 hdc, 1 sc to create a pointed center (approx shaping). Do not fasten off.
Round 3 :
Rotate work to work along other edge: 1 sc, 1 hdc, 2 dc, 1 hdc, 1 sc back down to base, sl st at base to finish leaf. Fasten off leaving long tail for sewing. (Leaf length approx 3 cm)
Info :
For a ribbed leaf like in the photo, use BLO on the edging rounds: after shaping the leaf, join yarn along the centre and work 1 sc in each st BLO so the central ridge stands up. Make 12-14 leaves to act as counters and fillers between flowers and around the runner edges.
Round 4 :
Optional vein: With a small length of darker green, embroider a central vein with stem stitch down the middle of each leaf for added realism.
— Joining Doilies Together :
Round 1 :
Layout your doilies L1-L5 in final order, overlapping adjacent scallop edges by one scallop to create a continuous runner. Pin in place to ensure consistent spacing.
Round 2 :
Using lavender yarn and a tapestry needle, join adjacent scallops by whipstitching through mirrored scallop bases: insert needle through scallop 1 base and scallop 2 base and sew back and forth through the center of each scallop loop to create a flat, secure seam. Work neat small stitches so the seam is invisible from the front.
Info :
Take care to align the doilies so their central motifs visually align along the runner axis. Use pins and mirror each scallop when stitching for a consistent, decorative join line visible on both sides.
Round 3 :
After joining all five doilies, go back along the join on the wrong side and tack corners as needed to keep the runner flat. Fasten off and weave tails inside the seam.
Round 4 :
Info: If you prefer a more permanent join, use slip-stitch join: with right sides facing, insert hook through corresponding stitches of both scallops and sl st through both to join. This forms a neat chain join but can show as a ridge on the front, so use whipstitch if you want an invisible join.
— Attaching Large Flowers, Small Flowers and Leaves :
Round 1 :
Arrange large flowers over the doilies as shown in the photo: place one large flower centered over every second doily and stagger across the join lines so the row reads as overlapping floral clusters. Use pins to hold position.
Round 2 :
Sew each large flower down with long tails from centers or using separate matching thread. Work from center out: anchor through center round, then take small stitches through petal bases and the doily edge to secure. Aim for 8-10 small stitches per flower base to prevent shifting.
Info :
Do not pull stitches too tight; keep the flower top slightly lifted for a dimensional look. If you want the flowers completely flat, sew more evenly across the petal base.
Round 3 :
Sew small daisies into gap areas and along join seams, tucking them under petals of large flowers where appropriate for a natural cluster. Secure leaves around flower bases and along runner edges to mask joins and add organic flow.
Round 4 :
Info: Alternate leaf directions and rotate them slightly to avoid symmetry that looks overly engineered. Overlapping the leaves slightly under petals helps them appear to grow naturally from behind the flowers.
— Outer Edging & Final Scallop Detail :
Round 1 :
With lavender yarn, join at any scallop point and work: *ch3, 3 dc in scallop top, ch3, sl st into next scallop top; rep along both sides of runner to create an elegant scalloped border linking each doily’s edge. Keep tension consistent to maintain a flat edge.
Round 2 :
Work a finishing picot round: *sl st, ch3, sl st in same st to create delicate loops on every scallop to echo the doily inner loops. Fasten off and weave ends.
Info :
Edge both sides of the runner the same way so the pattern reads as one continuous piece; this also disguises any irregularities in join spacing. If your runner is longer or shorter than desired, add or remove a doily and repeat joins as needed.
Round 3 :
Optional: Use a contrasting thread to stitch a light decorative running stitch along the center seam of the runner on the wrong side to stabilize for frequent use.
Round 4 :
Final pressing/blocking: Lightly steam-block flower tops to flatten and set shape, being careful not to overpress textured petals. Ensure the runner lies fully flat before final trimming of ends.
Info :
Trim and hide all yarn tails on the underside of the runner. Check that no stitches are loose—add additional small securing stitches under flowers if the table runner will be used often.
— Notes & Variations :
Info :
You can customize the runner length by adding or removing doilies. Experiment with alternate colors: white doilies with pastel petals for a spring look or deep plum with cream centers for autumn. For a stiffer, more sculptural appearance, lightly coat petals with fabric stiffener following manufacturer instructions and re-shape before final assembly.
Info :
If you prefer a sewn-on lace backing, add a lightweight fabric strip under the runner to protect delicate tabletops and to provide more durability for frequent use.
This floral table runner brings classic crochet lace together with dimensional daisy appliques for a charming handmade centerpiece. Layering petals, vibrant centers and olive leaves creates a look that is both structured and romantic. It's a meditative, rewarding project that yields a beautiful heirloom-style accessory perfect for gifting or dressing your own table. 🧶 Add a cup of tea and enjoy the bloom-filled finishing touch you created. 🌼✨