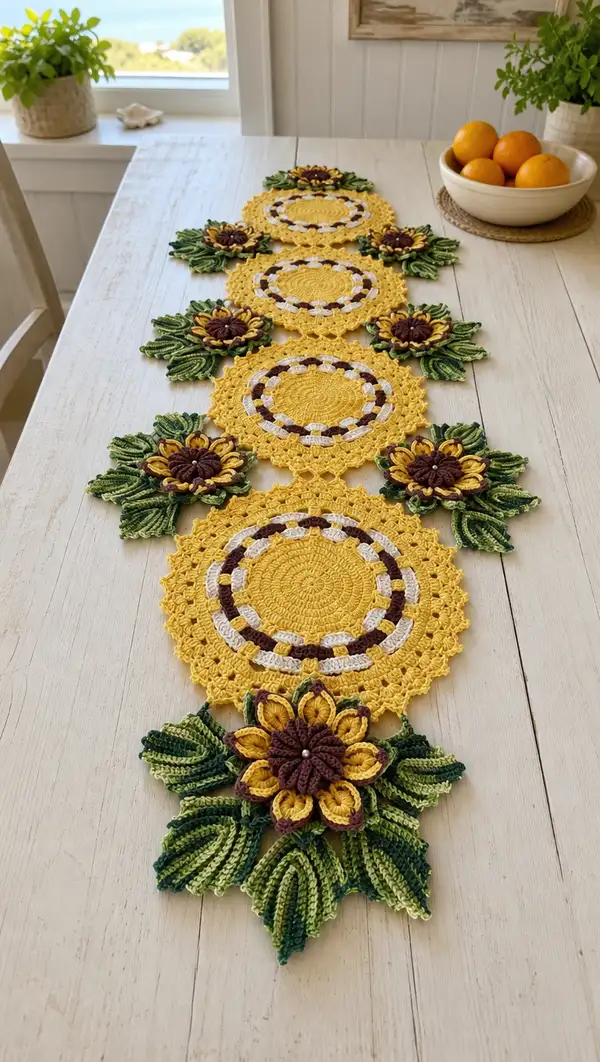
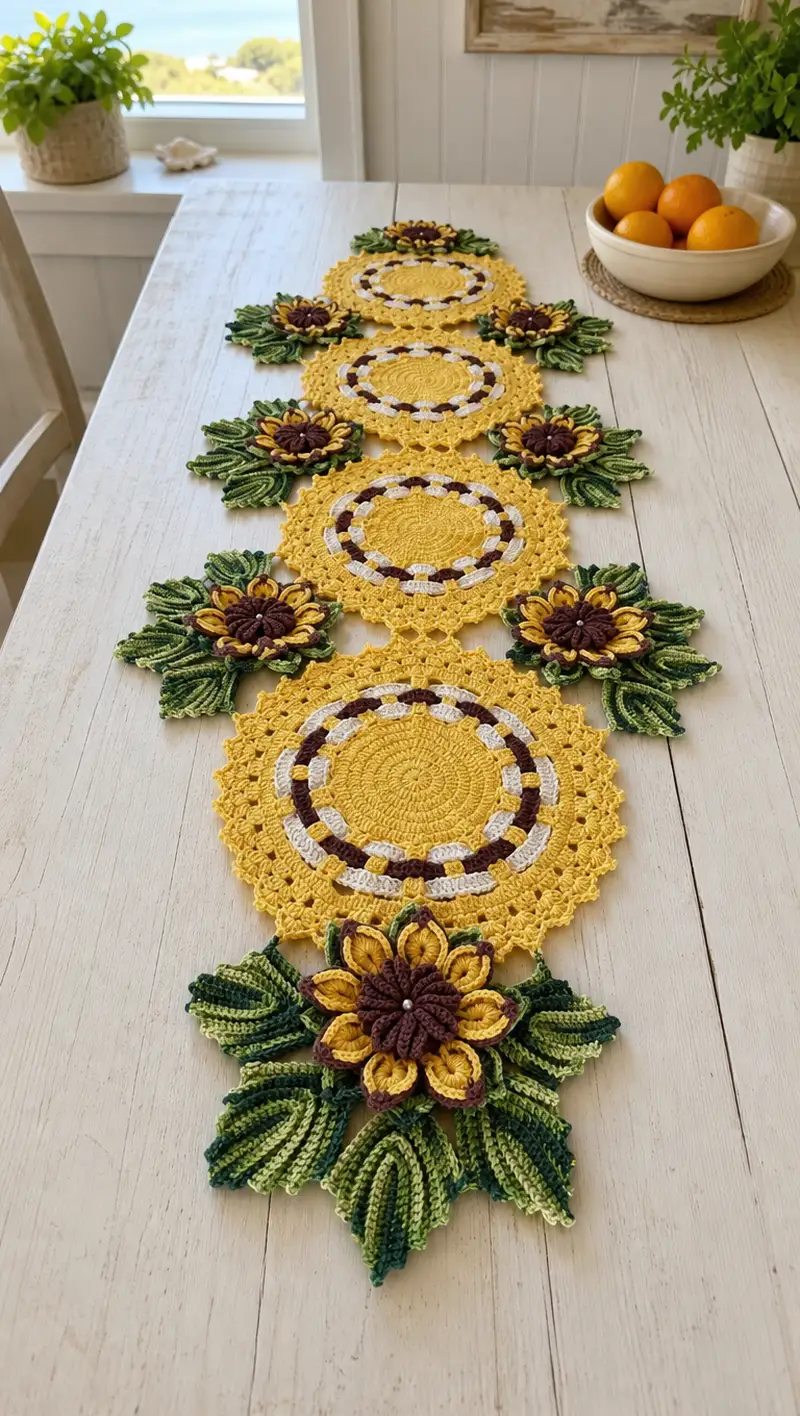
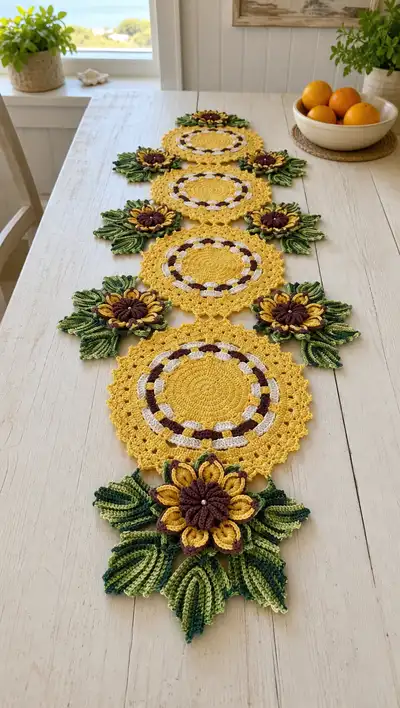
A bright, lacy table runner inspired by sunflowers — five linked round motifs embellished with layered 3D sunflowers and leafy clusters. Warm golden yellow medallions, a contrasting cream-and-brown ring, and sculpted variegated green leaves create a vibrant centerpiece perfect for a dining table. The design features textured petals, raised centers, and a decorative scalloped lace border for a handmade heirloom look.
Progress Tracker
0% Complete
— Pattern Notes :
Info :
Make 5 circular motifs for the runner center. Each motif is worked flat in rounds. Work petals, leaves and flower centers separately as detailed, then assemble. Use stitch markers to mark beginning of rounds. Maintain consistent tension.
Info :
Color names used: 'Yellow' (main motif), 'Cream' (inner ring contrast), 'Brown' (inner square/ring accents and flower centers), 'Variegated Green' (leaves). Substitute equivalent shades as desired.
— Main Round Motif (Make 5) :
Round 1 :
6 sc in magic ring (6)
Round 3 :
(1 sc, 1 inc) x 6 (18)
Round 4 :
(2 sc, 1 inc) x 6 (24)
Round 5 :
(3 sc, 1 inc) x 6 (30)
Round 6 :
(4 sc, 1 inc) x 6 (36)
Round 7 :
(5 sc, 1 inc) x 6 (42)
Round 8 :
(6 sc, 1 inc) x 6 (48)
Round 9 :
1 sc in each st (48)
Info :
Check that your circle is lying flat. If it cups, one more even round; if it ruffles slightly, omit a small increase in the previous round. Keep tension even.
Round 10 :
1 sc in each st (48)
Info :
Change to Cream for inner contrast ring on next round. Carry Yellow inside or fasten off and rejoin as preferred.
Round 11 :
With Cream: *1 sc in next st, change to Brown, 1 sc in next st, change to Cream, 1 sc in next st, change to Yellow, 1 sc in next st; rep from * x12 (48)
Info :
This round alternates small color blocks to create the woven ring look. Keep tails short and weave later, or carry colors inside the ring for cleaner finishing.
Round 12 :
With Yellow: 1 sc in each st (48)
Round 13 :
With Yellow: 1 sc in each st BLO (48)
Info :
Working BLO creates a slight inner ridge that frames the cream/brown ring. Use a smaller hook if you want a tighter ridge.
Round 14 :
With Yellow: 1 sc in each st (48)
Round 15 :
With Yellow: (3 sc, ch2, skip 1) x 12 - place 12 small arches around the circle; stitch count remains 48 when counting sc only (48)
Info :
These chain arches create lacy spaces for the final scalloped edge and for joining between motifs. Keep ch2 loops even by pulling the chains to uniform tension.
Round 16 :
With Yellow: 1 sc in each sc and 3 sc in each ch2 loop made in previous round to create a fuller lace ring (48 + 36 in loops = counts worked as 84 points but main st count remains even)
Info :
When working loops, treat each ch2 as a spot for 3 sc to keep the outer edging even and stable. This is a common technique to convert chain-arches into firm lace.
Round 17 :
With Yellow: (2 sc, 1 picot, 2 sc) in every third st around to create scallops; work 16 scallops evenly across the outer library (48)
Info :
Picot = ch3, sl st in top ch to make a small point. Picots add the delicate points seen in the outer edge of the motifs. Keep them tidy by tightening the sl st snugly.
Round 18 :
With Yellow: 1 sc in each st, making sure scallops are evenly shaped; fasten off and weave in ends (48)
Info :
Block each motif flat using pins and spray/blocking or a damp cloth to get crisp scallops and uniform circles. Blocking will also make joining easier later.
— Sunflower Center Disk (Make 5) :
Round 1 :
With Brown: 6 sc in magic ring (6)
Round 3 :
(1 sc, inc) x 6 (18)
Round 4 :
(2 sc, inc) x 6 (24)
Round 5 :
1 sc in each st (24)
Info :
These rounds create a slightly domed disk. Use tight tension to keep the center raised. Optional: add a small bead sewn into the center after assembly for a pearl accent.
Round 6 :
Work 12 puff stitches evenly across the next round: *(ch1, yo, insert, pull up loop 4 times, yo and draw through all loops), ch1, sl st in next st* repeat x12 (24 base points, 12 puffs)
Info :
Puff stitch instructions vary by style; maintain consistent number of loops per puff so they match visually. After each puff, secure with a ch1 and sl st into the next base stitch.
Round 7 :
Fasten off brown and weave tail to underside. Center disk will be sewn to petal layer later.
— Petal Layer A (Inner Petals) (Make 5) :
Round 1 :
Join Yellow to edge around the sunflower disk center where you'd like inner petals to sit. Ch2, *(3 dc in same st, ch2, sl st in same st) to form a shell; move to next base st; rep around to create 8 shells (work placement evenly)
Info :
Inner petals are formed as shells anchored to the brown disk. Count shells to match the flower layout (8 shells works nicely for the photo proportion).
Round 2 :
Work each shell into a petal: for each shell work 1 sc in top, ch5, 3 tr in ch5 space, ch5, sl st to base to create a raised petal; repeat around (8 petals)
Info :
Use FLO or BLO on petals for crisp ridges if desired: work petals in FLO of the last round to lift them slightly from the center.
Round 3 :
Finish petals by edging each with 1 sc around the outer edge of the petal to stabilize shape; fasten off and weave in ends.
— Petal Layer B (Outer Petals) (Make 5) :
Round 1 :
Join Mustard/Gold (a slightly darker yellow) to a spacing between inner petals, ch3, work *(5 dc in next space, sl st into next petal base) rep to create 8 larger outer petals
Round 2 :
For each outer petal: work (sc, hdc, 3 dc, hdc, sc) across the petal to shape and add body; fasten off and leave long tail for sewing to main motif
Info :
Using two shades of yellow layered creates the dimensional sunflower look seen in the photo. Sew the completed petal assembly to the brown center disk before attaching to motif.
— Leaf (Make 30) :
Round 1 :
With Variegated Green: ch 12. In 2nd ch from hook work: 1 sc, hdc in next, 2 dc in next, 3 dc in next, 2 dc next, hdc next, sc next; this creates half-leaf; ch1 and work same down the other side of chain mirroring the increases to the base; sl st to join at base (approx 22 sts across leaf)
Info :
Chain length controls leaf size. The photo shows elongated leaves with deep ridges; adjust chain to lengthen or shorten as required.
Round 2 :
Work 1 sc around entire leaf edge for a clean border; place 3 sc at the tip to round it off; (stitch count varies with size but edge should be even)
Round 3 :
Change to darker green for veins (optional): Using surface slip stitch technique, work 3 raised veins: *fpdc lines from base toward tip centered and off-centered to imitate natural veins*; secure and fasten off
Info :
Surface crochet veins: insert hook from front to back along the stitch line, pull up a loop and sl st back along the same line to create a raised appearance. Keep veins symmetrical between leaves for consistent look.
Round 4 :
If desired add a second row of edge ridges by working 1 sc BLO around to create a ribbed appearance at the leaf base; fasten off and block flat
Info :
Make 6 leaves for each flower cluster (3 pairs of two sizes). For 5 motifs you will make 30 leaves total. Block leaves with pins to shape them with a natural curve before assembly.
— Decorative Joining & Lace Connector :
Round 1 :
Between adjacent motifs add chain arches: from motif A outer scallop, join with sl st to motif A scallop point, ch8, sl st to the scallop point on motif B; repeat across the three joining points between each motif pair to create stable links
Info :
Pin motifs in place on a flat surface to ensure even spacing before crocheting the chain arches; 3 arches per adjoining pair give the airy look in the photo.
Round 2 :
Reinforce arches by working 1 sc in each ch across on the top side of the arch and 1 sc on the underside joining into motif stitches (this stabilizes the connections and evens edges)
Info :
When joining motifs, use a long tail and mattress stitch or whip stitch if you prefer sewing to crocheting joins. Crocheted arches give the lacey continuous look; sewn joins produce a flatter runner.
Round 3 :
Create a small decorative diamond between motifs by working: from motif edge ch 4, (sc, ch 3, sc) into a small ring then sl st to next motif; fasten off (repeating the small motifs along joins)
— Outer Edge Final Scallop & Finishing Rounds :
Round 1 :
With Yellow: along entire runner outer edge, join yarn and work (sc, ch3, sc) in each outer scallop point to create a continuous picot-scallop border; move around full runner including flower leaf clusters (count scallop points as you go)
Info :
When working around leaves and flowers, use smaller hook and slightly tighter tension so the border sits flat and hugs the shapes without puckering.
Round 2 :
Edge finishing: Into each ch3 space work (sl st, hdc, sl st) to create a delicate raised bead effect; this does not change stitch count but adds texture and weight to border
Round 3 :
Weave in all ends using a yarn needle, trim tails, and block the entire runner to final dimensions. Use pins to shape leaves and petals, allow to dry fully.
Info :
Blocking transforms the lace and gives the runner that crisp, professional finish. For cotton yarn use warm steam or wet blocking and let fully dry pinned to shape.
— Assembly Steps & Flower Placement :
Info :
Sew each assembled sunflower (brown disk + inner petals + outer petals) to the motif at the motif edge where the cream/brown ring sits; position the sunflower between two adjacent scallops as in the photo, then secure with even whip stitches around the base.
Info :
Arrange leaf clusters around each flower in a fan: two leaves pointing away, two angled slightly sideways, and two small accent leaves tucked under petals. Pin and adjust until visually pleasing before sewing.
Round 1 :
Sew flower centers to petal layers with concealed stitches. Use extra whip stitches at the base for security as runner will be handled often.
Info :
Attach leaves by overlapping leaf base with stitches that go through motif edge and leaf base to keep leaves flush. Backstitch for extra strength.
— Optional Embellishments :
Info :
Sew a small pearl or decorative bead into the very center of each sunflower for a polished look. You can also add a light dusting of fabric paint to petal tips for slight color variation.
Info :
For machine-washable stability choose mercerized cotton and double-knot all sewn joints. Test a small sample wash if concerned about long-term durability.
Completing this sunflower lace runner is such a rewarding experience — each circular motif blossoms into a sunny centerpiece and the layered petals and sculpted leaves add beautiful depth. The modular approach lets you savor each stage, from crocheting crisp scallops to sewing on the 3D sunflower clusters. I hope this pattern brings warmth and brightness to your table and becomes a cherished handmade accent. 🧶🌻✨