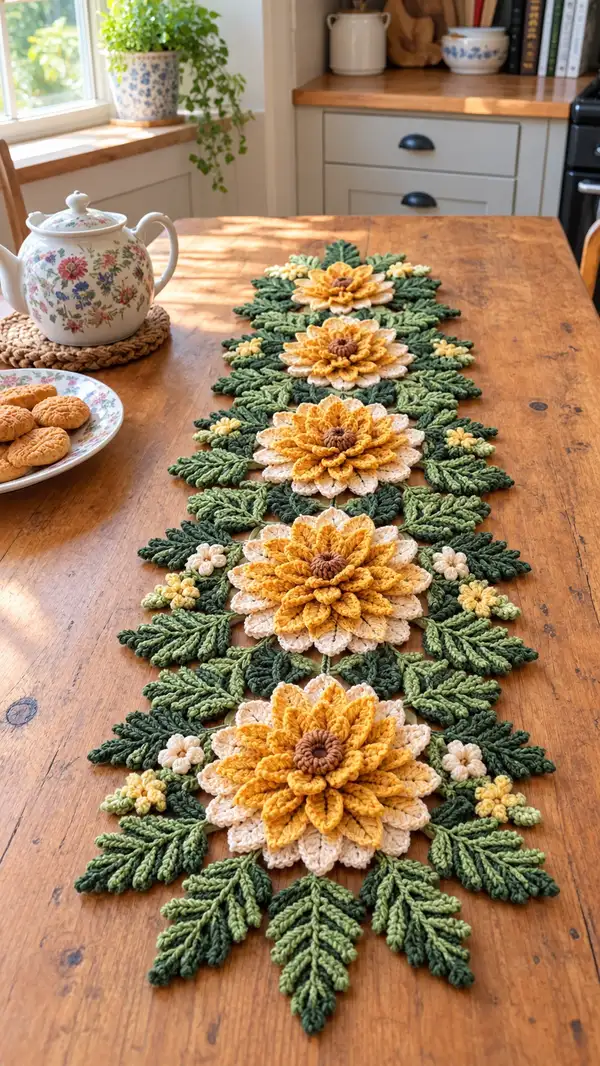
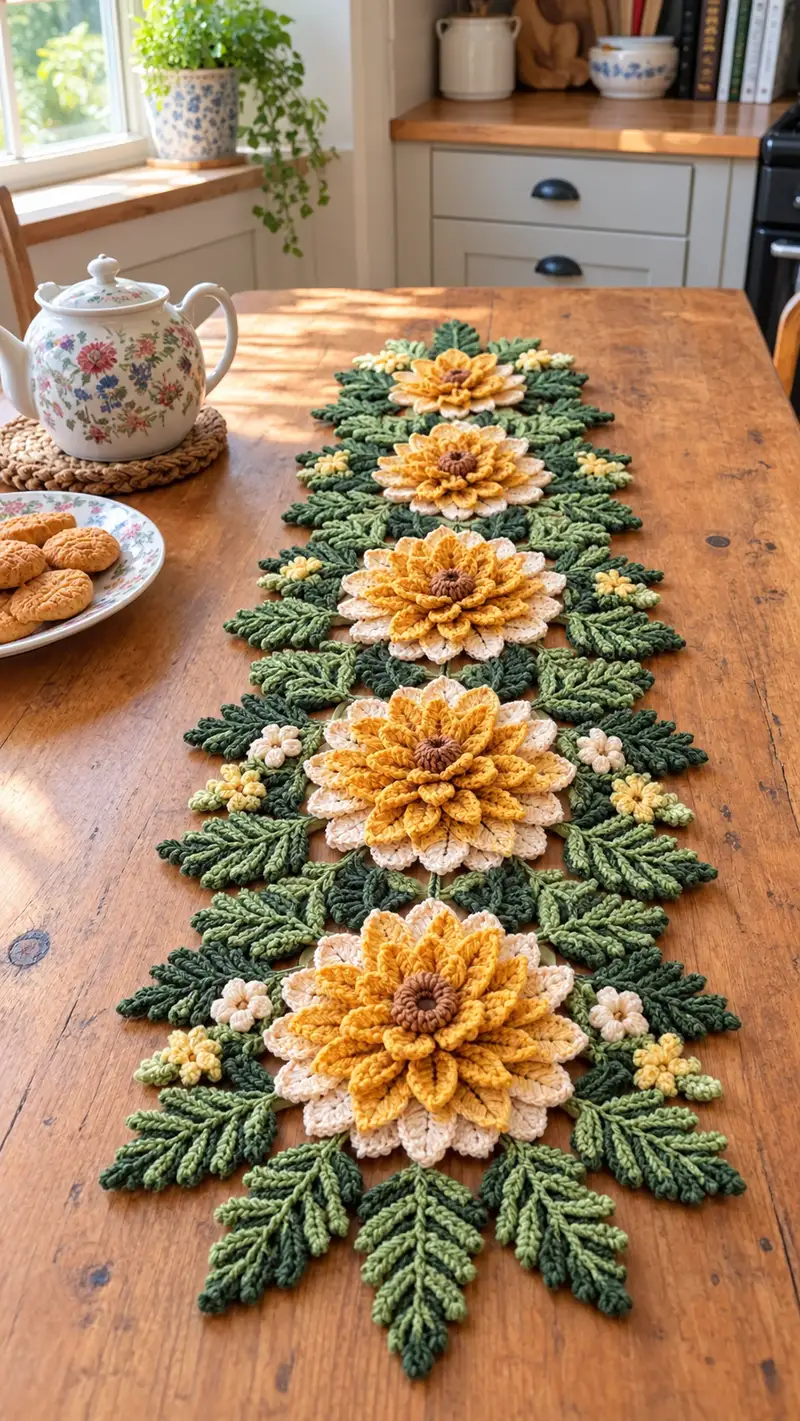
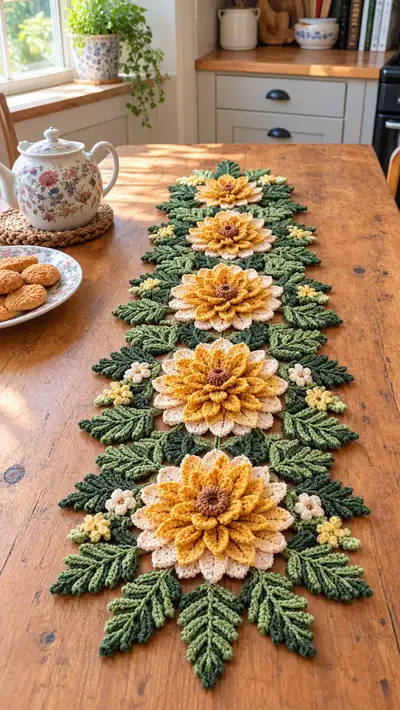
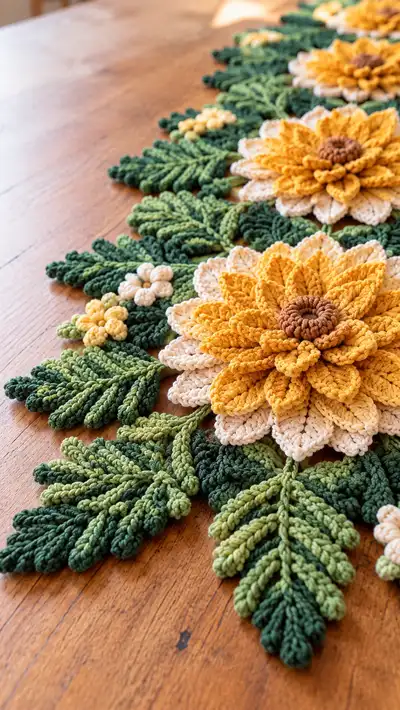
Create a stunning sunflower lace table runner built from layered floral motifs, textured fern-like leaves, and tiny blossom clusters. This pattern recreates the warm golden petals, cream underpetals, rich brown centers, and multi-toned green foliage visible in the photos. The finished runner is decorative and flat—perfect for tabletops, dressers, or as a seasonal centerpiece.
Progress Tracker
0% Complete
— Flower Center (Make 4-5) :
Round 1 :
6 sc in magic ring (6)
Round 3 :
(1 sc, 1 inc) x 6 (18)
Round 4 :
(2 sc, 1 inc) x 6 (24)
Round 5 :
1 sc in each st (24)
Round 6 :
1 sc in each st (24)
Info :
Use a rich brown yarn for the center. Work tightly so the center forms a slightly raised disc. If you prefer a smaller center, stop at Round 4 and fasten off. Place centers flat on your work area to assemble petals later.
Round 7 :
1 sc in each st (24)
Round 8 :
1 sc BLO in each st (24) — creates a subtle ridge for anchoring inner petals
Info :
Fasten off leaving a long tail for sewing the center to the inner petal layer. We will crochet petal layers separately and then attach to this center to build a stacked flower.
— Inner Petal Layer (Make one per flower — 24 petal repeats) :
Round 1 :
Join cream/ivory yarn with sl st to any BLO ridge stitch from center. Ch 1, sc in same st, *ch 5, 3 dc in next st, ch 5, sl st in next st; rep from * around 24 times (24 ch-arches, 24 3-dc clusters)
Info :
Each ch-5 arch becomes the base for a petal shape. Keep tension even; if arches look too loose, reduce to ch4. The number of arches matches the center count (24). Count carefully to maintain symmetry.
Round 2 :
*Working in each ch-5 arch: sl st into arch, ch 1, (sc, hdc, 3 dc, hdc, sc) all in arch, sl st into base between arches; rep around to form 24 small rounded petals (24 petals)
Round 3 :
Working behind first row of petals: join yarn to the back loops at the base of each arch, ch 3, (2 dc, ch1, 2 dc) in same base to create a small scallop under each petal. Rep around (24 scallops)
Info :
Block this inner layer lightly on a flat surface to keep petals even. Use pins to shape each petal so that the outer petal layer will sit neatly on top.
Round 4 :
Weave a row of slip stitches around the base of petals to create a secure edge for sewing to the center (24 sl st)
Info :
Fasten off with a long tail for sewing. When attaching, position so cream petals peek out under the golden layer for the two-tone effect visible in the photos.
— First Gold Petal Layer (Make one per flower — 24 petals) :
Round 1 :
With mustard-gold yarn, make a magic ring, ch 1, 8 sc in ring, pull tight (8)
Round 3 :
(1 sc, 1 inc) x 8 (24)
Round 4 :
Ch 2, *sc in next st, ch 5, sc in next st; rep around to create 24 ch-5 arches for petals (24 arches)
Round 5 :
*In each ch-5 arch: (sl st, ch1), (sc, hdc, 5 dc, hdc, sc), sl st into next foundation st; rep around to form 24 medium petals (24 petals)
Round 6 :
Fasten off leaving long tail. Securely sew this layer on top of the cream inner petal layer, slightly rotating so petals are staggered from the cream petals beneath. Sew through the row of base slip stitches to anchor evenly.
Info :
Make sure each petal is folded slightly upward while sewing to create the 3D layered look in the photo. Use blocking pins to shape petals as you sew for consistent curvature.
— Second (Upper) Gold Petal Layer (Make one per flower — 24 smaller petals) :
Round 1 :
Join gold yarn at the back of the first gold layer base: ch 1, sc in same st, *ch 4, 5 dc cluster in next arch, ch 4, sl st in space between petals; rep 24 times (24 small arches)
Round 2 :
*In each small arch: sl st, ch1, (sc, hdc, 3 dc, hdc, sc) to form 24 smaller sculpted petals; rep around (24 petals)
Round 3 :
Fold each petal toward the center and secure the base with a small whipstitch using the long tail. Arrange petals slightly above the first gold layer to get the multi-tiered effect (no change in base stitch count)
Info :
These upper petals are intentionally smaller so they sit atop the first gold layer. Pin them in place and adjust before permanent stitching. Trim and hide tails under the center when attaching the brown center disc.
— Center Finishing (Attach brown center to petal stack) :
Round 1 :
Position the brown center disc over the joined petal layers. Using the long tail from the center or new brown yarn, sew through the center and into the base of petals, making small, tight stitches around the perimeter until the center sits snug and secure (no stitch count)
Round 2 :
For a tufted look: with brown yarn, ch 4, sl st to center hole, rep around 6-8 times to create tiny raised coils in the very center. Fasten off, weave ends (visual/custom choice)
Info :
The center should hide the inner joins of all petal layers. If you want a taller center (as in photos), stack two small brown discs slightly offset and sew together before attaching to the flower.
— Large Leaf (Make multiple per motif) :
Round 1 :
Ch 21, sc in second ch from hook, sc in next 8 ch (9 sc), hdc in next 2 ch (2 hdc), dc in next 6 ch (6 dc), hdc in next 2 ch, sc in last ch — now work along opposite side of foundation chain: sc in next 6 ch, hdc in next 2 ch, dc in next 6 ch, hdc in next 2 ch, sc in remaining (count will match symmetry) — total stitches across both sides: 38-42 depending on ch counts (foundation shape)
Info :
This leaf is worked flat in one long oval chain. Keep starting chain tension consistent; if chain is too tight, use a larger hook for the foundation, then switch back for body of leaf. Exact stitch number across the leaf edges will vary slightly depending on chain tension; use the shaping technique below to maintain a symmetrical leaf.
Round 2 :
Working around the leaf edge: sl st to next st, sc in each st across the right edge, then sc across the left edge to close the round — total edge sc count should be even and mirror; fasten off at tip and weave in tail (edge sc count approx 40)
Round 3 :
To create veins: join contrasting dark green at leaf base, ch 1, sc along center of leaf backbone (work in front loops where possible) forming a raised chain spine of 10-12 sc; fasten off (spine formed)
Round 4 :
Working from the spine: with the same contrast green, join at the base, *ch3, sl st in next spine stitch, ch3, sl st in next spine stitch; rep to create little raised branches where you will attach stitches for each 'tooth' of the leaf (approx 10 branches)
Round 5 :
*On each ch-3 branch work: sc, hdc, dc, hdc, sc to make a small scallop (tooth) on each side of the spine; rep both sides symmetrically. Fasten off and block slightly to open docking scallops (approx 20 scallops total)
Info :
For the heavily textured, ferned leaves in the photo, work the edge scallops using a stitch marker so each 'tooth' is evenly spaced. Make several large leaves in dark green and medium green to layer under each flower.
— Fern-Style Leaf (Make many per motif — multi-length) :
Round 1 :
Ch 31, sl st in 2nd ch from hook, sc in next 2, *ch3, skip 2 ch, sc in next ch; rep across to create base slotted spaces for 'featherlets' (approx 8-10 chain loops each side)
Round 2 :
Turn and work on opposite side of foundation: in each ch-3 loop work (sl st, ch1, sc, hdc, 3 dc, hdc, sc) then sl st to next base point to mirror the first side; rep across to create small featherlets along the length (approx 16-20 featherlets)
Round 3 :
Edge: sc around entire fern leaf to tidy edges and add stiffness. Fasten off with long tail for joining (edge sc count will match number of featherlets times 2)
Info :
Vary the initial chain length to make short and long fern leaves. Use a darker green for deeper leaves and a lighter green for top layering. Pin and lightly steam-block each fern leaf to form the pronounced ridges you see in the photos.
— Small Five-Petal Flower (Make many small blossoms) :
Round 1 :
With pale yellow yarn, ch 5, join to form ring, ch 1, in ring work (sc, ch3) x5 to create 5 small arches (5 arches)
Round 2 :
*In each ch-3 arch: (sl st, ch1, sc, hdc, dc, hdc, sc), sl st into next arch; rep 5 times to make 5 small rounded petals (5 petals)
Round 3 :
Make a tiny row of sc around base and fasten off leaving tail for sewing. For a clustered look as in photos, slightly flatten and sew clusters of 2-3 blossoms together.
Info :
Small blossoms can be worked quickly and attached in triads near the large flower base. Use cream and pale yellow alternately for visual interest.
— Tiny Puff Buds (Make several per motif) :
Round 1 :
With pale yellow, ch 2, 6 sc in second ch from hook, do not join — (6)
Round 2 :
*Round of puff: (yo, insert hook in st, yo, pull up loop) 3 times, yo, pull through all loops, ch1, sl st in next st; rep around to make 6 puffs; fasten off leaving tail
Info :
These tiny puff buds add the clustered small yellow dots visible between foliage. Sew them in small clusters of 2-4 using the tails left when fastening off.
— Connecting Stem / Runner Spine :
Round 1 :
Using medium green, ch 200 (or desired length to space motifs; this length gives about 5 motifs spaced like the sample), turn and sc in 2nd ch from hook and across to create a narrow strip (199 sc across). Fasten off after desired length; make 1 strip for runner backbone.
Info :
Instead of one long chain you can make the runner in modular connectors: create 40-50 ch segments and join them with slip stitch tabs between motifs. Pin motifs along the spine to decide spacing before final join.
Round 2 :
Optional ridge: join dark green along one edge and work 1 row of sc BLO to make a raised stem line; fasten off (edge sc count equals backbone length)
Info :
To mimic the natural vine-like joins in the image, stitch stems from the backbone to the undersides of each motif using length-adjusted slip-stitch stems. Leave about 3-4 inches between flower attachment points for natural spacing.
— Border Edge Finishing :
Round 1 :
After all motifs are joined to the spine, work a round of sc around the entire outside edge of the runner (work into edge loops created by petals and leaves). Maintain even stitch spacing — expect several hundred sc depending on runner size (work evenly)
Round 2 :
Picot scallop: *sc in next 3 sts, ch 3, sl st in top of last sc (picot), sc in next 3 sts; rep around to create a soft scalloped border. Fasten off and weave ends.
Info :
If your runner edges are very irregular, use a foundation of chain loops worked along the edge first and then sc into those loops to create a tidy uniform border.
— Assembly Notes and Final Shaping :
Info :
Layout all pieces on a large table or blocking board. Arrange each flower with 3-4 large fern leaves radiating downward and 2-3 medium leaves tucked between petals. Place small blossoms and puff buds in clusters so they appear to grow naturally between leaves.
Round 1 :
Sewing petals: using long tails from each petal layer, baste the layers together first, then whipstitch more securely through the base rounds. Make sure the inner/outer petals are offset so none of the layers line up exactly.
Round 2 :
Attach to spine: position each completed flower over the spine, slip-stitch or sew the underside of the flower to the spine backbone at 3-4 attachment points per flower (more if you expect heavy use). Secure ends of backbone by knotting and weaving in ends.
Info :
When sewing leaves, use ladder stitch (invisible mattress stitch) for neat seams. If you prefer a more organic raised look, use small whip stitches but leave threads loose enough to create a slight gap under leaves for shadowing.
Round 3 :
Blocking and finishing: pin the entire runner to the desired flat shape and lightly steam with an iron from a distance or use a steamer. Do not press directly onto yarn. Allow to dry fully before removing pins to keep petals and leaves shaped.
Info :
Trim stray fibers and weave all tails to the backside. Add a drop of fabric glue to high-stress seam points for use on tabletops that will see frequent handling.
— Variations and Size Adjustment :
Info :
To make a shorter or longer runner: change the number of flower motifs and adjust the backbone chain length accordingly. You can also make individual placemat-sized motifs by making a single flower with border leaves. For a table runner like the photo (approx 4-5 motifs), plan backbone length of approx 200 chains and five complete flowers with accompanying leaves and clusters.
Info :
For extra fullness, add a third, even smaller petal tier centered on top of the gold layers, using dtr stitches to create tall narrow petals. Always check that counts remain consistent so centers align properly.
Completing this sunflower lace table runner is such a satisfying project—each layered petal and textured leaf builds into a beautiful, botanical centerpiece. The warm golds and multi-tone greens bring a sunlit, cozy charm to any table setting. You’ll love how the 3D petals catch the light and how the runner can be scaled or customized for any space. 🧶🌼 Enjoy making something that feels both vintage and fresh, and don't forget to share your finished creation! ✨