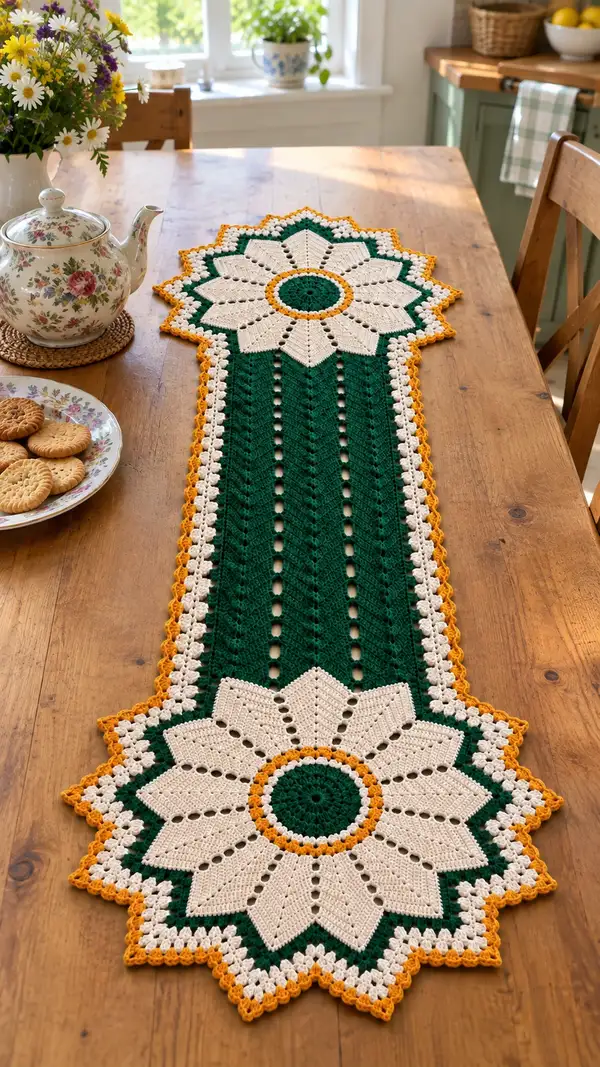
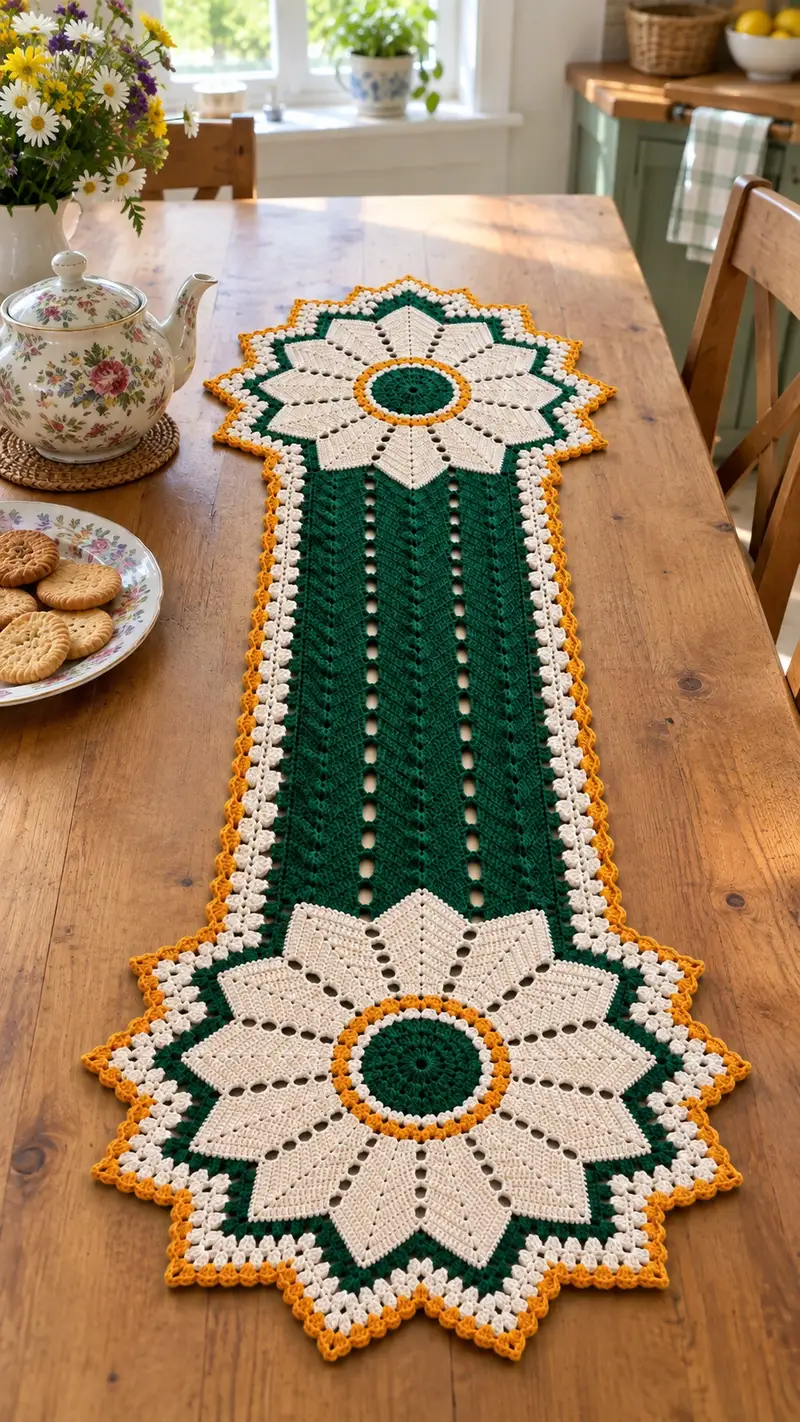
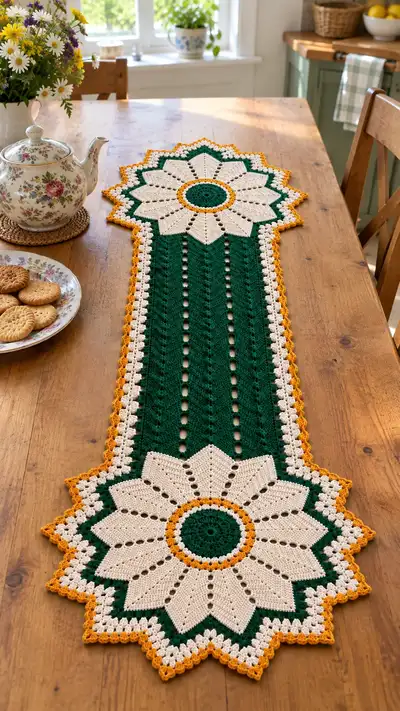
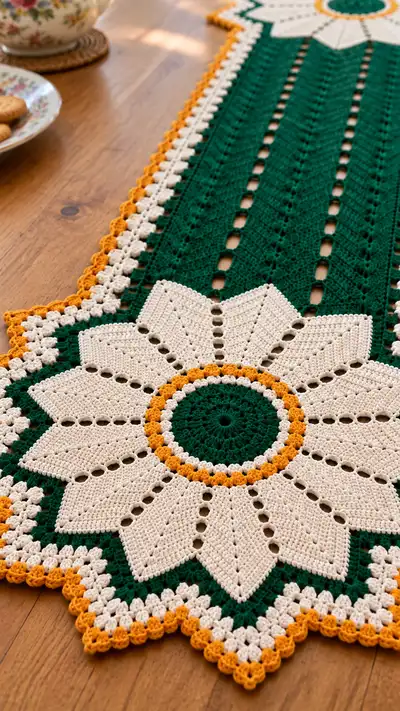
A charming sunflower table runner featuring two large floral medallions joined by a lacy green panel and finished with a delicate cream and mustard scalloped edge. This pattern uses worsted-weight cotton yarn to create crisp stitch definition and a vintage-inspired look. The runner measures approximately 14" wide at the center panel and extends to roughly 48-52" long depending on gauge and number of repeat rows. Perfect for a kitchen or dining table to bring a sunny, handmade touch to your home.
Progress Tracker
0% Complete
— Materials & Gauge :
Info :
Use worsted-weight (Aran/#4) cotton or cotton blend yarn for crisp stitch definition. Gauge: 16 dc x 10 rows = 4" in double crochet (use 4.0mm hook). Blocking will change final measurements slightly; gauge is primarily for matching motif to panel width.
— Sunflower Medallion (Make 2) :
Round 1 :
6 sc in magic ring (6)
Round 2 :
Inc in each st around (6 inc) (12)
Round 3 :
(1 sc, inc) x 12 (24)
Round 4 :
(2 sc, inc) x 12 (36)
Round 5 :
(3 sc, inc) x 12 (48)
Round 6 :
(4 sc, inc) x 12 (60)
Round 7 :
(5 sc, inc) x 12 (72)
Round 8-9 :
1 sc in each st (72)
Info :
These rounds create a firm central disc. Keep tension even and avoid pulling too tight to prevent warping. Place a stitch marker at the beginning of round 10 for petal alignment.
Round 10 :
*Sc in next 6 sts, ch 6, sk next 6 sts* - repeat from * to * 12 times (72 sts around with 12 ch-6 spaces)
Info :
The 12 chain-6 spaces will be the foundation for each petal; ensure they are evenly spaced. If your count is off, adjust by adding/subtracting single crochets before this round to preserve 12 even repeats.
Round 11 - Petal Row 1 :
Join yarn in first ch-6 space: ch 3 (counts as dc), 2 dc in same ch-6, (dc, ch2, dc) in same ch-6, 3 dc in same ch-6 - this creates a full petal base (total 8 dc and 1 ch-2 sp). Sl st into next sc between petals to anchor. Repeat for each ch-6 space to make 12 petals. (Each petal worked into ch-6 space; petals separated by a sl st to the sc between spaces.)
Round 12 - Petal Row 2 :
Working into each petal: sl st into center ch-2 sp, ch1, sc into ch-2 sp, ch1, (3 dc) into first outer dc of petal, dc into next dc, 3 dc into next outer dc, ch1, sc in ch-2 sp, sl st to anchoring sc. This rounds increases petal body and shapes a pointed silhouette. Repeat for 12 petals.
Round 13 :
Ch 1, sc evenly around each petal edge to tidy. Place 6 sc across each petal top and 3 sc along the sides into the anchoring stitches between petals (approximate totals per petal). Maintain continuity so overall round counts remain near 144-148 depending on exact side stitches; adjust evenly across petals.
Info :
Keep petals symmetrical by counting stitches per petal. If one petal seems larger, remove or add a single crochet at the top to balance. Blocking will also help even out shapes later.
Round 14 :
Ch 1, sc around the entire medallion working 1 sc into each top-of-petal stitch and 2 sc into larger junction spaces. Aim to end with approx. 168 sc around to provide a solid base for the next contrast round.
Round 15 - Contrast Ring (Mustard)
Info : Change to mustard gold yarn. Join with sl st to the back loops of a top-of-petal stitch to create a raised ring effect. Ch1, sc in same st, *ch2, sk 2 sts, sc in next 4 sts* around to form small loops; adjust to get 12 even ch-2 loops that sit between petals (approx 168 sts overall).
Round 16 :
Work into each ch-2 loop: (sc, ch3, sc) in each loop to create a daisy-like ring of mini-loops around the medallion (12 small loops total). Fasten off mustard and join cream for outer scallop.
Round 17 - Outer Contrast Base :
Join cream yarn: ch 3 (counts as dc), 2 dc into same st, *sk 2 sts, (3 dc, ch2, 3 dc) into a central top-of-petal point (this forms a large shell for the petal valley), sk 2 sts, 3 dc into next top-of-petal point* around to form scalloped valleys between petals. Repeat around to form 12 large shells. This round will be in multiples to fit the 12 petals; expected total stitches around ~144 shells/cluster points.
Round 18 :
Ch1, sc around to tidy and to create a stable edge for joining to the green foundation in later rounds. Make sure you have an even number of sc between shell clusters (use 6 sc between peaks as guide).
Info :
Block the medallion flat to set stitches and make joining easier. Pin each petal carefully so the petals are evenly spaced; steam or wet-block according to yarn instructions and allow to dry completely before joining.
Round 19 - Prepare Joining Rim :
Ch 1, sc evenly around the outside edge placing 3 sc into each shell peak, and 1-2 sc into the smaller side stitches to reach an even stitch count - aim for multiples of 12 so the runner panel can align with 12 transition points. Typical final round count should be 156-164 depending on exact sc placement.
Round 20 :
Optional decorative picot: *(sc, ch3, sl st into top of sc)* around peaks only to create small pointed edging - work into shell peaks (12 picots). Fasten off and weave ends.
Info :
Repeat all medallion rounds to make a second identical sunflower. Keep one set of yarn tails long on each medallion for the final joining to the panel if you prefer to sew rather than join-as-you-go.
— Center Runner Panel (Work 1 long strip) :
Info :
The central panel is a long rectangular strip in deep green. It creates vertical open columns and a chevron/vee texture formed by alternating rows of dc clusters and eyelet rows. The width is designed to match the medallion joining points (12 repeats across). Using a foundation chain will give a neat edge; we will create a strip approx 36 stitches wide (adjust to suit your medallions if your round join counts differ).
Row 1 :
Foundation chain (F-ch) 40 chains (counts as turning chain where necessary). Turn. (40 foundation chains create 36 working stitches after turning chains if using ch3 as dc count; adjust if needed to match medallion joins.)
Row 2 :
Dc in 4th ch from hook and in each ch across. (37 dc) Turn.
Row 3 :
Ch3 (counts as dc), dc in same st, *skip next st, dc in next 2 sts, (dc2tog over next 2 sts) to form small vee*, repeat across finishing with dc to end to maintain 37 sts. This row begins subtle chevron shaping - total 37 dc equivalents.
Row 4 :
Ch2, hdc across in each st to create a slightly shorter row and compacted texture (37 hdc). Turn.
Info :
The panel stitch pattern alternates textured rows and eyelet rows. Keep the right edge consistent: place a marker in the first stitch of each row to ensure your edge stays straight and aligns to medallion joining points later.
Row 5 :
Ch 3, *dc in next 2 sts, ch1, sk 1* repeat across, ending with dc in last 2 sts (creates vertical eyelets spaced along panel). Count will remain 37 dc positions with ch-1 spaces between some columns.
Row 6 :
Ch2, hdc in each st across including into ch-1 spaces, working 1 hdc into each space (37 hdc). Turn.
Row 7 :
Ch3, dc across placing (2 dc, ch2, 2 dc) into the center of each recommended V created two rows earlier to form a raised column - this creates vertical ridges when alternating with eyelet rows. Keep counts consistent: maintain 37 stitch positions.
Row 8 - Row 60 :
Repeat Rows 4-7 ten times (or until desired length is reached). Each 4-row repeat adds the lace/texture motif and maintains 37 working stitch positions across. For a standard runner length aim for 56-60 rows (approx 18-22" length depending on gauge). For a longer runner repeat the 4-row block more times until you reach the desired length; remember you will add medallion sizes on each end, so account for those lengths when measuring.
Info :
If you prefer, make two shorter strips and seam them together at the center; this can make handling easier. Keep both ends of the panel blocked flat before joining to the medallions for a neat seam.
Row 61 :
Ch1, sc evenly across the top and bottom rows to tidy the raw edges, placing 37 sc across. This provides a base for the cream contrast row and makes joining more manageable.
Info :
Measure the finished panel against the medallion rims. The panel width between the peaks should match the distance between joining points on medallions. If you are off by a repeat, add or remove multiples of 4 rows to adjust the length without breaking the lace repeat unit.
— Joining Medallions to Panel :
Info :
Decide whether to use join-as-you-go (JAYG) or sew. JAYG will give a neater seamless join but requires working the final rounds of the medallion while attached to the panel edge. Sewing allows precise placement and blocking first. For clarity we describe the sewing method; see Info for JAYG tips below.
Step 1 :
Block medallions and the panel flat. Center one medallion at each end of the panel aligning 12 major peaks on the medallion to the 12 major repeat divisions across the panel width. Pin tightly.
Step 2 :
Sew using a matching green yarn tail from the medallion: whip stitch through the outermost sc round of the medallion and through the edge sc of the panel, spacing stitches approx every 3-4 mm. Make small, even stitches and avoid pulling too tightly to prevent puckering. Stitch around entire medallion circumference where it meets the panel.
Info :
For Join-As-You-Go: On the final medallion round where you sc around the edge, align the panel edge to the medallion and slip stitch into panel scs in the places you'd usually sew, then continue the medallion edging. Work slowly and use lots of pins to maintain alignment.
— Layered Outer Border (Cream & Mustard) :
Round 1 :
With cream yarn join at any panel edge sc: ch1, sc around entire runner (including medallion outer edges) placing 3 sc in each shell peak and 1 sc into smaller stitches. Work evenly to produce an even base for the next shell rounds. Expected stitch count around runner will vary; do not worry if counts differ slightly - just keep stitch distribution balanced.
Round 2 :
Switch to cream if not already in cream. *Ch3, sk 2 sc, 5 dc shell into next sc, sk 2 sc, ch3, sl st into the next sc* - work this decorative shell/shell-gap pattern around the medallions and along the panel edge. The shells create the scalloped look between medallion peaks; adjust spacing to create 12 major scallops at each medallion end.
Info :
When working around straight panel edges, place shells at regular intervals (about every 6 sc) to echo the medallion scallops and keep border rhythm consistent. Use more shells in longer straight sections to maintain the scalloped look.
Round 3 - Mustard Picot Edge :
Change to mustard gold. Join mustard in the back loop only of a shell peak stitch: *(sc, ch3, sl st into same sc - picot), sk 2, sc into center shell top* repeat to create a raised picot edge along the scallops. Work around entire runner creating a bright finished edge. Fasten off and weave ends securely.
Info :
The mustard picot ring adds contrast and visual pop. If you prefer a subtler finish, work a simple sc round in cream instead. Weave ends into the back of shells and run tails into the runner so they are hidden from view.
— Alternative Edging Option (Clustered Granny Row) :
Round 1 :
With cream, ch1, sc around edge placing a 3dc cluster (shell) every 5-6 sc along straight panels and into each medallion valley to create a continuous border. This creates the textured white band seen behind the mustard picot in the photo.
Round 2 :
Optional: Add a small reverse single crochet (crab stitch) in mustard around the entire runner for a twisted rope-like edge for extra durability and a professional finish.
Info :
If you choose the crab stitch edge, use a 3.5mm hook for this round to tighten the border and make it slightly raised. Work slowly to keep the tension even; crab stitch is worked left to right for a neat effect.
— Finishing Touches :
Info :
Block the entire runner again, pinning scallops carefully so they are evenly shaped. Light steam or wet-block according to yarn label until flat and symmetrical. Trim and weave in all ends, burying them into the wrong side of the border rounds. Press gently if fabric allows, being cautious of cotton yarn shine and texture.
Care Instructions :
Hand wash cool with mild detergent and dry flat. Cotton may shrink slightly on first wash; re-block after washing to reshape scallops and keep edges crisp.
Bringing together two bold sunflower medallions with a lacy green panel, this runner makes an instant table centerpiece full of handmade charm! The cream petals and mustard edging add warmth and detail, creating a vintage-inspired yet fresh look. I love how the layered scallops and picot edge give a professional finish that feels lovingly handmade. 🌻🧶