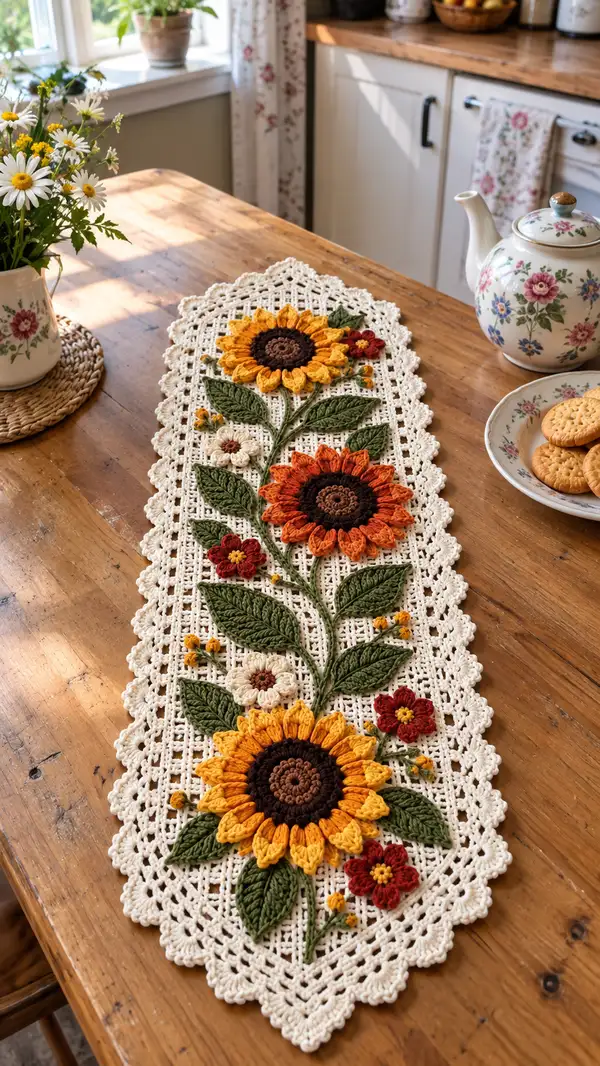
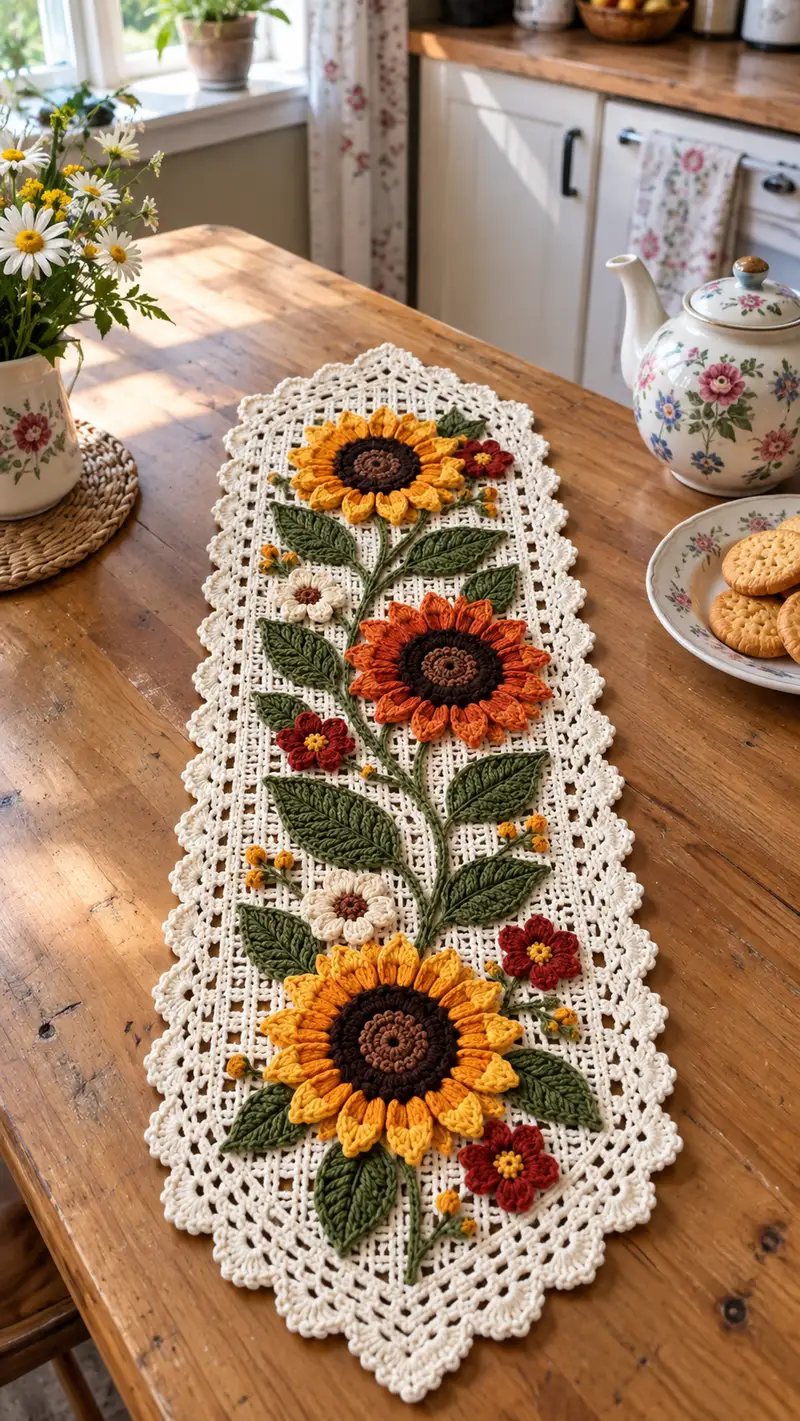
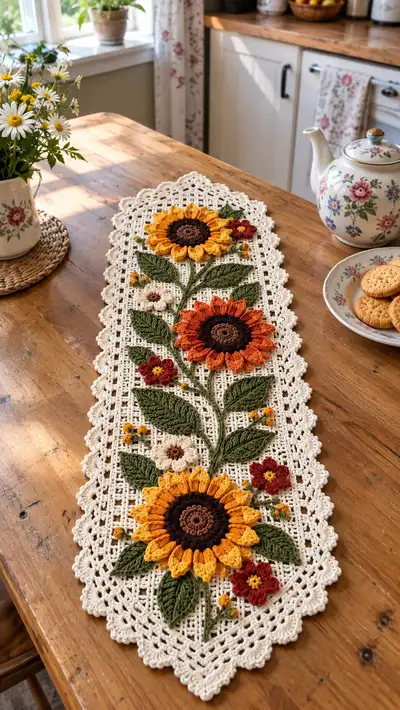
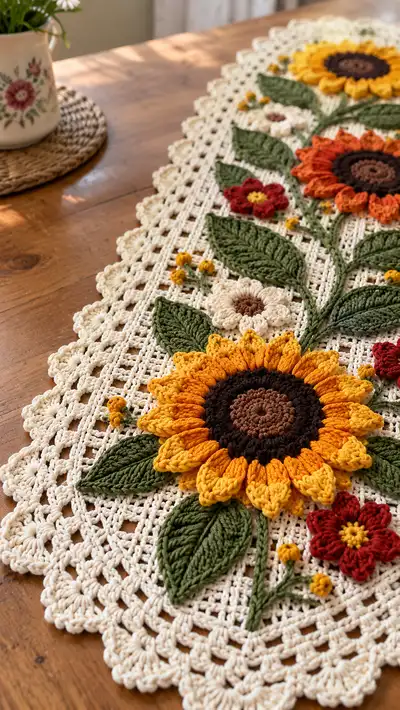
A lacy, vintage-inspired table runner featuring three dimensional sunflowers, layered petals, textured leaves and delicate buds. Worked in a soft cream mesh with warm autumn tones—golden yellows, burnt orange, olive greens and rich browns—this runner adds a handcrafted, cottage-style accent to any tabletop. The pattern uses overlay and applique techniques to build raised petals and sculpted leaves that sit elegantly atop a filet-like lacy base.
Progress Tracker
0% Complete
— Base Mesh :
Round 1 :
Foundation chain 121, ch 3 (counts as dc), dc in 4th ch from hook and in each ch across. (121 dc)
Round 2 :
Ch 3 (counts as dc), turn. *Dc in next 3 sts, ch2, sk 2 sts, dc in next 4 sts; rep from * across to last 3 sts, dc in last 3 sts. (This forms the first row of framed mesh; maintain 121 stitch positions including ch spaces)
Round 3 :
Ch 3, turn. Dc in each dc across, placing 2 dc into each ch2 space from previous row where indicated to maintain the mesh pattern—end row with dc in top of turning ch. (121 positions)
Round 4-6 :
Repeat Row 2 and Row 3 sequence once more to deepen the mesh and create a stable field for applique. Maintain pattern so mesh squares are approximately uniform. (121 positions)
Info :
Keep a stitch marker in the first dc of each row to mark the turning point. The base is worked flat in rows; counts are expressed as consistent placement rather than absolute dc counts each row because ch2 spaces count as cells in the filet.
Round 7-12 :
Work 6 rows of alternating filet: Row A (ch3, turn, dc in next 3 dc, ch2, sk 2, dc4) and Row B (ch3, turn, dc across filling ch spaces with dc). These rows build the main body; repeat until you reach approx 12cm from the bottom edge or until you have completed 12 rows in total. (121 positions)
Round 13 :
Ch 3, turn, work dc across but every 10th space make a ch 1 floating loop (for later applique anchor points) — place a small ch1 loop on 11 evenly spaced positions along the center line where main vine will cross (this adds guide loops; these are optional). Continue to maintain mesh layout. (121 positions)
Round 14-24 :
Continue filet mesh repeating rows A and B (as defined). Work until the mesh measures approximately two-thirds of final runner length. At this point you will begin reserving framed cells where large sunflower centers will be attached. (121 positions)
Info :
Measure as you go: this runner in the photo is roughly 90–100 cm long; adjust number of mesh rows to match your desired final length. Blocking the base after finishing the mesh will even out the grid for applique.
Round 25-32 :
Continue mesh for additional 8 rows to reach full length of base field. Maintain consistent tension; place scrap yarn markers at the three central sunflower positions (bottom, middle, top) to mark centers for later applique placement. (121 positions)
Info :
If you plan to place the sunflowers asymmetrically, measure and mark positions now with pins through the mesh. Use a tape measure to space the three focal points roughly 28–32cm apart center-to-center depending on runner length.
Round 33 :
Work a stability row: ch1, turn, sc in each dc and sc in both loops around previous ch2 spaces to lock the mesh. This row makes sewing applique easier. (121 sc)
Round 34-36 :
Work 3 rows of dc across, finishing with a neat turning row. These rows raise the base slightly to give a shallow raised plane for the centers to sit on. (121 positions)
Round 37 :
Ch 1, turn. Sc in each st across, finish with sl st to first sc. (121 sc)
Round 38-40 :
Work a light decorative filet motif to prepare for border: Row with cluster shell motifs every 6 cells to create scallop anchors—follow this short repeat: *sk 2 cells, (2 dc, ch2, 2 dc) in next cell, sk 2 cells, dc in next cell* across. This does not change the base width, just the appearance. (Pattern fits within 121 positions)
Info :
Block the base: wet-block lightly and pin to rectangular shape with straight edges; let dry fully (unless you prefer to attach applique first—blocking now helps get a true baseline for positioning).
— Large Sunflower Center (Make 3: bottom, middle, top) :
Round 1 :
Using medium brown, 6 sc in magic ring (6)
Round 3 :
(1 sc, 1 inc) x 6 (18)
Round 4 :
(2 sc, 1 inc) x 6 (24)
Round 5 :
(3 sc, 1 inc) x 6 (30)
Round 6 :
(4 sc, 1 inc) x 6 (36)
Round 7-9 :
1 sc in each st around (36) for two to three rounds to build the center bulk
Info :
Change to dark brown on the last stitch of Round 9 using invisible color change. This creates a darker central ring. Secure ends but leave a 15 cm tail for sewing the center onto the mesh.
Round 10 :
With dark brown, 1 sc in each st around (36)
Round 11 :
(3 sc, 1 inc) x 9 (45)
Round 12 :
1 sc in each st around (45). Fasten off leaving long tail for basting to base. (45)
Info :
These rounds build a slightly domed center suitable for anchoring petals. If you prefer a flatter center, omit Round 11 and keep 36 sts. Make three centers in sizes: two large (use 45 sts) and one slightly smaller (stop at 36 sts) for variation; adjust rounds accordingly.
— Petal Layer 1 (Primary Petals for each large sunflower) :
Round 1 :
Attach golden yellow to the edge of the center. Ch 2, *in next st: (2 tr, ch1, 2 tr) cluster worked into the same base st to form petal base; sl st into next st to anchor*; rep across until you have 12 petal bases evenly spaced around center (12 petals). Count: you should have 12 petal anchors spaced into the 45 center if using 45 sts (use every 3-4th st). Fasten off and weave tail. (12 petals)
Round 2 :
Return to first petal anchor with yarn and work outward: in ch space created by cluster, work the petal shell: ch1, (sc, hdc, 3 tr, hdc, sc) all into same ch space. Sl st into next anchor to secure. Repeat for each petal (12 petals).
Round 3 :
Work a second row of petal texture: attach yarn at base of each petal behind the first petal row and work front post stitches: *fpdc around the central treble of the petal, then 2 hdc over the outer petals to sculpt. Sl st to next base.* This adds ridge and depth. Repeat for all petals.
Round 4 :
Optional decorative picot edge on each petal: attach yarn to petal tip, ch3, sl st into base of last st to create a gentle point. Repeat around. Fasten off and weave ends. (12 petals)
Info :
Work petals relatively firmly so they hold shape. For the second sunflower, use burnt orange as the primary petal color and repeat the same counts—consider staggering petal placement so petals do not align directly over each other for visual interest.
— Petal Layer 2 (Inner Petal Row for added depth) :
Round 1 :
Using a slightly darker golden or a light orange, attach yarn between every petal (in the ch1 space between petal bases). Ch 2; in same space work (hdc, 3 tr, hdc) to form inner petal nub; sl st to next spacing. Repeat 12 times. Fasten off. (12 small inner petals)
Round 2 :
Work surface slip stitches from inner petal bases toward petal tips to add veins: insert hook at base of inner petal, sl st on surface toward outer petal tip, secure. Repeat for each petal creating subtle striations. (12)
Info :
If you want fuller sunflowers, add a third petal row using a contrasting tone and slightly shorter heights (2 tr clusters) to sit tucked beneath outer petals.
— Small Accent Flowers (Make 6-8) :
Round 1 :
Using deep red, 6 sc in magic ring (6)
Round 3 :
*Ch 3, sl st in next st* around to create 6 small loop petals; fasten off leaving tail. (6 loops)
Round 4 :
Optional: with yellow, add a small french-knot style bobble in the center by winding yarn around needle and securing with a short stitch to create a sewn center. Alternatively, use a small yellow embroidered French knot style stitch. (decorative)
Info :
Make 6–8 of these small flowers in red and cream. They are lightweight and should be sewn flat to the mesh near the larger sunflowers for accent. Leave long tails for sewing.
— Tiny Buds (Make many small buds) :
Round 1 :
Using golden yellow, ch 2, 6 sc into the 2nd ch from hook (6). Do not join; sl st to first sc, leave tail and shape into a small sphere by running a gathering stitch at the base and pulling tightly. Fasten and leave long tail for sewing. Make 12–20 buds.
Info :
These tiny buds are sewn singly or in clusters on short surface stems. They add the delicate sprigs seen around the sunflowers; position them near leaves and flowers and secure with a few stitches.
— Leaves (Make 8–10 leaves, sizes vary) :
Round 1 :
Using olive green, ch 13. Row 1: sc in 2nd ch from hook and each ch across (12 sc). Turn. This forms the leaf foundation. (12)
Round 2 :
Ch1, sc in next 4 sts, hdc in next 2, dc in next 2, hdc in next 2, sc in last 2. Turn. (12)
Round 3 :
Ch2, *work 3 hdc into the next st at an angle to create a raised rib (use FLO on the last st of each group to create vein effect) across the midsection; continue shaping by decreasing 1 sc at each tip on alternate rows until you reach a tapered tip.* Fasten off when leaf is tapered to a point. (Varies)
Round 4 :
On WS, use surface crochet and FPtr: working from base to tip, use front post double crochet (fpdc) down the center of the leaf to create a raised central vein. Make 8–10 fpdc depending on leaf length. Fasten off leaving long tail for sewing. (Texturing)
Round 5 :
Reverse the leaf for a symmetrical second side if desired: pick up edge and mirror Round 2 for a fuller leaf. Fasten off. (If you want a thinner leaf, skip this mirror round.)
Info :
Make leaves in at least two sizes: large leaves approx 12–14cm long and medium leaves 8–10cm long. Use a 3.0mm hook for tighter definition if desired. Make 8 leaves total: 4 large, 4 medium.
— Vines and Stems (Surface stitched onto base) :
Round 1 :
Using olive green, ch a long chain (approx 80–120 cm depending on runner) for the main vine. Lay across the mesh in a gentle sweeping curve from bottom to top; pin every 4–6 cm.
Round 2 :
Sew the chain to the mesh through the center of the chain (invisible sewing) using long tail and yarn needle. At points where leaves attach, leave a small loop to insert leaf base seam for easier sewing. Repeat for secondary stem branches using shorter chains. (Surface stitching)
Info :
Alternatively, you can work stems directly on the surface with a thick yarn and Tunisian simple stitch or with back surface slip stitches to get a rope-like vine. Ensure the stems are secure and flexible.
— Attachment and Positioning Guide :
Round 1 :
Place large centers on the base at previously marked positions. Pin centers in place through the base using long-tail tails left from centers. Space centers approximately 28–32 cm apart center-to-center. (Placement)
Round 2 :
Baste each center with a running stitch through the long tail; do not pull too tight—allow slight dome. Check orientation of petal layers before final sewing. Attach leaves and small motifs by pinning and adjusting to visually balance composition.
Info :
Assemble from large elements to small: center → inner petals → outer petals → leaves → small flowers → buds. This avoids accidentally covering attachment points of larger pieces.
— Sew Petals and Centers to Base :
Round 1 :
Use a yarn needle and matching yarn tail from each center. With running whip stitch, sew through the last round of the center and into the mesh in multiple places (6–8 evenly spaced stitches) to anchor securely. (Sewing)
Round 2 :
Sew inner petal rows first bridging into center base. Then sew outer petals; take small invisible stitches along the base of each petal to secure to the mesh. Fasten and weave tails behind the mesh into the base for a tidy back.
Info :
For very secure seam, use a backstitch on the underside of the mesh where a lot of handling is expected. Knot and hide knots within the center so they are not visible from RS.
— Decorative Border (Scalloped Edge) :
Round 1 :
With cream, attach yarn to corner or edge of mesh. Work 1 row of sc evenly around entire runner edge, placing 3 sc in corners to keep shape. Maintain an even number of stitches along straight edges. (Edge sc)
Round 2 :
Ch 3, *skip 2 sc, (5 dc shell) in next sc, skip 2 sc, sl st in next sc* across edge. Work 3 shells in each corner to turn gently. (Shell scallops)
Round 3 :
Ch1, *in top of shell: sl st, ch3, (3 dc, ch3, 3 dc) into ch3 space to make larger scallop; sl st into next sl st anchor.* Repeat around. This creates the decorative rounded edge visible in the photo.
Round 4 :
Finish with a picot trim: *sc in each st across shells, ch 3, sl st in 3rd ch to make picot* Repeat around. Fasten off and weave ends. (Decorative)
Info :
If your mesh is slightly wavy after applique, apply light steam blocking after border is attached to set the scallops. Do not over-wet the applique pieces; pin them flat during final blocking to preserve 3D effect.
— Final Finishing Rounds :
Round 1 :
Check all tails: weave in using yarn needle, pulling tails along the inside of stitches for invisibility. Trim extra ends.
Round 2 :
Using matching green yarn, embroider subtle veins across large leaves if you want additional definition: use straight stitch or couching for veins. Secure ends on WS. (Embroidery)
Round 3 :
Attach any extra small buds: sew in clusters of 2–3 buds on short stems next to leaves and flower edges. Knot threads securely and hide tails within base mesh.
Round 4 :
Give runner a final gentle blocking to shape edges and to flatten the mesh where needed while leaving petals slightly raised for dimension. Allow to dry fully before use. (Blocking)
Info :
For washing care recommend gentle hand wash in cool water and reshape while damp; do not wring. Press lightly with towel to remove excess water and lay flat to dry to protect 3D elements.
This sunflower runner is a celebration of texture and color—an heirloom-quality piece to brighten your table! Each 3D petal and sculpted leaf is crafted to sit proudly on a delicate lacy base, making it both a decorative and tactile focal point. The pattern encourages slow, mindful stitching and gives you the joy of layering applique to create dimension. 🧶🌻 Whether you display it for harvest season or year-round, it's a beautiful labor of love—enjoy every stitch! ✨