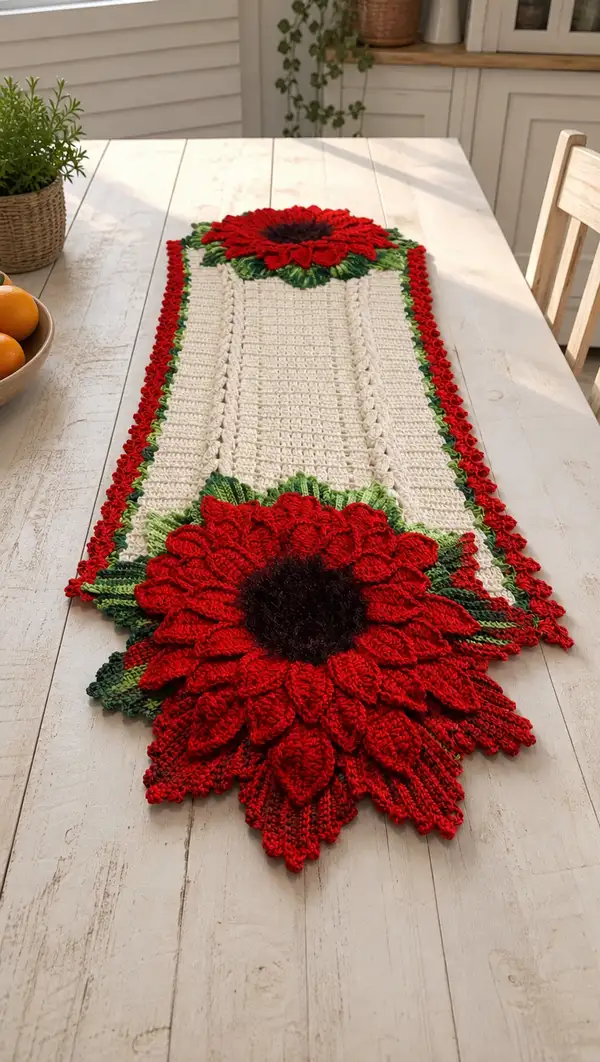
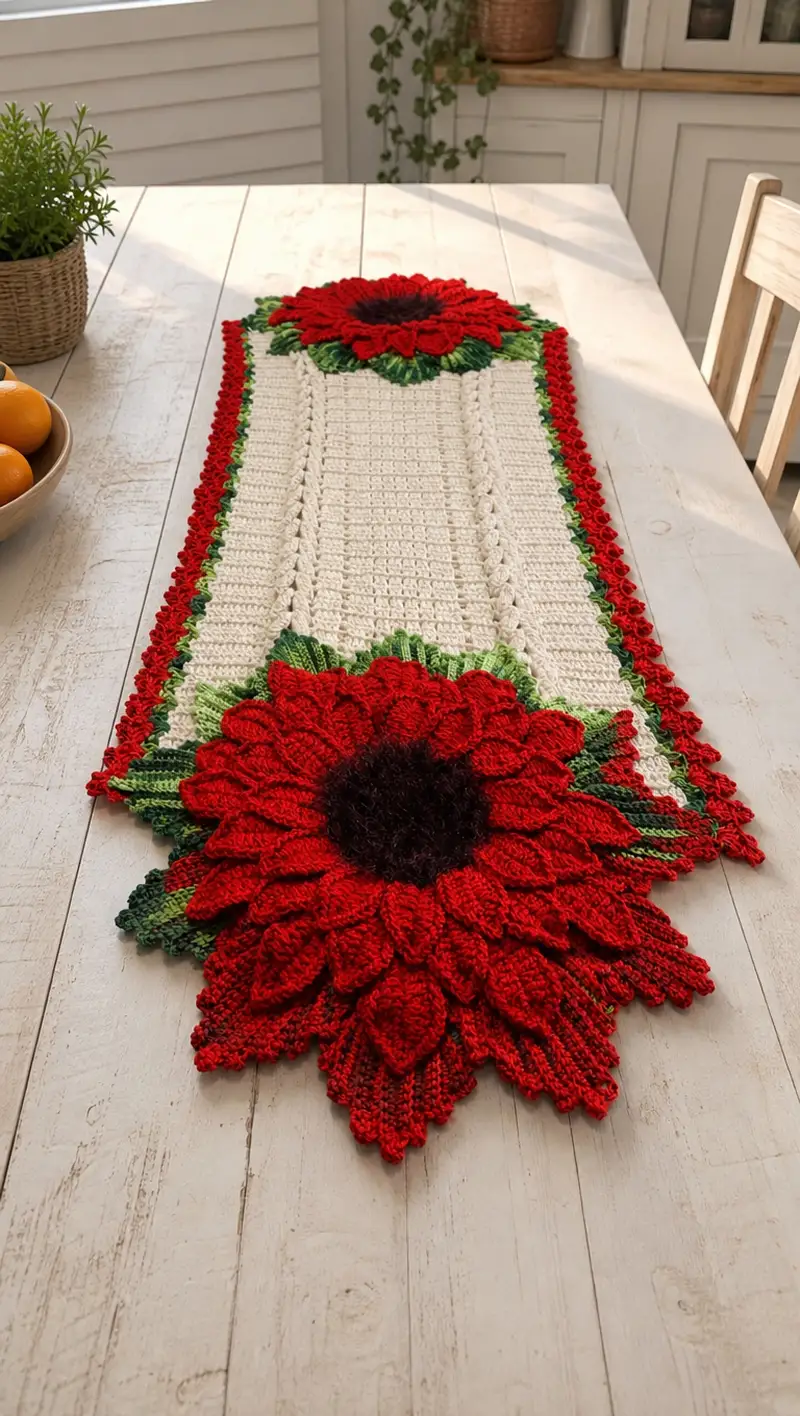
A long, elegant table runner featuring two large sunflower motifs at each end and a textured cream center panel. Lush green leaves and a scalloped red edge frame the runner for a bright, farmhouse-inspired look. Perfect for seasonal tables or as a year-round centerpiece that brings handcrafted warmth to your dining space. Detailed construction with layered petals and lace-like borders creates a dramatic focal point.
Progress Tracker
0% Complete
— Notes and Overview :
Info :
This pattern is modular: you will make a long rectangular center panel, two identical sunflower end motifs (each composed of a central disk, layered petals and a leaf underlayer), several standalone leaves and then join everything together and add the red scalloped border. The sequences are written for US terms. Gauge is not critical for fit but will affect finished size; measurements shown are approximate based on stated yarn and hook. Use stitch markers to mark row ends during center panel construction. Block sunflower motifs and leaves before final assembly for a crisp look.
Info :
Abbreviations used: ch, sc, hdc, dc, tr, sl st, inc, dec, BLO, FLO, MR. All rounds/rows with counts include the total in parentheses. Some rounds use 'rows' notation when worked in back-and-forth; others are rounds for circular motifs.
— Center Panel (Rectangular Body of Runner) :
Info :
Work flat in rows using worsted weight cream yarn. Foundation chain of 102 ch gives a center panel approx. 36-40 cm (14-16") wide after blocking; adjust foundation chain by adding multiples of 2 if you want different width. The panel will be worked mostly in dc and hdc for a textured fabric with alternating vertical lace columns created using ch-sp and v-sts. Keep turning chains consistent: ch2 counts as hdc, ch3 counts as dc where indicated.
Round 1 :
Ch 102, hdc in 2nd ch from hook and in each ch across. Turn. (101 hdc)
Round 2 :
Ch2 (counts as hdc), hdc in next 3 sts, *ch1, sk 1 st, hdc in next 4 sts; rep from * across ending with hdc in last 4 sts, turn. (101 sts total with 1-ch spaces across)
Round 3 :
Ch2, hdc in each st and in each ch1 space across. Turn. (101)
Round 4 :
Ch3 (counts as dc), dc in next 4 sts, *ch1, sk 1 st, dc in next 4 sts; rep from * across, ending dc in last 4 sts, turn. (101)
Info :
The pattern alternates hdc rows with dc rows to create a subtle ribbed texture. Maintain even tension and keep edge stitches slightly tighter to avoid flaring. Place a stitch marker in the first stitch of each row to keep track of the edge.
Round 5 :
Ch2, hdc in each st and in each ch1 space across. Turn. (101)
Round 6 :
Ch3, dc in each st and in each ch1 space across. Turn. (101)
Round 7-8 :
Repeat Rounds 5-6 to establish base texture. (101)
Round 9 :
Ch2, hdc in first 6 sts, *(sk1, dc3 in next st as a small cluster) to create a raised column edge, hdc in next 12 sts; rep from * across ending with hdc in last 5 sts. Turn. (101)
Round 10 :
Ch3, dc in each st across maintaining clusters in same facing to create vertical columns. Turn. (101)
Info :
If you prefer more defined vertical columns, switch the cluster in Round 9 to fpdc/bpdc alternations to create raised ribs. Mark the column centers with small stitch markers to maintain pattern alignment.
Round 11-20 :
Repeat Rounds 5-10 five times (or until center panel reaches desired length between motifs). Keep stitch count consistent at 101 sts per row. (101)
Info :
Measure the panel as you go. A standard runner in the photo is approx. 90-110 cm (35-43") long between motifs, but you can work longer or shorter. Place markers at both ends of the center panel where motifs will be attached; typically leave 12-14 rows of plain texture inside each motif attachment zone for a balanced look.
Round 21-30 :
Continue alternating hdc and dc rows maintaining the stitch pattern. Work 10 more rows (five hdc rows and five dc rows) to build body height. (101)
Info :
Before finishing the panel, leave a long tail for joining to motifs or make slip-stitch loops along the short edges for an easier join later. Fasten off and weave in ends, pressing lightly or blocking while flat to even out tensions.
— Sunflower Motif (Make 2 identical, one per end) :
Info :
Each sunflower motif is made in layers: center disk (fuzzy), base disc (solid), inner petal layer (small petals), outer petal layer (larger petals), then an underlayer of leaves. Work motifs flat in rounds. The counts below give a flower approximately 22-26 cm (9-10") across after blocking, depending on petal fullness.
Section Title :
Center Disk - Fuzzy Core (Use dark fuzzy yarn)
Round 1 :
MR, 6 sc into MR. Pull tight. (6)
Round 2 :
Inc in each st around (12)
Round 3 :
(1 sc, inc) x 6 (18)
Round 4 :
(2 sc, inc) x 6 (24)
Round 5 :
(3 sc, inc) x 6 (30)
Round 6 :
(4 sc, inc) x 6 (36)
Round 7 :
1 sc in each st around (36)
Info :
Fasten off leaving a 40-50 cm tail for sewing center disk onto the base disc. Do not stuff; center disk is flat and decorative. Trim fuzzy yarn to create a soft pompom-like surface or use eyelash yarn to work these rounds so a naturally fuzzy texture appears without trimming.
Section Title :
Base Solid Disk (worked under fuzzy core; use red or dark red to anchor petals)
Round 1 :
MR, 6 sc into MR (6)
Round 2 :
Inc in each st around (12)
Round 3 :
(1 sc, inc) x 6 (18)
Round 4 :
(2 sc, inc) x 6 (24)
Round 5 :
(3 sc, inc) x 6 (30)
Round 6 :
(4 sc, inc) x 6 (36)
Round 7 :
(5 sc, inc) x 6 (42)
Round 8 :
1 sc in each st around (42)
Info :
Leave a 50-60 cm tail for sewing the fuzzy core and petal layers to this base disc. Position fuzzy core on top and tack in place with a few stitches for stability; final assembly will secure it fully.
Section Title :
Inner Petal Layer (small petals; make 18-20 petals around)
Info :
Switch to red yarn for petals. Each petal is worked as a short flap anchored into the base disc. Work petals into specific stitches around; counts below assume 42 sts around base disc so spacing will be every 2 st for 21 petals — adjust to make petals even by spacing 2 sts or 1 st as needed.
Round 1 (Petal 1) :
Join red yarn to any stitch on round 8 of base disc with sl st. Ch1, sc in same st, ch2, (hdc, dc, hdc) in next st, ch2, sc in next st, sl st into next st to anchor. Fasten off or continue to next petal. Repeat around to create 21 petals. Each petal uses 4-6 sts of the base disc spacing. (21 petals)
Round 2 :
After making all petals, work one round of sl st around the base disc and through the base loops of petals to secure them (42 sl st). Fasten off and weave tails to the back. (42)
Info :
Petal shapes can be adjusted by changing the sequence (sc, hdc, dc) to (sc, dc, tr) for slightly taller inner petals. Keep petal bases consistent so outer layer has a stable foothold.
Section Title :
Outer Petal Layer (larger sculptural petals; make 18 large petals)
Info :
Outer petals are worked over two rounds to create a fuller, 3D effect. Work into the base disc and also attach into the outer edge of inner petals for a layered effect. Each outer petal spans 2-3 base stitches; for 42 base sts you can make 21 large petals for fullness; adjust spacing to taste. Use red yarn.
Round 1 (Outer Petal Start) :
Join red yarn to base disc at a point between two inner petals. Ch1, sc in same st, *ch3, (sk1, dc3 in next st forming a tall cluster), ch3, sc in next st; rep from * around to create 21 tall petal arches. (anchor count 21)
Round 2 (Outer Petal Shaping) :
Work into each tall arch as follows: sl st into first ch3 space, sc, hdc, dc, tr, dc, hdc, sc, sl st back into base to form a full petal. Repeat for each arch. After completing all petals, work a round of sc across the base of the petals to hold them in place. (21 petals)
Round 3 :
Fasten off and weave long tail for securing this outer petal row to the base disc in final assembly. Trim and neaten edges as needed. (No change to count)
Info :
Block outer petals so they curve slightly upward — pin each petal into desired shape and steam/block carefully. This gives a sculptural, lifelike effect and prevents petals from lying flat.
— Leaf Underlayer and Individual Leaves :
Info :
Under each sunflower motif there is an underlayer of variegated green leaves fanning outward to frame the flower. Additionally we work several separate leaves to place under and along the runner edges. Use variegated green for natural shading; leaves are made flat in rounds and edged with a darker green ridge using BLO or FLO to form veins.
Leaf (Make 8 for each motif; 16 total) Round 1 :
MR, ch1, 6 sc into MR, pull tight (6)
Round 2 :
Inc in each st around (12)
Round 3 :
(1 sc, inc) x 6 (18)
Round 4 :
Ch1, sc in next 3 sts, hdc in next 4 sts, dc in next 4 sts, hdc in next 4 sts, sc last 3 sts. Do not join; leave last st open to shape point. (18)
Round 5 :
Working back along opposite side of foundation: sc in next 3 sts, hdc in next 4 sts, dc in next 4 sts, hdc in next 4 sts, sc last 3 sts. Sl st to first sc to finish. (18)
Round 6 :
Ch1, sc around in BLO to create a ridge along the center vein, place bpdc or fpdc down the center for raised vein if desired. Fasten off leaving long tail for sewing. (18)
Info :
Make leaf shapes in both variegated green and solid green; vary sizes by changing stitches in rounds 3-5 (use more dc rows for longer leaves). After making leaves, block them to achieve a natural curve and allow them to overlap under petals elegantly.
Large Leaf Variation (Make 6 per motif) Round 1 :
MR, 8 sc into MR (8)
Round 3 :
(1 sc, inc) x 8 (24)
Round 4 :
Work 2 rows of dc along center to create elongated shape, then sc around opposite side to complete. Sl st and fasten off leaving tail. (24)
Info :
Arrange leaves so large ones sit closest to the base disc, with smaller leaves layered on top. Pin in place and tack with long tails before final sewing to ensure proper overlap and consistent look on both motifs.
— Runner Border and Scalloped Edge :
Info :
Once the center panel is complete and both sunflower motifs and leaves are blocked and ready, join motifs to the center panel and add a three-row border in green and red. The outermost row is a small scallop using red yarn to echo petals and create a finished edge.
Round 1 (Join Panel to Motifs) :
Position one sunflower motif centered along short edge of panel (align motif center with panel center). Using long tail from motif base disc, whip stitch through both panel edge and base disc edge around attachment zone, spacing stitches every 4-6 stitches to create a secure join. Repeat for second motif on opposite short edge. Fasten off. (No count)
Round 2 :
With green yarn join in any corner of the runner, ch1, sc evenly around the entire runner, working 3 sc in each corner to keep the fabric flat. Aim for approximately 2 sc per 3-4 panel stitches for even coverage. Count will vary; maintain even tension. (approx. 420-460 sc depending on panel length)
Round 3 :
Switch to light green. Ch2, hdc in each st around, placing 3 hdc in each corner. Turn if you need a raised ridge along the border. (same count as Round 2)
Round 4 (Scallop Edge in Red) :
Join red yarn. *Sk next st, (5 dc in next st, sk next st, sl st into next st) to form a small shell; rep from * around corners do 7 dc shell for bigger curve. Adjust to keep scallops evenly spaced. Fasten off and weave in ends. (shells spaced approx 12-16 across each long side)
Info :
If your runner flares at edges, work an additional thin row of sc in a smaller hook (3.5mm) to draw edges in slightly before adding scallops. Blocking the entire runner after finishing will help the scallops sit beautifully.
— Assembly and Final Finishing :
Info :
Lay out center panel and motifs on a flat surface. Pin motifs in place and adjust leaves until composition looks balanced from both ends. Use slip-stitch tacking or whip stitch to attach leaves and outer petal layers. Final sewing should be done with tapestry needle and matching yarn tails for invisible seams.
Round 1 :
Sew outer petal layer to base disc by stitching through the underside of petals into the base disc using long tail from outer petal round. Make small, even stitches to avoid pulling petals flat. Secure with backstitch and weave in. (No count)
Round 2 :
Sew fuzzy core to base solid disc by matching centers and using long tail from fuzzy core. Make a circular stitch line to hold fuzzy yarn in place. Trim extra fuzz to even surface if needed. (No count)
Round 3 :
Pin leaves under the flower and baste them in place with a few long stitches using matching green yarn. Arrange variegated leaves to show shading variation. (No count)
Round 4 :
Sew sunflower assembly to panel edge by stitching the base disc to the panel edge in a hidden mattress stitch, catching only the back loops of the base disc and the panel edge for an invisible join. Work evenly to avoid puckering; use moderate tension. (No count)
Info :
After assembly and border are complete, block the entire runner flat. Spray lightly with water and pin scallops and petals into final positions until dry. Optionally press with a warm iron under a damp cloth for a crisp finish. Weave all ends securely and trim close to the work.
— Pattern Variation and Size Adjustments :
Info :
To create a longer runner, lengthen the center panel before joining motifs. To change width, alter the foundation chain before starting the panel in multiples of 2 and adjust vertical column repeats to keep pattern balanced. For a softer petal look, use DK weight yarn with a 3.5mm hook and adjust counts as needed; motif counts will remain proportional but finished size will be smaller.
Info :
For holiday variations, change petal color (sunflower yellow/orange) and edge color to match seasonal decor. Add beaded centers or small crocheted berries to motif centers for festive accents.
This Sunflower Table Runner brings bold color and layered texture to any table — a labor of love that becomes a stunning centerpiece! Each petal and leaf is worked to create sculptural depth and a handmade elegance you will love to display. The modular approach makes the project manageable and satisfying as it grows row by row. Whether for seasonal decor or everyday charm, this runner is a beautiful way to show off your crochet skills and brighten a room. 🧶🌻