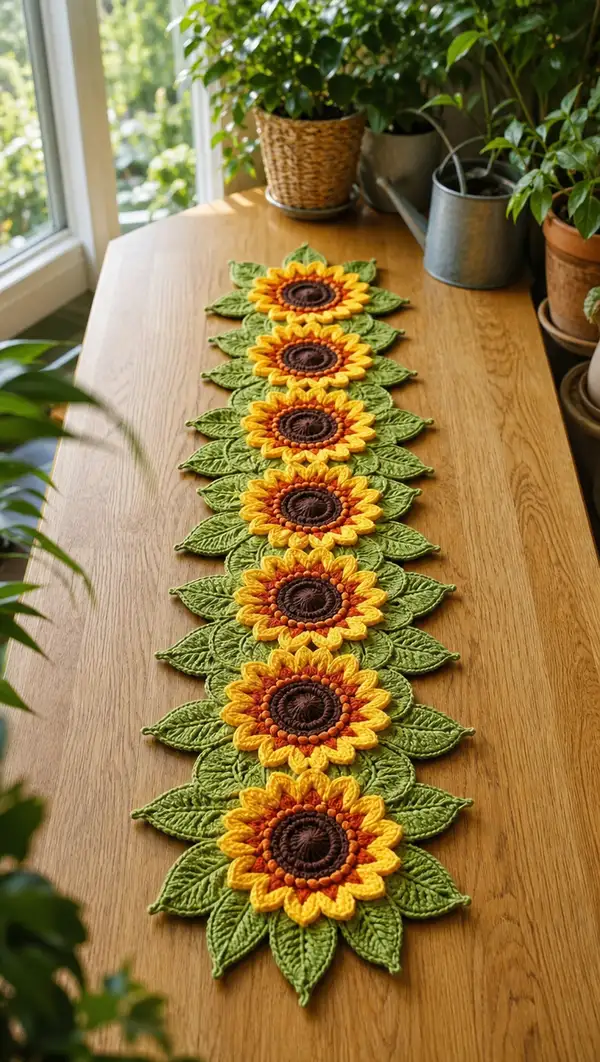
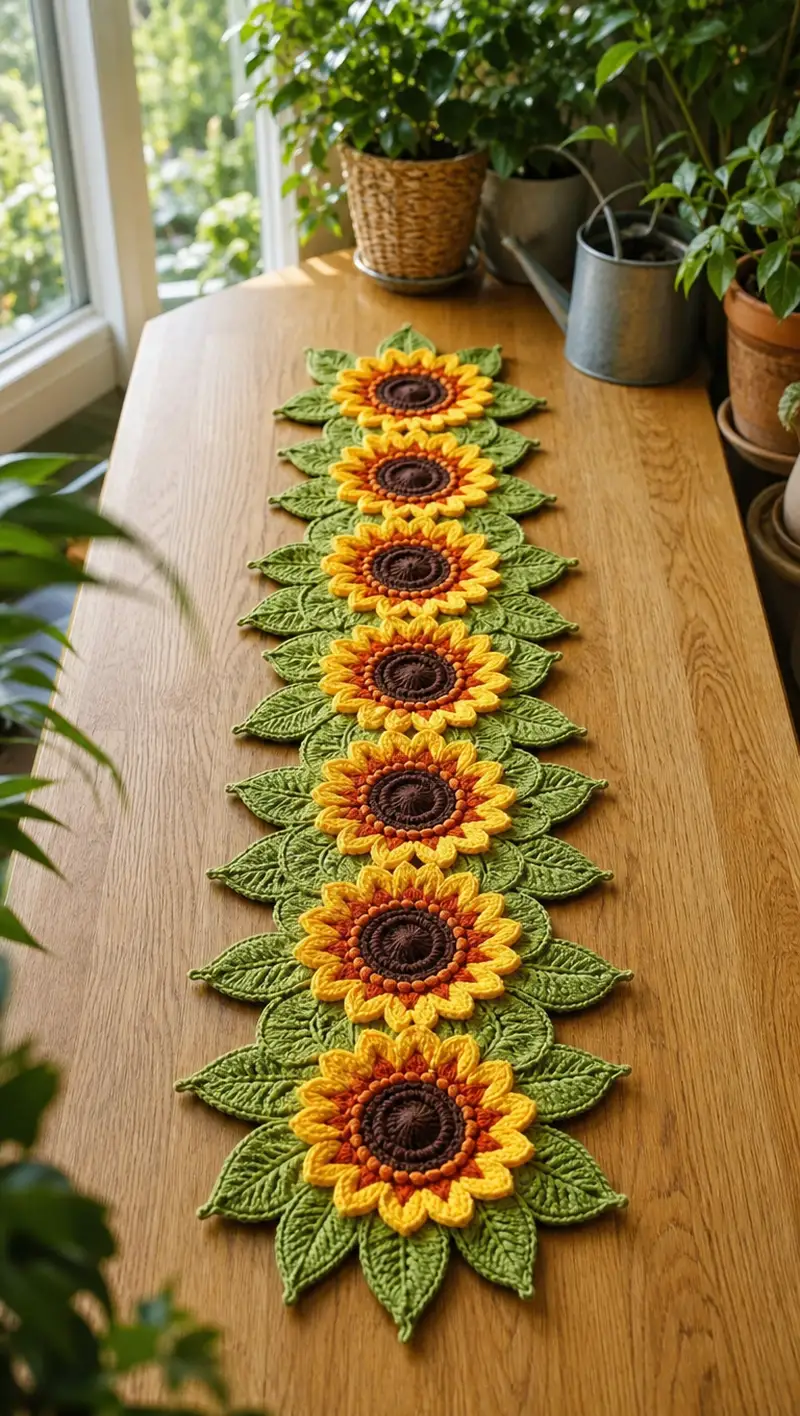
A bright, botanical table runner composed of linked sunflower motifs and textured leaves. Each sunflower features a deep brown center, rust seed ring, layered golden petals, and sculpted green leaves that interlock to form a long runner. The finished piece lies flat and is perfect for a dining table or sideboard to bring warm, sunny charm to any room.
Progress Tracker
0% Complete
— Overview :
Info :
This pattern is written in rounds and flat motifs. Each sunflower motif is made in layers: a central disk( Rounds 1-10), a textured seed ring (Rounds 11-16), inner petal base (Rounds 17-24), layered petal shaping and texture (Rounds 25-48), then an outer frame and edging (Rounds 49-56). Leaf motifs are made separately (Rounds 1-20 for each leaf) and joined to each sunflower. The runner is constructed by joining 7 sunflower motifs end-to-end via their leaves; reduce or increase motif count to change runner length.
Info :
Gauge is not critical for a decorative runner but be consistent throughout. The sample runner uses worsted weight yarn and a 4.0mm hook. Finished width for a single motif across leaves is approximately 9.5-10.5 inches; each sunflower center measures about 4.5-5 inches across.
— Sunflower Center Disk (Dark Brown) :
Round 1 :
6 sc in magic ring (6)
Round 3 :
(1 sc, inc) x 6 (18)
Round 4 :
(2 sc, inc) x 6 (24)
Round 5 :
(3 sc, inc) x 6 (30)
Round 6 :
(4 sc, inc) x 6 (36)
Round 7 :
(5 sc, inc) x 6 (42)
Info :
Work these increases evenly to create a flat circular disk. If the disk cups, reduce hook size by 0.25-0.5mm. If it ruffles, increase the hook slightly or tighten tension.
Round 8 :
(6 sc, inc) x 6 (48)
Round 9 :
1 sc in each st (48)
Round 10 :
1 sc in each st (48)
Info :
Fasten off dark brown. We will attach the rust seed ring next to the edge of this disk. Leave a short tail for sewing if preferred (about 8-10 in/20-25 cm).
— Seed / Inner Bobble Ring (Rust) :
Info :
Attach rust yarn with a sl st into any stitch on Round 10 of the center disk. We will work a textured bobble ring around the brown disk where bobbles sit just outside the edge to imitate sunflower seeds.
Round 11 :
ch1, *sc in next st, ch1; rep from * around 48 sc (48 ch1 spaces)
Round 12 :
*(yarn over, insert hook in ch-1 sp, yarn over pull up loop) x3, yarn over pull through 6 loops on hook (bobble), ch1, sl st in same ch-1 sp, sl st in next sc; rep from * around (24 bobbles, 24 sc between bobbles) (48 total foundation sts)
Info :
Create medium-tight bobbles. If your bobbles are large, use fewer loops per bobble (2 loops) or reduce yarn tension. Keep spacing consistent—this round visually separates center from petals.
Round 13 :
ch1, sc in each sc and sl st around to tidy foundation (48)
Round 14 :
1 sc in each st (48)
Round 15 :
1 sc in next 3 sts, *(hdc, ch2, hdc) in next st as petal base (v-stitch), 1 sc in next 3 sts; rep from * around (12 v-stitches spaced evenly) (48)
Info :
This round establishes 12 spaced anchor points for petals. Count your v-stitches when you finish; adjust by placing extra sc between v-sts if spacing feels too tight.
Round 16 :
sl st to center of first v-st, ch3 (counts as dc), 2 dc in same stitch, *(3 dc in next v-st), sl st in next sc between v-sts; rep from * around to make twelve clusters (12 clusters x 3 dc = 36 dc), sl st to join (36)
Info :
Fasten off rust. Leave long tail if you prefer to secure bobble round from the back. At this point you have a central disk with a ring of v-stitches ready for petal construction.
— Inner Petal Foundation (Amber/Golden) :
Info :
Join amber/golden yarn into the ch-2 space of the first v-st from Round 15. Each petal will be worked over a v-stitch foundation to create layered petals. There are 12 petals total. Keep a stitch marker on the first petal to track round starts.
Round 17 :
Into each v-st: *(ch1, 1 sc in v-st, ch1, sl st in same v-st) across; rep x12 to create small stem loops (12)
Round 18 :
sl st to front of first loop, ch1, *(sc, hdc, dc, tr, dc, hdc, sc) all worked into the loop of first petal to form a petal shell; sl st into next loop; rep around forming 12 petals (each petal uses 7 stitches) (12 petals)
Round 19 :
ch1, sc in each stitch around petals working along backs of petals to anchor (84 sc total approximated across all petal shells)
Info :
When stitching around petal shells, count to ensure even stitches per petal. The approximate count will vary slightly depending on tension but aim for consistent size petals. Use stitch markers to separate petals if needed.
Round 20 :
1 sc in each st (84)
Round 21 :
*(ch2, fpdc around post of tr of petal below, ch2, sl st between petals) rep around to create raised lines at petal centers (approx 12 fpdc, spacing sl st) (84)
Info :
Use front post double crochet to create defined ridges on each petal. This round deepens texture and helps petals hold shape.
— Petal Layering and Sculpting (Yellow Bright) :
Round 22 :
Join bright yellow at base of any petal loop. ch1, *(sc in next 6 sts across petal base, ch2, turn onto petal, work (dc, tr, tr, dc) into top edge of petal forming a taller petal; sl st back to base), rep across for each petal to add a taller outer petal layer
Round 23 :
Ch1, sc around entire outer edge of new petals and across joins to tidy (approx 120 sc)
Info :
Work petals one at a time if it helps with control. Ensure outer petal peaks sit slightly over inner petals to create a layered look. If petal count is less or greater, adjust spacing in earlier v-stitch round.
Round 24 :
*(fpdc around post of central dc of outer petal, ch1, sl st at base between petals) rep around to create central rib on outer petals (12 ribs)
Round 25 :
1 sc in each st around entire motif including the back joins to tidy (approx 120 sc)
Round 26 :
*(3 sc in base of petal, sl st in next base), rep around to create small scalloped base under petals (approx 36 scallops)
Info :
At this stage the motif should be noticeably three-dimensional. Fasten off yellow but leave an 8-10 inch tail for sewing to leaves if you prefer to join from front through yellow round rather than green backing.
— Outer Petal Edge & Stabilizing Round :
Round 27 :
Join a thin accent yarn (optional olive or same green) with sl st at petal base, ch1, 1 sc in each st around working in BLO to create a neat ridge (approx 120 sc)
Round 28 :
1 sc in each st (120)
Round 29 :
*(sc in next 4 sts, inc) x 20 to gently expand outer frame and allow leaf anchors (120 -> calculation for incs: if 120 current and you do pattern (4 sc, inc) x 20 = 140 total)
Info :
This round adds a shallow expansion so the sunflower sits framed and gives room to attach leaf units without crowding petals. If your counts differ slightly, ease in or out a few sc between leaf anchor points.
Round 30 :
1 sc in each st (140)
Round 31 :
*(ch3, sl st in 4th ch to create small picot loop, sc across next 10 sts), rep around to create small outer decorative loops (approx 12 loops)
Round 32 :
1 sc in each st (140)
Info :
These outer loops are primarily decorative and provide convenient anchoring points for leaf placement. If you prefer a flatter finish, skip the picot loops and continue with sc rounds only.
— Leaf Motif (Make 6-8 leaves per sunflower) :
Info :
Each sunflower in the pictured runner shows 6 leaves radiating around it (three on either side to join to next motif). Leaves are crocheted flat and sculpted with post stitches to create veins. Make a practice leaf to ensure size matches petals before making all duplicates.
Round 1 :
Using green, ch12, sc in 2nd ch from hook and across (11 sc) (foundation chain base)
Round 2 :
ch1, turn, (1 sc in next 3, hdc, dc, tr, dc, hdc, 1 sc in next 3) work across to form a tapered shape (11 sts total)
Round 3 :
ch1, turn, sc in next 3, *(hdc, dc, tr, dc, hdc) in center group to build leaf body, sc last 3 sts (11)
Round 4 :
Fold leaf lengthwise and sl st along base to create a fuller body; ch1 and sc along outer edge working extra 2 sc at the widest middle to create a pointed tip (approx 16 sc total around)
Info :
These initial rounds establish the leaf silhouette. Keep tension slightly firmer to give leaf body and definition. Blocking will sharpen edges and veins.
Round 5 :
Work along leaf edge: *(sc, hdc, dc, hdc, sc) across one side to tip; at tip work (sc, picot, sc) to create a point; return down other side mirroring stitches (approx 28 sts total)
Round 6 :
1 sc in each st around to tidy (28)
Round 7 :
*(fpdc along the central row of stitches to create the main vein from base to tip), rep for additional shallow veins using bpdc to each side as desired (approx 8-12 post stitches)
Round 8 :
sc around and fasten off leaving a long tail for sewing to sunflower (approx 28)
Info :
Make 6 leaves per sunflower for the pictured runner: 3 leaves attached on each long side of the motif so they interlock with adjacent motifs. If you want a fuller frame, add 2 extra leaves per side.
Round 9 :
Optional: Add a second decorative round in a contrasting green by slip stitching into alternate edge stitches to create a raised border (28)
Info :
Block each leaf flat and pin to shape. Use steam or wet-blocking to open the veins. Leaves should be uniform in size for easy joining.
— Outer Join Base & Backing Round (Green) :
Round 1 :
With green, join at any point on outer petal frame, ch1, sc in each st around motif including under leaves if you prefer an attached backing (approx 140-150 sc)
Round 2 :
1 sc in each st (140-150)
Info :
This backing round stabilizes the motif and gives consistent points to sew leaves and to join adjacent motifs. If you prefer a lacey look, work sc in alternate stitches only and leave small gaps for a lighter fabric.
Round 3 :
*(sc in next 8 sts, ch3, skip 2 sts) rep around to create small loops used to align leaf tips and provide join points (approx 14 loops)
Round 4 :
1 sc in each st to tidy (140)
Info :
Fasten off leaving tails for joining. Make sure to weave ends through a few stitches on the back and knot if you prefer extra security before trimming.
— Joining Motifs (Assembly Rounds) :
Info :
Lay two motifs right sides up with leaves overlapping as in photo: each motif’s leaves tuck into the adjacent motif’s leaf spaces. Pin leaves to align tip-to-base so motifs alternate like a chain. Joining is performed by whipstitching through the green backing rounds and leaf bases, or by crocheting slip stitch joins through anchor loops if you prefer a crocheted seam.
Round 1 :
Position motifs so three leaves on each side overlap with the adjacent motif's corresponding three leaves. Using yarn tail from backing round, whipstitch through both motifs along green backing and leaf bases at 8 to 12 evenly spaced points (no stitch count change)
Round 2 :
Optional crochet join: with green and a 3.5mm hook, join motifs by slip stitching through matching ch3 loops on each motif, *sl st in loop of motif A, sl st in matching loop of motif B; rep across all loops to create a neat seam
Info :
When joining, keep seam flat and avoid pulling too tight; the runner should remain flexible and lay flat. Block the runner after joining to help seams relax and even out shape.
Round 3 :
Secure leaf tips: tack each leaf tip to adjacent motif with a small whipstitch through the picot loop so the leaf tips form a continuous scalloped edge along the runner (approx 24 tacks per motif join)
Info :
Work slowly on the first few joins to determine ideal spacing and tension. Once a consistent method is established, the remaining joins will proceed quickly and evenly.
— Final Edging & Finishing Rounds :
Round 1 :
With green, work a single crochet border along the entire outer edge of the runner, working evenly around each motif and around every leaf. Where two motifs meet, crochet through both layers to secure seam (count varies; work evenly)
Round 2 :
Work a decorative picot round: *(sc in next 3 sts, picot (ch3, sl st in top ch), sc in next 3 sts) rep around for a scalloped look
Round 3 :
1 sc in each st to tidy and fasten off, weave in all ends securely on back side
Info :
Blocking: Wet block or steam block the entire runner pinned to shape, allowing leaves to open and petals to sit flat. Use a medium setting steam and avoid pressing directly on puff stitches. Let dry completely before removing pins.
Round 4 :
Optional: Stiffen with a fabric stiffener or diluted PVA for a table runner that holds shape better (test on a scrap first)
Info :
Final inspection: smooth any stray loops, re-secure any loose bobbles by stitching through their base from the back. The finished runner will be flexible and decorative but not recommended for heavy spilled liquids without protective coating.
— Repeat & Layout :
Info :
The pictured sample shows seven sunflower motifs joined in a linear arrangement. To create a shorter runner, use fewer motifs. To create a table centerpiece circle or tablecloth, join motifs in multiple rows using the same edge joining technique, bearing in mind leaf orientation and overlap for consistent coverage.
Round 1 :
Repeat motif making and leaf attachments for each unit. Ensure every motif has identical leaf placement—3 leaves per side—so joining is consistent (no stitch count)
Round 2 :
When joining all motifs into the runner, lay each new motif aligned with previous motif by matching three leaf bases on the long side; pin and join as described in Joining Motifs section
Info :
Keep an even tension on joining stitches so the runner does not curve or twist. Work seams on the underside so the top shows continuous sunflowers and leaves.
— Tips & Troubleshooting Rounds :
Info :
If your petals are inconsistent, frog back to the petal foundation (Rounds 15-18) and redo petals one at a time, checking size against a previously completed petal. For bobble uniformity, practice making bobbles on scrap until consistent in height and density.
Info :
If the runner is too floppy, block and then add a second green backing round across motifs before joining to stiffen slightly. If too rigid, remove one backing round to restore drape.
Info :
For color variations: try cream centers and orange petals for autumnal runner, or soft pinks for a spring look. When mixing dye-lots, alternate skeins every other petal to blend color changes.
Info :
Maintenance: hand-wash in cold water and reshape while damp. Avoid tumble drying. Spot-clean as needed and store flat to prevent distortion.
This cheerful sunflower table runner brings sunshine to any table with rich brown centers, rust seed rings, and layered golden petals framed by sculpted leaves. The repeating motif assembly is satisfying and meditative, and the end result is a striking decorative piece to enjoy for seasons. 🌻 Spread warmth and handmade charm across your table — a beautiful project to gift or display. 🧶