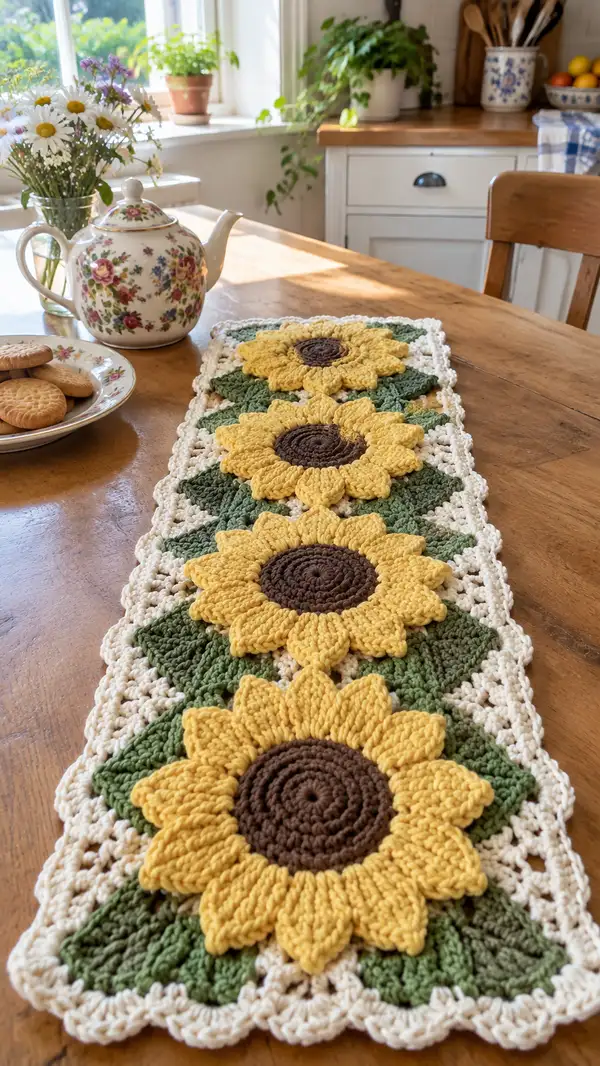
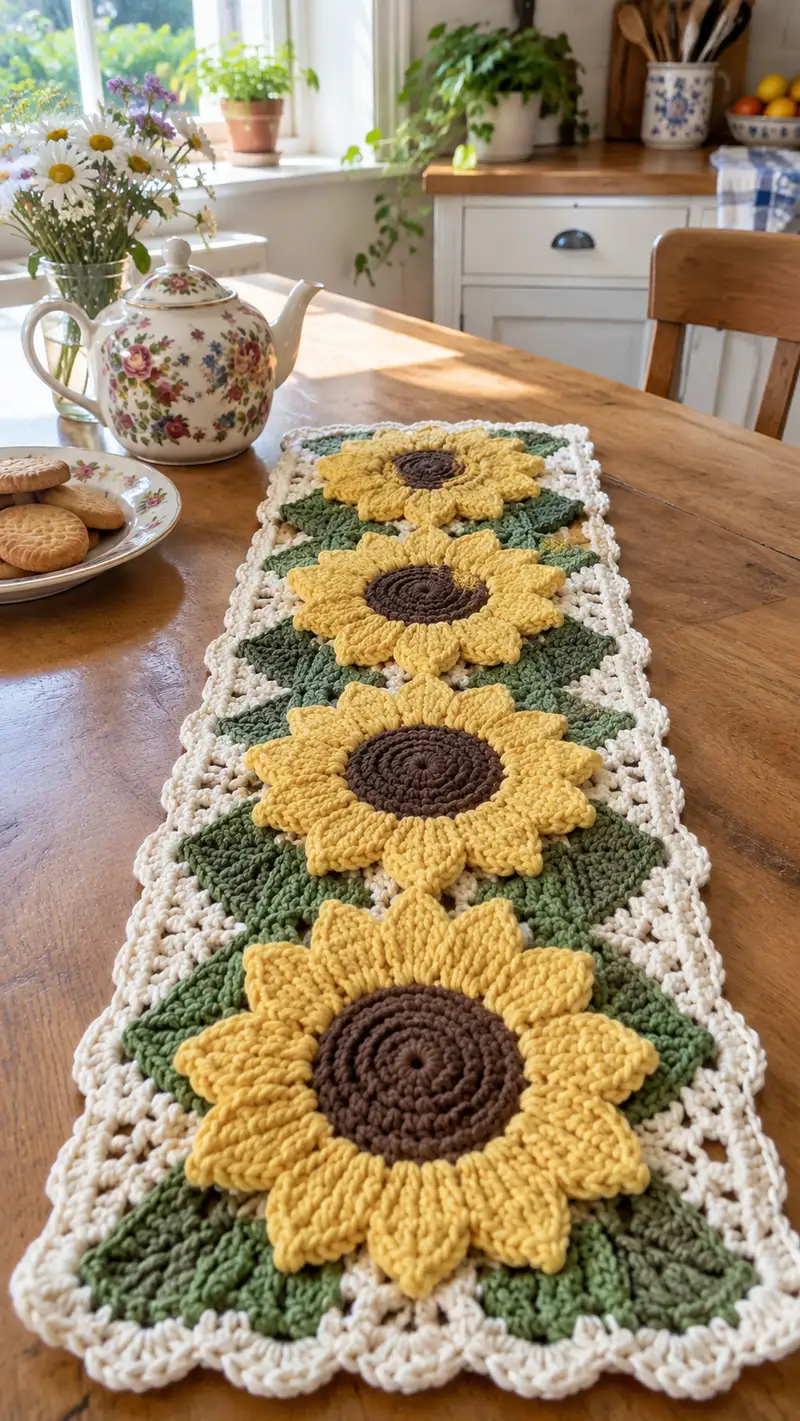
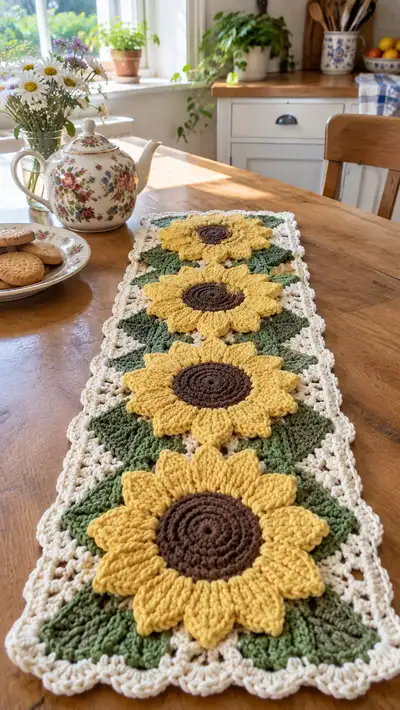
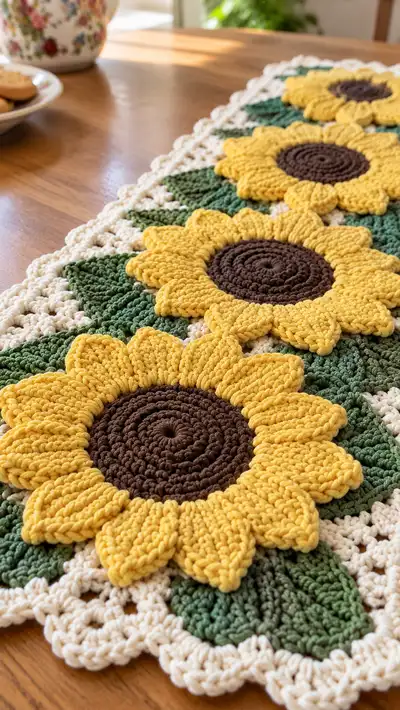
A charming sunflower table runner worked in warm golden yellows, deep brown centers, leafy greens and a creamy lacy background. This runner features three-to-four bold 3D sunflower motifs set over green diamond leaves and joined with an openwork cream lattice. The textured petals and layered centers create a striking, farmhouse-style centerpiece for a dining table or sideboard.
Progress Tracker
0% Complete
— Sunflower Center (make 4)
Round 1 :
6 sc in magic ring (6)
Round 3 :
(1 sc, inc) x 6 (18)
Info :
Work these first rounds tightly—this center is the anchor for the sunflower. Use smaller hook (3.5mm) if you want a denser center.
Round 4 :
(2 sc, inc) x 6 (24)
Round 5 :
(3 sc, inc) x 6 (30)
Round 6 :
(4 sc, inc) x 6 (36)
Info :
Check your circle: it should sit flat. If it ruffles, skip an increase evenly in next round. If it cups, add increases evenly to flatten.
Round 7 :
1 sc in each st (36)
Round 8 :
1 sc in each st (36)
Round 9 :
1 sc in each st (36)
Info :
These even rounds build the height of the center and create a firm base for petal attachment. Keep tension consistent.
Round 10 :
Change to Chocolate Brown if not already using. 1 sc in each st (36)
Round 11 :
(4 sc, inc) x 6 (42)
Round 12 :
1 sc in each st (42)
Info :
Fasten off leaving a long tail for sewing to the petal circle later if you choose to make petals separately. Many crocheters continue directly into petals from this round.
— Petals (work around each center: 12 petals per sunflower)
Round 13 :
Join Yellow in any st. *ch 2, 3 dc cluster in same st, ch 2, sl st in next st* - repeat from * to * around to create 12 petal bases (12 clusters). Note: work clusters into the FLO of Round 12 if you want petals to sit slightly forward. (12 petal bases)
Info :
When working the cluster, treat the cluster as one petal base. Adjust spacing if petals are too close or too far—work sl st increases/decreases in spacing stitches between clusters.
Round 14 :
Work back around petals: in each petal base work - (sl st in base, ch 1, 1 sc, ch 1, 3 tr in next sp, ch 1, 1 sc, ch 1, sl st in base). This builds a tall, textured petal (work same for each of the 12 petals).
Info :
Use consistent tension on the tall stitches to achieve even petal height. If one petal seems taller, pull slightly when sewing petal base down later.
Round 15 :
Turn each petal into a rounded pointed shape by working 3 sc across the top of each petal shape: sl st into petal top, (ch 1, 3 sc in same sp), sl st back to base. Repeat for each petal (12 small 3-sc buttons at petal tops).
Round 16 :
Working behind petals to bulk them: join yarn at the base of petal 1. *ch 1, 1 sc in base, BLO hdc 2 in the next 3 stitches behind petal to create a ridge, sl st to next petal base* repeat to end. This gives depth behind petals.
Info :
If you prefer thicker petals, work the petal rounds a second time to puff them. Each extra round will slightly increase diameter—keep that in mind when planning final layout.
Round 17 :
Optional decorative ridge: in petal valleys, *ch 2, picot (ch3, sl st into 3rd ch from hook), ch 2, sl st into valley*, repeat between all petals to create small scallops (12 picots).
Round 18 :
Fasten off and weave in ends. Block each sunflower flat: center should measure roughly 11-13 cm across including petals when using worsted cotton and 4.0mm hook. Adjust gauge by adding/removing petal rounds.
Info :
Make 4 identical sunflower motifs. Lay them out as in photo: a long runner with 4 flowers in a single column separated by leaf diamonds. Blocking now makes the join step predictable and neat.
— Leaf Diamond Motif (make 6 - two between each flower)
Round 1 :
Start with MR, ch 2 (counts as hdc), 11 hdc into ring; join with sl st to top ch-2 (12) - this creates a small circle for the leaf center.
Round 2 :
Ch 1, sc in same st, *ch 3, skip 1 st, sc in next*, repeat around to form 6 ch-3 loops; join (6 loops)
Info :
These loops mark the diamond points. Work loosely enough that later rounds increase smoothly into a diamond shape.
Round 3 :
Working into loops: (in first loop work (2 dc, ch 2, 2 dc) to form a point), sl st to next loop; repeat around for 6 points (6 corners).
Round 4 :
Turn diamond into a fuller leaf by working 1 sc along side of each square wedge, in corner (2 sc), along next side (3 sc), corner (2 sc), top point (3 dc), continue to form diamond shape; total stitch count should be 36 stitches (36).
Info :
Keep counts consistent by placing markers on each corner. The diamond should lay flat and approximate a square-on-point that will sit behind the sunflower.
Round 5 :
Change to darker green for depth. FLO: 1 sc in each st around (36)
Round 6 :
Tile ridges: *ch 1, sc in same st, 1 hdc in next 3 sts, 1 sc in next 2 sts* repeat for all edges to create visual ribs in leaf (36)
Round 7 :
Edge shaping: (sc, inc) x 12 (48)
Round 8 :
1 sc in each st (48)
Info :
Fasten off leaving long tail for joining. Make 6 diamonds (two between each pair of flowers). When placing, orient diamonds so points sit at north/south/east/west positions in layout as per photo.
— Background Lattice/Joining Panel (cream lattice that connects motifs)
Round 1 :
Start with a chain foundation to match runner width: ch 64 (or multiple to equal motif width + seam allowances). Join with sl st to form a narrow band if you prefer working in rounds, or work in rows for a flat panel. For this pattern we do a join-as-you-go so you will make a strip of granny squares later to match motif positions.
Info :
Measure the width of a sunflower plus two leaf diamonds—your chain foundation must equal that width. If your gauge is different, adjust chain length accordingly in multiples of 4 + 2.
Round 2 :
Work a lacy filet-like foundation: ch 3 (counts as dc), *skip 2 ch, (dc, ch 2, dc) in next ch, skip 2 ch, dc in next ch* repeat to end. This creates openwork blocks for visual lightness.
Round 3 :
Turn and repeat the openwork row: ch 3, dc in each dc and (dc,ch2,dc) into chain-2 spaces and dc in dc; work 6 rows total to produce a panel about 3 cm tall for anchor (6 rows).
Info :
Instead of a large flat panel, many crocheters join motifs directly using join-as-you-go technique: attach cream to motif edges and slip stitch into the lattice corners as you attach. This runner uses a granny-lattice join that we will explain below.
Round 4 :
Layout step: Lay out 4 sunflower motifs and 6 leaf diamonds on top of your panel or on blocking surface. Position so there is a small cream openwork square between motifs; measure the spacing and mark seam points with pins.
Info :
Join-as-you-go: You may crochet cream granny squares around each motif edge and then seam them together by slip-stitching adjacent granny spaces. This keeps joins neat and lacy.
— Join-As-You-Go Granny Frames (make 10 frame pieces around motifs)
Round 1 :
With cream yarn, join at the back of a sunflower center (or at a designated join point). ch 3 (counts as dc), 2 dc in same st, *ch 2, skip 2 sts of motif edge, 3 dc in next 2 sts*, repeat to form a small cluster frame around the motif edge; total clusters 8-12 depending on motif circumference.
Round 2 :
Turn and form corners: into each ch-2 space work (3 dc, ch 2, 3 dc) to form granny corner squares. In side clusters work 3 dc. Repeat around to create a square-ish frame that extends the motif into the cream lattice.
Info :
Work frames for every sunflower and diamond. Make sure corner chain-2 spaces align with adjacent motif frames so that join stitches will match up in the final assembly.
Round 3 :
Work 1 sc evenly around the frame to tidy outward edge and prepare for joining. Place markers at every corner chain-2 space (these will be join points).
Info :
At this stage you have many framed motifs. When joining, overlap frames and slip stitch through both frames' corner chain-2 spaces to create continuous openwork rows between motifs.
— Joining Motifs to Form Runner
Round 1 :
Arrange your framed motifs in runner order: Sunflower - Diamond - Sunflower - Diamond - Sunflower - Diamond - Sunflower. Use pins to mark corners that will be joined.
Round 2 :
With cream yarn and right side facing, join at first corner chain-2 of leftmost motif. Working through both motifs' corner ch-2 spaces, sl st across both frames to attach. Work across edges: in side clusters sl st into neighboring frames' sc border to attach evenly. Continue joining each pair of adjacent motifs along the runner center.
Info :
When joining, keep tension loose enough to allow the runner to lie flat but tight enough to prevent gaps. If runner skews, unpick a few join sts and adjust placement.
Round 3 :
After all central joins are completed, fill in the gaps between motifs by working small lace 3-ch sp clusters in remaining open spaces: *(sl st to next loop, ch 3, sl st to opposite loop)* across each gap to emulate the delicate cream lattice in photos.
Info :
Use pins to keep motifs aligned while you add connecting clusters. This step transforms separate pieces into one cohesive runner canvas.
— Outer Border & Scalloped Edge
Round 1 :
With cream, join at any side seam. 1 sc evenly around entire runner per stitch and space (this tidy round establishes the edge). Work 1 sc in each sc and 3 sc in corner chain-2 spaces. Keep counts even across long sides. (approx variable stitch count depending on layout).
Round 2 :
Ch 1, *skip 2 sts, (5 dc) in next st, skip 2 sts, sl st into next st* repeat around to create scallops. At corners, work (3 dc, ch 2, 3 dc) into the corner to turn neatly. Adjust repeat so scallops are evenly spaced across the runner edge.
Info :
Scallop sizing depends on yarn and tension. If scallops are too large, reduce cluster to 3 dc. If too small, increase to 7 dc. Block carefully for smooth scallops.
Round 3 :
Tidy round: sl st into each scallop center and place a small picot or ch-3 loop between scallops for a delicate finish. Fasten off, weave in all ends on the wrong side.
Info :
After finishing the border, lightly steam-block or wet-block the runner to even out stitchwork and bring scallops into shape. Pin scallops gently during blocking for best results.
— Finishing Touches & Notes
Info :
Weave in tails neatly at seams so ends are hidden within the cream lattice. Trim any excess. If your motifs have a slight curl, block flat with pins and a damp cloth until dry. A cotton-based yarn will hold blocking well and give a crisp edge to the lace.
Info :
To lengthen or shorten the runner: add or remove sunflower + diamond units. Each full sunflower unit (sunflower + two diamonds + connecting lattice) measures approximately 15-18 cm. Adjust foundation chain or number of motifs as desired.
Info :
For a firmer table runner, consider adding a thin fabric lining cut to shape and sewn to the back by hand. This helps keep the runner flat and protects delicate stitchwork from wear.
Info :
Care: hand wash in cool water or gentle machine cycle inside a mesh bag, reshape while damp and lay flat to dry. Avoid tumble drying to keep scallops crisp.
This sunflower table runner brings a burst of sunny charm to your home with layered petals, bold centers, and delicate cream lace that ties everything together. Each motif is a satisfying mix of texture and color, perfect for gift giving or a seasonal refresh. Enjoy blocking and assembling — the floral impact is worth every stitch! 🌻🧶✨