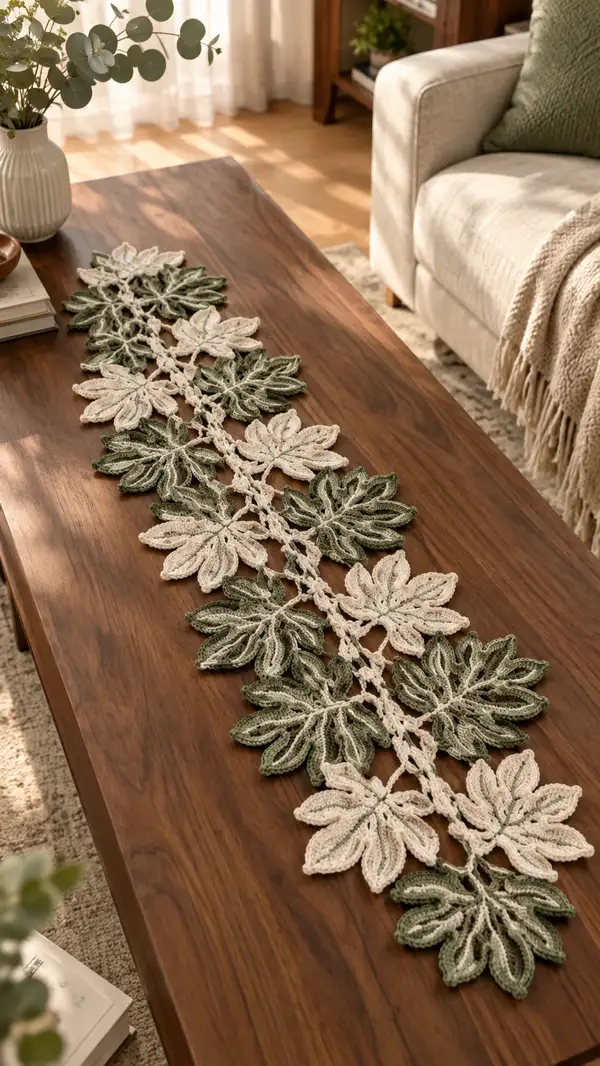
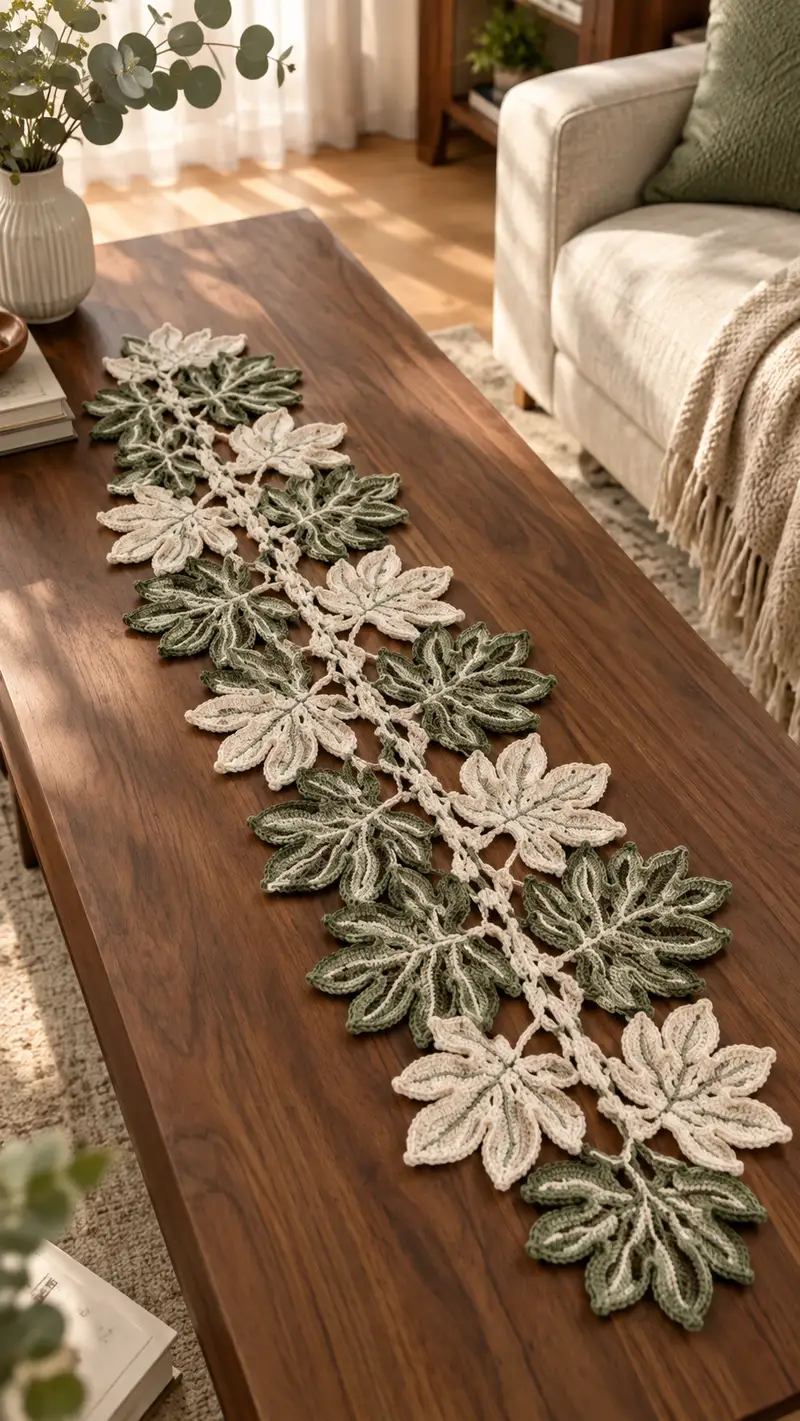
Create a botanical-inspired table runner made from layered crochet leaf motifs in two soft tones—sage green and warm cream. This runner features dimensional, textured leaves joined by a lacy vine-like connector for an airy, handcrafted centerpiece. The finished piece is lightweight, drapey, and perfect for coffee tables, sideboards, or dressers.
Progress Tracker
0% Complete
— Large Leaf Motif (Make 10-12 total, alternating colors) :
Round 1 :
Make a MR, ch1, 6 sc into ring, pull ring closed (6)
Round 2 :
Inc in each st around (12)
Round 3 :
(1 sc, inc) x 6 (18)
Round 4 :
(2 sc, inc) x 6 (24)
Round 5 :
(3 sc, inc) x 6 (30)
Info :
This initial round set creates a small circle that will act as the leaf base. Keep tension even; these rounds form the attachment area for later petal development.
Round 6 :
1 sc in each st (30)
Round 7 :
Ch2, *hdc in next 3 sts, 2 dc in next st; rep from * around (30 hdcs + increases resulting in 36 total shaping points)
Info :
Round 7 sets the first subtle lobes. The pattern above creates repeated lobe bases; count carefully—you will be establishing petal anchors in the next rounds.
Round 8 :
Switch to the longer leaf shaping: *ch6, sl st in 2nd ch from hook and sc in the next 3 chains to create a chain loop; sk 2 sts on base, sl st to next base st; rep around forming 6 long loops (work will total 6 loops)
Round 9 :
Work into each long loop: (sc, hdc, 3 dc, tr, 3 dc, hdc, sc) into loop, sl st to base to finish petal (6 large petals)
Info :
These petals form the main lobes of the large leaf. Keep the petals slightly tapered — the stitch sequence above forms a smooth point. Make sure each petal is the same size; use a stitch marker on the first petal as a mirror for counting.
Round 10 :
Working around the outside of each petal, in the base of the petal edge, *(sc in next 2 sts, inc) across the lower edge to add a scalloped underside (increase count adds 6 sts total per petal); total will be approx 72 (adjust if necessary to maintain symmetry)
Round 11 :
FLO rib detail: *In each scallop along petal edge work (1 sc in next 2 sts, 1 fpdc around corresponding dc from petal body) repeat around; end with sl st (72)
Info :
Front loop and post stitches create raised vein texture. Work fpdc carefully — place hook around post of the stitch two rows below to raise a clear ridge along each petal.
Round 12 :
Along petal center: attach contrasting yarn for a vein if desired. With contrasting yarn, ch1 at tip of petal, sc across 3 sts toward base, working back down with reverse sc to create a visible central vein. Repeat petal-to-petal (this is a decorative optional step)
Round 13 :
Edge refinement: with main color, in BLO around outer edge of petals work (sc, ch2, sc) for picot-like scallops at intervals; place one picot per petal ridge so total picots equals number of petal ridges (approx 18-24 depending on prior increases)
Info :
Picots provide a crisp, lacy finish to each petal. If you prefer a softer edge, substitute (sc, ch1, sc) small loops instead.
Round 14 :
Work a reverse edge: *ch3, sl st in 3rd ch from base to create slight loop, skip 1 st on base, sl st to next; repeat around to form the outer lace (approx 30-36 loops)
Round 15 :
Secure outer loops with a row of sl sts into outer-most stitches to keep loops aligned; this flattens the edge and ensures consistent joining points later (same stitch count as previous stable row)
Round 16 :
Define midrib: Turn the motif and using contrasting or same yarn, work a chain-2 from center to tip and back with sc along both sides to create a raised midrib down each petal; do each petal individually (this is textual; counts vary by petal width)
Info :
Work the midrib on RS so it sits above the petal. Keep stitches snug but not tight to prevent puckering. This step is what makes the leaves appear dimensional in the photo.
Round 17 :
Stabilize base: Join with cream (if working sage leaf) or sage (if working cream leaf) and work 1 rnd sc around the base center to neat the underside (30)
Round 18 :
BLO decoration: 1 sc in each st BLO around base and petal undersides, placing a sl st where petals meet to flatten join (30)
Round 19 :
Optional tiny leaflets: Using small loops in chain spaces between petals, create two mini leaves per gap by working (ch5, work petal cluster as (sc, hdc, dc, hdc, sc) into loop) for an intricate layered look; repeat for each gap
Round 20 :
Finishing round: Fasten off leaving 20-25 cm tail for assembly; weave tail into the base for secure joining. Block motif flat, pinning petal tips gently outward to match photo shape
Info :
Make 10-12 large leaf motifs alternating sage and cream, or adjust number to fit your desired runner length. Blocking will dramatically improve uniformity and ready motifs for join-as-you-go assembly.
— Small Leaf Motif (Make 8-10 total, used as alternating filler leaves) :
Round 1 :
MR, ch1, 6 sc into ring; close ring (6)
Round 2 :
Inc in each st around (12)
Round 3 :
(1 sc, inc) x 6 (18)
Round 4 :
1 sc in each st (18)
Round 5 :
Ch6, into chain make (sc, hdc, 2 dc, hdc, sc) to form a single smaller petal; sl st to next base st and repeat for 6 small petals (work will result in 6 petals)
Info :
Small leaves are flatter and used to tuck between larger motifs. Keep petals shallow to avoid bulk between motifs.
Round 6 :
Edge: 1 sc in each st around including petals; aim for consistent spacing (approx 36)
Round 7 :
FLO rib: 1 sc in each st FLO around to create a slight ridge on top (36)
Round 8 :
Optional vein: with contrasting yarn, sc down center of each petal then back, securing with sl st at base
Round 9 :
Fasten off leaving long tail for joining; block flat slightly convex to tuck under larger leaves
Info :
Make 8-10 small leaves to use as fillers or to alternate in the runner pattern to mirror the photographed layout.
— Center Connector Vine & Lace (Make 1 long centered strip; length adjustable) :
Round 1 :
With cream yarn, ch 120 (or ch length longer for desired runner length). This ch forms the backbone for the vine; count and adjust to match the number of leaf attachment points you need (ch120 yields approx 10-12 leaf attachment locations spaced every 10 chains)
Info :
Measure chain across your workspace to visualize final placement of leaves before working further. You can add or subtract chains in multiples of 10 to keep spacing consistent.
Round 2 :
Starting in 2nd ch from hook, sc in each ch to end (119)
Round 3 :
Turn, ch3 (counts as first dc), dc in each st across to end; this creates a raised ridge for vine texture (119)
Round 4 :
Turn, ch1, sc in each st BLO across to create a neat underside (119)
Info :
Work the vine in a small width so it remains flexible. Use BLO and dc rows to create subtle ribbing that mimics a braided stem.
Round 5 :
Decorative lacing row: *ch4, skip 4 sts, sl st in next, rep across to create lacy loop spaces for joining leaves (approx 24-26 loops depending on chain length)
Round 6 :
Turn, in each loop make (ch6, sl st into loop center) to form connector loops that will be used to hand-sew or crochet-join leaf bases. Secure with sl st to vine ridge between loops (approx 24)
Info :
These connector loops are the primary join points. When placing leaves, align the base center of each leaf over a loop and either sew through the loop or use a few sl sts to anchor the leaf.
Round 7 :
Edge reinforcement: sc around top and bottom edges of the vine (2 rows) to give stability for sewing motifs. Work 1 sc between loops and 2 sc in loop anchor points (approx 130 after reinforcement)
Round 8 :
Decorative posts: With contrast color, work fpdc and bpdc alternately along vine ridge to evoke corded appearance (119 ridge stitches, alternate fpdc/bpdc across length)
Round 9 :
Optional tassel anchors: Where you plan extra leaves, add a small cluster (ch6, sc back toward base) to create a basket-like anchor for leaf base
Round 10 :
Fasten off leaving 30-40 cm tail at both ends to weave into the final edge; block the vine flat keeping loops open for attachment
Info :
Make this connector long enough to accommodate all leaf motifs plus 5-10 cm extra at ends for finishing lace corners like the image shows. Blocking here helps keep loops properly spaced for join-as-you-go.
— Join-As-You-Go Method & Joining Rounds :
Round 1 :
Lay out vine and leaves on blocking surface in the order desired, alternating sage and cream large leaves with small leaves as filler to match the photographed staggered pattern. Mark each intended attachment point on vine with a pin.
Info :
Carefully plan orientation: petal tips should alternate direction to create the staggered, overlapping botanical look in the photo. Take a photograph of your layout before you start joining to preserve placement.
Round 2 :
Position first large leaf so its base center aligns with the first loop on the vine. From the RS of the leaf, use the long tail left at finishing to whip-stitch through the vine loop and the base of leaf with a mattress or sl st-like stitch around the base: go through 6-8 base stitches to secure (approx 8-12 stitches used to anchor)
Round 3 :
After sewing a leaf, secure by working 3 sl sts through vine ridge directly on top of the sewn tail to lock it; weave the remaining tail inside leaf underside and trim
Info :
Alternative: Crochet-join by placing leaf base over loop and working 6 sc through loop and leaf base at once to create a neater, invisible join that also keeps the leaf flexible.
Round 4 :
For small leaves use 4 anchoring stitches, matching stitch placement so small leaf edges tuck under adjacent large leaves; repeat anchoring along vine (work sequentially for total of 10-14 joins)
Round 5 :
As you join, periodically flip runner to check RS/WS and ensure petals overlap as desired. Use pins to hold pieces while you work across a run of 3-4 leaves, then fasten off and weave tails before moving on
Round 6 :
Where two leaves meet at adjacent loops, overlap by approx 6-8 mm and either whip-stitch or sl st through overlapped petal edges to keep seam invisible. Aim for mirrored overlaps on both sides of vine.
Info :
Making the joins slightly loose gives the runner a gentle three-dimensionality. Do not pull joins tight or leaves will lay flat and lose texture.
Round 7 :
Mid-run reinforcement: After every 4-5 leaves, work a decorative chain bridge between vine and leaf tips to echo the lacy center—ch8, sl st to selected petal tip, ch8 back to vine and sl st; repeat as desired for visual interest
Round 8 :
Finish all joins along the length. Block the entire assembly lightly once joining is complete to encourage consistent drape and layout.
— Outer Edge Lace & Finishing Border :
Round 1 :
With 3.25 mm hook and cream yarn, join at one runner end and sc evenly around the entire assembled runner edges including around petal tips and vine edges. Aim for 1 sc per approximately 3-4 mm around curves; count will vary widely but expect roughly 300-380 sc around full runner (adjust to maintain even spacing)
Info :
Work slowly around intricate petal tips. Use extra sc in deeper curves and fewer where edges are straight to maintain even tension and avoid ruffling.
Round 2 :
Ch3, *sk 1 sc, (dc, ch2, dc) in next sc (creates shell), sk1 sc, sl st in next; rep across entire edge to make repeating shell lace; end with sl st to first sc
Round 3 :
Turn, in each shell work (sc, picot (ch3 sl st into first ch), sc) so each shell has a central picot; repeat along edge to add delicate points
Info :
If shell spacing doesn't align perfectly with petal tips, soften by removing a shell or adding a short row (sl st to next sc) to re-balance. Symmetry matters for finished look.
Round 4 :
One more decorative row: sl st into each picot and work a small loop (ch4, sl st into picot) to create airy points that echo leaf veins in the center (repeat across)
Round 5 :
Fasten off, carefully weave in all ends along underside of runner. Use a yarn needle to bury tails through several stitches to secure.
Info :
For an extra crisp border, starch or lightly spray with fabric stiffener once fully blocked and dried. This helps the lace hold its shape on a table surface.
— Alternate Finishing: Corner Rosettes & End Treatments :
Round 1 :
At both ends of the vine, create a small rosette: MR, ch1, 8 sc, sl st to close, then in each st around work (ch4, sl st) to create loops; fasten and sew to vine ends to match photo styling of clustered ends (this uses 8-12 loops per rosette)
Round 2 :
Embellish rosettes with 3 small leaves each using the small leaf recipe but only creating 3 petals; sew around rosette edge and secure
Info :
End rosettes give a polished finish and echo the clustered leaf look in the image. Make rosettes in cream for continuity with vine color.
— Blocking, Pressing & Final Details :
Round 1 :
Pin the runner flat on blocking mat using the desired final shape—fan out leaf tips slightly, set overlapping leaves to match your layout. Steam gently with iron on low (do not press iron directly; use cloth) or spray with water and let dry overnight.
Round 2 :
Check joins for any gaps. Reinforce weak joins with a few invisible mattress stitches on the underside; do not over-stitch as you want delicate movement.
Info :
Final blocking defines the lacy details and ensures the runner sits evenly on a table. Once dry, trim stray fibers and give the runner a final light spray of starch if a stiffer look is desired.
Round 3 :
Photograph your finished runner on a flat wooden table or linen surface to capture the texture and color contrasts. Enjoy styling options: center runner, offset on console, or layered on a larger tablecloth.
This elegant leaf lace runner turns a simple coffee table into a curated vignette; every leaf and vein was designed to capture natural movement and handcrafted charm. Finishing the joins and blocking is the satisfying final step when your runner transforms into a delicate, botanical centerpiece. Display it solo or layer it with linens for a curated tabletop look—your home will have that warm handmade touch. 🧶🌿