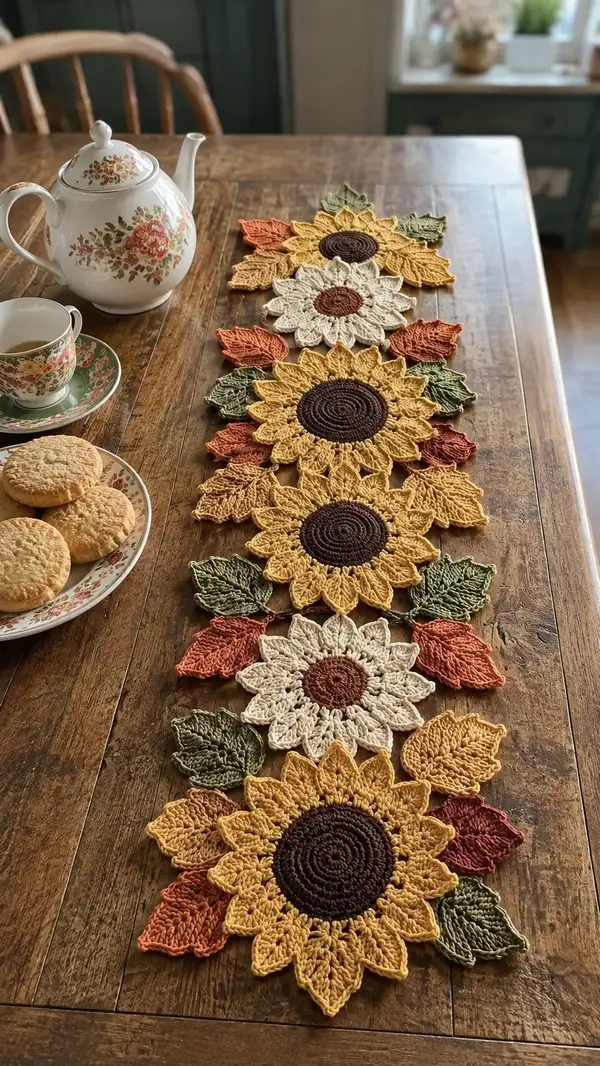
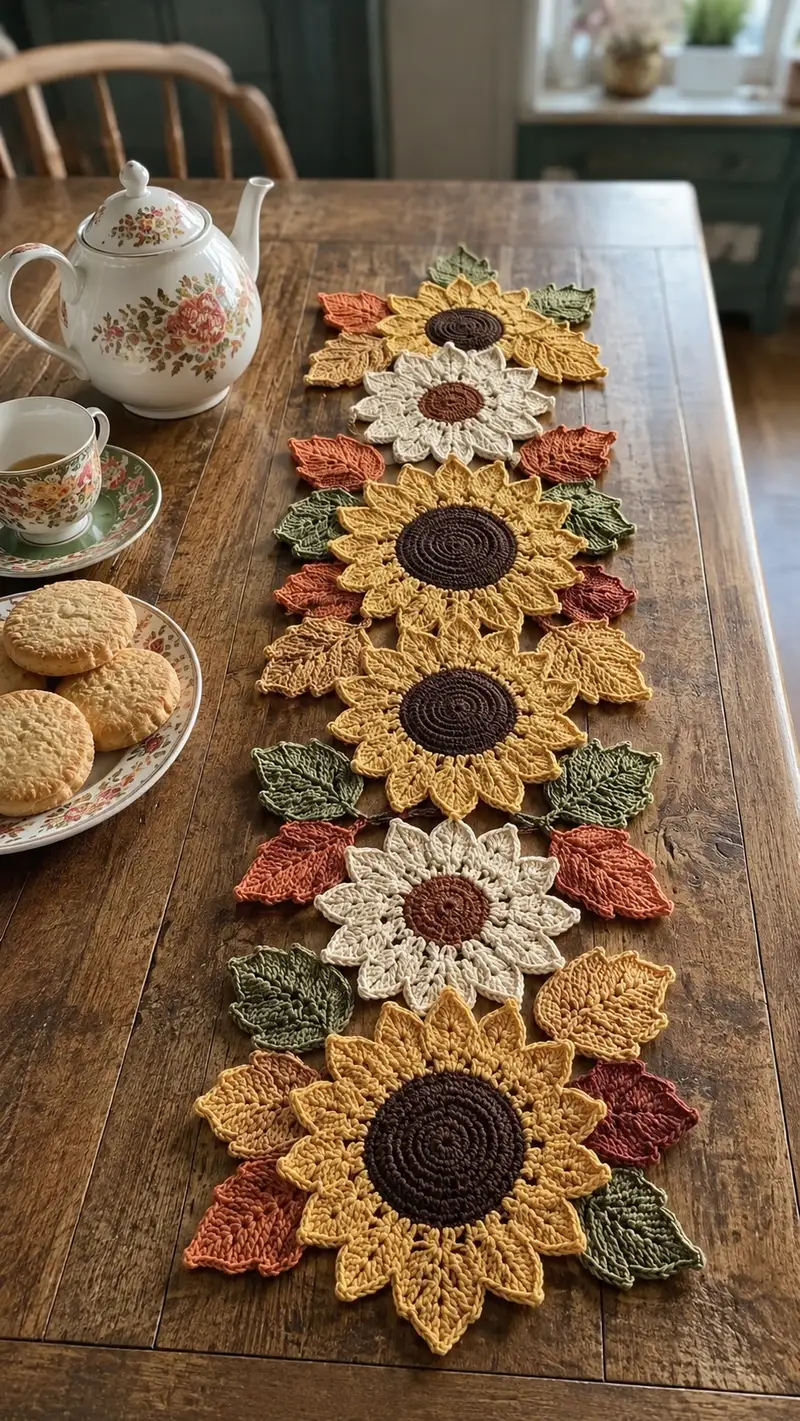
Bring warm, rustic charm to your table with this sunflower table runner pattern. The design features intricately textured sunflower motifs with layered petals and detailed leaves in autumn tones (mustard, cream, rust, olive and deep brown). Motifs are crocheted separately and joined to create a long, elegant runner—perfect for tea time or seasonal decor. Detailed stitch-by-stitch instructions and assembly notes guide you through every round and join.
Progress Tracker
0% Complete
— Notes & Gauge :
Info :
Gauge is not critical for motif-based table runner but each sunflower center should measure approximately 11-13cm (4.5-5") across when using worsted cotton and 3.5mm hook. Keep tension consistent so petals are even and motifs lie flat. Block motifs lightly to flatten and shape edges before joining.
Info :
Colors used in the sample: Deep Brown (Center), Mustard/Golden Yellow (Large Sunflower Petals), Cream/Ivory (Small Sunflower Petals), Olive Green (Leaves), Rust/Autumn Orange (Accent Leaves). You can substitute DK weight yarn—reduce hook by one size and expect smaller motifs.
— Sunflower Center (Make 5 for runner) :
Round 3 :
(1 sc, inc) x 6 (18)
Round 4 :
(2 sc, inc) x 6 (24)
Round 5 :
(3 sc, inc) x 6 (30)
Round 6 :
(4 sc, inc) x 6 (36)
Round 7 :
(5 sc, inc) x 6 (42)
Round 8 :
(6 sc, inc) x 6 (48)
Round 9 :
(7 sc, inc) x 6 (54)
Round 10 :
(8 sc, inc) x 6 (60)
Round 11-12 :
1 sc in each st (60)
Info :
Work in continuous spiral or join rounds with sl st then ch1 depending on preference. The center should be a dense, flat disk. If using continuous rounds, keep a marker in first stitch and move it each round. Weave in a tail for later sewing if making join-as-you-go.
Round 13 :
1 sc in each st BLO (60) — this creates a small ridge to anchor petals (60)
Info :
After Round 13 you will begin attaching petals to the back ridge created. Ensure center lies flat; if the center cups, add 1-2 rounds of sc to increase flatness, or switch to a slightly larger hook for centers only.
— Large Petal Base & Petal Cluster (12 petals per sunflower) :
Info :
We will work 12 petals around the center. Each petal uses a 5-stitch anchor from the center ridge (Round 13). Mark the first stitch of a petal anchor and divide 60 sts by 12 = 5 stitches per petal anchor.
Round 1 (Petal Foundation) :
*Ch 1, sc in next 2 sts, ch 4, skip 3 sts, sc in next 0/1 st to anchor* repeat around to form 12 ch-4 loops as petal foundations. Adjust spacing so you have 12 loop anchors evenly spaced (12 loops)
Info :
Alternative foundation: Instead of ch-4 loops you can sc into 5 successive stitches and treat those 5 stitches as the anchor for the petal cluster. The ch loops make airy petals; anchored stitches give denser petals.
Petal Cluster Round A :
Work petals into each ch-4 loop as follows: (sc, hdc, 3 dc, tr, 3 dc, hdc, sc) into loop, sl st to next anchor (this forms a tall petal) — repeat 12 times (12 petals)
Info :
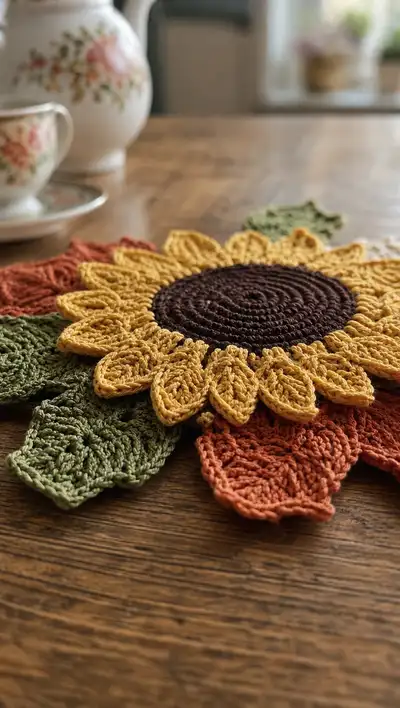
Use post stitches to add raised veining next. Work petals on the right side of the center disk so petals radiate outward. Keep petals tall but stable by maintaining consistent stitch height.
Petal Cluster Round B (Veining and Shaping) :
Into each petal center, work *ch 2, fpdc around the middle dc cluster from previous round on petal front, bpdc around petal back for contrast, ch 1, sl st into base to secure* — repeat for each petal (12 veined petals)
Info :
FPdc/BPdc create visible veins; work them into the post of the center dc of the petal so the 'vein' runs down the middle of the petal. Keep loops small and tidy to avoid floppy tips.
Petal Round C (Edge Finish) :
Around each petal edge, work *sc in first st, hdc in next, picot (ch 3, sl st into top of hdc) for a slightly scalloped edge, hdc, sc* across the curved outer edge of the petal to form a neat tip (repeat across each petal) — finish with sl st to join (petal edges completed)
Info :
At the end of petal finishing rounds, fasten off and weave in ends. Repeat the center + petal sequence to make five large sunflower motifs. For alternating small cream sunflowers use the same center rounds but reduce petals to 10 and shorten stitches in Petal Cluster Round A (use (sc, hdc, 2 dc, tr, 2 dc, hdc, sc) pattern) so the small flower reads as delicate.
— Alternate Small Sunflower (Make 2) :
Round 3 :
(1 sc, inc) x 6 (18)
Round 4 :
(2 sc, inc) x 6 (24)
Round 5 :
1 sc in each st (24)
Info :
Change to cream yarn if making the small flowers. Work one round of sc BLO to create a slight ridge for 10 petals: ch spacing = divide 24 by 10 = 2.4; use alternating anchors: (sc, ch2) across to create 10 loops and finish petal clusters as described but shortened.
Petal Foundation :
*Ch 1, sc in next st, ch 3, skip next st* repeat to form 10 ch-3 loops (10 loops)
Petal Cluster :
Into each ch-3 loop: (sc, hdc, 2 dc, hdc, sc). Fasten off and weave in ends (10 smaller petals)
Info :
Small sunflowers are used as alternating motifs in the runner to break up repeated large sunflowers and add visual contrast. Block lightly to shape petals into a slightly cupped form if desired.
— Leaf Motif (Make 18-24 assorted leaves) :
Info :
Leaves come in two sizes and two colors (olive and rust). The pattern below makes a medium leaf; for a large leaf add extra rounds of dc along the outer edge. Make enough leaves to fill gaps between sunflowers—sample uses three leaves around each sunflower cluster.
Round 1 :
Ch 12, sc in 2nd ch from hook, hdc in next, dc in next 3, tr in next 2 (center tip), dc in next 3, hdc in next, sc in last (works one side) — now work back along opposite side: sc in next, hdc, dc x3, tr x2, dc x3, hdc, sc. Sl st to join to top of chain to produce a symmetrical leaf (approx 22-24 sts)
Round 2 :
Ch1, 1 sc in same st, (hdc, dc) up to tip where you work (3 dc, picot: ch2 sl st to top), then dc down other side with (dc, hdc, sc) to end. Fasten off. (Leaf edge formed)
Round 3 (Vein) :
Reattach yarn at leaf base, ch1, sc in base, ch1, fpdc along center chain from base to tip creating a raised ridge: work fpdc into the posts along center ch3/4 at even intervals (approx 6-8 fpdc). Sl st to base and fasten off. Weave ends. (Raised vein)
Info :
For a more rigid leaf, use a smaller hook (3.25mm) or add one round of sc around leaf edge. For large leaves ch 16 and add extra dc on each side before tip (creates longer leaf). Make leaves flat by blocking and pinning to shape while damp.
— Decorative Joining Motifs (Optional small connectors) :
Round 3 :
1 sc in each st (12)
Info :
These small circles can sit between petals and act as extra anchor points when sewing motifs together. Make 6-10 as needed.
— Join-As-You-Go & Layout :
Info :
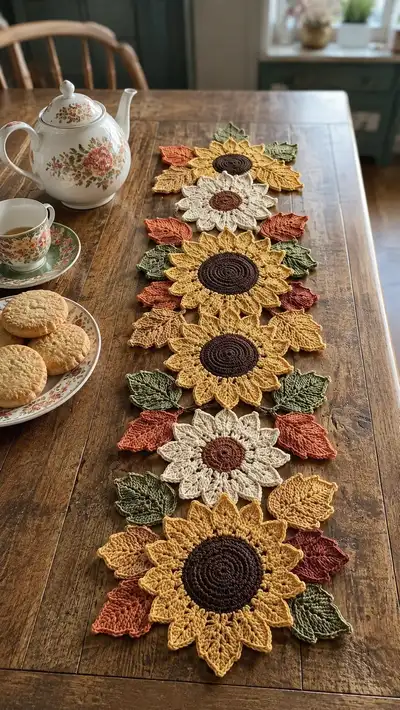
Layout your motifs on a flat surface matching the photo: the sample arranges motifs in a long linear strip: Large sunflower, small cream sunflower, large sunflower, small cream, large sunflower, etc., with leaves filling gaps. The runner photographed shows five large sunflowers with two small cream flowers interspersed and leaves layered around each motif cluster.
Info :
Choose join method: a) Join-as-you-go using slip stitches where petals overlap by connecting petal bases to adjacent motif edges, or b) Sew motifs together using a yarn needle for a more secure, invisible seam. I recommend pinning and sewing for table runners that will be handled often.
Join Method A (Join-as-you-go - slip stitch) :
Place first sunflower right-side up. Lay second motif so petals overlap slightly. With right sides together, insert hook through petal base stitch on Motif A and matching base stitch on Motif B, yo and sl st to join; continue joining across 6-8 anchor points around overlap. Fasten off and weave in ends. Repeat to join entire row.
Join Method B (Sewing) :
Pin motifs in planned layout. Using matching yarn and yarn needle, work small whip stitch or mattress stitch through BLo of petal base and the corresponding st of adjacent motif, taking care to hide knots. Sew in a few invisible back-and-forth passes at each anchor for stability. Tie off and weave ends well.
Info :
When sewing, stitch through the fabric where two motifs overlap, catching only a few plies of yarn so the join is flexible and unobtrusive. Use blocking and pins to ensure motifs remain flat and evenly spaced during joining.
— Edging & Scallop Border (Full Runner) :
Info :
After joining all motifs and leaves into the runner layout, we will add a decorative scalloped edge that follows the outer petal shapes and leaves to create a cohesive finished border.
Border Round 1 :
With yarn color chosen for edging (mustard for petals and olive for leaf edges or a single neutral), join yarn at a discreet point using sl st. Work 1 sc evenly around entire outer edge of runner, working 2 sc around points where leaves or petals project to keep the edge smooth. Keep stitches even—approx 1 sc every 3-4 mm. (This round will vary in stitch count based on your runner width)
Info :
Use small hook (3.25mm) if your sc is too loose. This round evens out join seams and prepares for scallops. Count stitches around and divide by 12 to plan scallop placement, or work scallops around each exposed petal and leaf tip the way described below.
Border Round 2 (Scallops around Petals/Leaves) :
*In a grouping of 5-7 sc along a petal tip: (sc, hdc, 3 dc, hdc, sc)* create a scallop. Skip 1-2 sc between scallops on smoother edges. For leaf tips, use (sc, hdc, 2 dc, hdc, sc) for smaller scallops. Repeat around entire edge to form continuous scalloped border. Fasten off and weave in ends.
Info :
If the runner will see heavy use, consider adding a back layer of fabric (thin felt) sewn to the underside to protect your table. Alternatively place pads under motifs at stress points when in use.
— Finishing Touches & Blocking :
Info :
Wet block or steam-block each motif pinned to exact shape and size before joining to make joining easier and to ensure a flat runner. For cotton, a light steam and pinning on a towel will set shape. Allow to dry completely. After blocking, weave in all yarn ends and trim. Optionally, handstitch a lightweight felt backing to underside of runner for protection and stability.
Info :
Trim any fuzz or stray fibers and press lightly from the back if necessary. Use fabric-safe adhesive for stubborn ends before weaving in for machine-washable durability.
— Tips for Successful Motifs :
Info :
Always count anchors when making petals: 60 center stitches / 12 petals = 5 anchoring stitches per petal. For the smaller motif: 24 center stitches / 10 petals ≈ 2-3 stitches per petal anchor—adjust spacing as needed. Use stitch markers to denote the start of each petal and each motif’s top center to keep orientation consistent.
Info :
Make one full motif as a test to ensure your petals and leaves lay flat and match size expectations. Adjust hook size or stitch pattern before making the full set.
— Optional Variations :
Info :
Use tonal yarns for petals (ombre or hand-dyed) to give a gradient petal appearance. Add a small bead or french knot embroidery in the center for a textured seed look. Create a full-width table mat by crocheting additional rows of small connector motifs between sunflower rows for a wider runner.
Info :
Produce more or fewer sunflowers to match table length. Each large sunflower + spacing module in this layout uses roughly 12-16 cm of length; estimate runner length by multiplying modules and adding seam allowances for joins.
— Stitch Count Reference & Troubleshooting :
Info :
If centers look ruffled, you may have added too many increases—unravel to the previous even round and rework the increase round with one fewer increase set. If petals cup upward, block them flat under a damp towel and pin until dry. Loose petals can be reinforced by adding a BLO round at the base before forming foundation loops.
Info :
If a leaf seems longer than others, measure chain foundation and trim by unraveling and reworking with fewer chains (e.g., ch10 instead of ch12 for medium leaf). Keep leaf sizes proportional around each sunflower cluster for a natural look.
— Approximate Round Totals (for reference) :
Info :
Large sunflower center rounds (13 rounds) + petal rounds (3 rounds) = 16 rounds per large sunflower. For 5 large sunflowers = 80 rounds. Small sunflowers: 6 rounds + 2 petal rounds = 8 rounds each; 2 small = 16 rounds. Leaves: 3 rounds average each; for 18 leaves = 54 rounds. Border and joins + finishing rounds approx 10-20 rounds. Total combined rounds across motifs, leaves and border approx 160-170 rounds depending on optional connector motifs and border complexity.
Info :
This pattern's rounds are counted as discrete steps for clarity; your actual working rounds may be joined or combined depending on your preference and join method. Keep a notepad to track rounds for each motif type you make to ensure consistency.
This sunflower table runner design combines warm autumn colors and beautifully textured stitches to create an inviting centerpiece for your table. Each sunflower and leaf is a small accomplishment that comes together into an eye-catching long runner you can be proud of. The pattern is versatile—make it longer, shorter, or wider to suit your space and style. Happy crocheting and enjoy your cozy, handmade centerpiece! 🌻🧶