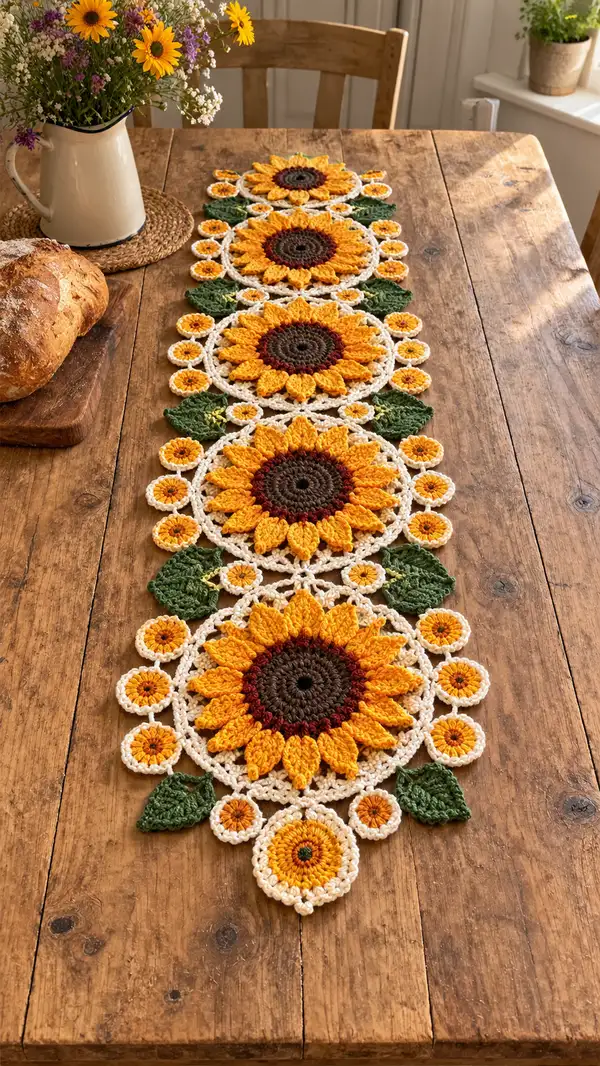
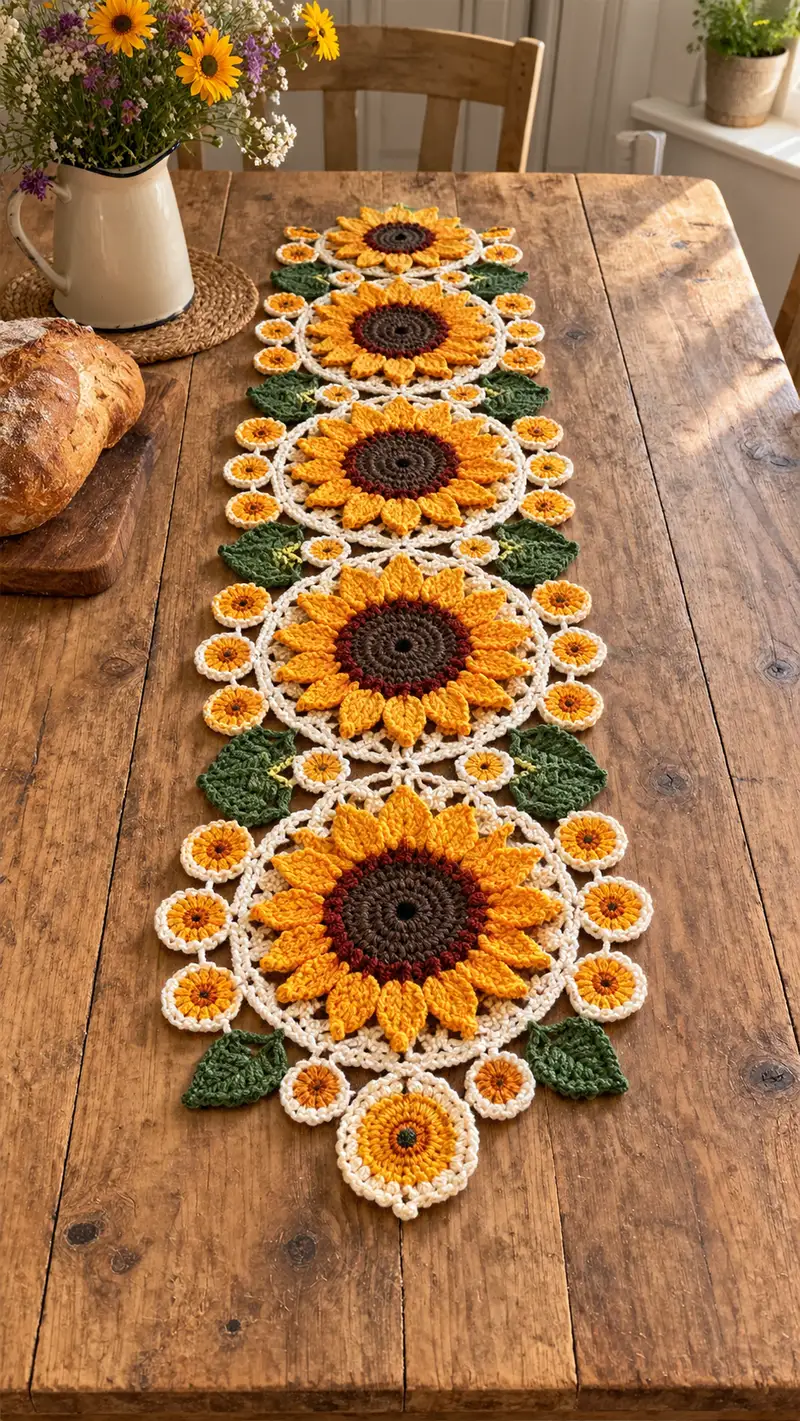
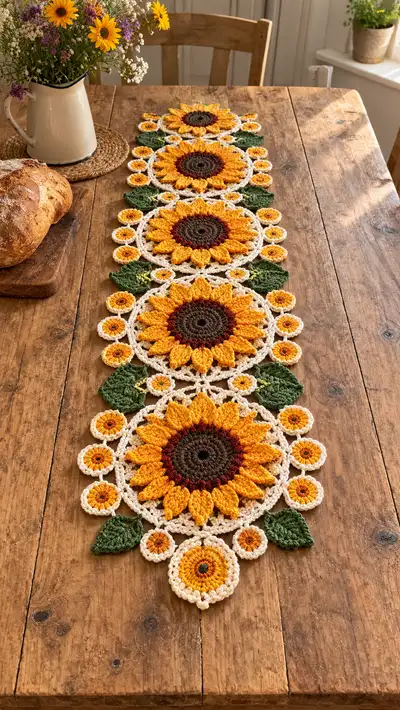
A warm, vintage-inspired lace table runner featuring oversized sunflower medallions linked by delicate cream lace, tiny daisy rounds and leafy accents. Rich sunflower centers in deep brown and rust are surrounded by textured golden petals, framed with an airy cream lace and green leaves for contrast. This long runner creates a bright, welcoming focal point on any wooden table and is perfect for seasonal or everyday decor.
Progress Tracker
0% Complete
— Materials & Notes :
Info :
Gauge is not critical for a table runner but affects motif size. Using recommended yarns and a 3.5mm hook the large sunflower medallion measures about 24-26cm across. Work tightly enough for neat petals but not so tight that texture is lost. The pattern is written in rounds and uses multiple color changes; weave ends on the wrong side or fasten off between colors.
— Sunflower Medallion (Make 4 or desired count) :
Round 1 :
With DARK BROWN. 6 sc in magic ring (6)
Round 3 :
(1 sc, 1 inc) x 6 (18)
Round 4 :
(2 sc, 1 inc) x 6 (24)
Round 5 :
(3 sc, 1 inc) x 6 (30)
Round 6 :
(4 sc, 1 inc) x 6 (36)
Round 7 :
(5 sc, 1 inc) x 6 (42)
Round 8 :
(6 sc, 1 inc) x 6 (48)
Info :
Keep center rounds worked evenly; the final 48-stitch round provides a stable base for the decorative rust ring and the petal placement. Place a marker at the first stitch of round 8 to keep track when forming petals.
Round 9 :
1 sc in each st (48)
Round 10 :
Change to RUST/BRICK RED. 1 sc in each st (48)
Info :
Change colors by completing the last pull-through of the previous round with the new color to avoid gaps. Fasten yarn tail toward the wrong side and weave later.
Round 11 :
Change to SUNFLOWER YELLOW. 1 sc in each st (48). Mark positions for 12 petals by placing removable markers every 4th stitch starting from any chosen stitch (48 base positions = 12 petals).
Info :
Petal markers will help maintain evenly spaced petals. Each petal will be built over a single base stitch but use surrounding stitches as anchors; keeping markers prevents drift.
Round 12 :
(3 sc, Petal) x 12 (48) — Petal worked in following way: into the next marked stitch work (ch1, 1 hdc, 2 dc, 1 tr, 2 dc, 1 hdc, ch1) all into same stitch and secure with sl st in next base stitch. Note: the 'Petal' adds height but does not change base stitch count.
Info :
Petal stitch described is elongated cluster/puff style worked in one base stitch. Keep loops even and don't pull too tightly so petals sit plump. Work petals so the center tr (treble) produces a peak for realistic shaping.
Round 13 :
1 sc in each base stitch around, working behind the petals (48). Use BLO if you want a subtle ridge behind petals (1 sc in each st BLO) to set petals forward.
Round 14 :
Change to CREAM/IVORY. Join with sl st to any sc between two petals. *(ch6, sl st in next sc) repeat around to create 12 chain arches. After last arch, sl st to join. (12 arches over 48 base stitches)
Info :
Create chain arches deliberately sized to frame petals. Count 4 base sts per arch region (3 sc then a petal) so arches align between petals. These arches form the decorative lace ring that will be connected to adjacent medallions later.
Round 15 :
Into each chain-6 arch: (sl st, ch1, 3 dc, ch1, sl st) into the center of arch to make small shell clusters; do this into each of the 12 arches (12 shell clusters). Maintain base st count (48 anchor points remain unchanged).
Round 16 :
Working in cream: *ch3, sc into next sl st between shells* repeat 12 times to create small picot-type loops between shells. Sl st to join. (12 loops)
Info :
This decorative crown helps the medallion read as a single lace circle when multiple motifs are joined. Keep tension even — too tight and connectors will pull in, too loose and they will sag.
Round 17 :
Switch to SUNFLOWER YELLOW; working behind petals again, place one round of crab stitch (reverse sc) around petals working into FLO of the petal bases to give subtle edging and a slightly raised petal outline. Work 1 reverse sc in each base st region corresponding to petals and small gaps (48).
Round 18 :
Return to CREAM. Join in any chain-loop; *(ch5, sl st into center top of each tiny shell from Round 15) x 12 to stiffen and create small connecting points between medallions. Sl st to join. (12 connecting points)
Info :
At this stage the sunflower medallion is built: deep center, rust ring, 12 textured petals and a cream lace crown of arches and shells. Make 4 identical medallions for the runner pictured or more if longer runner is desired.
— Small Daisy Medallion (Make many for connector points) :
Round 1 :
With SUNFLOWER YELLOW. 6 sc in magic ring (6)
Round 3 :
Change to RUST for inner accent. 1 sc in each st (12)
Round 4 :
Change to CREAM. *(ch3, 3 dc cluster in next st, ch3, sl st in next st) around to create ruffled edging; join. This creates 12 small ruffles around the tiny daisy perimeter (12).
Round 5 :
Optional: add a single round of sc around in cream to tidy edge (12). Fasten off and weave ends.
Info :
Small daisies are used as fillers between large motifs and stitched into the chain arches created on the sunflower medallion. Make approximately 20-24 small daisies for a four-motif runner; adjust quantity based on spacing preference.
— Leaf (Make 8-12) :
Round 1 :
With MEDIUM GREEN. 6 sc in magic ring (6)
Round 3 :
(1 sc, 1 inc) x 6 (18)
Round 4 :
Working along one side only to shape a leaf: ch1, turn, sc in next 9 sts, ch3, turn (working along edge) to form tip; now work down other side with sc decreasing to form point. (counts will vary; leaf is shaped triangle) Approx final count anchoring back at base (18)
Round 5 :
Using BLO on last round to create central rib: With a contrasting slightly darker green, work 1 sc in each st BLO across the central ridge to create vein texture (18).
Info :
Leaves on the pictured runner are stylized and slightly cupped; use gentle blocking to give them shape. Make sure leaves are symmetrical and pointed; block damp and pin into shape then steam lightly to set.
Round 6 :
Edge the leaf in MEDIUM GREEN with a round of sc around the outer edge, placing 2 sc in curved sections to round the shape and 1 sc in tighter corners. Fasten off and weave in ends.
— Lace Connector / Joining Ring (Make 3 between each sunflower) :
Round 1 :
With CREAM. 8 sc in magic ring (8)
Round 3 :
(1 sc, 1 inc) x 8 (24)
Round 4 :
(2 sc, 1 inc) x 8 (32)
Round 5 :
1 sc in each st (32)
Info :
These intermediary rings are slightly smaller than sunflower crowns so they fit between petals and daisies; they are worked flat and then decorated with arches and picots to create lace joins.
Round 6 :
*ch6, skip 2 sc, sl st in next sc* repeat around to create 8 chain arches (8)
Round 7 :
Into each chain-6 arch: (sl st, ch1, 5 dc cluster, ch1, sl st) to make 8 small fans around ring. Join with sl st.
Round 8 :
*ch4, sc into the base between fans* repeat 8 times to create small loops used to stitch daisies and to join to sunflower crowns (8)
Info :
When assembling, the small daisies are sl st or sewn into these loops; leave tails long to whip-stitch daisies closed for extra security.
Round 9 :
Optional slip-stitch round around outer edge to strengthen join points; 1 sl st in each sc and loop (approx 32). Fasten off and weave ends.
— Decorative Small Round Connector (tiny sunburst, make many) :
Round 1 :
With SUNFLOWER YELLOW. ch4, sl st to form small loop. Work 8 sc into loop (8)
Round 2 :
1 sc in each st (8)
Round 3 :
Change to CREAM. *(ch3, sl st in next st) around to make 8 small loops. Sl st to join. Fasten off and weave ends (8)
Info :
These tiny rounds are used to fill spaces between large medallions; they can be sewn into the cream chain loops on the large medallions to add visual continuity.
— Extended Lace Edge & Finishing Rounds :
Round 1 :
With CREAM. Join to any outer chain loop on assembled runner; work 1 sc in each loop and chain spaces along the full runner length to create a tidy inner edge (stitch count depends on assembly layout).
Round 2 :
*ch5, sl st into every 4th sc to create a scalloped outer border along both sides of the runner. Repeat along entire length.*
Round 3 :
Along each scallop: (sl st, ch1, 5 dc, ch1, sl st) to form shells. Continue for each scallop to create a consistent border. Fasten off and weave ends.
Info :
Edge rounds adapt to the assembled width; count scallops to ensure symmetrical ends. For the pointed ends shown in the picture, shape final scallops into a triangle by working extra shells and decreasing the chain length progressively toward the runner tip.
— Joining & Assembly (Join-as-you-go with sewing for extra security) :
Info :
Layout your medallions on a blocking board or flat table in the order desired. Pin them in place with all lace crowns facing up. Use the cream chain loops and arches as the primary joining points. Plan where daisies and leaves will appear — typically each side between two large medallions takes two small daisies and one leaf.
Round 1 :
Join first two sunflower crowns: With CREAM, on the first medallion, join yarn in a chain-loop that corresponds to connection point A; ch3, sl st into the chain-loop of the second medallion to form a bridge, ch3, sl st back into first medallion loop. Repeat for each connection point around both medallions (usually 6-8 joins per side depending on arch count).
Info :
For stable joining, use a yarn needle to sew through adjacent chain loops with whip stitch after creating the initial chain bridges. This prevents stretch and maintains lace alignment.
Round 2 :
Sew small daisies into leftover chain loops between medallions using matching cream yarn; secure with hidden stitches through the round base and around loops. Add leaves by aligning their bases under petals and whip-stitching down through the cream arch and petal base for natural attachment.
Info :
When joining motifs ensure petals do not become distorted — sew only into chain loops and inner shells rather than pulling through the petal stitches themselves. Block again after joining to set the shape and open the lace slightly.
— Blocking & Final Touches :
Info :
Wet-block or steam-block motifs to flatten petals and open lace rings. Pin motifs to exact final dimensions and leave to dry fully before removing pins. Lightly steam-block leaves to create gentle cupping. Weave in all ends on the wrong side and trim excess yarn.
Round 1 :
Optional: Add small embroidered brown dots in center with fine yarn and blunt tapestry needle to emphasize seeds — work tiny French-knot style knots or small straight stitches radiating from center.
Info :
Final runner length: pictured runner uses 4 large medallions with daisies and leaves and measures approximately 120-130cm (47-51 in). Add or remove medallions to suit your table length.
This sunflower lace table runner brings warm, rustic charm to any table — each medallion is a miniature piece of garden art. Working through the layered petals, delicate lace arches and tiny daisy connectors is deeply satisfying and creates a runner that feels vintage and handmade. Block carefully and join with love — your home will glow with these sunshiny motifs! 🌻🧶