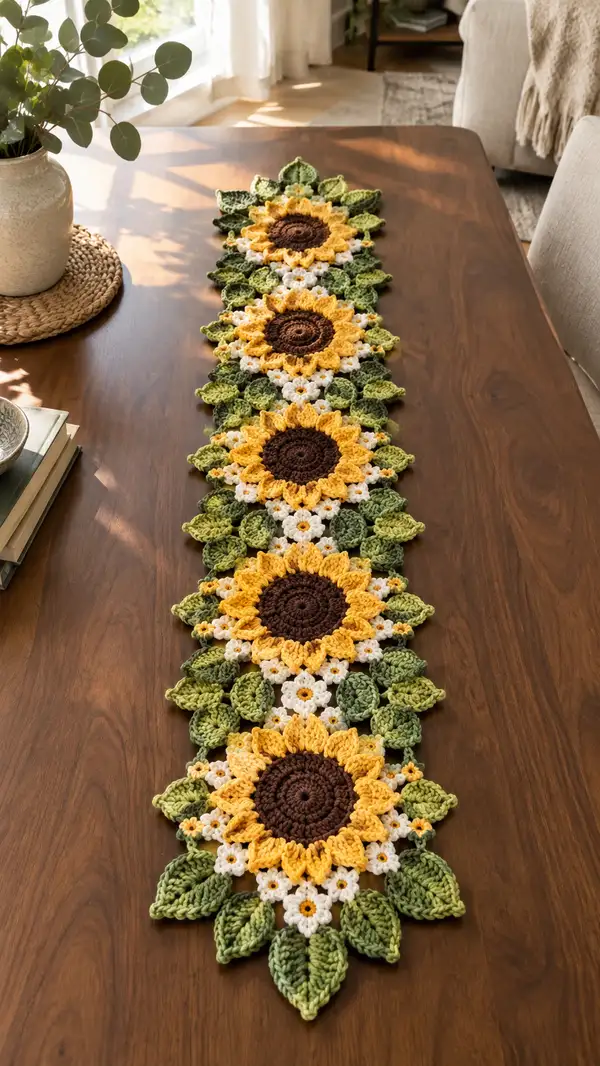
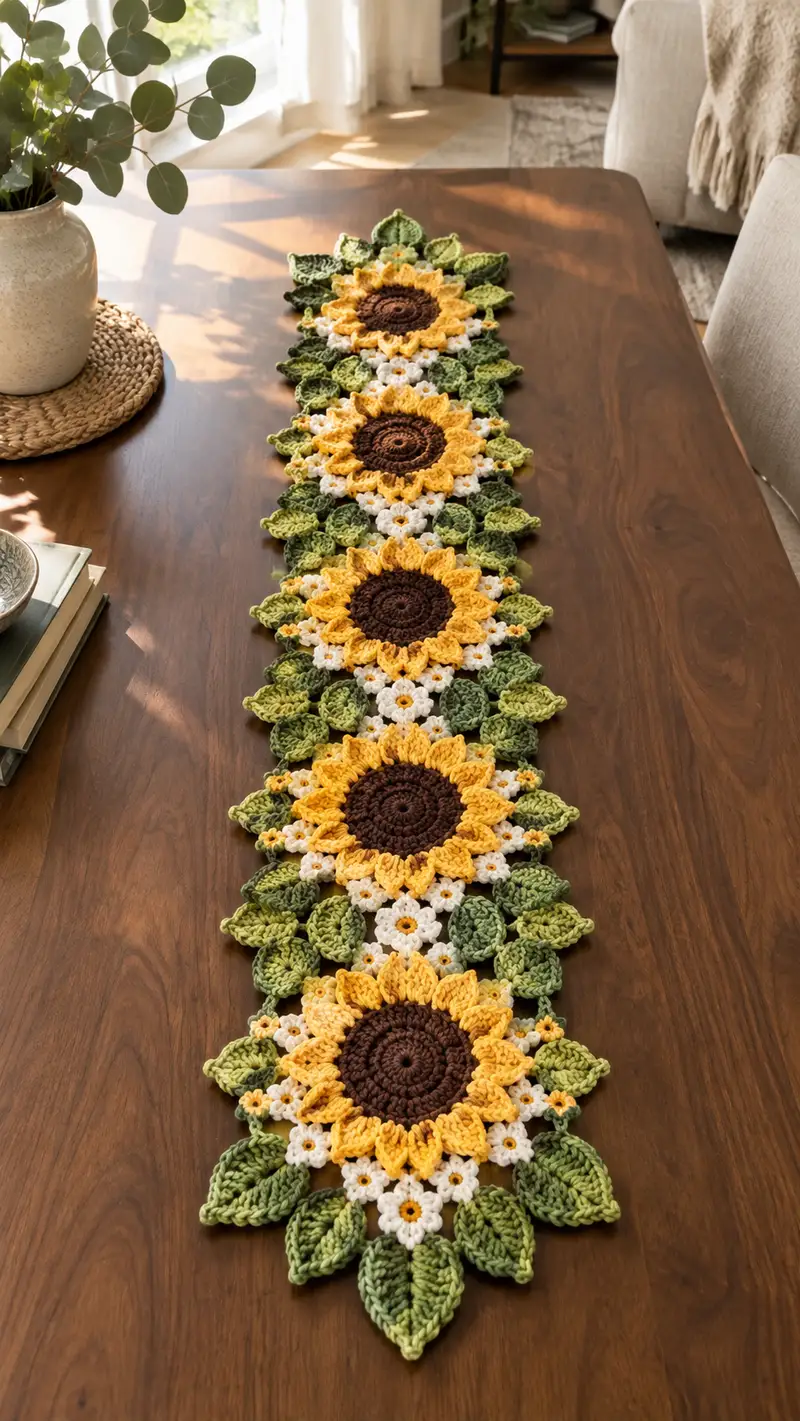
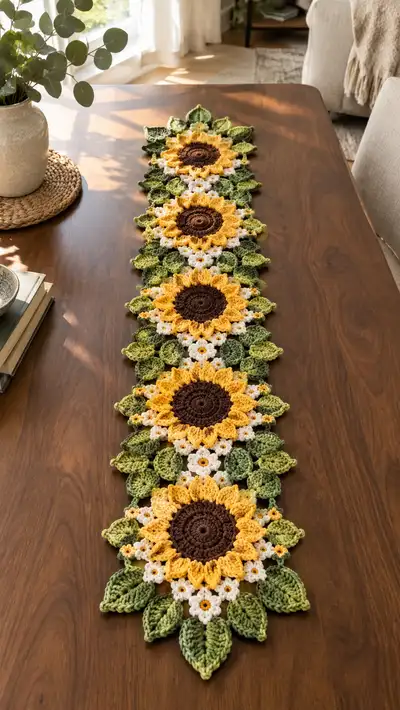
Create a cheerful sunflower table runner inspired by rustic summer fields. This pattern features four large sunflower motifs linked by clusters of tiny white blossoms and layered textured leaves in two shades of green. The runner lays flat with a scalloped leafy edge and brings bright yellow accents to any table. Clear step-by-step instructions, shaping tips, and assembly guidance help you recreate this vibrant centerpiece.
Progress Tracker
0% Complete
— Materials & Gauge :
Info :
Gauge is not critical for a table runner but using worsted yarn and 4.0mm hook yields sunflowers approximately 6.5" (16.5cm) across center-to-petal-tip. Adjust hook or yarn weight to change motif size. Make a swatch of one sunflower center+petal to check size.
— Sunflower Center (Make 4) :
Round 1 :
With Brown, make magic ring, ch1, 6 sc in ring (6)
Round 2 :
Inc in each st around (12)
Round 3 :
(1 sc, inc) x6 (18)
Round 4 :
(2 sc, inc) x6 (24)
Round 5 :
(3 sc, inc) x6 (30)
Info :
Keep tension snug so the center is slightly domed but not tight enough to pucker. Do not fasten off; we will add texture rounds.
Round 6 :
1 sc in each st (30)
Round 7 :
1 hdc in each st around (30)
Round 8 :
Work a texture round: *fpdc around next st, bpdc around next st; rep from * around (30)
Info :
This alternating post stitch round creates a ridged seed-head look. Use a stitch marker to track beginning.
Round 9 :
1 sc in each st (30)
Round 10 :
(4 sc, inc) x5 (35)
Round 11 :
1 sc in each st (35)
Round 12 :
Sl st to next st, finish off leaving long tail for sewing (35)
Info :
Weave tail through the last round to slightly flatten if desired, creating the small dish shape typical of a sunflower center. Make 4 centers.
— Petal Foundation (Single Layer, Make 4 sets around each center) :
Info :
Switch to Golden Yellow for petals. Petal foundation is worked into sts around the center. Begin by joining yarn to the top of Round 11 of center with sl st in any st; ch3 to act as first dc in next round.
Round 1 :
Join Yellow, ch3 (counts as dc), *skip 1 st, (sc, ch1, 3 dc, ch1, sc) in next st (petal shell), skip 1 st; rep around, ending with sl st to top of ch3. Make 12 petal shells (12 large petal points)
Info :
Spacing every other stitch will yield 12 evenly spaced petals around a 35-st center. If your center stitch count was different, calculate petal placement as every (center sts / 12) stitches approximately.
Round 2 :
Working behind petals: sl st into ch1 sp at base of the first petal, ch1, sc in same space, *ch2, sc in next petal base ch1 sp; rep around to create small connectors between petals (12 ch2 loops)
Info :
This connector round stabilizes petals and creates an underlayment for the textured petal layer to come.
— Petal Texture & Layering (Make 4) :
Round 1 :
Attach Yellow at base of any petal, ch1, sc in same sp, *working in the top of the petal shell: (ch3, dc3tog cluster made in the three dc of the petal shell) sl st to next petal base; rep around (12 petal clusters)
Round 2 :
Ch1, sc around each petal cluster working evenly, placing 5 sc across each petal arc to form a firm petal edge (approx 60 sc)
Round 3 :
Working in BLO, 1 sc in each st around to create a ridge (60)
Info :
Work a decorative picot at the tip of every petal on next round to create lifted petal tips if desired: *sc across petal until tip, (ch3, sl st into tip), continue.
Round 4 :
Petal shaping round: *in the center sc space of each petal, (ch2, 3 tr, ch2, sl st) to form an elongated pointed petal; sl st to base between petals; rep around (12 petals)
Round 5 :
Edging round: sl st into each st around petal base to tidy and finish (60)
Info :
At this stage your sunflower should measure roughly 6.5" across. Adjust a later blocking if needed.
— Petal Inner Accent (Optional textured row) :
Round 1 :
With a slightly darker golden shade or the same yellow, join at back of each petal, ch2, 3 hdc in arc of petal, sl st to next petal base; rep around to add depth (12 sets, approx 36 hdc)
Round 2 :
1 sc in each st around to clean up (approx 36)
Info :
This accent layer helps petals appear layered and shaded. Make sure each petal remains flexible and not overworked.
— Tiny White Filler Flowers (Make multiple clusters per runner) :
Round 1 :
With White, ch4, sl st in first ch to form ring, ch1, 6 sc in ring, sl st to first sc (6)
Round 2 :
*Ch3, sl st into next st to make a petal picot; rep around to create 6 tiny petals (6 picots)
Round 3 :
Finish off leaving short tail for sewing; with orange, embroider a small French knot or tiny cluster in center (approx 1-2 mm) to emulate golden center (optional)
Info :
Make many of these tiny flowers (about 10-18 per sunflower motif in the photo) and sew them in clusters between petals and leaves to mimic the airy white filler.
— Leaf (Large) (Make 28-32 total alternating shades) :
Round 1 :
With Deep Olive, ch10.
Round 2 :
Sc in 2nd ch from hook, hdc in next, dc in next 2, tr in next 2, dc in next, hdc in next, sc in next (working along chain) then turn and work along opposite side: sc, hdc, dc, tr, dc, hdc, sc back to starting point; sl st to first sc (18 sts total approx, leaf-shaped)
Round 3 :
*Ch1, sc around leaf edge placing 2 sc in tr peaks to accentuate tip, continue around (approx 22 sc)
Round 4 :
Vein row: With wrong side facing, join yarn at base, *fpdc down center column for 6-7 sts to create raised midrib; fasten off (creates prominent center vein)
Info :
Alternate Deep Olive and Light Sage leaves to mimic the image's two-tone leafy border. Make slightly smaller leaves by using ch8 and reducing row increases for inner edge layers.
Round 5 :
Optional: Add a second round in Light Sage: join yarn at base and sc evenly around to add a two-layer leaf look (approx 26 sc)
Info :
Make a total of about 28-32 large leaves for a 4-sunflower runner as in the photo; exact count depends on how many you place between motifs and at edges.
— Small Leaf (Make 30-36) :
Round 1 :
With Light Sage, ch7.
Round 2 :
Sc in 2nd ch from hook, hdc, dc, tr, dc, hdc, sc across and mirroring back on opposite side; sl st to first sc (approx 14 sts)
Round 3 :
Sc evenly around edge to tidy (approx 16 sc)
Info :
Smaller leaves fill the runner gaps and edge. Work them slightly cupped by making BLO sc rounds to produce a lifted shape.
— Joining Motif Cluster (Between Each Sunflower Pair) :
Round 1 :
Decide on runner layout: photo shows 4 sunflowers arranged linearly with clusters of 5 tiny white flowers and 3 leaves between each. Plan motif layout and pin motifs onto flat surface before joining.
Round 2 :
With White, ch5, join into a small ring, make 6 tiny flowers as previous; lay them in a triangular cluster (3 bottom, 2 above) and use a long tail to mattress stitch them together at adjacent petals; secure cluster to sunflower bases between petals
Round 3 :
Placement Info: Place clusters at the 4 cardinal gaps between adjacent sunflowers. Sew clusters so their outer edges align with petal tips, leaving space for leaves to overlap.
Round 4 :
Use Light Sage leaves to frame the cluster: position 2 small leaves on top corners and one large leaf pointing outward. Sew in place with secure stitches through leaf bases and cluster centers.
Round 5 :
Repeat for each gap between sunflowers along the runner until all four sunflowers are linked with white flower clusters and leaves (this creates the continuous runner look)
Info :
Pin every piece and step back frequently—the photo shows careful staggering of leaves so they overlap slightly and create scalloped edges.
— Joining the Sunflower Motifs (Detailed Stitch Join) :
Round 1 :
Lay two finished sunflower motifs RS up, overlapping petal edges about 1/2" where white clusters will sit. Use contrasting pins to hold in place.
Round 2 :
With matching Yellow, use yarn needle and mattress stitch to join petal bases: pick up loops from the last petal round of both motifs through the sc/edge rounds, working every 3rd sc to hold petals without pulling petals flat. Sew across the overlap (about 8-12 pick-ups) and tie off securely.
Round 3 :
Secure White clusters by sewing through tiny flower centers and the adjacent petal bases. Add a few ladder stitches from the back to flatten join. Repeat between each motif so the runner becomes a linear strip of sunflowers linked by white clusters.
Info :
Avoid sewing through petal tips; sew at earlier rounds near the petal base to keep petals free and dimensional.
— Runner Edging & Leaf Border (Worked After Joining All Motifs) :
Round 1 :
With Light Sage, join at an exposed seam between sunflowers, ch1, sc evenly around entire runner outline including outer petal tips and exposed leaf edges to create a uniform edge. Work approx 1 sc per 1/4" of edge; exact count varies with runner size.
Round 2 :
*In each curving petal tip, create (ch3, 3 dc, ch3) shell to form a scallop; in leaf tips, work 2 dc clusters to accentuate; sl st between sections. This creates a rhythmic scalloped border.
Round 3 :
Alternate Deep Olive leaves into the scallops: join Deep Olive at the base of every other scallop and work a small leaf (ch6 construction) projecting outward; sl st back into edge and finish off. Repeat around runner edge to create the leafy border like photo.
Round 4 :
With a final tidy round in Light Sage, sc in each st to even the border and hide joins (approx number will match previous round stitch count)
Info :
Ensure the border lies flat; if it tends to curl, block and steam lightly after finishing. Add a backing fabric under runner for extra stability if used daily.
— Detailed Rounds & Variations to Increase Total Motif Depth (Optional Decorative Rounds) :
Round 1 :
Additional seed ring: rejoin Brown to inner center and work 2 rounds of very small picot cluster rings: *ch3, sl st into adjacent st to create a dotted effect. This provides a speckled seed look (approx 35 picots)
Round 2 :
Underpetal chainwork: join under each petal base and work ch4 loop and sc back into base to create a lacy under-layer. Rep for all 12 petals (12 loops)
Round 3 :
Extra leaf layering: add Light Sage BLO sc around selected leaves (1 round) so leaves appear veined and double-layered (adds 10-12 sts per leaf)
Round 4 :
Decorative seam: along inner joins between sunflowers, use a running spiral of small sc in Orange to bring out tiny golden accent dots (work small knots every 3rd sc)
Info :
These optional rounds increase texture and add realism; include as desired to match the rich depth of the photographed runner.
— Final Finishing Touches :
Info :
Weave in all ends securely to the back of the runner. Use a small amount of clear craft glue at knot points if the runner will be handled frequently. Block the entire runner by pinning flat to a blocking board and lightly steaming or misting then allowing to dry to ensure motifs lay flat.
Round 1 :
Check symmetry: adjust any leaf or petal angles by gently tugging loops and evening out edges before final blocking.
Round 2 :
Optional: attach a thin non-slip felt strip to underside at ends if placing on smooth surfaces to prevent sliding.
Info :
Label and photograph your finished runner to document placement of clusters and leaf counts for future repeats or enlargements.
— Pattern Notes & Sizing Options :
Info :
To lengthen the runner, make additional sunflower motifs and join in the same manner. To create a table mat version, make a single sunflower with surrounding leaves and a simple edge. To create a square centerpiece, arrange sunflowers in a 2x2 grid and join with the same white clusters and leaves.
Info :
Always block motifs before joining for flat joins and consistent sizing. Use the same dye lot for yarn to keep color consistency across motifs.
This sunflower table runner pattern brings sunny cheer to any table with layered petals, tiny white filler flowers, and leafy scalloped edges. Each motif is crafted to be dimensional yet lays flat when joined and blocked. Working modularly allows you to customize length, color, and texture — perfect for seasonal refreshes or gifts. Enjoy the slow, satisfying process of building blossoms and leaves into a beautiful centerpiece. 🌻🧶