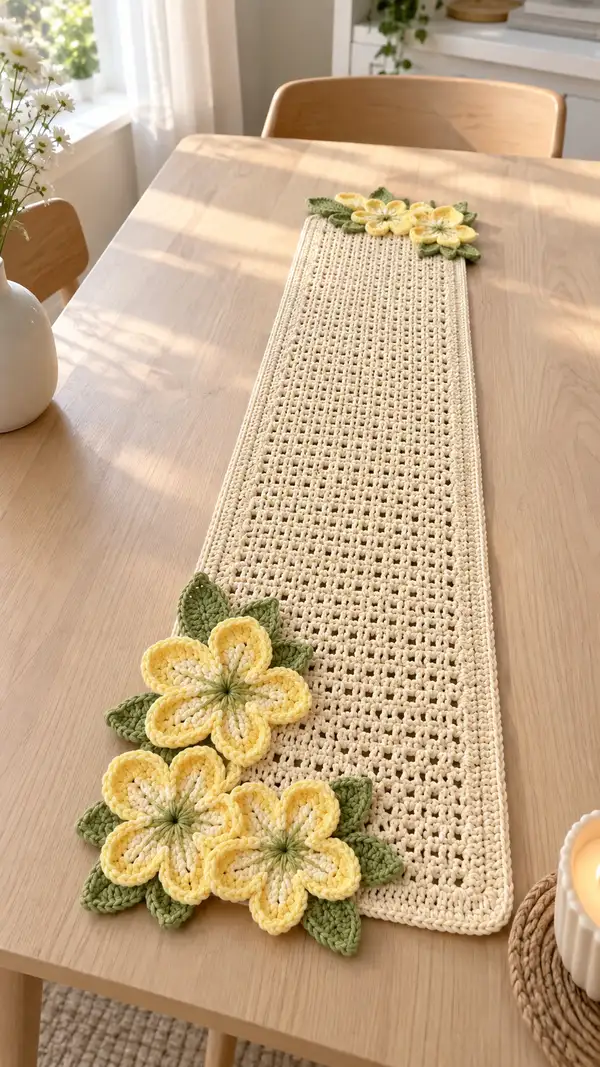
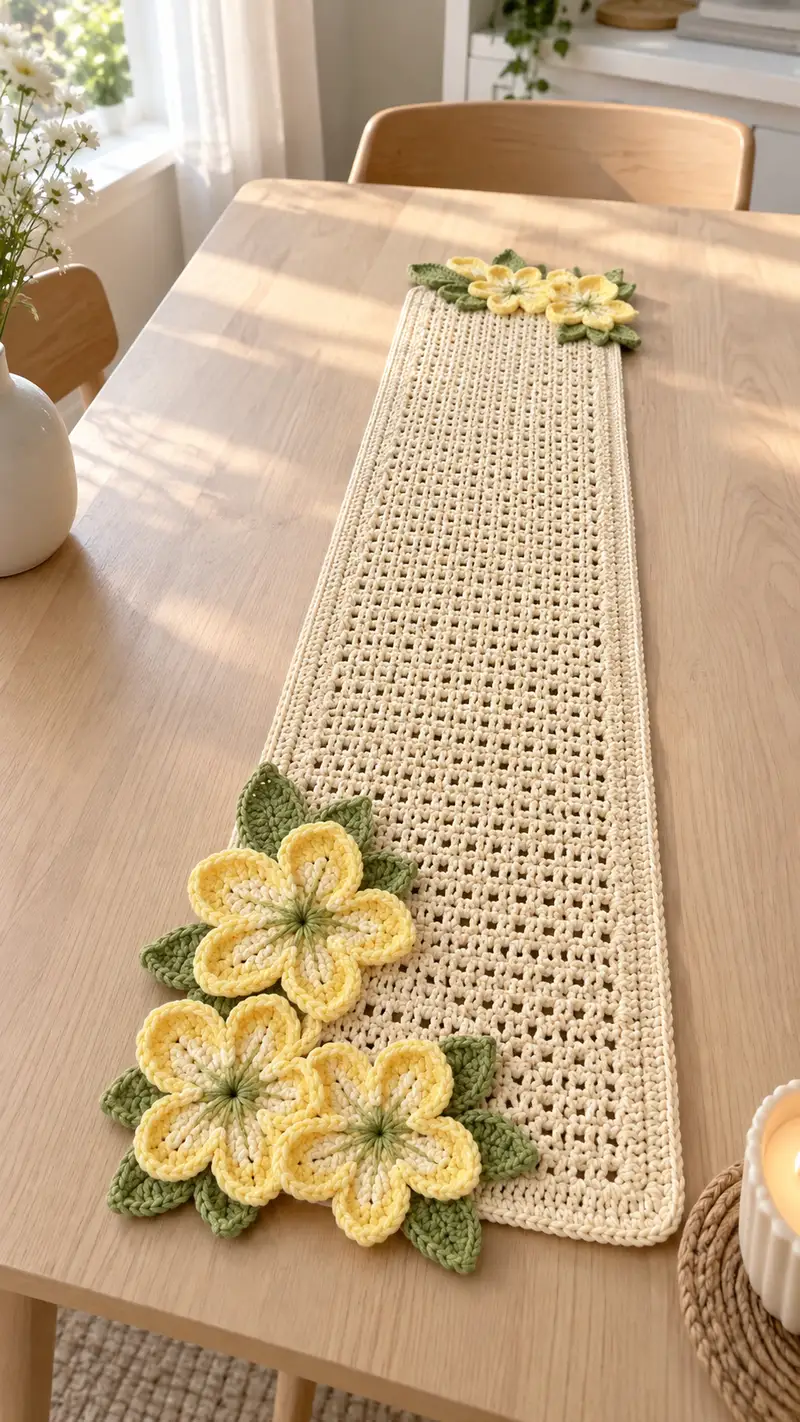
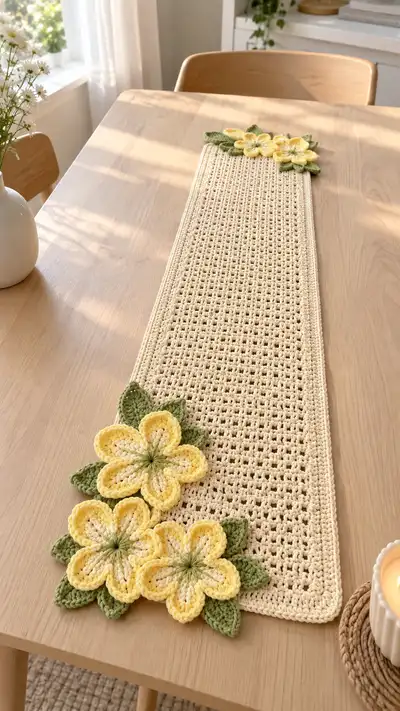
A delicate, spring-inspired table runner featuring an open mesh center with tidy ribbed edges and cheerful three-dimensional yellow flowers with green leaves at each end. Worked flat in a soft cream cotton, the runner adds a light, handmade touch to dining spaces and looks beautiful draped down the middle of a table or sideboard. Includes detailed instructions for the mesh panel, neat border, layered flowers and leaves with clear assembly guidance.
Progress Tracker
0% Complete
— Overview & Gauge :
Info :
This runner is worked flat, lengthwise, beginning with a foundation chain. Gauge for main panel (important for final dimensions): 10 sc x 10 rows = 4" in single crochet when using 3.5mm hook and worsted cotton. Final approximate dimensions using the specified materials: 36" long x 7.5" wide. Adjust chain and row counts to lengthen or widen the runner.
— Materials & Setup :
Info :
Use a chain that is a multiple of 4 plus 1. The sample runner uses ch 121 (multiple of 4 = 120, plus 1 turning chain). This creates a working stitch count of 120 for each row across the runner.
— Main Panel (work flat, rows labelled as rounds for consistency) :
Round 1 :
Foundation: Chain 121. (This counts as 121 chains; you will work in the 2nd ch from hook onward.)
Round 2 :
Row 1 (RS): Sc in 2nd ch from hook and in each ch across. Turn. (120 sc)
Round 3 :
Row 2 (WS): Ch 1, sc in first st and in each st across. Turn. (120 sc)
Round 4 :
Row 3 (RS): Ch 1, sc in first st, *ch 3, sk next 3 sts, sc in next st; rep from * across so that every 4-st block gives a ch-3 space. End with sc in final st. Turn. (120 'working points' = 120 sc positions)
Info :
The mesh row above creates evenly spaced chain-3 spaces every 4 stitches. Keep your tension consistent to avoid skewed mesh. If your chain-3 spaces look large, you can substitute ch 2 - but keep same throughout to maintain even appearance.
Round 5 :
Row 4 (WS): Ch 1, sc in each st and in each ch-3 space across (work 3 sc evenly into each ch-3 space if you prefer a denser look). Turn. (120)
Round 6 :
Row 5 (RS): Repeat Row 3: Ch 1, sc in first st, *ch 3, sk next 3 sts, sc in next st; rep from * across. Turn. (120)
Round 7 :
Row 6 (WS): Ch 1, sc in each st and into each ch-3 space (work 3 sc into each ch-3 space or 1 sc then 2 sc in following 2 base sts, whichever keeps counts even). Turn. (120)
Round 8 :
Row 7 (RS): Ch 1, sc in each st across. Turn. (120)
Info :
Place a stitch marker at the first stitch of each row to track your row start and prevent drift. The runner center repeats a 4-row mesh motif (solid sc row, mesh row, sc-in-spaces row, solid sc row) — keep repeating this set for the length of the runner.
Round 9-20 :
Rows 8-19: Repeat Rounds 4-7 repeated twice, then repeat Round 8. Essentially: alternate mesh rows and sc-solid rows to build up the rectangular mesh panel. Keep stitch count at 120 each row. (Each row: 120)
Round 21 :
Row 20: Ch 1, sc in each st across. Turn. (120)
Round 22-30 :
Rows 21-29: Continue working the 4-row mesh repeat described above until you have worked a total of 60 rows (including the initial sc rows). In this sample, work until the panel measures about 34" long or you reach your preferred length less the borders. Maintain 120 stitches each row. (Each row: 120)
Info :
If you want a narrower or wider runner, change the foundation chain in multiples of 4 + 1. Make a small gauge swatch and calculate how many chains equal 1" across, then scale for your desired width.
Round 31-40 :
Rows 30-39: Continue the established mesh repeat. Check width and straighten edges as you work by ensuring first and last stitches each row are worked into the turning chain or last stitch consistently — this keeps edges square. (Each row: 120)
Round 41-52 :
Rows 40-51: Repeat the 4-row mesh pattern. At this stage your panel should be near full length. Stop when you have approximately 2" of length remaining before desired finished length to reserve space for an even border. (Each row: 120)
Info :
Count rows with a row counter or mark every 10 rows on a sticky note to avoid losing your place. Blocking the panel flat before adding border will make the border sit better and make flower placement easier.
Round 53-60 :
Rows 52-59: Finish the mesh panel by repeating the final 4-row motif until the panel reaches desired finished length minus border allowance. End with a final solid sc row on the RS for a neat base to work the border. (Each row: 120)
Round 61 :
Row 60: Ch 1, sc in each st across. Fasten off and weave in tail if you plan to block before edging. (120)
Info :
At this point block the panel flat to the exact measurements you want, pinning straight edges and smoothing mesh spaces. Blocking evens out the stitches and ensures borders and flowers lie flat.
— Border (worked around entire rectangle):
Info :
We will work a neat single crochet + ribbed border around the entire panel. Join yarn at one corner and work evenly along each side. Border counts are described per side using the 120 st width as a guide.
Round 62 :
Round 1 (Border): With RS facing and cream yarn, join with sl st to any corner stitch. Ch 1, work 1 sc in same corner, then work 1 sc in each sc along the short end (if you have end-to-end runner adjust) and then along long side work 1 sc in each row end (approximately 60 sc when working along long side measured in rows); work 3 sc evenly in corner turning chain to turn; continue along opposite long side and opposite short end to return to first corner. When you reach the starting point, join with sl st to first sc. (Even, neat edging; total stitch count will vary by edging method but aim for tight even border.)
Round 63 :
Round 2 (Ribbing): Ch 1, working in BLO of each border sc, sc in each stitch around for one round creating a subtle ridge. Work 3 sc in corners to keep border flat. Join with sl st to first sc. (st count mirrors previous round)
Info :
Ribbing in BLO creates a defined edge which frames the airy mesh. Keep tension slightly firmer on border rounds so the runner edges do not roll.
Round 64 :
Round 3 (Finish Edge): Ch 1, sc in each st around working evenly and smoothing corners; if desired, work a final round of hdc for a softer, thicker edge. Fasten off and weave in ends. Your runner panel is now complete and ready for floral embellishment. (st count mirrors prior round)
Info :
If you plan to make the flowers removable, sew small loops (chain 6) spaced under the flower bases during the border rounds to allow buttoning or anchoring later.
— Large Layered Flower (Make 6 total, 3 per end or as desired) :
Info :
These layered flowers are worked flat in rounds. Each flower consists of a central stitch cluster, two layered petal rounds for depth, and a decorative center. Use Soft Yellow and a slightly lighter yellow for petal highlights.
Round 1 :
Using yellow yarn, make a magic ring. Ch 1, work 8 sc into magic ring. Pull ring closed. (8)
Round 2 :
Ch 1, 2 sc in each st around. (16)
Round 3 :
Ch 1, (1 sc in next st, 2 sc in next st) around. (24)
Round 4 :
Ch 1, sc in next 2 sts, (ch 3, sl st in base to create a small loop) *sc in next 2 sts, ch 3, sl st in next st; rep from * to form 6 loop anchors for petals. End and join. (24 sc base, 6 ch-3 loops)
Info :
These ch-3 loop anchors mark petal positions. Keep joins tidy and place last loop precisely opposite first for petal symmetry. You will work petals into these loop anchors.
Round 5 :
Petal Round A (outer petals start): Join yarn in a ch-3 loop. Work into loop: (sc, hdc, 3 dc, hdc, sc) in same loop to form a full petal. Slip stitch to next ch-3 loop and repeat this petal in each loop for a total of 6 petals. Finish with sl st to base and fasten off if layering a second petal round. (6 petals)
Round 6 :
Petal Round B (second layer for fullness): Join a lighter yellow (or same color for tonal) in the base between petals or directly in the ring, ch 1. Work behind the first petal row, inserting hook into the space between petals and work 6 staggered petals: (sc, hdc, 4 dc, hdc, sc) into each designated petal space so the petals overlap slightly with the first layer. There will be 6 petals arranged in an offset manner for depth. Fasten off and weave tails. (6 petals)
Info :
Petal shaping is achieved by adding extra dc in the second layer to make petals fuller. Slight blocking of petals after finishing (pinning to shape and dampening lightly) helps the petals keep their sculptural outline.
Round 7 :
Decorative Center: With leaf green yarn, join in center st behind petals. Using a tapestry needle and a long tail, pull a length of green yarn through the center hole multiple times, evenly distributing the yarn to create a 'gathered' star center. Alternatively, work a small embroidered star: insert the needle into the center, pull yarn through, and create radial stitches out to the base of the petals and back, repeating 8-12 times until the center looks like a tightly gathered blossom. Secure and weave in ends. (No additional stitches counted)
Info :
Using embroidery technique gives a soft, knotted center similar to the runner photo. You may add a small French knot or a tiny button if desired; if so, secure with extra thread so it does not come loose in wash.
— Flower Variation (Small Accent Flowers) :
Round 8 :
Small flower base: Magic ring, ch 1, work 6 sc in ring. Join. (6)
Round 9 :
Ch 1, (ch 3, sl st in next st) around to create 3 small loops for petite petals. Join and finish with 3 small petals worked in same manner as large petals but with (sc, hdc, 2 dc, hdc, sc) into each loop. Fasten off and weave ends. (3 small petals)
Info :
Use smaller accent flowers to supplement the large layered blooms where desired; these can be placed singly or in clusters between larger flowers.
— Leaves (Make 12-16 total) :
Round 10 :
Leaf Foundation: With leaf green, ch 8. Row 1: Sc in 2nd ch from hook, hdc in next, dc in next 2, hdc in next, sc in next, sl st in last ch to form tip. (7 sts including tip)
Round 11 :
Working back along the opposite side of foundation chain: sl st in next ch, sc in next, hdc in next, dc in next 2, hdc in next, sc in last base st. Fasten off leaving tail for sewing. The leaf will be slightly cupped. (Symmetrical leaf)
Info :
To make leaves more sculpted, work the final row in BLO and then steam-block lightly, pinning the leaf into a gentle curve. Vary leaf sizes by working ch 10 foundation for larger leaves and adjusting stitch increases to match.
Round 12 :
Leaf Variation with center vein: Work as above but before fastening, embellish the center with a running stitch of darker green yarn from base to tip and back for a defined vein. Secure ends and weave in.
— Assembly Prep (Blocking & Layout) :
Info :
Block the main panel, border and each flower and leaf flat. Pin the flowers and leaves in the arrangement you prefer: sample layout uses three large flowers clustered at one end (overlapping slightly) and two large + one small at the opposite end. Leaves are staggered under each flower cluster to frame the petals. Photograph or take notes of placement before sewing to preserve symmetry.
— Attaching Flowers & Leaves :
Round 13 :
Attach each flower by placing it on the pinned position and using a yarn needle with matching cream yarn to sew through the base rounds (Rounds 1-4 of flower) into the runner border and main panel layers. Use small whip stitches spaced every 4-6 threads around the flower base to hold it flat but secure. Sew only through outermost border and one row of mesh to keep attachment neat.
Info :
For invisible joins, use ladder stitch or sew through the back loops of the flower base and a few stitches of the runner to hide the joining tail. Secure the sewing thread with 4-6 tiny stitches and weave tail inside the runner's border.
Round 14 :
Position leaves under and around each flower, sewing the leaf base into the underside of the flower and into the runner to hold the leaf at a slightly angled position. Use 6-8 secure stitches per leaf, and hide tails by weaving into the runner edge.
Round 15 :
Optional: If you prefer removable embellishments, sew small snap buttons or create small matching loops on the runner border and sew corresponding buttons to the back of each flower. Attach loops at the border during the border rounds or by sewing a short chain and reinforcing with a buttonhole stitch.
Info :
Check that flowers lie flat after sewing; if a petal puckers, carefully insert a few stitches through the petal base and anchor to the runner to flatten or adjust petal curve. Trim any long tail ends and weave them into the underside to avoid visible tails on RS.
— Finishing Touches :
Round 16 :
Final pressing: Lightly steam or spray the runner and pinned flower/leaf assembly flat, then remove pins when dry. Avoid excessive heat on cotton to maintain fiber integrity. Inspect for loose stitches and reinforce as needed.
Round 17 :
Trim and weave in all remaining ends. If using wash-and-wear cotton, your runner can be carefully hand washed and laid flat to dry. Avoid machine washing if excess embellishments are used; instead spot clean or hand wash gently.
Info :
If gifting, consider binding a length of coordinating ribbon beneath the runner so the new owner can remove and reposition flowers. Attach ribbon with a few sewn stitches and tuck ends under the runner border for a tidy finish.
This sunny blossom runner brings handcrafted warmth to any tabletop with its airy mesh and cheerful layered blooms. Each carefully constructed petal and leaf is made to complement the soft cream ground — a design that feels both fresh and timeless. Finishing this piece gives real satisfaction as the separate parts come together into a cohesive, elegant accent. 🧶🌼 Spruce up your home with this lovely runner and enjoy the cozy, handmade vibe it creates. ✨