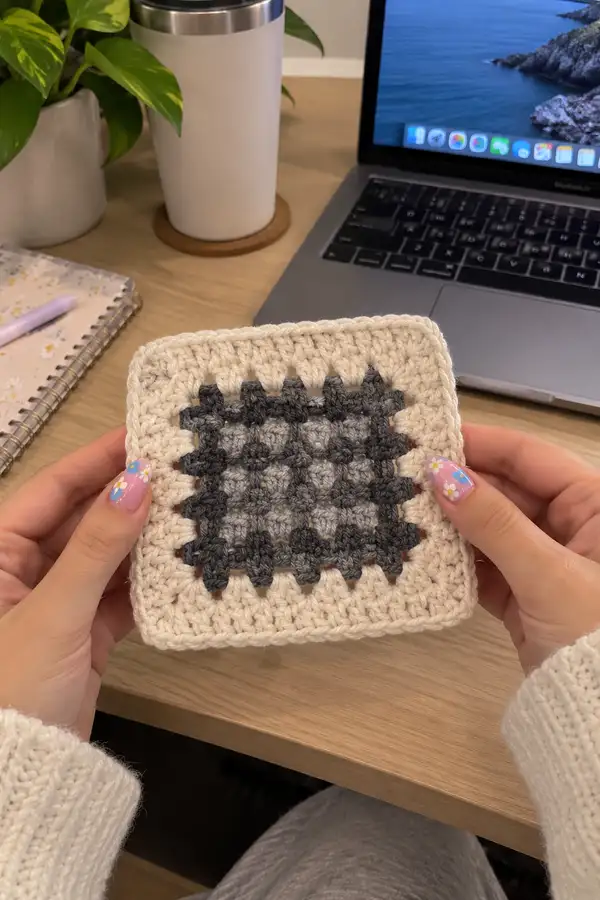
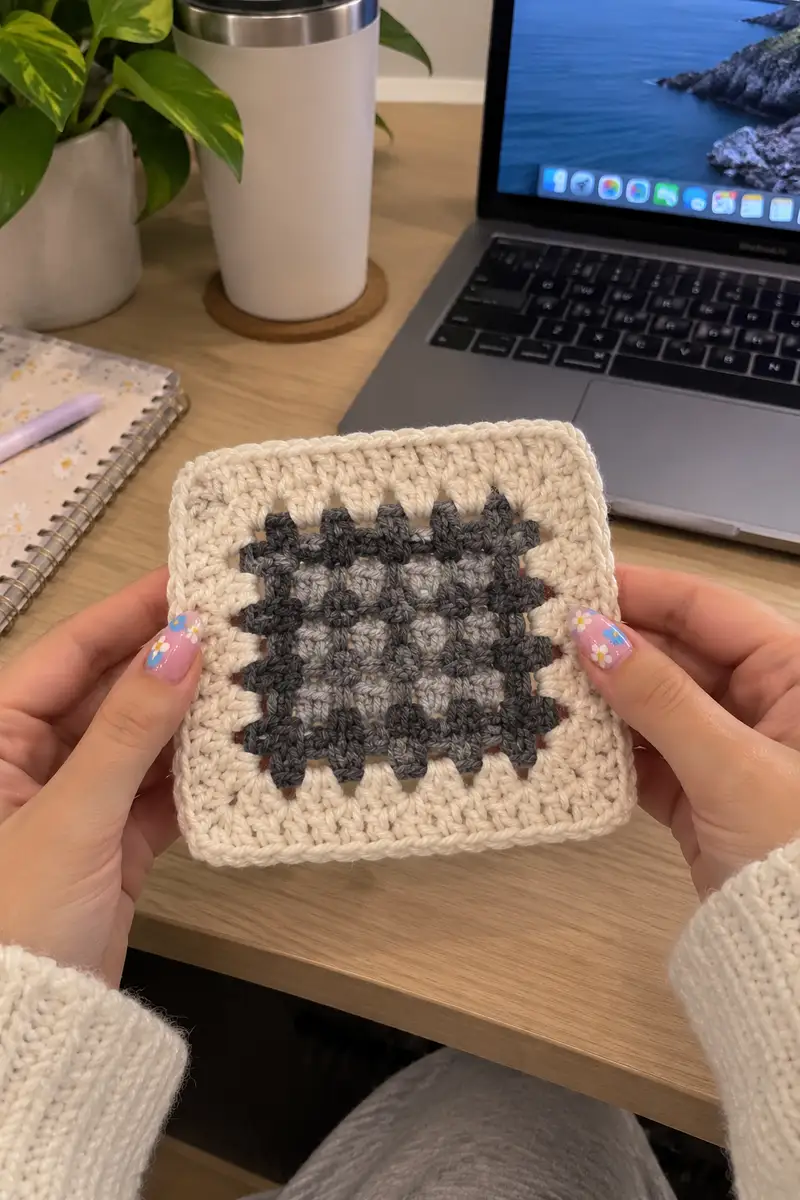
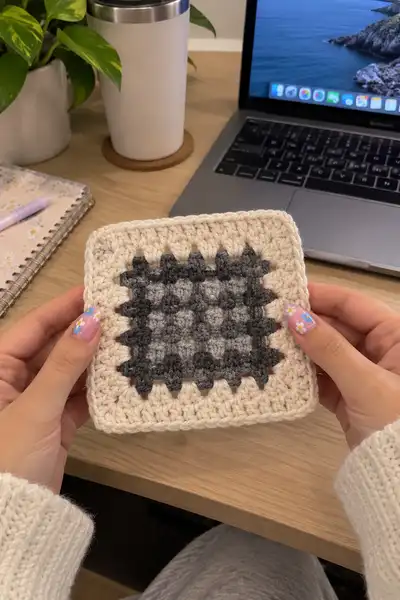
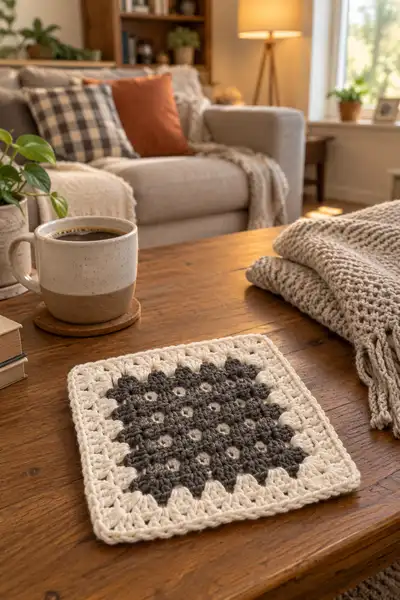
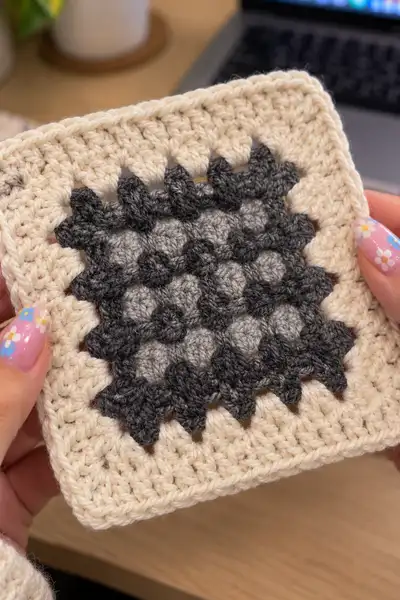
A timeless textured square bedspread made from clustered puff-style granny squares in warm cream with two coordinating grays. Each square features a dense puff center surrounded by a bold cream frame, then joined into a large bedspread and finished with a soft, chunky border. This pattern teaches the textured puff cluster technique, neat join-as-you-go methods, and a clean four-round finishing border for a professional look. Designed to be modular so you can size the spread by increasing or decreasing the number of squares.
Progress Tracker
0% Complete
— Notes & Gauge :
Info :
Gauge: one completed motif (before blocking) measures approximately 12.5cm (5in) square using 5.0mm hook and worsted weight yarn. Gauge is flexible for a bedspread - keep consistent tension across motifs for a neat join. Work tightly enough that the puff centers keep their shape but not so tight they become stiff.
Info :
Terms: 'puff' refers to the 5-loop puff described in Round 2 below. When changing color, fasten off and weave in tails neatly at the back before starting the next round unless carrying yarn along the inside is preferred.
— Square Motif (Make X squares to fit bed; layout example 9 x 9 for queen, 8 x 10 for king) :
Round 1 :
With Color B (Medium Gray). Make a magic ring, ch2 (counts as first hdc), work 7 hdc into ring. Join with sl st to top of ch2. (8 hdc)
Round 2 :
Info : Puff stitch instruction — yo, insert hook, yo pull up loop (do this 4 times into same stitch), yo pull through all loops on hook, ch1 to close puff. For a tighter puff, work 5 loops. Keep puff height consistent across motif.
Round 2 :
With Color B. Ch1, work 1 puff into each st around, ch1 between puffs (8 puffs, 8 ch-1 spaces). Join with sl st to first puff. (8 puffs)
Info :
Placement: These 8 puffs form the central ring. Keep the same right-side orientation for each puff so the texture sits uniform on the RS.
Round 3 :
Change to Color A (Dark Charcoal). Ch2 (counts as hdc), [1 hdc in ch-1 space, ch1] x8 around, join with sl st to top of ch2. (8 hdc, 8 ch-1 spaces)
Round 4 :
Info : This round creates small spacer rows between puff rings. Maintain consistent ch-1s to keep stitch counts even and neat.
Round 4 :
With Color A. Ch1, puff into each hdc and into each ch-1 space, working [puff, ch1, puff] across each side equivalently to create a 4x4 grid starting to emerge. Aim for 16 puffs total. Join with sl st. (16 puffs)
Info :
Count puffs after joining to ensure 16. If a puff was missed, undo last puff and correct now to avoid skewed grid later.
Round 5 :
With Color B. Ch2, 1 dc in same st, *ch1, 1 dc in next puff base, ch1, dc in next, repeat across to evenly space and build into a compact square; you should work 24 dc around (each puff base receives a dc, and chain spaces are created between). Join with sl st. (24 dc)
Round 6 :
Info : At this stage you have a central textured area approximately 4x4 puffs. The plan now is to build outward with corner increases to square off the motif. Count stitch groups across each side to plan corner placement.
Round 6 :
With Color A. Ch3 (counts as dc), 2 dc in same stitch to form corner, *skip to midpoint of next side and work 3 dc cluster in same space, repeat corner clusters at the four sides to form the first true square frame. After completing the four corner clusters you should have 36 dc total. Join with sl st. (36 dc)
Info :
Mathematics check: This round increases by 12 from the previous round (24 -> 36) by adding 3-dc clusters in each corner area. If you used a slightly different count in Round 5, adjust so that you add 12 stitches total through four corners (3 each).
Round 7 :
With Color A. Ch1, sc in each dc around to create a compact frame and define the square edge. (36 sc)
Round 8 :
Info : Use this single crochet round as a checkpoint; the sc round gives a neat edge to measure against later and prepare for outer puff rows. If the motif is not square, lightly block now to reshape.
Round 8 :
With Color B. Ch2, *puff in next sc, ch1, skip 1 sc, puff in next sc, repeat across, adjusting at corners where you will do puff, ch2, puff to keep corners open. After working all around join with sl st. Expected puffs: 36 puffs aligned with sc placement.
Round 9 :
With Color B. Ch3, 2 dc in same sp for corners, 1 dc in each ch-1 space along sides, adding 3-dc corner clusters. This round will increase the stitch count by 12 again to 48 dc. Join with sl st. (48 dc)
Info :
Work evenly — placing corner clusters precisely keeps the square geometry stable. If you find a corner has too many stitches, redistribute by slipping the next stitch into the corner ch space and adjust placement.
Round 10 :
With Color C (Cream). Ch1, sc in each st around to tighten and square the motif. (48 sc)
Round 11 :
Info : This is the point where you will build the large cream frame that is very visible on the finished bedspread. Work the next rounds in cream to create a unified border around each motif.
Round 11 :
With Color C. Ch3, dc in same stitch, *ch1, skip 1 sc, (3 dc) cluster in next sc, repeat around placing (3 dc, ch2, 3 dc) in corner ch spaces to create defined corners; this round will expand to 60 dc total. Join with sl st. (60 dc)
Round 12 :
With Color C. Ch1, sc in each st around working 60 sc to tighten edge. Join with sl st. (60 sc)
Info :
If your motif measures smaller than expected, work one extra even round of sc to reach the intended dimension; adding one sc round increases firmness and makes joining easier.
Round 13 :
With Color C. Ch2 (counts as hdc), hdc in same st, *hdc in next 3 sc, (hdc, ch2, hdc) in corner sp, repeat around to form a broad textured frame. Expected stitch count: 72 hdc. Join with sl st. (72 hdc)
Round 14 :
Info : Use BLO (back loops only) on the next round to create a slightly raised outer ridge that helps visually separate squares once joined.
Round 14 :
With Color C. Ch1, 1 sc in each st BLO around (72 sc). Join with sl st. (72 sc)
Round 15 :
With Color C. Ch3, dc in next 2 sts, *ch1, sk 1, dc in next 3 sts repeating across; at corners work (dc, ch2, dc) to keep square corners roomy. This is an aesthetic row to create a slight scallop. (72 dc with ch-1 spaces)
Info :
Count across each side to confirm evenness — each side should contain 18 dc clusters plus corner spacing if your count matches 72 total.
Round 16 :
With Color C. Ch1 and work 1 sc in each st around to tighten the round and prepare for joining. (72 sc).
Info :
At this point your motif should be square and measure approximately 12-13 cm / 5 in. Block motifs if needed. Make as many motifs as required for your bed size using the same color order and tension so joins are consistent. Example counts: Queen: 9 x 9 = 81 motifs; Double: 7 x 8 = 56 motifs.
— Optional Decorative Outer Row & Final Square Size Adjusting :
Round 17 :
With Color A (Dark). Ch2, 1 hdc in each st around if you want a subtle darker frame (72 hdc). Join. (72 hdc)
Round 18 :
Info : If your bedspread requires wider seams for stability, add another even round of hdc in Color C here. Otherwise proceed to join rounds.
Round 18 :
With Color C. Ch1, sc in each st around to finish motif neatness (72 sc). Fasten off leaving long tail if using sew-together method, or fasten off short tail if using Join-As-You-Go (JAYG). (72 sc)
Info :
Repeat motif instructions exactly for each square. To vary color layout like pictured, alternate Color B and Color A positions in a checkerboard arrangement while keeping Color C as the consistent outer frame.
— Join-As-You-Go (JAYG) Method for Fast Assembly :
Info :
JAYG is recommended for this project to avoid a bulky seam. Work the last round (Round 16 or 18 depending on your sequence) in Color C but DO NOT join with a sl st to finish a closed round for subsequent squares; instead, use sl sts through corresponding sts of an already completed square to join as you go.
Round 19 :
During JAYG with Color C: When you reach a side that abuts a completed square, do the following: work sc into your motif until corner; ch1, insert hook into corresponding st on square already in position, sl st to join, ch1, continue sc along next side, joining each ch-1 or sc to the corresponding stitch on the adjacent square with sl st. Corners: work (sc, ch2, sc) into corner and sl st to the corner ch-2 of adjacent square. Join across one side fully then continue around if joining multiple squares simultaneously. This round will not change your stitch count. (72 sc)
Info :
Work slowly on joins so edges match. If the adjacent square is slightly smaller, ease the join by working a few sc2tog or small increases to match counts; avoid large mismatches by checking gauge before assembly.
Round 20 :
With JAYG continue until the first row of squares is joined fully; when connecting four corners you can pivot and attach multiple sides to minimize weaving later. After completing a join row fasten off and weave ends to the wrong side.
Info :
Mathematics: Joining should maintain the same stitch count per motif (72 sc) provided you insert sl sts into exact corresponding stitches. If you prefer a decorative seam, use single crochet joins visible on RS by working sc through both motifs instead of sl st.
— Alternate Sew-Together Seam :
Round 21 :
Info : If you prefer to make all motifs first and then sew together, block each motif squared and lay out the full bedspread grid to ensure correct color placement before sewing.
Round 21 :
Sewing method: Using yarn tail from Round 18, with tapestry needle mattress stitch through the back loops of the outermost sc of both adjacent motifs to create an invisible seam. Work along the entire side with even spacing; approximate stitch placement: pick up the back loop of every 2nd sc if your round count is high (72 sc -> 18 per side if 4 sides). Secure ends and weave into the wrong side.
Info :
Sewing gives a flatter join with less visible bulk than visible sc join. Tuck ends into the seam to hide them and add a small reinforcing stitch at the center of each side for longevity.
— Joining Rows & Layout Suggestions :
Round 22 :
Info : Layout patterns: For the pictured bedspread the designer alternated dark-centered motifs with medium-centered motifs in a checkerboard. Make planning sheet: rows x columns matching bed size. Example queen: 9 wide x 9 long = 81 motifs. Lay out on floor then start joining from one corner working horizontally across rows, attaching each new square to the previous squares' side and the row beneath when appropriate.
Round 23 :
When joining using visible sc seam: With Color C and RS facing, insert hook through both motifs' outermost sc loops, sc through both to join. Work 1 sc for every sc on the motif side. This will keep edges even and create a subtle raised join line. (stitch count per motif unchanged)
Info :
Check alignment after each 3-4 joins. If you notice cumulative skewing, unpick the last few joins and realign motifs to keep grid straight.
— After All Motifs Are Joined: Wide Border Construction :
Round 24 :
Info : Once your grid is complete, build a 6-round outer border to frame the entire bedspread. The border is worked in Color C for cohesion; you can add a thin stripe of Color A before the cream border if desired as an accent.
Round 24 :
With Color C (Cream). Join yarn at any outer corner with sl st, ch3 (counts as dc), work (2 dc, ch2, 3 dc) in corner space to build corner, then *dc in each stitch along edge of the joined motifs placing 3-dc corner clusters at each corner. This will increase the overall stitch count per round but is a standard square border approach. Join with sl st to top of ch3.
Round 25 :
With Color C. Ch1, sc in each st around for a solid framed edge. This evens out the previous dc round and produces a neat base for further decorative rows. (stitch count equal to number of dc from Round 24)
Round 26 :
With Color C. Ch2, 1 hdc in each st around for two rounds to stiffen the edge and make the bedspread drape smoothly. Join and fasten off after two rounds. (same stitch count as sc round)
Info :
If you would like a thicker border for a bedspread that will hang over the side, repeat the hdc rounds to build desired depth; add spaced fp/bp ribs for texture by alternating rows (example Row A = hdc, Row B = 1 fpdc around each st).
— Decorative Final Rounds & Corner Detail :
Round 27 :
With Color A. Ch1, sc in each st around; at corner sts work sc, ch2, sc to keep corners square. This small contrast round frames the blanket perimeter with a subtle darker edge. Then fasten off and weave in ends. (unchanged stitch count)
Round 28 :
Info : For a scalloped finish, instead of sc in Round 27 work *sk 2, 5 dc in next st, sk 2, sl st in next st across. Space scallops evenly and finish corners with 3 sc to create gentle curves. This choice changes the aesthetic but not required for pictured bedspread.
— Optional Tassel Trim (Perimeter) :
Round 29 :
Info : To add tassels, evenly space anchor points around the edge (for example, every 6th sc). Use 6 - 8 cm tassels made of 12-15 yarn wraps and tie them off, then attach with a lark's head knot through the sc on the final border row. Repeat around the perimeter. This adds a boho farmhouse finish as seen in some photos.
Round 30 :
With Color C. Attach tassels by folding tassel loop, inserting loop through border space, pulling tassel ends through loop and tightening. Secure with a few small stitches at the head of the tassel if needed.
Round 31 :
Info : Trim tassels to even length and comb gently to fluff. If worried about durability, add a small stitch through each tassel head to secure it to the border backing.
— Pillow Cover (2) using Single Motif or 4-Motif Panel :
Round 32 :
Make 2 or 4 motifs using the same motif instructions above. For single-motif pillow cover, fold a pillow-back of fabric or make two motifs and join them by working sc around three sides and then inserting pillow form then finishing the fourth side with invisible join.
Round 33 :
For a 2-motif envelope back, attach two motifs RS together on three sides using sc through both motifs with Color C, leaving one side open to insert cushion; edge with one sc round to neaten. Add buttons or tassel ties if desired.
Info :
Pillow form sizes: for a 12.5cm motif use a 20cm pillow form for a slight puff; for larger motifs choose an accordingly sized insert. Blocking will affect final fit.
— Finishing & Weaving In Ends :
Round 34 :
Info : Weave all tails neatly to the wrong side using a yarn needle. When weaving into motifs, follow the stitch path for at least 5 cm (2 in) before trimming to secure tails. For extra security knot and weave the knot tail back into work before trimming.
Round 35 :
Info : Block the entire blanket lightly using a steam iron at a distance or wet blocking. Pin corners and edges on a flat surface and allow to dry thoroughly to set square edges which will greatly improve the blanket appearance when made from many motifs.
— Care Instructions :
Round 36 :
Info : Wash on gentle cycle in cool water and lay flat to dry. If you used 100% wool, hand wash and lay flat to dry. Avoid heavy agitation; use mild detergent. Store folded and away from direct sunlight to keep colors vibrant.
Round 37 :
Info : If you want to scale the project smaller for a throw or lapghan, reduce square size by making fewer outer cream frame rounds and use fewer motifs in the grid (e.g. 5x6 grid for a lapghan).
— Troubleshooting & Tips :
Round 38 :
Info : If motifs look wavy, add a single even sc round to tighten; if motifs cup, switch to a slightly larger hook for later squares to even tension with earlier ones. Keep a test square for any tension changes.
Round 39 :
Info : When carrying yarn for colorwork across the back, catch floats every 3-4 stitches to avoid long floats that catch and cause gaps; this also makes seams easier to join later.
Round 40 :
Info : For matching pillow sets, work pillow motifs with identical blocking treatment as bedspread to ensure consistent measurements and fit.
Round 41 :
Info : When assembling a large spread, work in rows across the short side first to allow for easier handling as the blanket grows (less weight pulling on joined seams while you work).
Round 42 :
Info : Label motif piles as you make them (A for dark-centered, B for medium-centered) and line them in layout order on the floor to avoid mistakes when joining into a checkerboard arrangement.
Round 43 :
Info : Keep extra yarn to replace tassels or for repairs; a small skein of Color C reserved for future repairs is worth the investment for a bedspread that will see long use.
Round 44 :
Info : If you want to add subtle surface embroidery, add a small embroidered line around the central puff grid before joining rounds to create extra visual contrast; use a tapestry needle and matching yarn held double for definition.
Round 45 :
Info : Consider adding corner reinforcement on bedspread underside by sewing a small fabric patch at each corner inside the border if the spread will be hung heavily over the sides and subject to stress.
Round 46 :
Info : Final overall size depends on the number of motifs and number of border rounds added. For a 9x9 grid with the rounds as written, approximate finished size before blocking is 135cm x 135cm (53in x 53in). Adjust motifs or rounds for desired overhang or bed coverage.
Round 47 :
Info : Keep a consistent reference motif to compare side lengths as you join to keep the whole piece uniform. If necessary adjust later motifs slightly to match the length of the reference motif.
Round 48 :
Info : For color substitution, keep the outer frame a single neutral to unify diverse centers. Too many changing colors in the frame creates visual busyness and makes joining more complex.
This textured square bedspread brings handcrafted comfort to any bedroom and is a lovely way to showcase textured puff stitches and classic granny construction. Each motif is a small treasure, and joining them into a large spread is an immensely satisfying process — the blanket grows steadily and beautifully as you work. The neutral cream border unifies the two gray centers into a soft, modern statement piece that will become a favorite in your home. 🧶 Snuggle up in your handmade creation and enjoy the warmth of hours spent creating something truly special. ✨