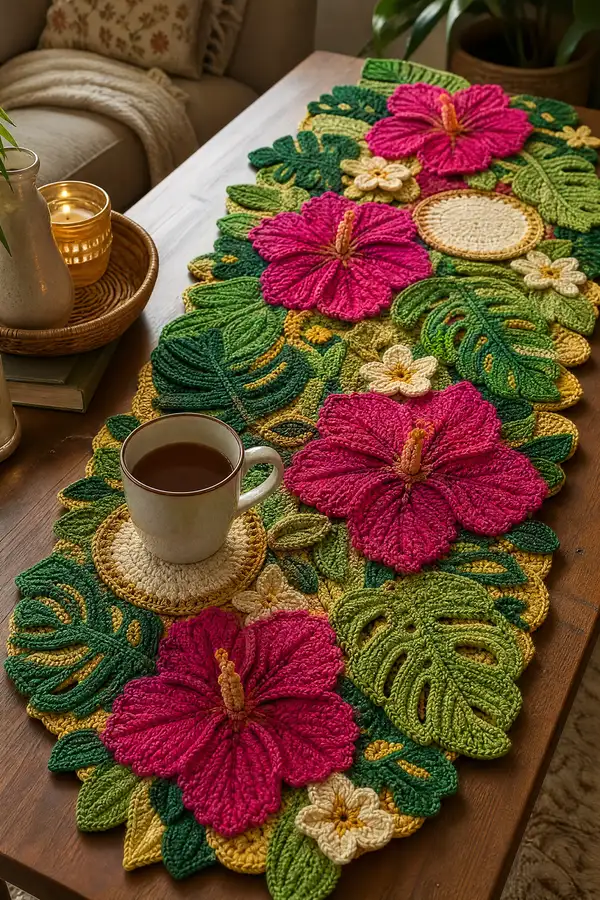
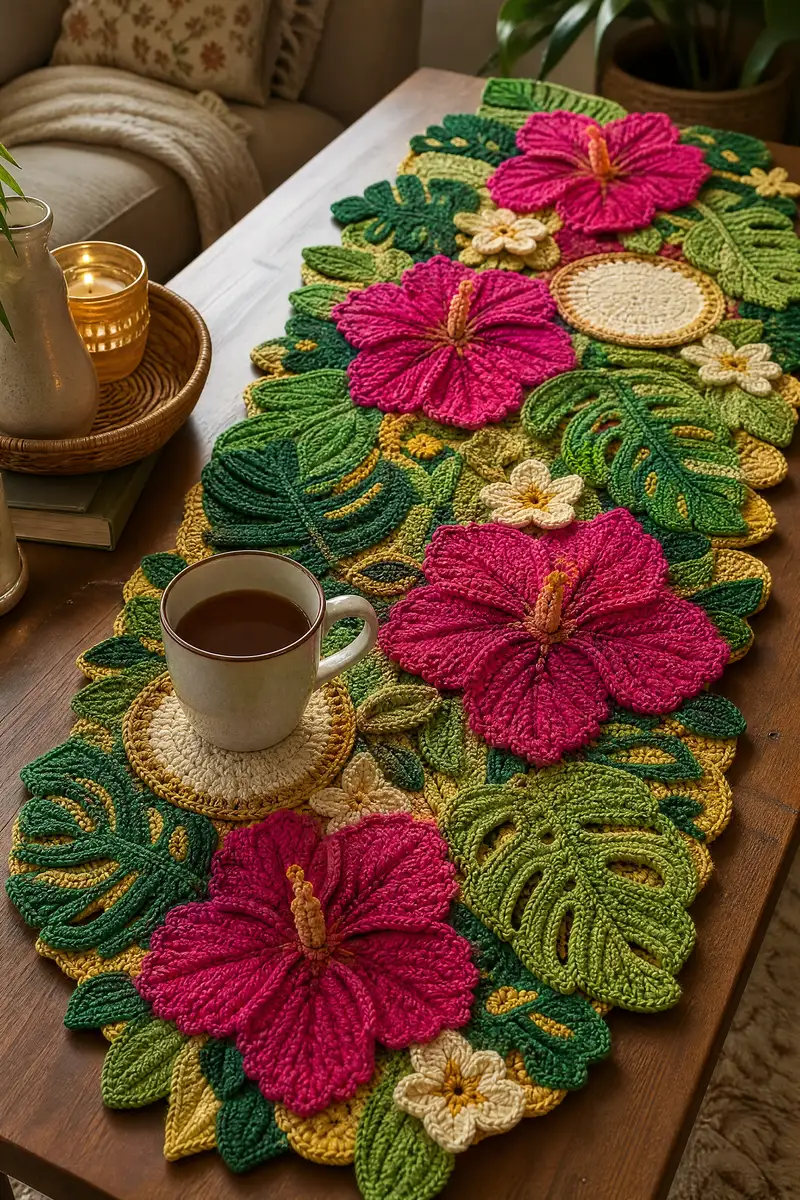
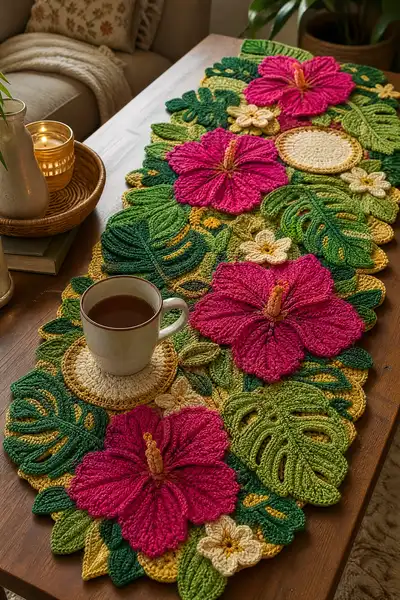
Create a lush tropical table runner covered in layered greenery and bold magenta hibiscus blooms. This modular crochet project uses motif-building techniques—flowers, leaves, and round coasters—assembled into an organic runner. Textured stitches, front/post relief, and puff clusters give depth and a handcrafted, botanical look ideal for a sunny table display.
Progress Tracker
0% Complete
— Hibiscus Flower (Make 3) :
Round 3 :
(1 sc, 1 inc) x 6 (18)
Round 4 :
(2 sc, 1 inc) x 6 (24)
Round 5 :
(3 sc, 1 inc) x 6 (30)
Round 6 :
(4 sc, 1 inc) x 6 (36)
Round 7 :
(5 sc, 1 inc) x 6 (42)
Round 8 :
(6 sc, 1 inc) x 6 (48)
Info :
Work the center tight: use 3.25mm hook if your gauge is loose. This disk forms the base the petals attach to. Place 5 evenly-spaced markers to mark petal join points (every 9-10 sts depending on tension).
Round 9 :
1 sc in each st (48)
Round 10 :
1 sc in each st (48)
Info :
The center disk should measure approximately 3.5" (9cm) across for the large flower using worsted yarn and 3.5mm hook. If too small/large, adjust hook.
Petal (Make 5) — Round 1 :
Join petal color with sl st at marker, ch 2 (counts as first hdc), 6 hdc evenly along 6-8 base stitches, ch 1, turn (7 hdc)
Petal Round 2 :
Inc across: (1 hdc in first st, inc hdc in next) rep to end (10 hdc)
Petal Round 3 :
1 hdc in each st (10)
Petal Round 4 :
(1 hdc, 1 inc) x 3, 1 hdc in last 4 sts (13)
Petal Round 5 :
1 hdc in each st (13)
Petal Round 6 :
(2 hdc, 1 inc) x 3, 1 hdc in last 4 sts (16)
Info :
These early rounds shape the base flare of the petal. Keep stitches tidy and do not pull too tight; petals will be shaped with post stitches in later rounds.
Petal Round 7 :
Ch 3 (counts as dc), 1 dc in next 2 sts, fpdc around corresponding center disk st to create a raised center vein, 1 dc in next 6 sts, ch 2, sl st to turn and continue in rows across the petal edge to create a fan-shaped petal (work 8 dc along row edge back toward join). End with sl st into petal base.
Petal Round 8 :
Working around petal edge: (sc in next 2 sts, hdc in next 2, dc in next 4, tr in next 2, dc in next 4, hdc in next 1, sc to join) — shape this so the outer edge forms gentle scallops (approx 28 sts total across both sides)
Petal Round 9 :
Work fpdc down the center vein every 2nd stitch from outer tip toward base to create deep ribs: (fpdc, 1 sc) repeat across center row. Fasten off leaving long tail to sew. (Approx 24-28 sts depending on shaping)
Info :
Puff clusters or front/post stitches will give petals the 3D ridged look seen in the photo. You can starch lightly or steam shape petals gently before final assembly to hold shape.
Petal Round 10 :
Optional decorative: Work 1 round sc around petal edge in contrasting slightly darker magenta to define edges (sc evenly, approx 28-30 sc)
Info :
Make all 5 petals identical. Block or shape each petal, then pin to center disk on a flat surface to plan layout before sewing.
Stamen Tube (Make 1 per flower) — Round 1 :
With orange yarn, mr, 6 sc in mr (6)
Stamen Round 2 :
Inc around (12)
Stamen Round 3-6 :
1 sc in each st (12)
Info :
Stuff tube very lightly or leave hollow depending on look. Flatten slightly then sew to flower center with the raw edges of petals stitched beneath the stamen tube for a neat finish.
Hibiscus Assembly :
Arrange 5 petals evenly on the center disk using the markers; whip stitch base of each petal to the center disk through both petal base and disk rounds 9-10. Overlap slightly so petals sit snugly. Sew stamen tube through center disk, anchor to back with several sturdy passes. Fasten off and weave ends.
Info :
When sewing petals, take only a few threads per stitch to keep seam invisible. Adjust petal flare by sewing fewer or more stitches at the very base to rotate them slightly forward if desired.
— Large Textured Leaf (Make 8 assorted sizes) :
Round 1 :
Ch 6, sc in 2nd ch from hook, sc in next 3, 3 sc in last ch; working on opposite side of chain sc in next 3, 2 sc in last (12) — forms a small oval base
Round 2 :
Inc around evenly (24)
Round 3 :
1 sc in each st (24)
Info :
These leaves are worked in rows out from a central spine using fpdc and bpdc to define veins. Change to 3.5mm hook if you want denser leaves.
Round 4 :
Ch 1, start at one end, 1 sc in next 6 sts, turn to work along long edge: ch 1, 1 sc in next 12 sts, leave last 6 sts for other side — this prepares edges for vein rounds; do not close round, work as rows along the length to create elongated leaf.
Round 5 :
Work in rows: ch 2 (counts as hdc), hdc across to tip (approx 12), at tip work 3 hdc in same stitch to create rounded end, continue down opposite side hdc to base. Fasten off (approx 28 hdc)
Round 6 :
With contrast mid-green, rejoin at base. Work a central spine: ch 1, fpdc in next 3 sts up center line, ch 1, bpdc on either side to form raised veins — work fpdc every 2nd stitch to create distinct ribs (approx 12 fpdc total)
Round 7 :
Edge round: sc evenly around leaf edge working 3 sc in tip to keep shape (approx 40 sc)
Info :
Vary stitch height and post stitches to create smaller and larger leaves; for narrower leaves reduce initial chain to ch4 for a slimmer base.
Round 8 :
Optional: Embroider additional vein lines with yarn needle using surface slip stitch or darning thread to emphasize texture.
— Monstera-Style Split Leaf (Make 4) :
Round 1 :
Ch 7, sc in 2nd ch from hook and next 4, 3 sc in last ch; work back along chain sc in next 4, 2 sc in last (16)
Round 2 :
Inc evenly around (32)
Round 3 :
1 sc in each st (32)
Round 4 :
Ch 1, sc in next 6, ch 6, skip 6 sts, sc in next 10, ch 6, skip 6 sts, sc in last 4 — create two long cutout chains on either side to make the split leaf silhouette
Round 5 :
Work around edges: sc evenly including the ch-6 spaces (where the slitted holes are now closed with sc) (approx 40 sc)
Round 6 :
With darker green, work fpdc along central stalk: make a line of fpdc down the center and add 6 short diagonal fpdc ribs on each side to mimic natural fenestrations
Info :
Monstera holes are created by chaining and skipping stitches before edging; adjust chain lengths to change hole size. Use bpdc on one side and fpdc on the other to give a curled edge look.
— Small 5-Petal Flower (Make 6) :
Round 1 :
mr, 6 sc in mr (6)
Round 2 :
Ch 2, (2 dc, ch 2, sl st in next st) x 5 to create petals around; sl st to join (5 petals)
Round 3 :
In each ch-2 space: ch 1, (sc, hdc, 2 dc, hdc, sc) to form fuller petals. Fasten off and leave tail for sewing.
Info :
Use cream for these small blossoms and a tiny contrasting french knot or small puff in yellow for the center. These are flat applique9s sewn over leaf junctions.
— Round Coaster/Disc (Make 4) :
Round 1 :
mr, 8 sc in mr (8)
Round 3 :
(1 sc, 1 inc) x 8 (24)
Round 4 :
(2 sc, 1 inc) x 8 (32)
Round 5 :
1 sc in each st (32)
Round 6 :
Change to gold/yellow. sc evenly around to create rim (32)
Round 7 :
Optional surface round: sl st in BLO around rim to create defined edge (32)
Info :
If you want padded coasters, crochet two discs and stitch together leaving small opening for light stuffing, then close. Otherwise work single disc and sew into runner as pictured.
— Background Filler Motifs (Make many) :
Round 1 :
Small oval filler: ch 5, sc in 2nd ch from hook and next 3, 3 sc in last ch; sc back along chain (10)
Round 2 :
Inc evenly around to shape small leaf (20)
Round 3 :
Edge: sc around, 3 sc in tip to keep rounded ends. Fasten off.
Info :
Make a mix of small fillers in light green and yellow-gold to tuck into gaps between larger motifs; they visually support the composition and ensure the runner looks dense.
— Textured Petal Detail (Alternate method for petals) :
Round 1 :
Ch 12, sc in 2nd ch from hook to last, 3 sc in last, continue back along chain 1 sc in each (22)
Round 2 :
Work along long row: ch 2, 1 dc in each st to tip, 3 dc in tip, 1 dc down opposite side, fasten off (approx 30 dc)
Round 3 :
Make vertical ribbing: with contrast color work fpdc rows across the petal center to make visible ribs. Attach fpdc in every 3rd stitch creating about 8-10 ribs
Info :
This alternate petal produces a more elongated, heavily-ribbed petal; choose which petal style you prefer and make petals consistently across all flowers.
— Assembly and Joining (JOIN AS YOU GO & Sew) :
Info :
Lay out your runner plan on a large flat surface: arrange 3 hibiscus flowers spaced along the center lengthwise. Tuck monstera leaves and textured leaves around them in an overlapping composition. Use coins or lightly-weighted objects to hold pieces in place while pinning.
Step 1 :
Position all motifs on work surface, overlapping edges slightly. Decide if you will use whip stitch assembly (stronger for decorative traffic) or crocheted join-as-you-go. The instructions below combine both methods.
Step 2 :
Starting with the center hibiscus, sew the petal bases to the nearby leaf edges: use mattress or whip stitch through the disk rounds and leaf edges, taking 3-5 stitches per attachment point. Reinforce where three motifs meet by passing needle through each piece in one stitch before tying.
Step 3 :
For open gaps, work small filler motifs and attach with hidden whip stitch. For visible joins that should look decorative, join motifs with sc join: align two motif edges, insert hook into both edges and work sc across to connect (this creates a neat visible ridge).
Info :
If joining with sc, use the same color as the motif edge for a seamless look. For decorative contrast, join with a mid-gold to pick up the yellow accents shown in the image.
Step 4 :
Once all motifs are connected into a continuous runner, work an edge round of sc around the entire perimeter to tidy the outline. Where edges are scalloped, place 3 sc in each outer curve to preserve shape.
Step 5 :
Edge Round: With gold/yellow color, join at any point and sc in each stitch around, placing (3 sc) in tips and decreasing slightly along concave edges to avoid puckering. Fasten off and weave ends.
Info :
Use a tapestry needle to bury ends through several motifs so they stay hidden and secure. If the runner will be used often under cups or plates, consider reinforcing joins with a line of whip-stitches on the back side as well.
— Finishing Touches :
Step 1 :
Sew small yellow french knots or tiny puff stitches into the centers of cream flowers for pop. Use a short strand of yarn doubled for sturdier knots.
Step 2 :
Add tiny gold accent dots along leaf edges using bullion stitch or small surface slip stitches.
Info :
Lightly steam-block petals and leaves if your yarn allows; do not press with iron. Pin petals into position while they cool to set a slight cupped shape.
Step 3 :
Final inspection: check for loose tails, reinforce seams where the runner may bear weight, and trim any stray fibers. Your runner is ready to display.
Info :
Because this runner is decorative and not meant to be laundered heavily, spot clean with damp cloth. If washing is needed, hand wash gently and re-shape while damp.
Finishing this tropical hibiscus runner is such a joyful moment — seeing each petal and leaf come together into a flowing composition is pure crochet satisfaction! The bright magenta blooms and layered greens transform any table into a sunny vignette. Take a moment to admire your stitching and give yourself a well-earned pat on the back. 🧶🌺 Your handmade runner will be a conversation starter at brunch or whenever you set it out. Enjoy showing off your botanical handiwork! ✨