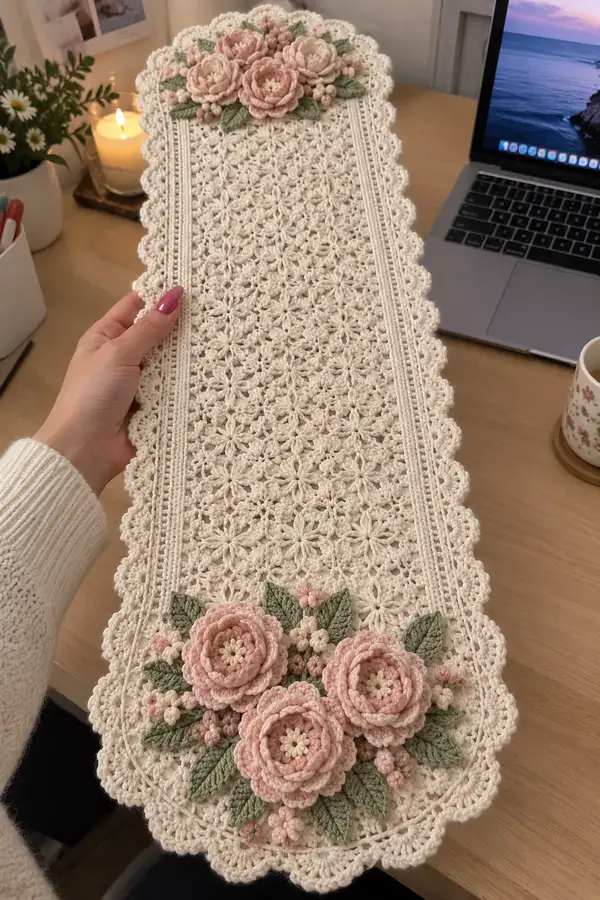
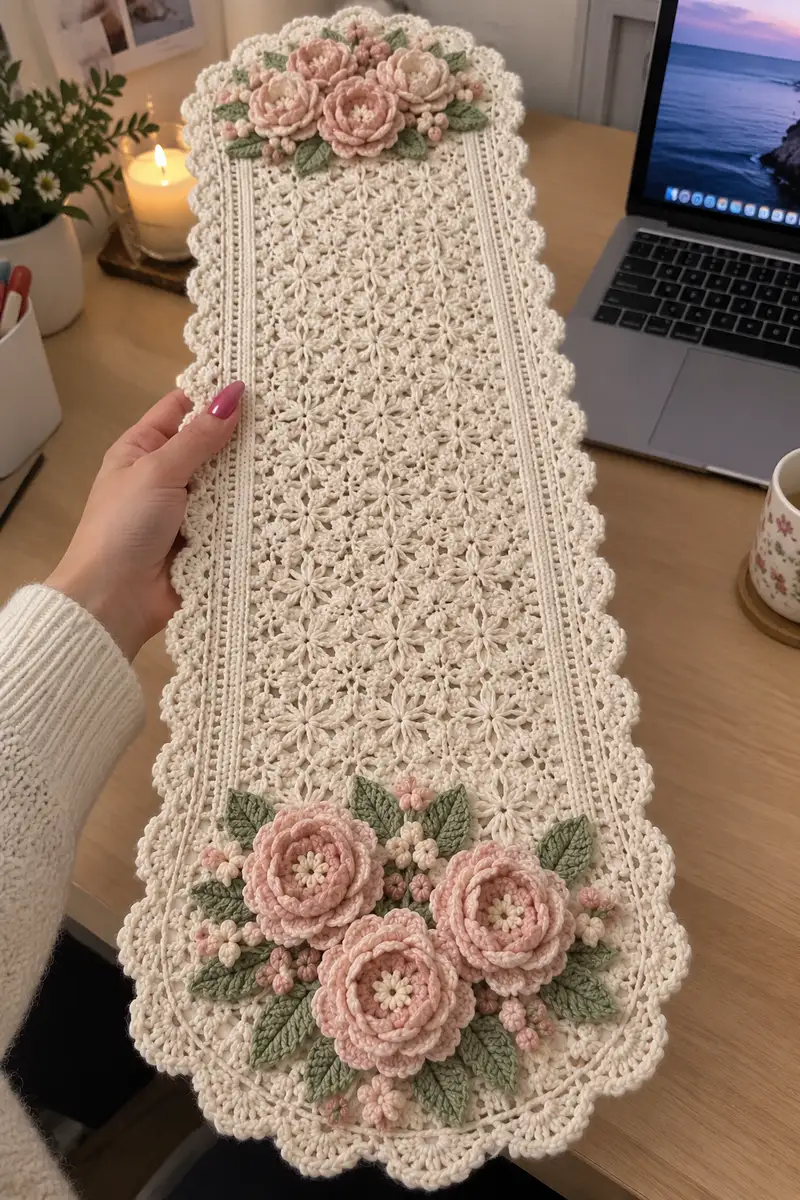
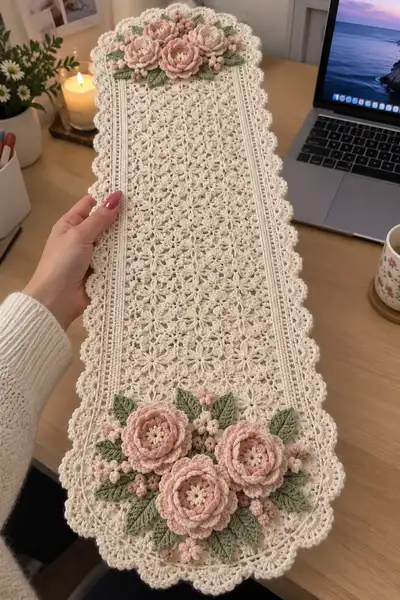
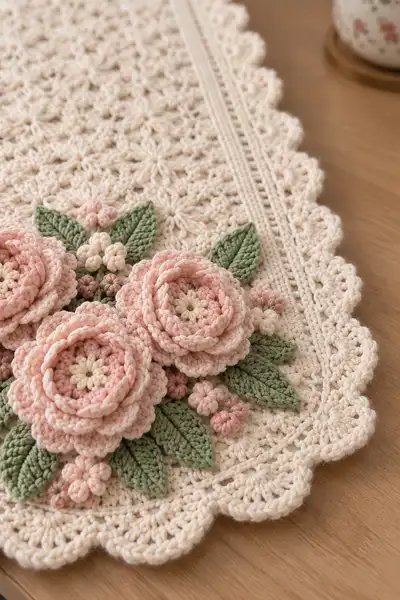
A delicate, lace-like table runner featuring repeated starburst motifs and a scalloped edge, finished with three-dimensional blush roses and sage leaves. Worked in a soft cream cotton with neat vertical ribs and textured panels, this runner is perfect as a centerpiece or decorative dresser scarf. The applique bouquet adds romantic depth and a handcrafted vintage feel.
Progress Tracker
0% Complete
— Overview :
Info :
This runner is built from a repeated star-daisy motif tiled in a long rectangle, flanked by two narrow rib panels, and completed with a scalloped edging. One end is adorned with three layered 3D roses, leaves, berry clusters and small blossoms. Work the motifs first, join as you go into the long panel, add the rib panels, work the border in rounds around the entire rectangle, then make and applique the floral decorations.
— Star-Daisy Motif (Make 36) :
Info :
Make 36 motifs in main cream color. Each motif finishes approximately 3.2in/8cm across after blocking. Join motifs into rows of 6x6 (six across, six down) to create the long runner panel. Use a stitch marker to mark the start of each round.
Round 1 :
Work a magic ring, ch1, 8 sc into ring. Pull ring closed. Join with sl st to first sc (8)
Round 2 :
Ch3 (counts as dc), (ch2, dc) into same st, *skip next st, (dc, ch2, dc) into next* repeat from * to * around to form 4 ch2 loops around; join with sl st to top of ch3 (8 petal loops, 16 dc total; but loop-count is 8)
Info :
These ch2 loops become the petal supports. Keep tension even and do not pull too tightly when joining to avoid shrinking the petal base.
Round 3 :
Working into each ch2 loop: *(sc, hdc, 3 dc, hdc, sc) into loop* x 8 (7 sts per petal x 8 = 56)
Round 4 :
Ch1, 1 sc in first st, *ch3, sk next 3 sts across petal, 1 sc in top of next petal center (between petals)* repeat x8, join with sl st to first sc. You will have 8 ch-3 picot loops between petals (8)
Round 5 :
Work in picot loops to create joining points: Into each ch-3 loop work (sl st, ch3, sl st) to make a small bridge; then in the sc between petals work 3 sc. After finishing all petals you should have a tidy round with 8 small bridges and 24 sc around (24)
Info :
Round 5 creates a small ring around the flower to make joining easier. Count the sc to ensure you have 24 stitches before proceeding. If one loop feels tight, adjust by loosening the initial ch3 in round 4.
Round 6 :
Ch1, sc in same st, (2 sc in next, sc in next) x 8 (This increases to 36; calculation: initial 24 -> pattern yields 36) (36)
Round 7 :
1 sc in each st around (36)
Round 8 :
To create a slightly raised star texture, ch2, *fpdc around next 2 sts, bpdc around next 1 st* repeat around to create alternating ribs. Join and finish with sl st (36)
Info :
Use front- and back-post double crochet to add texture without adding width. Keep post stitches tall and even to match neighboring motifs when joined.
Round 9 :
Ch1, sc in each st around (36)
Round 10 :
Edging round for motif: *(ch3, sl st to create small loop), sk next st, 1 sc in next 2 sts* repeat around. After final repeat join with sl st to first sc. Final stitch count remains approximately 36 with 12 small ch-3 scallops around (36)
Info :
Fasten off leaving a 20-25cm tail for joining if you prefer whip joining; otherwise leave a short tail if using crochet-as-you-join methods. Block each motif flat, pin out petals gently to open the star shape.
— Joining Motifs into Panel :
Info :
Arrange motifs into 6 columns by 6 rows (total 36). Join motifs row-by-row using crochet join-as-you-go or whip stitch. The pattern uses a tessellated join: join at four points around each motif where small ch-3 picot loops align. Keep orientation consistent so star petals all point the same direction.
Round 1 :
Lay first motif flat; attach second motif by placing them RS together aligning 2 adjacent petal bridges. With a 3.5mm hook and main color, insert hook through bridge loop of first and corresponding bridge loop of second, ch1, sl st through both loops; *ch1, sl st into next aligned bridge pair* across join. Repeat for all joins along row. No numeric stitch count – join until row complete.
Info :
When joining, keep tension slightly looser than working tension so the join does not pucker. Use stitch markers to mark motif corners and centers to keep spacing even. Join all motifs in a row first, then join rows together aligning bridge points between rows.
Round 2 :
After joining rows, reinforce interior joins: work 1 sc in each bridge connection on the back side to flatten joins. This creates a small internal seam but helps the runner lie flat.
Info :
If you prefer a nearly invisible join, use ladder stitch with yarn needle matching the main color. For quicker work, use join-as-you-go; both methods produce an even panel after blocking.
— Central Panel Stabilizing Ribs (Make 2 long strips) :
Info :
Each rib strip is worked as a long rectangular panel to be seamed along the long edges of the motif panel, creating the vertical rib lines visible in the photograph. Make two strips to run the full length of the runner.
Round 1 :
Using main color, ch (panel-length in chains) to match runner length plus 4. For this sample, ch 120 (adjust to match your motif layout). Turn.
Round 2 :
Row 1: 1 sc in 2nd ch from hook and across (119) - foundation row.
Round 3 :
Ch1, turn, BLO: 1 sc in each st across for 3 rows total to create a neat ridge (119)
Round 4 :
Ch2, turn, *fpdc around next st, bpdc around next st* repeat across to create alternating raised ribs. Work 6 rounds of fpdc/bpdc texture (119)
Info :
Work a total of 12 rows of texture for a medium-width rib strip that visually matches the motif field height. Adjust the number of rows to align with the motif diameter when joined to the field.
Round 5 :
Ch1, turn, 1 sc in each st across for 2 rows to finish neat edges (119)
Info :
Make two identical strips. Block them flat. Position strips at about 1.5cm in from each long edge of the motif rectangle before sewing to ensure symmetry.
— Assemble Runner Base :
Round 1 :
Lay motif panel flat. Pin the two rib strips along the long edges, leaving a small gap (approx 3-4mm) so stitches from motifs show. Using main color and mattress stitch or whip stitch, sew strips to panel through the back loops of motifs where the sc rounds meet the rib, working a neat seam the entire length.
Info :
Check alignment by folding runner in half lengthwise to ensure ribs are symmetrical. Do not pull seams too tight; the border will later smooth the join.
Round 2 :
Once strips are attached, work a neat foundation round around the entire outer edge of the runner: With RS facing, join main color at one corner, ch1, evenly sc around the raw edges of motifs and strips, placing 2 sc in each corner curve to turn. This creates a firm edge for the border (approx stitch count varies by runner length; aim for an even distribution).
Info :
When sc-ing around motifs, place 1 sc into each sc of motif round to create continuity. Where lace has ch-spaces, place sc into space centers to minimize holes in the foundation round.
— Border Foundation Rounds :
Round 1 :
With main color and runner flat, work Round A: ch3 (counts as dc), 1 dc in same st, *ch2, skip 1, 2 dc in next st* repeat around to form small pairs of 2-dc groups with ch-2 arcs. Join with sl st to top of ch3. This gives a scaffold for scallops (pattern length dependent; continue evenly).
Round 2 :
Ch1, sc in each dc and ch-2 space around, placing (sc, ch3, sc) in each corner to maintain shape. This evens the foundation for scallops (stitch count will reflect your runner perimeter; maintain consistent stitch spacing).
Info :
If your runner is longer or shorter than sample, adjust ch counts in foundation and ensure you land one scallop pattern repeat per motif 'petal valley' to keep border symmetrical.
Round 3 :
Ch3, *4 dc in next space, ch2, sl st in same space to form a shell* repeat across; shells will become scallops. Place shells evenly around the perimeter; at corners, work 6 dc shells to keep corner rounded.
Round 4 :
Ch1, sc in each st, making 3 sc in the center of each shell to anchor. Join with sl st. This locks shells and keeps scallops flat (stitch count matches foundation; remain consistent).
Info :
Work the shells with even tension; blocking later will open scallops. Pin shells when blocking to keep a uniform curve.
— Scalloped Edge Final Rounds :
Round 1 :
Ch1, 1 sc in each st to start; then at each shell work: *(sl st, ch3, 7 dc in shell, ch3, sl st) into same shell center* to form a deep scallop. Repeat across edges and work a deeper 9-dc scallop at corners. Join and fasten off (stitch count equals foundation distribution).
Round 2 :
With a smaller 3.0mm hook, work a trimmed picot edge: *sc in next 3 sts, (ch3, sl st in first ch to make picot), sc in next 3 sts* repeat across scallops. This creates the delicate scalloped finish seen in the photos.
Info :
Block the entire runner now: damp block or steam gently, pinning scallops and motif petals into the exact shape. Allow to dry fully before applique to ensure final shape remains locked in place.
— Leaves (Make 12) :
Info :
Leaves are made in sage green using front post stitches to create a textured central vein. Make 12 leaves of varying sizes (small, medium, large) to arrange under the roses.
Round 1 :
Ch 10. Row 1: 1 sc in 2nd ch from hook, sc across (9). Turn. (9)
Round 2 :
Ch1, 1 sc in each st across, then working along opposite side of foundation chain 1 sc in each ch (total 18) to form a neat oval base (18)
Round 3 :
Ch2, turn, *hdc in next 4 sts, fpdc around the next 2 sts (center vein), hdc in next 4 sts* - this creates a slight height on the center column (10 sts on the row after shaping; overall 20 with foundation side) (20)
Round 4 :
Ch1, turn, sc in each st around, placing 3 sc at each tapered end to round them off (approx 22)
Round 5 :
Using sl st and long stitches to create pointed leaf tip: ch1, sc in next 3 sts, hdc, dc2tog (decrease over 2 sts) to form taper, sl st into center top to make point; repeat on other side returning to base. Fasten off leaving a 15-20cm tail for sewing.
Info :
For larger leaves, start with ch12 and follow same shaping increasing central fpdc area to 4 sts. For smaller leaves ch8 and keep central fpdc to 1 stitch. Create veins by stitching a line down center with matching yarn if you want additional definition.
— Small Five-Petal Blossoms (Make 24) :
Round 1 :
Magic ring, ch1, 5 sc in MR, pull tight (5)
Round 2 :
*ch3, sl st in next st* repeat 5 times to create 5 loops. Join and fasten off leaving tail for sewing. Each loop will be worked over to create petals.
Round 3 :
Using tail, work into each ch-3 loop: sl st, ch3, 3 dc, ch3, sl st (petal), repeat for each loop. Fasten off and weave ends (5 petals per blossom).
Info :
Make 24 blossoms in two sizes (full size and a tiny half-size using ch2 loops) to tuck between leaves and roses. Glue or sew a tiny seed bead or contrasting sc center for interest.
— Tiny Berry Clusters (Make 18) :
Round 1 :
Using blush or darker pink, ch3, join with sl st to form a small ring. Ch1, work 6 sc into ring (6). Fasten off leaving tail.
Round 2 :
With yarn needle, pull center to make a small puckered berry. Make clusters of 2-3 small berries on short ch stems (ch3, attach berry). These will be sewn into flower groupings.
Info :
Berries are tiny and should sit slightly raised on the runner; secure with several invisible stitches so they do not come loose in handling. Use contrast color for a subtle highlight if desired.
— 3D Roses (Make 3) :
Info :
Each rose is worked in blush pink in a spiral of layered petals to create the full three-dimensional bloom seen in the photos. Work 3 roses of graduated sizes: large (Rose A), medium (Rose B), small (Rose C).
Rose A - Round 1 :
Magic ring, ch1, 6 sc in MR, pull tight (6)
Rose A - Round 2 :
(inc) x6 (12)
Rose A - Round 3 :
(1 sc, inc) x6 (18)
Rose A - Round 4 :
Ch3, turn, work petals along last round: *(sl st, ch3, 5 dc, ch3, sl st) into next st* repeat around to form 6 outer petal loops. Fasten off and leave long tail for sewing (6 petal loops)
Rose A - Round 5 :
Create a spiral strip for inner petals: With new pink yarn, ch36, sl st into 2nd ch from hook and along chain: 1 sc in each ch back to start to create a narrow spiral band (approx 35 sc). Fasten off leaving long tail.
Rose A - Round 6 :
Roll the spiral band tightly to form the rose center, stitch base securely with tail, then arrange outer petal loops around spiral and sew each petal base to the spiral for a layered full bloom. Adjust petal positions to overlap naturally. Fasten ends and weave in.
Info :
Vary tension on the spiral to change bloom tightness - tighter roll = compact rose, looser roll = open rose. For the medium and small roses use shorter spirals: ch28 for medium, ch20 for small, and 5 or 4 outer petal loops respectively.
Rose B :
Work rounds as Rose A but with shorter spiral ch28 and 5 petal loops. Adjust counts accordingly: initial rounds up to R3 match R1-R3 of Rose A; R4 make 5 petal loops; R5 ch28 then sc back (approx 27 sc), roll and sew.
Rose C :
Same method: MR 6 sc, inc round to 12, ch shorter spirals ch20, 4 petal loops; roll and sew for a small tight bloom.
Info :
Make sure to stitch spiral base securely — use several overhand stitches through the base of the spiral to lock the layers. Leave long tails for sewing onto the runner. If desired, lightly steam to shape the petals after assembly.
— Additional Decorative Petals and Fillers :
Round 1 :
Make 12 small curled petals for under-rose texture: ch6, sc in 2nd ch from hook across, sl st to base, pinch and sew into curved shape. No fixed stitch count – create 12 pieces varying shapes.
Info :
These small curled petals are useful to soften the base of the roses and hide attachment stitches. Use the same blush pink color or a slightly lighter tone for depth.
— Attachment and Placement Guide :
Info :
Decide which short end of the runner you prefer for the bouquet. Pin the three roses in a triangular cluster (large rose centered slightly forward, medium and small to sides) leaving room around for leaves and small blossoms. The cluster in the photo sits about 3-4cm in from the scalloped edge and centered laterally.
Round 1 :
Pin leaves around the rose cluster: six larger leaves radiating outwards and six smaller leaves tucked in; secure temporarily with pins to check balance.
Round 2 :
Arrange small five-petal blossoms and tiny berry clusters into gaps between petals and leaves. Use a combination of 2-3 small blossoms near each rose and scatter berries for realism. Keep the cluster low profile to avoid toppling cups placed on the runner.
Info :
Sew each piece down with the long tail using small, tight stitches through the runner base only. Avoid sewing through the front of the blossom where stitches show; fix from the underside when possible. Use 6-8 passes per large rose and 3-4 passes for each leaf for durability.
— Final Finishing Rounds :
Round 1 :
Weave in all tails through multiple stitches, burying ends into backing fabric of runner. Trim close but not flush to avoid slippage. Use small dots of fabric glue under dense applique bases if extra security is required.
Round 2 :
Final blocking: pin runner and appliques in place on blocking board. Steam lightly from the right side using a cloth barrier. Let cool and dry completely under pins for 12-24 hours to set shape permanently.
Info :
If you machine wash your runner, use a gentle cold cycle in a laundry bag and reshape while damp. Air dry flat to maintain scallop shape and applique integrity.
— Optional Variations and Tips :
Info :
Try using fingering weight cotton and a smaller hook for a more delicate runner, or chunky cotton and larger motifs for a bold table accent. Change flower colors seasonally (pumpkin/orange for autumn, bright pastels for spring). Add beads to blossom centers for sparkle or embroider tiny veins on leaves with a darker green for realism.
Info :
For a reversible runner, make floral appliques detachable by adding small snap fasteners or velcro pads on the underside so you can wash the base independently.
Finishing this runner is incredibly satisfying — the lace center and scalloped edge provide elegant texture while the 3D roses bring warmth and handcrafted charm. The piece makes a stunning gift or a special accent for your own home. Pin, block, and admire your work; each stitch tells a story of patience and skill. 🧶🌸 Happy crocheting and enjoy creating a beautiful heirloom to treasure!