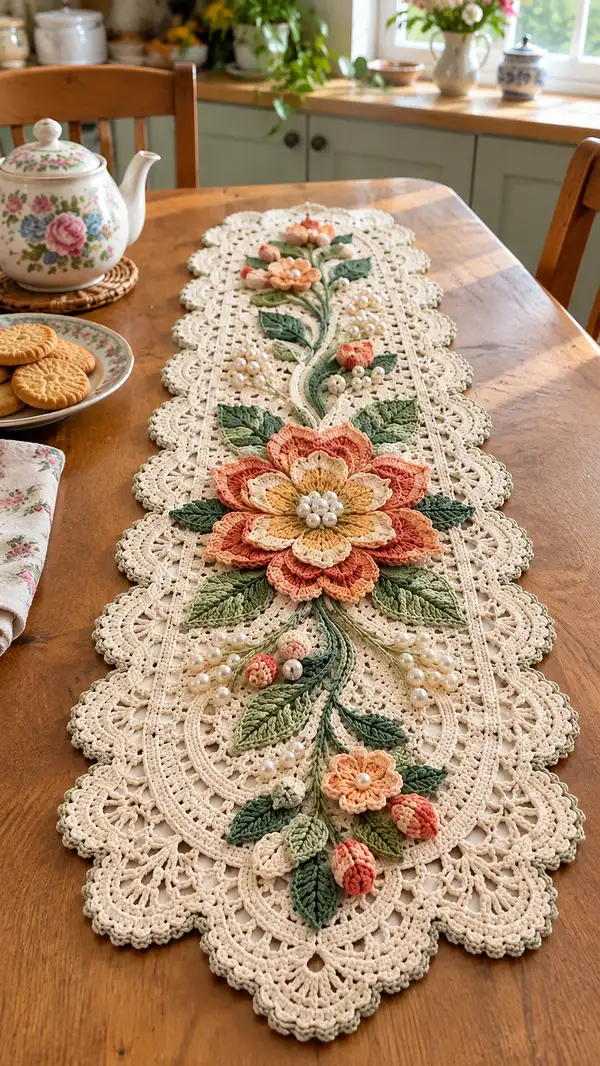
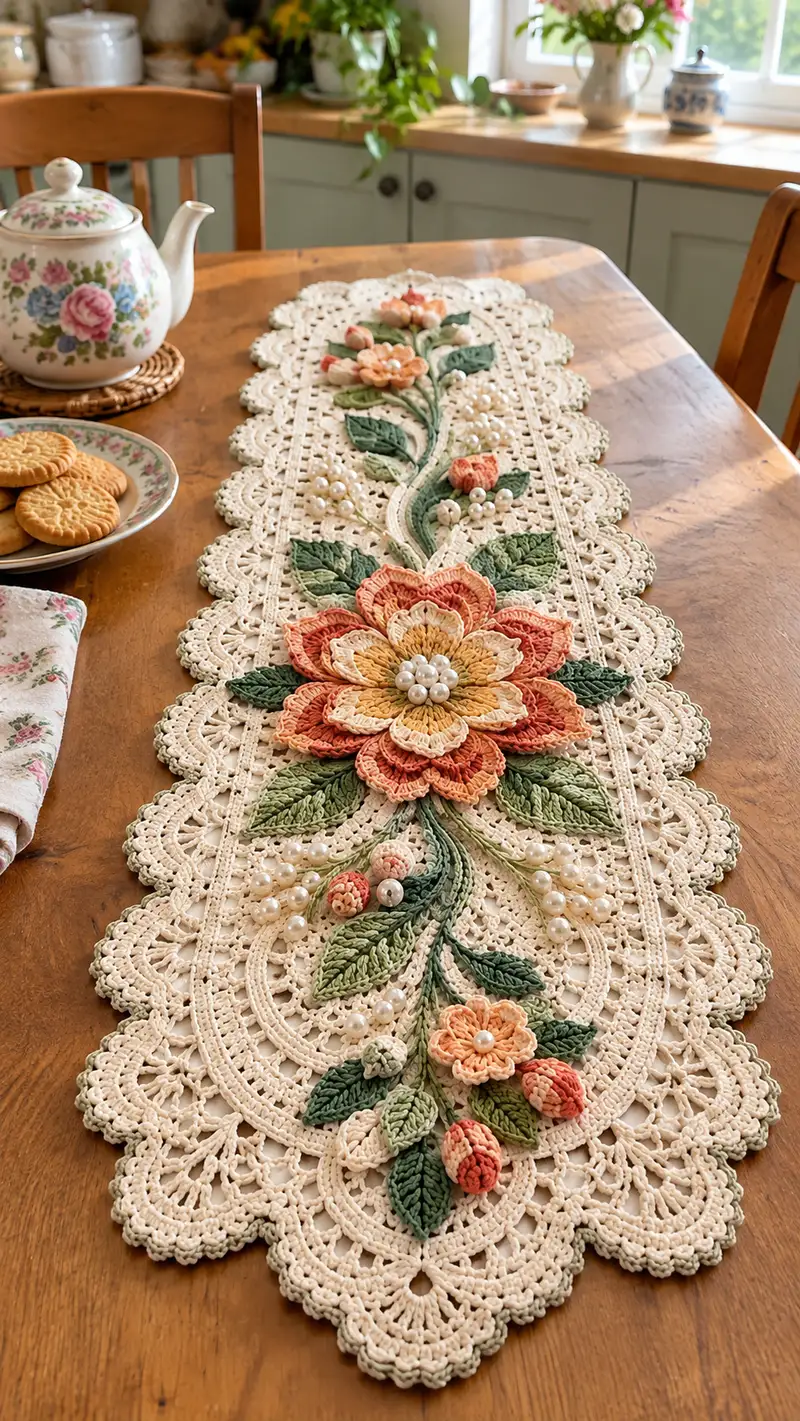
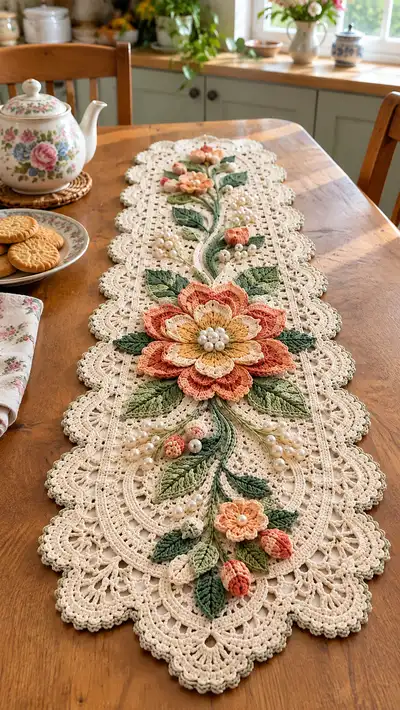
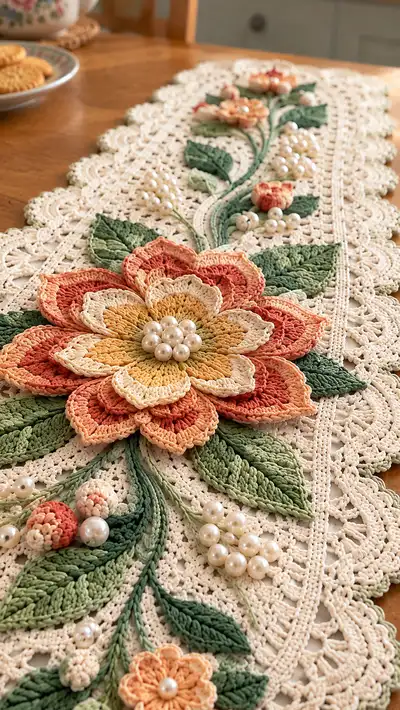
A romantic, vintage-inspired lace table runner adorned with layered 3D floral appliques, leafy vines and pearl clusters. This pattern recreates the delicate scalloped lace base and richly textured blooms seen in the photos, using cotton thread and precise stitchwork to build dimensional petals, leaves, buds and stems. Ideal for special occasions or to add timeless charm to your dining table.
Progress Tracker
0% Complete
— Materials & Gauge :
Info :
This pattern uses size 10 cotton thread for the lace base and DK cotton for appliques. Gauge is not critical for the runner, but consistent tension is essential. The finished runner in the photos measures approximately 14-16 inches wide by 48-52 inches long. Use a smaller hook if you want tighter lace. Block lace base after completion to reach measured size.
— Lace Base (Main Runner Oval) :
Round 1 :
6 sc in magic ring (6)
Round 3 :
(1 sc, inc) x 6 (18)
Round 4 :
(2 sc, inc) x 6 (24)
Info :
These first increases lay a round circular foundation; to begin shaping an oval, future increases will be placed on two opposing segments to elongate the shape.
Round 5 :
(3 sc, inc) x 6 (30)
Round 6 :
(4 sc, inc) x 6 (36)
Round 7 :
(5 sc, inc) x 6 (42)
Round 8 :
1 sc in each st (42)
Info :
To begin elongation, Round 9 will place increases on the two opposing arcs only. Place markers at the four quarter points (every 11 stitches approx.) to help identify the opposing increase zones.
Round 9 :
At quarter 1: (1 sc, inc) x 3 — work next 16 sts even — at quarter 3: (1 sc, inc) x 3 (48)
Round 10 :
1 sc in each st (48)
Round 11 :
At quarter 1: (2 sc, inc) x 3 — work next 18 sts even — at quarter 3: (2 sc, inc) x 3 (54)
Round 12 :
1 sc in each st (54)
Info :
Continue alternating rounds of increasing at the two ends only to shape a gentle oval. Keep the increases symmetrical: if you added three increases at one end, mirror them at the opposite end.
Round 13 :
At each end: (3 sc, inc) x 3 — work next 20 sts even (60)
Round 14 :
1 sc in each st (60)
Round 15 :
At each end: (4 sc, inc) x 3 — work next 22 sts even (66)
Round 16 :
1 sc in each st (66)
Info :
By now the oval is beginning to take shape. Work two to three even rounds between shaping rounds to maintain smooth curves. Add or reduce increases slightly if your oval becomes too rounded or too long compared to photos.
Round 17 :
At each end: (5 sc, inc) x 3 — work next 24 sts even (72)
Round 18 :
1 sc in each st (72)
Round 19 :
At each end: (6 sc, inc) x 3 — work next 26 sts even (78)
Round 20 :
1 sc in each st (78)
Info :
Once the oval meets the desired width (approx 14-16" in photos), begin building a more open lace fabric by switching to a combination of chain spaces and treble stitches. Keep stitch count multiples in mind for lace repeats.
Round 21 :
*sc in next 2 sts, ch 3, skip 2 sts, sc in next 2 sts* around (78)
Round 22 :
1 sc in each sc and 3 dc into each ch-3 space (78)
Round 23 :
*sc in next st, ch 4, skip 3 sts, sc in next st* around (78)
Round 24 :
1 sc in each sc and (1 dc, ch1, 1 dc) into each ch-4 space (78)
Info :
This sequence creates a stable yet lacy fabric. Continue working a set of lace rounds (R21-R24) with slight variations for texture for approx 8-12 rounds to form the runner field. Alternate chain spaces and clusters as shown so the fabric remains relatively firm to support appliques.
Round 25 :
Repeat Round 21 pattern but work ch-4 instead of ch-3 to widen lace (78)
Round 26 :
Work dc clusters into ch-4 spaces as appropriate: (2 dc, ch1, 2 dc) into each ch-4 (78)
Round 27 :
Work an open filet row: *3 dc, ch 2, skip 2 sts, 3 dc* across, maintaining oval shaping at ends (78)
Round 28 :
1 sc in each st to stabilize (78)
Info :
At the runner center line, mark the central axis where the large flower will be placed. This is typically the geometric center of the oval; place a removable marker to reference when placing appliques later.
Round 29 :
Begin decorative inner border: *sc, ch 5, skip 4 sts, sc in next 2 sts* around to create small arch pattern (78)
Round 30 :
Work into ch-5: (1 dc, ch1, 1 dc, ch1, 1 dc) in each ch-5 arch to make mini shell (78)
Round 31 :
1 sc in each st to stabilize and prepare for outer scallop (78)
Round 32 :
Outer scallop formation: *(sc, ch3, 4 dc, ch3, sc) all in next arch space, skip 4 sts* repeat around (78 scallops)
Round 33 :
Finish scallop edge: *sl st into top of 4 dc cluster, ch 1, 5 sc across the arc's base* repeat around to create a neat scalloped picot edge (78)
Info :
Blocking now will dramatically enhance the scallops. Pin each scallop evenly to desired dimensions and lightly steam or wet-block the lace base. Allow to dry thoroughly before attaching applique pieces.
Round 34 :
Optional decorative overlay: work 1 sc around the inside of outer scallops to create a tidy border (78)
Round 35 :
Weave in ends on the wrong side and trim. Block again after ends are woven for a crisp final shape.
— Large Layered Flower (Central Feature) :
Info :
Make flower from three concentric petal layers: center disk, inner petals, outer petals. Use DK-weight cotton for petals to achieve sculpted height. Make petals separately and join in a layered stack sewn to a small round base disk. The center is finished with a cluster of medium pearl beads sewn through the disk.
Flower Base Round 1 :
6 sc in magic ring (6)
Round 3 :
1 sc in each st (12)
Info :
This small disk will be the sewing anchor for petals and center beads. Fasten off leaving a long tail for sewing. Make one base disk.
Inner Petal Layer (Make 6 petals) - Petal Round 1 :
Ch 8, in 2nd ch from hook: 1 sc, 1 hdc, 4 dc, 1 hdc, 1 sc; sl st to base disk in a chosen stitch to anchor petal. Repeat to make 6 petals evenly around disk.
Inner Petal Round 2 :
Working around each petal edge: 1 sc in first st, (1 sc, ch 2, skip 1, 3 dc in next, ch 2, 1 sc) across to shape a scalloped petal edge. Fasten off and weave ends (each petal approx 9 sts across).
Info :
Sew each inner petal down by anchoring with small stitches through the petal base and the disk so petals sit up slightly; use matching thread and a mattress stitch to hide sewing thread.
Middle Petal Layer (Make 6 larger petals) - Round 1 :
Ch 10, in 2nd ch from hook: 2 sc, 1 hdc, 6 dc, 1 hdc, 2 sc; sl st to base disk between inner petals so the middle layer is offset.
Round 2 :
Edge each middle petal with: *1 sc, ch 2, 5 dc, ch 2, 1 sc* to form fuller curve. Make sure middle petals nest between inner petals. Fasten off leaving tails for sewing.
Info :
Use a slightly different color for the middle layer (peach) to build tonal depth. Stiffen petals lightly if you want them to hold shape better.
Outer Petal Layer (Make 8 large petals) - Round 1 :
Ch 12, in 2nd ch from hook: 2 sc, 2 hdc, 8 dc, 2 hdc, 2 sc; sl st to disk or to an anchoring round placed slightly behind middle layer so petals overlap naturally.
Round 2 :
Edge petals with a decorative picot: *1 sc, ch 3, 7 dc, ch 3, 1 sc* to create scalloped, ruffled petals. Make 8 petals for a full outer ring.
Info :
Sew the layers together: stack inner, middle, outer then secure with small whip stitches through the base disk and the bottom edge of each petal. Position layers so each outer petal sits between two middle petals and two middle petals sit between inner petals.
Petal Finishing Round :
Stitch around the underside of the assembled flower with 1 sc to tidy and create a secure join for sewing to the lace base.
Center Bead Cluster :
Sew 7 medium pearls in a tight circle on the disk center using a fine sewing needle and thread. Anchor thread on the underside and pass through each bead several times to secure, knotting and weaving tail onto wrong side.
Info :
Use small stitches and hidden knots. If you plan to wash the runner, consider using small stainless-steel head pins under the bead cluster or a dab of fabric glue on the knot for extra security.
— Leaves (Multiple Sizes) :
Info :
Leaves are worked flat in rows then shaped with decreases and surface slip stitches to form a raised midrib look. Make a variety of leaf sizes: large (9 rounds), medium (7 rounds), small (5 rounds). Use three shades of green to match the photo for realistic depth.
Large Leaf (Make 6) - Round 1 :
mr, 6 sc in mr (6)
Round 2 :
inc in each st around (12)
Round 3 :
(1 sc, inc) x 6 (18)
Round 4 :
Work in rows now to shape leaf tip: ch 1, turn; sc 5, hdc 4, dc 4, hdc 3, sc 1; turn without joining
Round 5 :
Decrease rows to form tip: sc 1, hdc 3, dc 3, hdc 2, sc 1 (remainder of row) — end of tip; fold and sl st to base to form pointed tip (approx 18 sts)
Info :
Work a long center rib: with a contrasting green or same shade, surface sl st along the center from base to tip on the right side to create a raised vein. Use long, evenly spaced stitches to create a sculpted effect.
Round 6 :
Return along opposite side mirroring stitch sequence to complete the leaf: sc 5, hdc 4, dc 4, hdc 3, sc 1; sl st into base to close (18)
Round 7 :
Edge leaf with picot: *sc around edge, at tip work (sc, ch3, sl st) then continue sc down other side* Fasten off and block flat
Info :
Stiffening lightly at the base edge (a small brush-on starch, or steam shaping) helps leaves sit well on the lace base. Make as many leaves as needed to reproduce composition (approx 14-18 leaves in multiple sizes).
Medium Leaf (Make 8) - Round 1 :
mr, 6 sc in mr (6)
Round 2 :
inc each st around (12)
Round 3 :
Work in rows: sc 4, hdc 3, dc 4, hdc 1, sc 0; mirror back and sl st to base (approx 12-14 sts)
Round 4 :
Edge with sc and small picots along perimeter; fasten off (12-14)
Small Leaf (Make 6-8) - Round 1 :
Ch 6, in 2nd ch from hook: sc, hdc, 3 dc, hdc, sc; sl st to base (approx 6-8 sts)
Info :
Arrange leaves around the central flower and along the vine; use a mix of light and dark greens and place darker leaves under lighter ones for depth.
— Buds & Berry Clusters :
Small Bud (Make 6) - Round 1 :
mr, 6 sc in mr (6)
Round 3 :
Working in continuous rounds: *1 sc, dec* x4 (8)
Round 4 :
Work 1 sc in each st for 1 round (8). Lightly stuff with fiberfill; fasten off leaving long tail for sewing.
Info :
Sew a bead to the base of each bud or embroider a tiny sepal with green thread before attaching to vine. Use contrasting speckled yarn for multicolored buds as seen in photo.
Berry Cluster (Make 4) - Round 1 :
Ch 6, join to form ring, 6 sc in ring (6)
Round 3 :
Dec evenly to 8 (8)
Round 4 :
Fasten off and sew 3-5 small pearls onto this little ball to mimic clustered berries; leave tails to sew onto runner.
Info :
Vary the number of pearls in a cluster for natural look. You will use about 3-5 pearled clusters distributed along the vine like the photo.
— Small Flowers (Make 4-6) :
Small Flower Round 1 :
ch 6, join to ring, 8 sc in ring (8)
Round 2 :
*ch 3, in same st 3 dc, sl st to next st* repeat around to make 8 petals (8 small petals)
Round 3 :
1 sc around to tidy; fasten off leaving long tail for sewing. Sew a single medium pearl in center for each small flower like in photo.
Info :
Small blooms are worked quickly and attach to vine clusters for variety and texture. Mix peach and coral hues for visual interest.
— Stems and Vine Work (Surface Crochet & Braided Chains) :
Info :
Stems are made from simple long chain bases, returned with surface slip stitches or chain-twisted cord to create braided, raised vines. Use mid green and deep green combined where the vine splits to suggest shadows.
Stem Method A (Surface Crochet on Runner) :
Position a long chain along the runner where the vine should lie and pin in place. Using a needle and same-colored thread, do a surface sl st following the chain path to draw a vine. Secure ends to underside with small stitches.
Stem Method B (Braided Cord) :
Braid three strands of fine thread (approx 12-18" length per vine segment). Fold in half and stitch the looped end to lace base; braid to tip, secure with a knot and weave tail inside a leaf or bud.
Info :
Attach buds, leaves and small flowers along stem by sewing through the braid and securing with tiny stitches. Pin pieces first to trial composition; stems may be glued temporarily on underside to hold placement while sewing.
— Attaching the Large Flower and Motifs :
Info :
Arrange all appliques on the blocked runner before committing. Position the large flower at the center axis marker, then fan leaves and vines outward, mimicking the photo composition. Use pins to hold placement and photograph the layout for reference while sewing.
Attachment Round 1 :
Sew the flower base disk to the lace base by working small slip-stitch sized whip stitches through the underside of the base disk and into the lace field, spacing stitches about every 3-4 mm. Work all around until flower sits secure (approx 24-30 small stitches).
Attachment Round 2 :
Sew leaves around the flower: for each large leaf, place base under outer petal and take 6-8 securing stitches through leaf base and lace fabric. For smaller leaves, use 3-4 tiny stitches. Keep stitches hidden on wrong side.
Info :
Sew buds and berry clusters last, threading needle through braid or stem and then into lace, knotting and weaving ends on wrong side. Reinforce beads by passing thread through bead and into the lace at least twice.
— Decorative Pearl Clusters & Finishing Touches :
Round 1 :
Arrange cluster of medium pearls to mimic the pictured groups: choose 6-9 pearls per cluster and sew each bead individually through lace and into tiny backing knot. Anchor thread with double knots on the wrong side and secure with a dab of glue if necessary.
Round 2 :
Sew one cluster near the center flower, several along the trailing vine, and smaller single pearls used to accent small flowers and buds (approx 25-35 pearls total).
Info :
Consider balancing pearl weight across runner so it lays flat. If a cluster pulls the lace downward, add additional stitches to distribute weight or place supportive embroidery stitches beneath cluster on wrong side.
— Final Edge & Blocking :
Round 1 :
Inspect outer scalloped edge for any irregularities. Reinforce with 1 sc around border and picot every 6-8 sc as needed to tidy scallops (count remains consistent with scallop points).
Round 2 :
Block the entire finished runner, pinning each scallop and shaping petals and leaves. Steam lightly and allow to dry fully for a crisp, table-ready finish.
Info :
Weave in all remaining ends on wrong side, trim closely. Use a small amount of craft glue on any knots exposed to prevent unravelling. Store flat or rolled to maintain shape.
Completing this floral lace runner is a truly rewarding experience — from the delicate lacy oval base to the sculpted multi-layer flower and pearl accents, every step adds vintage charm and texture. The end result is a timeless heirloom piece that elevates any table setting. 🧶🌸 Take your time, enjoy the layering and pinning process, and delight in the beautiful details that make this runner special. Happy stitching and cherish your finished creation! ✨