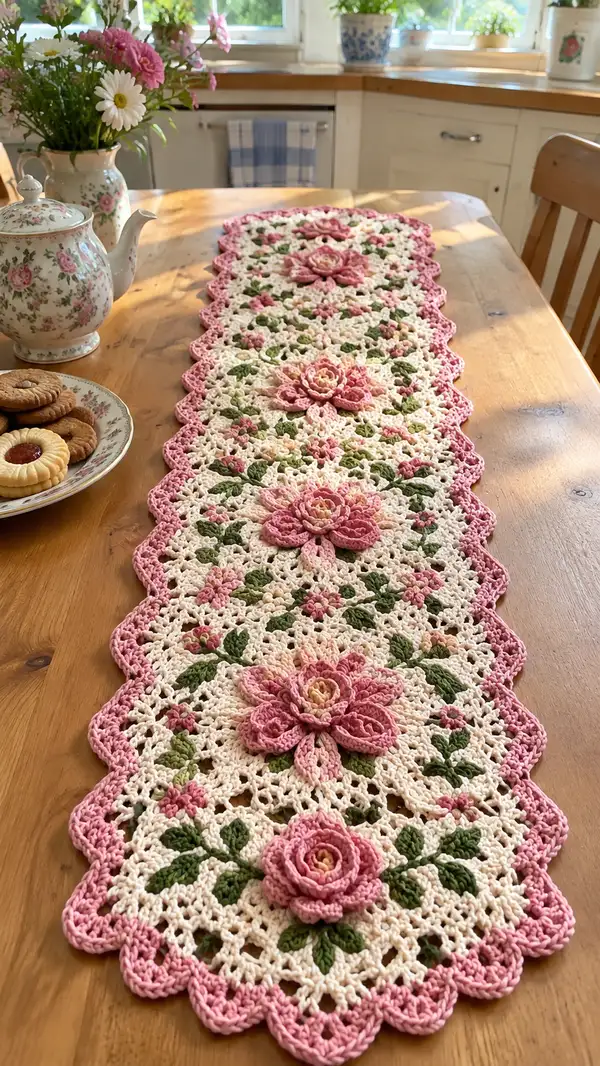
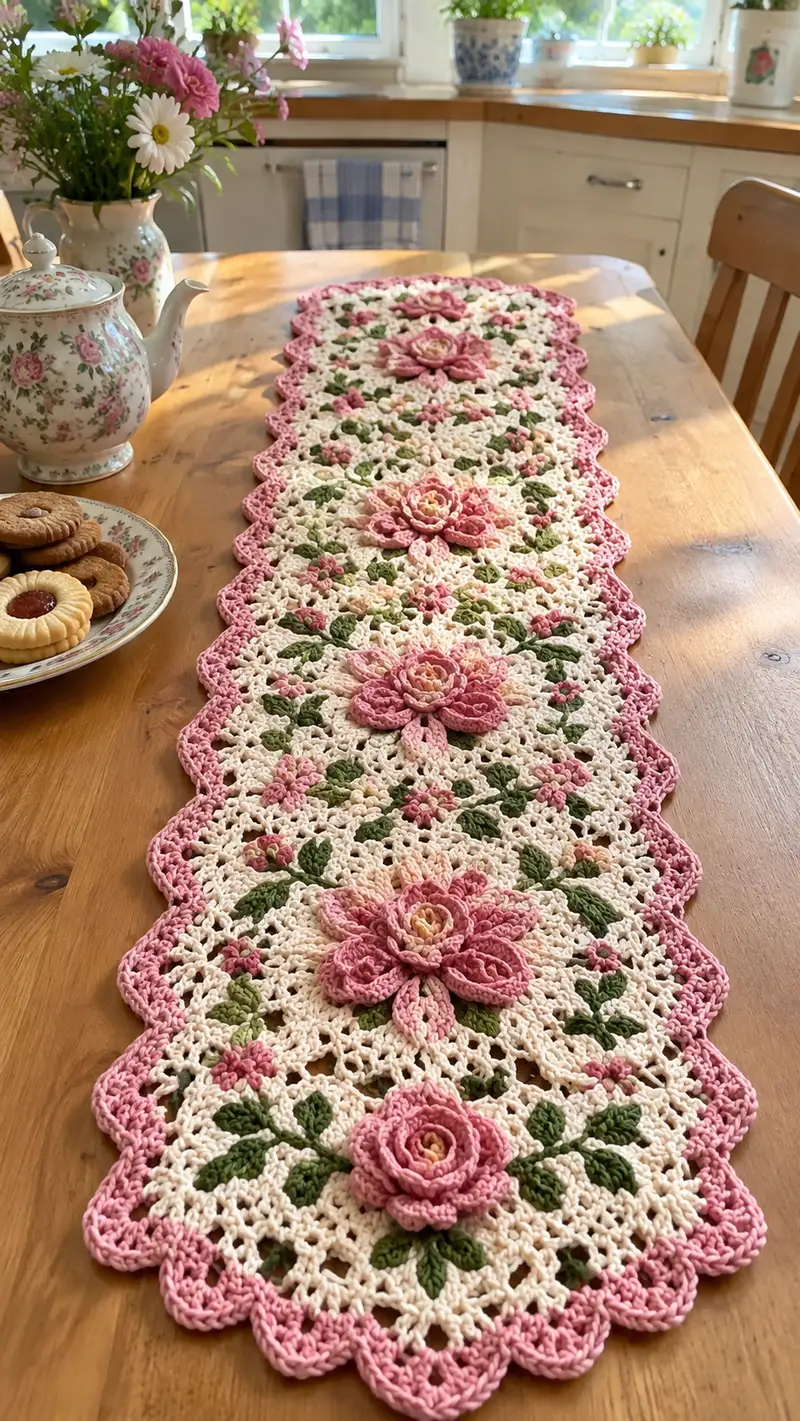
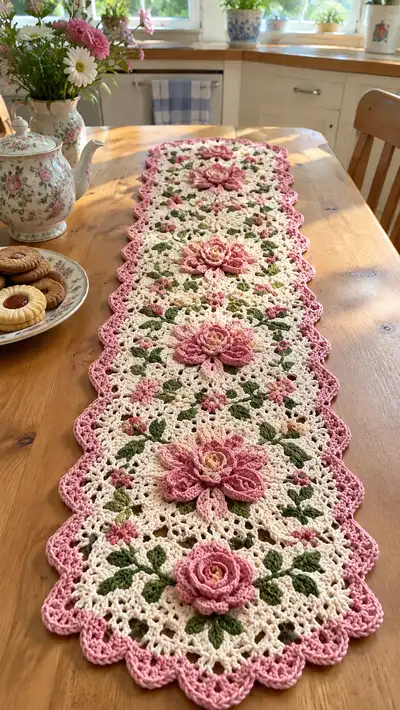
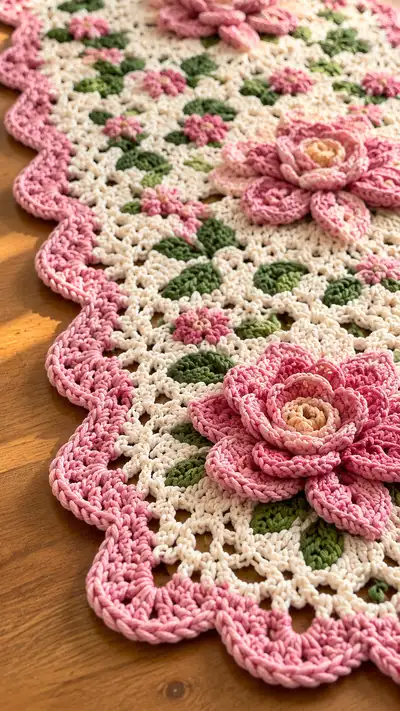
A romantic, vintage-inspired crochet table runner featuring delicate openwork lace, leafy motifs and sculptural 3D roses in soft pink and cream. This long runner is worked as repeat motifs joined and finished with a scalloped pink border for an elegant, shabby-chic centrepiece. Ideal for a sunny kitchen table or a special tea setting, the textured petals and layered leaves add charming depth and timeless detail.
Progress Tracker
0% Complete
— Overview :
Info :
This runner is worked as 7 repeated rectangular floral motifs joined end-to-end (adjust quantity for runner length). Each motif is built in rounds to form a 16x10cm panel (gauge may vary). A layered 3D rose sits in the centre of each motif and small buds and leaves are crocheted as part of the motif rounds. After all motifs are joined, a scalloped border in dusty pink is worked around the long edges and ends.
— Gauge & Finished Size :
Info :
Gauge: 18 dc x 10 rows = 10cm in pattern using 3.5mm hook and DK cotton. Each motif finished size ~ 16cm wide x 21cm long. Full runner in photo = 7 motifs = approximately 120cm long. Adjust motifs to your preferred length.
— Motif (Make 7) :
Round 1 :
Using cream yarn. Ch 6, join with sl st to form ring. Ch 3 (counts as dc), 15 dc into ring. Join with sl st to top of ch-3. (16 dc)
Round 2 :
Ch 3, dc in same st, ch 1, (2 dc in next dc, ch 1) x 7. Join with sl st to top of ch-3. (16 clusters of 2 dc separated by ch-1)
Info :
This round begins the central lacy star and creates the base for the 3D rose. Keep tension even to ensure the centre is flat.
Round 3 :
Sl st into next ch-1 space, ch 1, (sc, ch 3, sc) in each ch-1 sp around. Join with sl st to first sc. (16 ch-3 picot-like spaces)
Round 4 :
Ch 3, dc in same st, ch 1, *2 dc in next sc, ch 1; rep from * around (connect into ch-3 spaces and scs as needed), join. (32 dc total counted across spaces)
Round 5 :
Ch 1, sl st into next ch-1, ch 4 (counts as tr), tr in same sp, ch 1, *2 tr in next ch-1 sp, ch 1; rep around; join. (32 tr clusters)
Info :
Rounds 1-5 build a central open disc. The 3D rose will be constructed separately and sewn to the centre after motif rounds 1-12 are complete.
Round 6 :
Switch to leaf green for tiny leaves worked into the mesh. Sl st to a ch-1 sp, ch 1, (sc, hdc, 2 dc, hdc, sc) into the same ch-1 sp to form a small leaf. Sk 1 dc cluster, *leaf in next ch-1 sp, sk next cluster; rep around. Join. (16 small leaves)
Round 7 :
Switch to cream. Sl st to next sp, ch 3, dc in same sp, ch 1, (2 dc in next sp, ch 1) x 15, join. (32 dc)
Round 8 :
Ch 1, sc in same st, ch 3, skip next dc, *sc in next, ch 3, skip next; rep around forming a lacy mesh of ch-3 spaces. Join. (32 sc and 32 ch-3 spaces)
Info :
Place marker at the start of this round - this mesh will form the main background. Keep ch-3 spaces even to make joining easier later.
Round 9 :
Ch 3, dc in same st, 2 dc in next sc, ch 1, *2 dc in next sc, 2 dc in next sc, ch 1; rep around, join. (64 dc separated into groups)
Round 10 :
Switch to cream/light peach for small 5-stamen bud centers. Sl st into a ch-3 space, ch 1, (sc, ch 3, sc) in same sp for tiny blossom center. Work tiny blossom centers into every fourth ch-3 space around: make 8 tiny blossoms evenly spaced. Join cream for remainder of round.
Round 11 :
Back to cream. In remaining ch-3 spaces (not occupied by tiny blossoms), ch 3, dc cluster (3 dc) into each ch-3 sp, ch 1 between clusters to maintain mesh. Join. (Approx 56 dc clusters)
Round 12 :
Work a rectangular expansion to create a long shape: Ch 1, sc in next 6 sts, (sc, ch 5, sc) in corner position to start the long side, then work sc in next 12 sts across the long side of motif, (sc, ch 5, sc) to form opposite corner, sc in remaining 6 sts across. This round shapes motif into a rounded-rectangle with elongated ch-5 corner loops for the long edges. Count: approx 48 sc and 4 ch-5 corner loops.
Info :
Round 12 shapes the motif to be rectangular so that motifs can be joined into a runner. Adjust number of sc across the long side depending on gauge to make motifs wider or narrower.
— Leaf Clusters (worked in rounds onto motif) :
Round 13 :
Using leaf green. Join in a reserved ch-1 space adjacent to flower centre area. Ch 1, (sc, ch 2, 3 dc, ch 2, sc) to form a large leaf shell across a ch-3 space. Repeat to create 4 large leaves placed symmetrically around centre. Join. (4 large leaves)
Round 14 :
Ch 1, add single sc between leaves and small sc around edges to anchor. Work 8 sc around outer edge where mesh meets leaf bases, maintaining even spacing. Join. (approx 32 sc)
Info :
Work leaves on one side of motif rows (they are slightly raised); place them consistently for each motif so runner has pattern repeat alignment.
Round 15 :
Switch to cream. Ch 3, dc in same st, *ch 3, skip 2 sc, dc cluster 3 dc in next sc; rep across long side to form decorative openwork row forming the long rectangular lattice. Join. (pattern repeat across long edges)
Round 16 :
Ch 1, sc in each dc and ch-3 sp across creating a tidy edge along the long sides, working (sc, ch 3, sc) into corner loops (ch-5 from round 12) to form corner picot loops. Join. (even stitch count along perimeter)
Info :
At this stage each motif measures approximately 16cm x 21cm. Block flat now to ensure neat joining later. Weave in ends from leaf green but leave flower anchor points for sewing the 3D rose later.
— 3D Rose (Make 7; one for each motif) :
Round 1 :
Using peach accent yarn for centre. Ch 6, join to form ring. Ch 1, 10 sc in ring. Join. (10 sc)
Round 2 :
Ch 2 (counts as hdc), hdc in same st, (2 hdc in next st) x 9. Join. (20 hdc)
Round 3 :
Switch to dusty pink variegated. Ch 1, sc in same st, ch 3, *sc in next st, ch 3; rep around to make 10 ch-3 loops. Join. (10 ch-3 loops)
Round 4 :
In each ch-3 loop work: (sc, hdc, 3 dc, hdc, sc) to create the first small petal. Repeat around for 10 small inner petals. Join. (10 petals)
Info :
These inner petals form the rose centre. Keep petals slightly cupped by pulling center up and shaping petals with fingers while working surrounding rows.
Round 5 :
Ch 1, behind the petals (work in back loops or join at base) sl st to base of first petal, ch 5, sl st to base of petal two petals away, repeating to form loop supports for larger outer petals. Make 10 ch-5 supporting loops. Join. (10 ch-5 loops)
Round 6 :
In each ch-5 loop work: (sc, hdc, 5 dc, hdc, sc) for larger petal shaping. Fold each large petal forward and tack at base with sl st to create very full layered look. Repeat around for 10 large petals. Join. (10 large petals)
Round 7 :
Switch to a darker tone of pink if desired (optional), ch 1, sc around petal bases to tidy, working 2 sc in any base that feels loose. Join. Fasten off leaving long tail for sewing. (tidy base row)
Info :
Sew the rose to the centre of each motif using the long tail and whip stitch around the base of the rose. Tuck and secure the centre with a few hidden stitches so the rose sits flat but raised. Lightly block petals into shape if needed.
— Small Buds (Make 14 across motif) :
Round 1 :
Using pink. Ch 4, join to ring. Ch 1, 6 sc in ring. Join. (6 sc)
Round 2 :
Ch 2, (hdc, dc) in each sc around to make a small cup; join. (18 sts including chs)
Round 3 :
Switch to peach centre stitch: Join peach in center top and work a central tiny knot by doing 6 sc around a short knot stitch, finish off leaving tail for sewing. Sew each bud into designated small blossom positions on the cream mesh using long tail. (Make 14 buds across motif)
Info :
Buds are sewn into the mesh very slightly off centre so they appear raised. Use small hidden stitches through the base of the bud to anchor firmly so they don't flatten with use.
— Long Leaf Sprays (Make pairs on each motif sides) :
Round 1 :
With leaf green join at a ch-3 mesh point on the motif edge. Ch 1, (sc, ch 2, 3 dc, ch 2, sc) into sp to create one leaf. Move 2 ch-3 spaces down the side and repeat to form a spray of 3 leaves in succession. Join. (3 leaves per spray)
Round 2 :
Ch 1, sc across spaces between leaves to tidy edge and form the vein by working a sc row across leaf bases. Join. (approx 12 sc across spray)
Info :
Make symmetrical sprays on both long sides of the motif so they mirror when motifs are joined into the runner. Work leaves slightly raised to give a textured effect.
— Join-as-you-go Long Edges (Join motifs together - repeat to make full runner) :
Info :
We join motifs along the short edges first or along the long sides depending on preferred layout. The pattern below demonstrates joining long sides with join-as-you-go using sl st and ch-3 spaces alignment.
Round 1 :
With motif A completed and motif B prepared and blocked, lay motif B on top of motif A so edges match. Use cream yarn and join in the corner ch-3 sp of motif A and ch-3 sp of motif B, ch 1, sc through both layers, ch 3, sc through both layers in the next corresponding sp, continue across long side matching ch-3 and sc positions. Join securely. (number of join sts equals number of matching mesh points; typically 12-16 joins per long side)
Info :
Work slowly to keep motifs aligned. Use pins or stitch markers to hold motifs together before joining. Weave tails into join for a tidy finish.
Round 2 :
Once all motifs are joined into desired runner length, work an even cream row across the seam on the reverse side to lock the join: sc through both layers across seam points, placing 1 sc per join and 2 sc in wider spaces as needed to flatten seam. Join. (flat seam row)
— End Motif Finishing (Make 2 end caps) :
Round 1 :
For the two end motifs, after joining long sides, tidy the short ends by working a row of sc along the short edges to create a straight end. Ch 1, sc evenly across short side, working 2 sc in corner loops. Join. (approx 20 sc)
Round 2 :
Ch 3, dc across short edge into each sc to make a robust edge for border attachment. Join. (approx 20 dc)
Info :
End caps should be symmetrical; block the entire runner flat before working the scalloped border to ensure scallops sit even.
— Scalloped Border (worked around long edges and ends) :
Round 1 :
With dusty pink, join at a corner. Ch 1, sc in corner, *ch 3, sk 2 sc, sc in next sc; rep along long edge forming a picot-like base for scallops. Around end edges, work sc evenly to keep scalloping uniform. Join. (even spaced ch-3 picot bases)
Round 2 :
In each ch-3 picot base work: (sc, hdc, 5 dc, hdc, sc) to create a large scallop shell. Repeat along both long edges and 3 scallops across each short end, join and fasten off. (scallops across entire perimeter)
Info :
If your runner edge looks too tight or too loose, adjust by adding or removing a ch-3 base at even intervals to keep scallops even. Blocking after border helps the scallops relax into their final shape.
Round 3 :
Optional: Work a tidy sc picot trim on top of each scallop with (sc, ch 3, sl st to first sc) to produce a delicate edge. Fasten off and weave in ends. (final tidy)
— Final Blocking & Finishing :
Info :
Wet-block the entire runner gently: pin to dimensions on a foam block, shape scallops and petals, and allow to dry. This ensures the runner lays flat and petals keep their sculpted form. Use steam or spritz to shape petals slightly cupped if desired.
Info :
Weave in all loose ends. If any roses feel loose, reinforce by sewing a few hidden stitches through the base into the motif. Clip any visible tails close to work but not too close to avoid unravelling.
Info :
Optional: Starch lightly for a stiffer, table-ready finish. Avoid heavy starch if you prefer a softer, drapey runner.
This romantic floral table runner is a joy to finish — each layered rose and leaf adds character and charm to any table setting. Working the petals and join-as-you-go rows is deeply satisfying, and the scalloped border gives a perfect vintage finish. I hope this pattern fills your home with warmth and makes beautiful memories at your next tea or family gathering. 🌸🧶