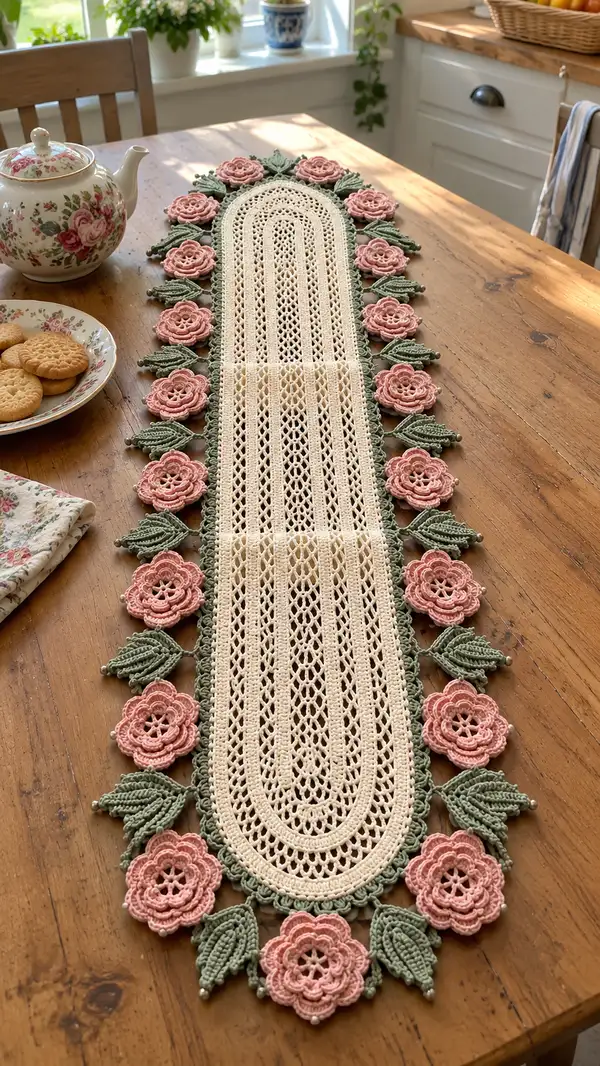
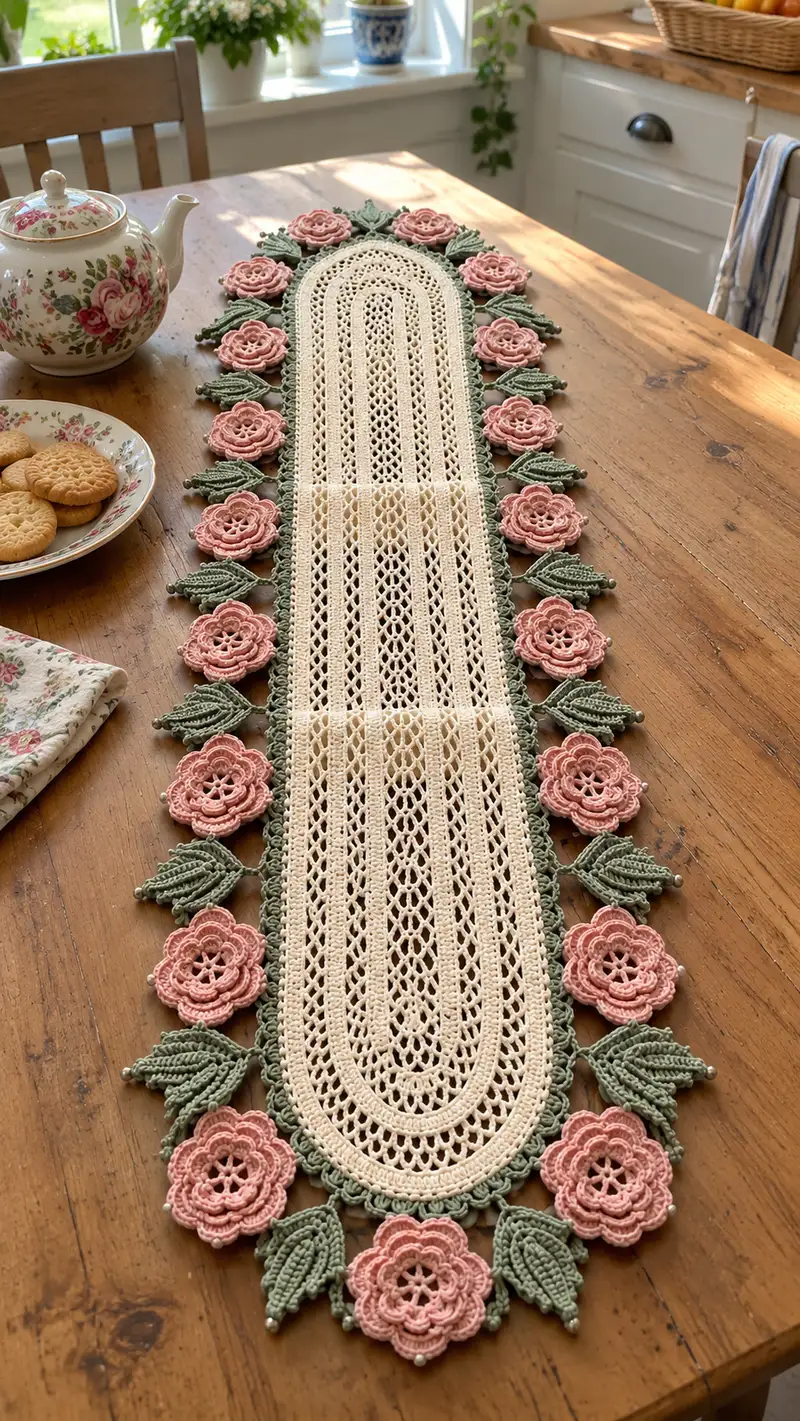
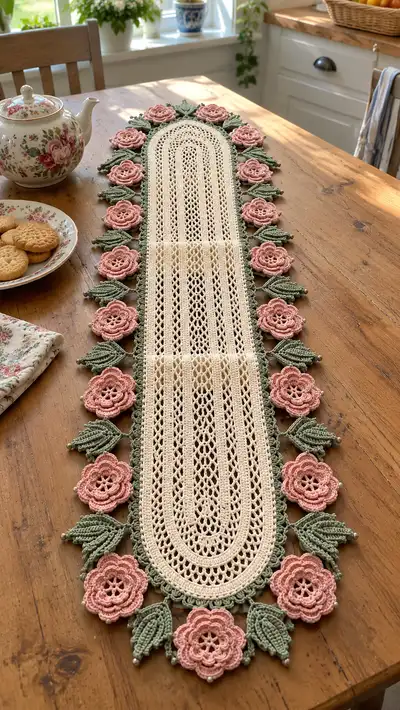
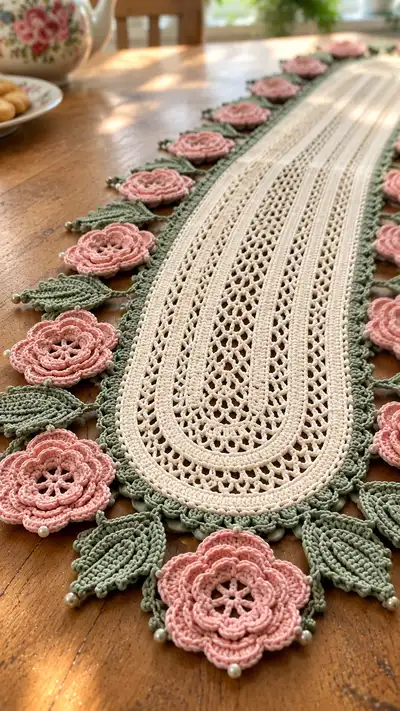
A delicate oval table runner edged with layered roses and textured leaves, worked in soft cream, dusty rose and sage green. The lacy center features repeated openwork arches and ribbed bands for an elegant vintage look. Finished with small pearl beads at each flower and leaf tip, it makes a perfect centerpiece for tea time or a rustic dining table.
Progress Tracker
0% Complete
— Center Panel (Oval Lacy Panel) :
Round 1 :
Ch 110. Working into 2nd ch from hook, sc in each ch across to last ch, 3 sc in last ch. Continue on opposite side of foundation chain, sc in each ch back to first ch, 3 sc in first ch. Join with sl st to first sc. Total = 224 sc.
Round 2 :
Ch1, 1 sc in same st and in each st around (224). Join. This round creates a neat foundation for later lace rows.
Round 3 :
Ch3 (counts as dc), *skip 1 st, dc in next st; ch2, sk 1 st, dc in next st; repeat from * around working 3 dc in each end corner group (the 3-sc groups) to maintain round shape. Maintain 224 anchor points (the ch2 spaces sit over previous sc pairs).
Info :
Keep stitch tension relaxed but even for lacework. Use a stitch marker to mark the front top center if you wish to align motifs later.
Round 4 :
Ch1, sc in each dc and in each ch2 space around (224). Join. This round stabilizes the arches.
Round 5 :
Ch4 (counts as tr), *sk next sc, tr in next sc, ch1, sk next sc, tr in next sc; repeat from * around, working 3 tr into each corner group to maintain smooth curve. Join. Anchors remain 224 points.
Round 6 :
Ch1, sc in each tr and ch1 space around (224). Join. This alternation of lacy arches and sc grounding rounds creates the central motif repeat.
Round 7 :
Ch3, *dc in next st, ch2, dc in next st, ch1; rep from * around inserting 3 dc into corner group. Join. Maintain 224 anchor positions; the ch1 between arch modules will create vertical channels.
Info :
At the end of Round 7 check that your oval lies flat. If it buckles, block lightly and check tension; do not add increases unless you intend to widen the runner.
Round 8 :
Ch1, sc evenly around in each stitch and chain space (224). Join. This is a grounding round—counts remain stable and provide an even edge for the next lace repeat.
Round 9 :
Ch2 (counts as hdc), *hdc in next 3 sts, ch2, sk 2, hdc in next 2; rep around, placing 3 hdc into corner groups to preserve the oval curve. Count remains consistent at 224 anchor points where hdc are placed.
Round 10 :
Ch1, sc in each hdc and ch space around (224). Join. This secures the vertical rib channels within the center panel.
Round 11 :
Ch3, (dc cluster arch) *sk 1, {dc, ch2, dc} in next st, sk 1, dc in next st; repeat from * around working clusters into the corner groups. Join. Panel will show repeating arches down the length.
Info :
Measure your central panel now; it should be approximately even along its length. If you want a longer runner, you can add more repeats of the lace motif rounds (11-12) in the middle section before moving to the edging rounds.
Round 12 :
Ch1, sc in each dc and ch2 space around (224). Join. This is the neat grounding round after the cluster arch.
Round 13 :
Repeat Round 11 (dc cluster arch) for a second arch row to build height and openwork. Join (224).
Round 14 :
Ch1, sc in each st and space around (224). Join. If you want additional height in the center, alternate rounds 11-14 until desired runner length is achieved. For this pattern work 4 complete arch modules total (Rounds 11-14 twice), resulting in a balanced lacy panel.
Info :
For the photographed runner, the maker worked a total of 20 center rounds including all repeats to reach the length shown - you should now have a rectangular length with rounded ends formed by the initial oval shaping. Check the runner lies flat before proceeding to the scallop foundation.
Round 15 :
Ch1, 1 sc in each st around (224). Join with sl st. This round creates a firm edge for attaching the scallop border in contrasting sage green.
Round 16 :
Info : Change to sage green yarn now. Fasten in with a sl st anywhere along the long side edge. Carry cream yarn inside if you prefer invisible carry, or weave in later. Make sure to brush the edge flat before continuing.
Round 17 :
Ch1, working in BLO (back loop only) of each sc around, 1 sc in each BLO (224). Join. Working in BLO creates a subtle ridge that helps the scallop sit neatly.
Round 18 :
Ch3, *skip 1 BLO, 5 dc in next st (scallop shell), skip 1 BLO, ch1, sc in next BLO; repeat from * around, spacing shells so that you place 28 shells total around the oval (this will naturally sit approx every 8 stitches). IMPORTANT: At each rounded end, place 7 shells to create the focal curve. Total will be 28 shells.
Info :
The number of shells depends on total stitch distribution around the oval. For even spacing, count points along a single long side and distribute shells evenly; aim for symmetry on both sides.
Round 19 :
Ch1, sc in between each shell and around shells into top of shells to anchor (224). Join. This anchors the scallop shells and provides small picot points for flower attachment.
Round 20 :
Ch1, (sc, ch3, sc) in top of each shell to create a small loop for joining (28 loops). In the spaces between each loop along the long edges make 1 sc per anchor point (approx 6 sc between each loop). This builds small arched loops that act as connector points for the leaf stems.
Info :
If you prefer a denser border, in Round 19 add hdc between shells rather than sc; keep the counts even on both sides. Always mirror long side counts to maintain oval symmetry.
— Leaf Motif (Make 48) :
Round 1 :
Ch 12. Working into 2nd ch from hook, sc across 10 sts (10), ch1, turn (this creates the base stem chain).
Round 2 :
Sc in each st across (10). At final st work 3 sc in the last chain to create rounded tip; work down the opposite side of foundation chain sc in each chain back to start, sl st to first sc. Total approx 26 sts including tip increases. This forms a flat leaf foundation.
Round 3 :
Info : Change to a slightly darker sage green if you want depth. We will work ribs on the leaf using front post stitches to create texture.
Round 4 :
Ch1, 1 sc in same st, 1 sc in next 3 sts, *1 hdc, 1 dc in next st, fpdc around next 2 sts to create a central raised rib; rep across the leaf spine, then mirror on the opposite side (total will vary around 30 sts). Sl st to join at base.
Round 5 :
Ch1, sc in first 4 sts, *(ch3, sl st into 2nd ch from hook) picot edge along leaf margin every 2 sts, sc in next 2 sts; repeat across and sl st to join. This gives the serrated edged look seen in the photo.
Info :
Make 48 leaves (24 each side) or match the number of flowers you will place. Bluntly trim ends and block each leaf slightly curved so they rest naturally when sewn on.
Round 6 :
For a raised central vein: with FLO work 1 sc in each st across the center ridge row so the center stands forward. Fasten off leaving a long tail for sewing. Repeat for each leaf.
— Flower Motif (Layered Rose) (Make 24) :
Round 1 :
Start with a magic ring. Ch3 (counts as dc), 11 dc into ring. Pull ring closed. Join to top of ch3 with sl st. (12 dc) This forms the first small wheel center.
Round 2 :
Ch1, *sc in next st, ch3; rep around making 12 sc separated by ch3 loops. Join. This creates 12 petal foundations around the center.
Round 3 :
Into each ch3 loop: work (sc, hdc, 3 dc, hdc, sc) to form pronounced petal. Join. This is the first petal layer (12 petals). Fasten off if you want separate layers, or continue to next round to build inner fullness.
Info :
Work Round 3 fairly tightly to ensure petals hold shape. Block lightly if needed and shape each petal with fingers while damp to set curvature.
Round 4 :
Attach dusty rose yarn to the base between petals, ch4, *sk 1 petal base, (sc, ch2, sc) in next base stitch; repeat around to create small anchoring loops for layer two (12 loops). Join.
Round 5 :
Into each loop work (sc, hdc, 5 dc, hdc, sc) forming a fuller second petal layer. Join. Now you have a double-layered flower with a 12-petal outer ring and inner ring.
Round 6 :
Ch1, sl st in one petal valley then make small puff cluster in center: (yarn over 3 times, insert hook into center, pull up loop and yarn over and pull through 2 twice) 6 times, gather and sl st to secure as a textured center. Fasten off leaving long tail for sewing. (Center puff cluster creates a beautifully textured heart.)
Info :
Make 24 identical roses; the pattern pictured has 12 down each side. For a more compact rose work shorter dc clusters (3 dc instead of 5) on the outer layer.
Round 7 :
Optional: For extra dimensional petals, add a third layer by joining yarn behind second layer and working scalloped picot rounds: (sl st, ch3, 3 dc, ch3, sl st) in the spaces between petals around (12 scallops). Fasten off.
— Small Connector Stems and Beads :
Round 1 :
To create the short stems connecting flowers to scallop loops: Using sage green, ch 6, sl st into the small loop created on the scallop border (Round 20), ch 6 back and sl st to the base of the leaf or flower. Fasten off. Repeat for each junction point (approx 24 per side).
Info :
Leave long tails on stems for sewing if you prefer to sew stems after pinning the flower and leaf in place. The stems can also be worked directly into the flower base to reduce sewing.
Round 2 :
Optional bead placement: String a 6-8mm pearl bead onto a fine sewing thread. Insert at the tip of each leaf and at the outer petal valleys of each rose, securing with two or three small stitches through the motif and knotting on the underside. Tuck knot under the flower and weave in end.
— Decorative Picot Edge and Final Scallop Finish :
Round 1 :
With sage green, join with sl st at any scallop top. Ch1, *sc in shell top, ch5, picot into 3rd chain (ch3 sl st), sc in next anchor; repeat around creating a pebbled picot chain between shells. This creates textured, bead-like edges that the leaves and flowers sit upon. Maintain approx 224 anchor points overall.
Info :
When you come to the rounded ends, increase the ch length to 7 for slightly larger loops to accommodate three flower attachments at the focal end. This preserves the visual weight in the curved section.
Round 2 :
Ch1, sc around anchoring into picot heads and shell tops evenly. Work (sc, ch3, sc) into every 4th anchor to create a discreet loop for the flower base. You should end with 28 loops as before; these are the primary flower connection points.
Round 3 :
Final edging: Work a neat row of sc around all edges (including around petals and leaves as they are attached) to create a uniform border and hide join stitches. Use sage green for a cohesive look. Fasten off and weave in ends.
— Assembly & Attachment :
Info :
Before sewing, block all pieces: center panel flat and leaves slightly cupped and petals shaped. Pin the scallop border onto the center panel loops, then place leaves and flowers to taste ensuring symmetry—12 flowers each side with a leaf pair between each flower looks balanced for the photographed size.
Round 1 :
Positioning: Pin the first flower at the long side center (midpoint between the rounded ends) aligning its base into the small loop created in the scallop edge. Place a leaf to the left of the flower and another leaf to the right to create a natural arrangement. Repeat down each side at even intervals (approx one flower every 9 shells for 12 per side).
Round 2 :
Sewing: Using long tails and a yarn needle, sew each flower down with small stitches through its base and into the picot loop below. Make at least 6 secure passes per flower, catching both runner fabric and scallop loop so the motif lies flat. Sew leaves in place similarly, angling them slightly outward.
Info :
Always pin and check spacing before final sewing. If you prefer a less dimensional look, sew only at two points under each flower to slightly raise petals for a shadow effect.
Round 3 :
After all flowers and leaves are sewn, add pearl beads to the tips using an embroidery needle and fine thread. Anchor each bead with two stitches and hide knots under the leaf or petal layers on the underside. Trim thread and weave in securely.
Round 4 :
Final finishing: Wash gently by hand in lukewarm water with mild soap if desired, and block the runner flat on a board. Pin petal shapes and leaf ribs to maintain form. Remove pins when completely dry and give a final light steam if needed for crispness.
Info :
For extra durability, secure motif joins with a few small backstitches of clear fabric glue on the underside where stitching is not obvious, but avoid glue on the visible right side.
Assembly Instructions
- Pin motifs in place first: arrange the 24 flowers and 48 leaves around the scallop loops, spacing evenly. Pin the center and both ends first for alignment, then fill in between.
- Attach the flowers by sewing through the flower base and through the scallop loop beneath; make 6-8 small secure stitches, knot and weave tail into the runner for invisibility.
- Sew each leaf using the long tail left after making each leaf; stitch through the leaf base into the runner's scallop loop and make 4-6 stitches along the leaf spine to secure curvature.
- Work the short connecting stems (chains) between scallop loops and the flower base as you sew, hiding the stem tail under the flower and securing with several stitches so stems lie flat.
- After all pieces are sewn, string pearls onto fine sewing thread and stitch a bead onto the tip of each leaf and selected petal valleys; secure with several stitches and hide knots under layers.
- Block the entire runner flat after assembly: pin to the blocking board in the desired oval shape and spray lightly with water or steam. Allow to dry completely before removing pins.
- Weave in all remaining yarn tails on the underside using a yarn needle and trim close. If desired, add a small dab of fabric glue under knots to prevent loosening.
- If you need to shorten or lengthen the runner, add or subtract center lace repeat panels before attaching the scallop border to keep end curves neat.
Important Notes
- 💡Use stitch markers consistently at the beginning of each round to avoid counting errors and maintain proper shaping
- 💡Stuff body parts gradually as you work rather than waiting until the end, especially for narrow openings like arms and legs
- 💡For this runner, block the center panel flat before attaching scallops to ensure accurate motif spacing
- 💡Maintain consistent tension throughout the project; tighter tension yields crisper lace and better-defined petals
- 💡Pin all pieces in position before final sewing to ensure symmetry and even spacing along both long edges
- 💡When sewing beads, use a short length of thread and secure knots under motif layers to avoid visible knots
- 💡Work on a large flat surface for assembly to prevent accidental distortion while pinning flowers and leaves
- 💡If swapping colors, keep a photo of the layout so that both long sides remain mirror images
This vintage-style oval runner brings soft floral charm to any table and showcases layered crochet technique beautifully. The combination of lacy openwork with three-dimensional roses is both elegant and practical — perfect for special occasions or everyday charm. Each stitch builds toward a stunning centerpiece you'll be proud to display. 🧶🌸 Add pearls for a touch of shine and enjoy the compliments! ✨
What is the finished size of this runner?
Using the specified hook and cotton thread, the finished runner measures approximately 36" long and 8" wide (91 x 20 cm). You can lengthen it by adding more center lace repeats before attaching the scallop border.
Can I use different yarn weights for this pattern?
Yes — but adjust your hook size accordingly. Finer thread gives delicate lacy results; thicker yarn will create a chunkier runner and will change final dimensions and motif scale.
How many flowers and leaves should I make?
The pictured runner uses 24 layered roses and approximately 48 leaves (24 per side). You can change the number to match your desired spacing by altering the scallop shell count before attaching motifs.
Do I need to block pieces before assembly?
Yes. Block the center panel flat and shape leaves/petals slightly domed so they sit nicely once sewn. Blocking ensures accurate spacing and prevents puckering after assembly.
How do I secure the pearl beads?
Sew each bead on with strong sewing thread, making at least two passes and knotting on the underside. Hide the knot under petals or leaf layers and weave in the thread tail for durability.
Can I omit beads for a child-safe version?
Absolutely. Simply replace beads with small knots of matching thread or tiny embroidered French knots to avoid small parts if the runner will be in a child-accessible area.
What tools help maintain even spacing when assembling?
Use a fabric ruler or tape measure and lots of fine pins. Pin the center first, then mark equal distances along the scallop loops to ensure mirrored placement on both sides.
How should I care for the finished runner?
Hand wash gently in cool water and block flat to dry. Avoid machine washing to preserve the pearls and dimensional petals; light steam ironing through a cloth can refresh the look.
Stay in the Loop!
Get notified when we release new free crochet patterns and join our crafting community!