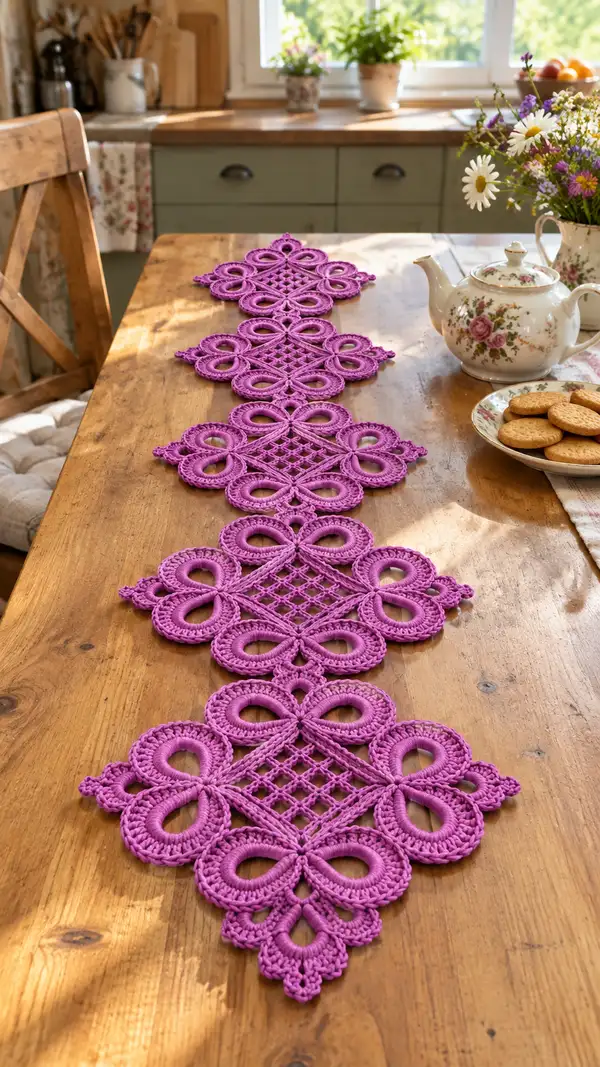
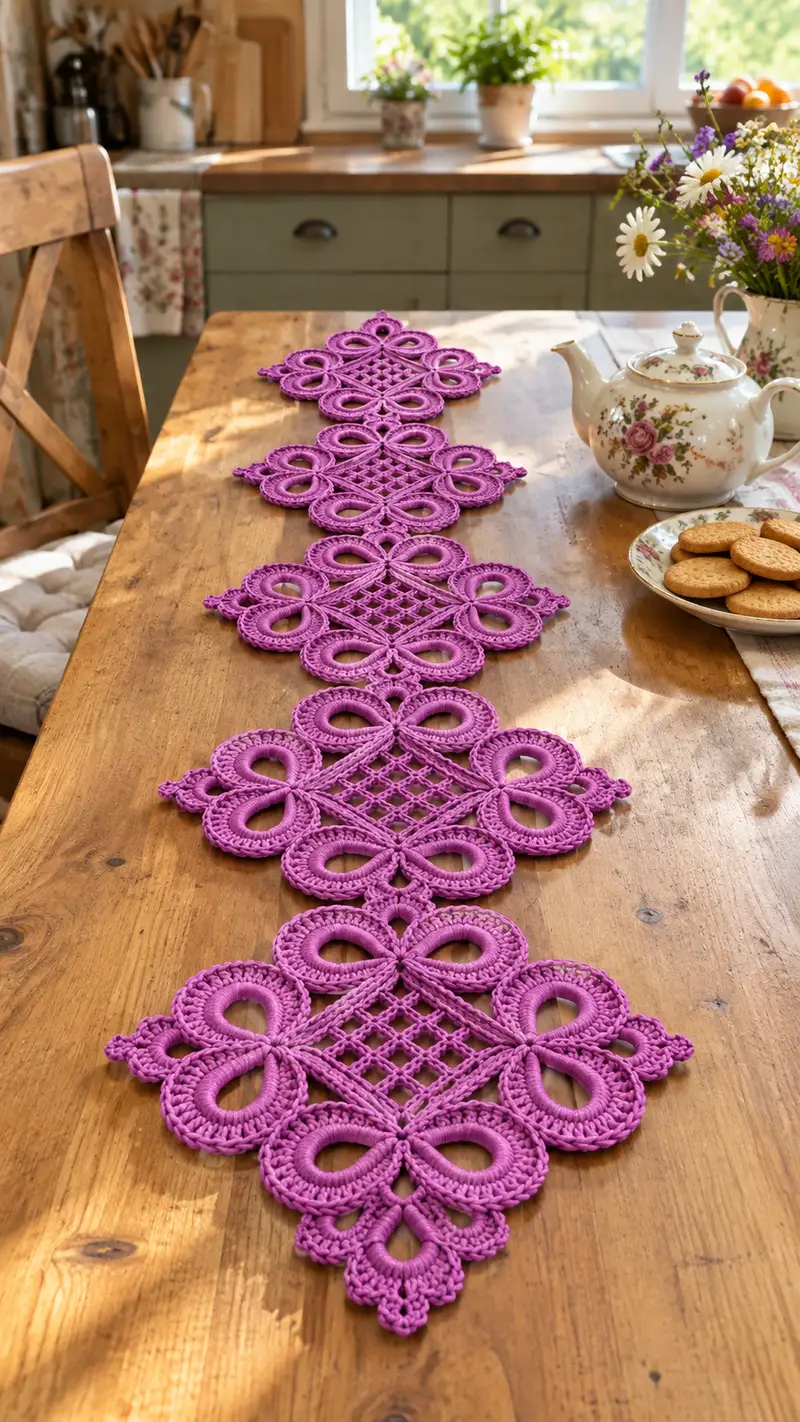
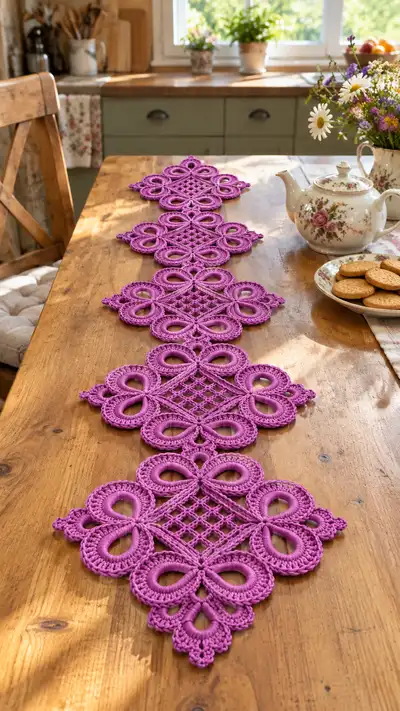
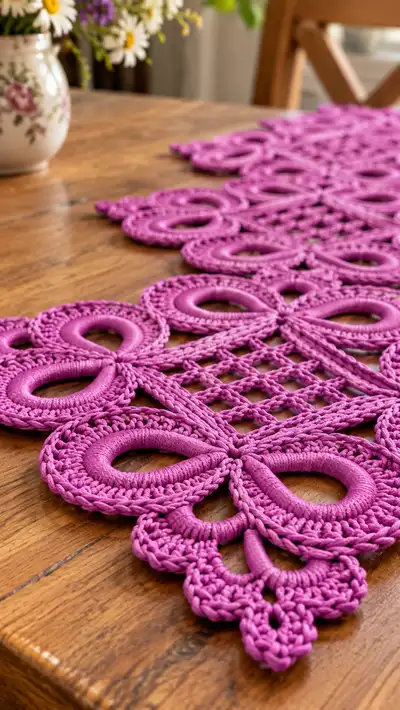
This elegant lace ribbon table runner features repeating floral-inspired motifs joined by an open lattice diamond centre. Worked in a sturdy cotton cord for crisp, sculpted loops, the runner lays flat and creates dramatic texture and shadow on a wooden table. The vibrant magenta colour in the photo highlights the raised petal loops and the delicate mesh interior, perfect as a statement centerpiece. Detailed joining and finishing instructions ensure a professional, washable result.
Progress Tracker
0% Complete
— Notes & Gauge :
Info :
This runner is worked in repeating modular motifs. Gauge is not critical for function but important for motif match: one finished motif (as written) measures approximately 18 cm (7") across at widest point and 18 cm tall when blocked. Adjust hook size if your motifs are noticeably larger or smaller. Use the same tension throughout to ensure motifs match. Blocking each motif flat before joining will drastically improve alignment and the finished look.
— Motif Base (centre rounds) :
Round 1 :
Make a magic ring, ch3 (counts as dc), 11 dc into ring, sl st to top of ch3 to join (12)
Round 2 :
(1 dc, inc) x6 — work 1 dc in first st, 2 dc in next; rep around (18)
Round 3 :
(2 dc, inc) x6 (24)
Round 4 :
(3 dc, inc) x6 (30)
Round 5 :
(4 dc, inc) x6 (36)
Round 6 :
(5 dc, inc) x6 (42)
Round 7 :
(6 dc, inc) x6 (48)
Round 8-10 :
1 dc in each st around (48)
Info :
Rounds 1-10 build a solid circular disk to anchor the mesh and petals. Keep tension consistent. Use stitch marker at the first st of each round to maintain correct counts and to orient later placements for petals.
Round 11 :
*1 dc in next 3 sts, ch10, skip 10 sts, 1 dc in next 3 sts, ch5; rep from * around placing 6 ch10 loops and 6 ch5 mini loops between clusters (48 dc & 12 chains-spaces total; work is now divided into 12 anchor points)
Info :
Round 11 prepares the foundation for petal loops and small connecting picot points. The long ch10 loops will be the shape guides for the raised petal teardrops; the ch5 mini loops are small anchors between petals. Keep chain length consistent for even petals.
Round 12 :
Working into each ch10 loop: attach yarn into the base of a ch10 with sl st, ch2 (counts as hdc), 18 hdc evenly spaced around chain loop, sl st to join at base (18 hdc per loop × 6 loops = 108 hdc). Continue to each ch5 mini loop: sl st into base, ch2, 5 hdc around, sl st (5 hdc × 6 = 30 hdc). Total stitches worked this round: 138 hdc plus the 48 dc anchor points remain (note: these hdc form new raised edges)
Info :
Here we are building a solid cuff around the chain loops to give that wrapped, rope-like appearance. Place stitches evenly; small variations will be adjusted by subsequent rounds. Use pins to hold loops flat on blocking board later if needed.
Round 13 :
Round in the round around the entire motif: *1 sc in each of the next 3 dc anchors, then 1 sc in each hdc across the petal cuff (18 sc over petal), 1 sc in each hdc across mini loop (5 sc), rep from * around. Total sc count this round: (3+18+5)×6 = 156 sc
Round 14 :
1 sc in each st around (156)
Round 15 :
Switch to BLO for a defined ridge: 1 sc in each st BLO (156)
Info :
Working BLO on Round 15 creates a small ridge that outlines each petal and gives that sculpted look you can see in the photos. If your cord is very thick, you may prefer to omit BLO for a softer edge.
Round 16 :
(3 sc, dec) x39 — repeat sequence around to create a slight scalloped reduction shaping the base (117)
Round 17 :
1 sc in each st around (117)
Round 18 :
(2 sc, dec) x39 (78)
Info :
Info :
Rounds 16-18 shape the outer transition between the cuffed petals and the diamond lattice that will form in the center of the motif. The decreased rounds compress the outer ring slightly so the lattice sits nicely within a diamond.
Round 19 :
Even round: 1 sc in each st around (78)
Round 20 :
Prepare for mesh: *ch6, skip 3 sts, sl st into next st; rep around to create 13 ch6 mesh anchors (total base sc remain 78 but you will have 13 chain loops formed)
Info :
These ch6 loops form the under-structure for the diamond lattice. They will be worked over to make an open mesh using crossed chains and single crochet anchors. Keep all chain lengths identical for a regular diamond.
— Mesh Diamond (central lattice) :
Round 21 :
Working into the 13 ch6 loops: in each ch6 work sc, ch4, sc (creates small loops), sl st to next anchor (3 stitches per loop x 13 = 39 sc + 13 ch4 loops)
Round 22 :
Crossed mesh formation: *Into ch4 loop: (ch3, dc, ch3), sl st into next ch4 loop, rep across to form diagonal arches; finish with sl st to base (no net increase in fixed stitch count; maintaining the 39 anchor sc stitches)
Round 23 :
Convert arches to lattice: work sc into top of each arch and ch1 between arches to lock grid, counting sc placements across 24 lock points (24 sc plus original 39 anchors = 63 working sc)
Info :
The lattice is formed by creating small arches and then locking them into a diamond using single crochet connecting points. This is intentionally built slowly so the diamond is stable when motifs are joined. Use a small amount of tension on the arches so they sit flat after blocking.
Round 24 :
Round of even single crochets across all visible stitches (63)
Round 25 :
Work (1 sc, inc) around where appropriate at the four compass points of the diamond to create corners: identify 4 corner anchor points and do 1 sc in each non-corner then (2 sc) at each corner — results in +4 stitches overall (67)
Round 26 :
1 sc in each st around (67)
Info :
At this point the motif centre is complete: a stable diamond mesh with a surrounding ring that connects to the petal cuffs. The counts above ensure even geometry so multiple motifs will sit flat when pinned together.
— Raised Petal Finishing (per petal, repeat 8 times) :
Round 27 :
Work into first petal cuff edge (the set of 18 stitches created earlier): join with sl st at base, ch1, 1 sc in same st and across 18 sts (18 sc per petal × 6 main petals = 108; plus 6 small petals of 5 sc = 30; but here we are defining large petals first)
Round 28 :
Shell shaping per petal: *(hdc, 2 dc, hdc) in next stitch, skip 2 sts, 1 sc in next 2 sts; rep across each 18-st petal to form 6 scallops (per petal count variable but total per large petal remains 18 stitches worked)
Round 29 :
BLO around the petal edge: 1 sc BLO in each st across petal (18 per large petal, maintain small petal pattern separately)
Info :
Rounds 27-29 bring the petal edges into a clean finished form. By working scallops and BLO you define the raised teardrop. If your cord is very stiff, use fewer rows to avoid an overly thick petal.
Round 30 :
Wrap round around the outside of the petal: join at base, ch1, *5 sc in next stitch, hdc in next, 2 sc in next*, repeat to follow petal contour — this tightens and frames the petal (per petal stitch count will end up equal to previous round counts; we maintain shape without altering motif geometry)
Round 31 :
Fasten off petal and weave tail in neatly around base; repeat Rounds 27-31 for each petal until all 6 large petals and 6 mini petals have been finished. After finishing petals there will be careful weave-in of tails to avoid bulk.
Info :
Take time to finish each petal identically. Use pins to shape each teardrop on a flat board before final securing and weaving. Small variations cancel out visually when joining identical motifs.
— Corner Petals & Small Details :
Round 32 :
At each of the 4 diagonal compass points between large petals, work a small ornamental point: join with sl st, ch3, (2 dc, ch2, 2 dc) in same base, sl st to base to form a small picot diamond (creates 4 decorative corner points)
Round 33 :
1 sc around the base of each corner point to anchor it into the motif (adds 12 sc total across motif)
Info :
These small corner points emphasize the diamond shape and give a finished look when motifs are butted together. Keep their height low so they don't interfere with flat joining.
— Blocking & Shape Correction :
Info :
Block each motif flat: pin it to the recommended finished measurement (approx 18 cm square) on blocking mats, stretching petals gently so the mesh sits flat. Lightly mist with water and allow to dry completely; for a crisper finish use a diluted starch or fabric stiffener sprayed lightly and then dried. Blocking ensures consistent motif size and crisp edges for joining.
— Joining Motifs (make and join motifs as many as needed for runner length) :
Round 34 :
Join method option A (slip-stitch join as you go): Lay motif A flat with the next motif B positioned on top, right sides facing up. With RS up and B aligned, work sl st through both edge loops at corresponding anchor points: *sl st through loop A base and loop B base; rep across 6 match points*. This produces a visible but neat join that follows the mesh lines. No global stitch count change to each motif.
Round 35 :
Join method option B (invisible join using yarn needle): Position motifs, use blunted yarn needle and whipstitch through the very base of the petal cuff and the adjacent motif cuff approximately 6-8 stitches per petal anchor for secure hold; tie off and weave ends. Again this does not change motif internal stitch counts.
Info :
Choose join method according to preference. Slip-stitch join is faster and creates a built-in seam, whereas needle joining is neater and nearly invisible on the right side. For a runner that must be washed often, secure with extra whipstitches at stress points.
Round 36 :
When joining in a line, join each new motif to the previous motif on two opposing petal anchors to create an alternating overlap. For a runner, you will join N motifs in a linear chain by repeating Round 34/35 steps. The geometry of the joins ensures motifs sit flat with the diamond centres forming a continuous open lattice down the centre line.
Info :
When assembling, work slowly and check alignment frequently by laying two or three joined motifs flat to ensure the lattice lines up across joins. If misaligned, unpick the join and re-pin motifs before re-sewing.
— Continuous Joining Variant (join-as-you-go technique) :
Round 37 :
To join as you complete a motif: when working the final rounds of the motif (Round 31 or 33), instead of fastening off, bring the motif to the position of the adjacent finished motif and work sl st into both motifs at each anchor point to attach permanently. Continue finalizing edges with sc along the join to tidy seam. This saves weaving and creates a continuous fabric-like join.
Info :
This technique is recommended if you prefer to work motifs in sequence and avoid a long sewing stage. Join-as-you-go requires careful alignment and patience but yields very sturdy joins and less finishing work.
— Runner Edge & Scalloped Border :
Round 38 :
With all motifs assembled into desired length, work a unifying edge: join yarn at one outermost petal tip, ch1, 1 sc around every visible outer st along runner edge to create a uniform base for scallops. Total stitches will vary with runner length; maintain consistent spacing (approx 2-3 sc per petal scallop section).
Round 39 :
Scallop row: *skip 2 sc, 5 dc in next st, skip 2 sc, sl st in next st; rep along the edge producing scallops across each outer petal*. This forms a decorative border that unifies the motif edges.
Round 40 :
Work a final neat picot row: *ch3, sl st in 3rd ch from hook to form picot, sl st in next sc to anchor* across the scallops if desired for a lacy finish. Fasten off and weave in ends thoroughly.
Info :
The scalloped edge both conceals small irregularities at seams and frames the runner. Keep scallops identical by using stitch markers at regular intervals or by counting stitches between each scallop. For a subtle finish omit the picot row.
— Alternative Finishing: heavier cord binding :
Round 41 :
Optional binding: use a contrasting cotton cord and work a rope-like slip-stitch binding around the full outer edge: sl st evenly around, then wrap once with single crochet to create a finished framed edge. This adds weight and structure to the runner.
Info :
A heavier binding is useful for long runners that need more weight to lay flat on the table. It will use additional yarn; plan for extra cord (approx +50-100 g depending on runner size).
— Repeat & Scale Instructions :
Round 42 :
Repeat Motif construction (Rounds 1-33) for each motif you require. A 5-motif runner (as pictured) uses five motifs joined end-to-end. To lengthen, add motifs in increments of one. To shorten, stop after the desired number and finish with edge rounds (38-40).
Info :
Because motifs are modular, you can create a placemat by using a single motif, two motifs for a narrow runner, or any longer sequence for a dramatic table centerpiece. Maintain consistent blocking and joining method for best results.
— Final Finishing Steps :
Round 43 :
Weave in all ends: use tapestry needle to bury tails inside the petal cuff or under the lattice where they won't be visible. Trim close to work.
Round 44 :
Final steam/block: pin entire runner to desired length and shape on blocking board, ensure scallops are even. Use steam iron held above fabric or light spritz and let dry fully. Remove pins carefully.
Info :
After final blocking the runner will sit flat and the raised petals will hold a sculpted silhouette. For a stiffer runner, use a light fabric stiffener or diluted craft glue applied sparsely to the reverse and then dried.
— Care Instructions :
Info :
Because this runner is made from cotton cord, hand-wash in cool water with gentle detergent or machine wash on a delicate, cold cycle inside a laundry bag if the cord and joins are secure. Reshape and dry flat. Avoid tumble drying at high heat which may shrink or distort the cord.
Completing this runner is such a satisfying, tactile project — you transform lengths of cotton cord into a sequence of sculpted petals and an elegant open lattice that looks like heirloom lace. Each motif adds personality and texture, and the module-based construction means you can customize length easily. 🧶 The final blocking and neat edging is the moment everything comes together, revealing the runner’s true charm. Whether for special occasions or everyday style, this piece brings handmade warmth to your table. ✨