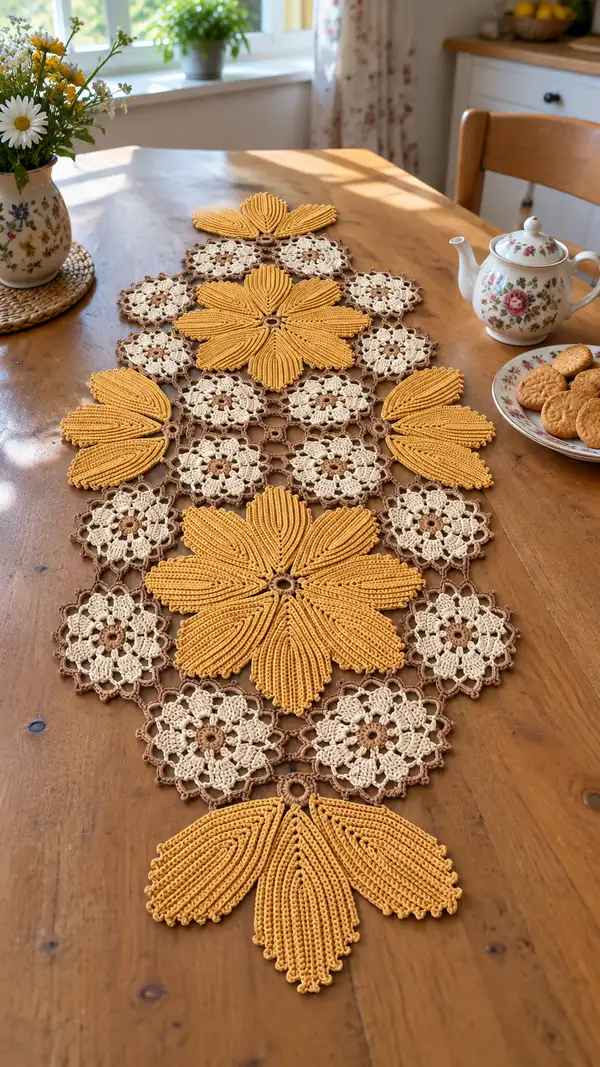
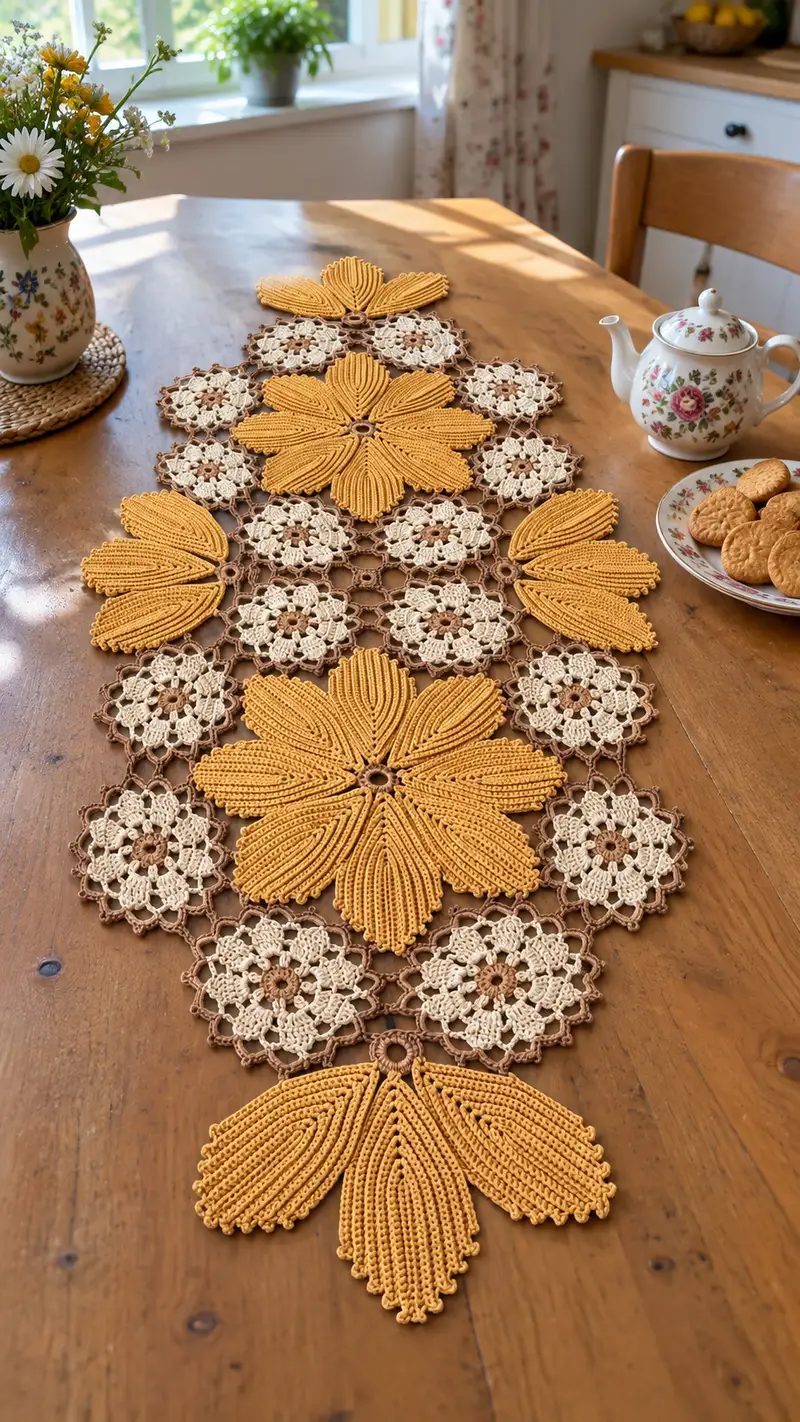
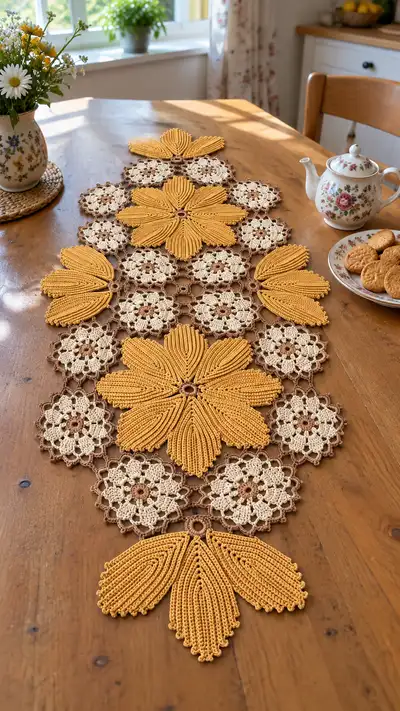
Create a warm, vintage-inspired table runner made from joined floral motifs in mustard, cream and warm brown. This pattern uses layered sunflower-style motifs (large 6-petal pieces) combined with delicate lace-like 8-petal medallions and small joining rings to form an elegant runner with a strong textured surface. The finished runner lies flat and makes a gorgeous centerpiece for a kitchen table or dresser. Detailed motif and join-as-you-go instructions make assembly straightforward.
Progress Tracker
0% Complete
— Notes & Overview :
Info :
This pattern is modular: you will make large Sunburst Flower Motifs (6 petals each), Small Lace Medallions (8-lobed circular motifs), and small Connector Rings. Join-as-you-go rounds are used to assemble the runner into the arrangement shown: three large flowers spaced along the runner with medallions filling the gaps and small rings connecting junction points. Block each motif flat before joining for best results.
Info :
Gauge is not critical for motif repeat fit, but consistent tension matters. The sample runner measures approximately 36-40 inches (90-100 cm) long by 8-9 inches (20-23 cm) wide with the yarn and hook recommended. Adjust motif count to change length.
— Materials & Prep :
Info :
Prepare yarn bobbins for each color to keep joins tidy. Keep stitch markers and spare lengths for joining. When using join-as-you-go, work connectors as you complete final rounds of motifs to avoid a lot of sewing at the end.
— Connector Ring (Make many — used for center holes and joins) :
Round 1 :
With Warm Brown, mr, ch 1, 8 sc into ring, pull tight and sl st to first sc (8)
Round 2 :
Ch 1, 2 sc in each st around (16). Sl st to first sc. Fasten off leaving tail for later if using as bare ring, or continue to Round 3 if covering the ring with brown.
Round 3 :
With same color, join in BLO, ch 1, 1 sc in each st around (16). Sl st to join. Fasten off. These rings will be decorative centers for the large Sunburst motifs and small connection nodes.
Info :
If you prefer a rigid center, you can substitute wooden or plastic rings (12-18mm) wrapped with yarn. To wrap, use sl sts into the ring until covered, then fasten off.
— Small Lace Medallion (Make required qty — sample layout uses 14 medallions) :
Round 1 :
With Warm Brown, mr, ch 1, 6 sc into mr, pull tight, sl st to first sc (6)
Round 2 :
Change to Cream. Ch 3 (counts as dc), into same st work 2 dc, ch 1, *3 dc in next st, ch 1; rep from * around for 6 groups, join with sl st to top of ch-3 (18 dc, 6 ch-1 spaces)
Round 3 :
Ch 1, sc into same st, ch 3, *(sc in top of next 3-dc group, ch 3) repeat around (6 sc and 6 ch-3 loops). Sl st to first sc.
Round 4 :
Into each ch-3 loop: (sc, hdc, 3 dc, hdc, sc). Repeat into all 6 ch-3 loops. At this point you have 6 petals forming a small flower (approx 54 sts including clusters).
Info :
Keep tension even for the lacy rounds; the petals will puff slightly. Do not stuff — medallions are flat. Block flat to open the lace.
Round 5 :
Ch 1, sc in each st around the outer edge of petals, placing (sc, ch 3, sc) in the valley between petals to create 6 small loops (this creates spacing for later brown joins). Count should be approximately 60 sc and 6 ch-3 loops. Sl st to join.
Round 6 :
Change to Warm Brown. Ch 1, *sl st into next 3 sc, ch 6, sl st into next sc; rep around to create a lacy web of chain loops linking medallions later. You should have 6 chain-6 loops around. Sl st to start and fasten off leaving a 6-8 inch tail for join-as-you-go.
Info :
These brown chain loops are intentionally generous — they form the airy lattice between medallions. When joining, use these loops as anchor points for chain bridge stitches.
Round 7 :
Optional: Rejoin Cream and work a picot round if you want a tiny floral frill: *sc in next st, ch 3, sl st into first ch of ch-3 to make picot; rep around. Fasten off and weave ends in.
— Large Sunburst Flower Motif (Make 3 for sample runner) :
Round 1 :
With Warm Brown, mr, ch 1, 8 sc into mr, pull tight and sl st to join (8)
Round 2 :
Ch 1, 2 sc in each st around (16). Sl st to join.
Round 3 :
Ch 1, (1 sc, 1 inc) x8 (24). Sl st to join.
Round 4 :
Change to Mustard. Ch 1, 1 sc in each st around (24). Sl st to join.
Round 5 :
Ch 3 (counts as dc), *ch 2, skip next st, dc in next st; rep around to create 12 chain-2 loops around the center. Sl st to top of ch-3. (12 chain-2 loops)
Info :
These ch-2 loops serve as anchors where petal bases will later be attached. Keep loops even: work dc and ch-2 into evenly spaced stitches — check counts before continuing.
Round 6 :
Into each chain-2 loop: join Mustard, (sc, hdc, 3 dc, hdc, sc). This creates 12 small petal-like bumps that will help define petal placement. Sl st to join and fasten off warm brown color if desired. (Approximately 72 sts including clusters)
Info :
For the large petal texture, each of the 6 large petals will be worked as a long shaped panel attached to alternating loops. The motif uses 6 petals, so you will attach petals to every second loop to leave space for the seam and decorative division.
Round 7 :
Petal Placement: Fold motif conceptually into 6 equal sectors. Mark the first loop to begin Petal 1 — you will work large petal panels attached along 6 adjacent loops to create a broad petal. Petal panels are worked in rows (treated here as rounds for counting): see petal sequence below. Repeat petal sequence 6 times around motif.
Petal Sequence — Each Petal is made in the same series of rounds (work 6 petals) :
Petal Round 1 : From a marked anchor loop, join Mustard, ch 1, sc into loop, ch 2, turn (foundation for petal ridge)
Petal Round 2 :
Work a foundation row of 8 sc across the loop area: sc into loop, sc into base stitches adjacent between loops to create a straight small row of 8 sc. Fasten off if necessary and rejoin to start vertical layering.
Petal Round 3 :
Join Mustard at the bottom of petal row, ch 1, 8 sc across (8). Turn. This row defines petal width at base.
Petal Round 4 :
Ch 1, sc in first st, (sc in next 3 sts, inc by 1 sc) repeat across to make 10 sts (10). Turn.
Petal Round 5 :
Ch 1, sc in first st, (sc in next 4 sts, inc) x2 (12). Turn. The petal is widening — keep edges straight by increasing at symmetrical positions.
Petal Round 6 :
Ch 1, sc across 12 (12). Turn.
Petal Round 7 :
Ch 1, (sc in next 5 sts, inc) x2 (14). Turn.
Petal Round 8 :
Ch 1, sc across 14 (14). Turn.
Petal Round 9 :
Ch 1, (sc in next 6 sts, inc) x2 (16). Turn.
Petal Round 10 :
Ch 1, sc across 16 (16). Turn.
Info :
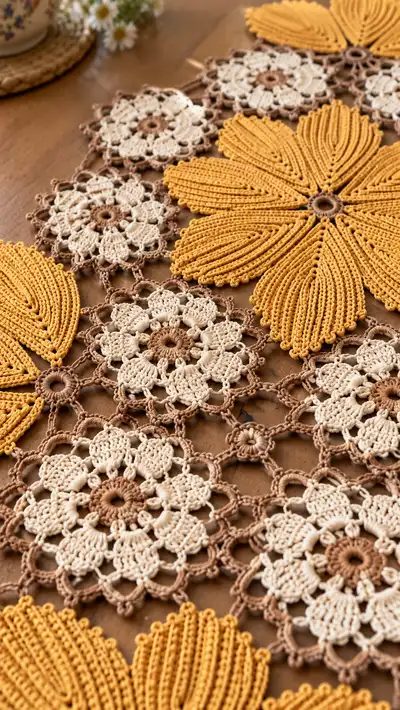
At this stage the petal panel is flat and broad. To get the pronounced ridged texture seen in the photos, we will work multiple surface ridges using front loop-only rows (FLO) and tall stitches to create packed ribbing.
Petal Round 11 :
Working from the edge back toward the base, join at outermost st, ch 1, sc in FLO across the row (16 sc FLO). Turn.
Petal Round 12 :
Ch 1, fpdc in each st across (16 fpdc) — these front post stitches will create vertical ridges along the petal when worked in alternating rows. Turn.
Petal Round 13 :
Ch 1, sc in BLO across (16 sc BLO) forming a reverse ridge. Turn.
Petal Round 14 :
Ch 1, fpdc across (16 fpdc). Turn.
Petal Round 15 :
Repeat Petal Rounds 11-14 four more times to build stacked ridges so total ridge repeats = 6 (so you will have a total of about 24 rows of ridging if counting base rows). After final ridge row, finish with one sc round across to tidy the outer edge.
Petal Round 16 :
With the final outer edge tidy row complete, work a picot-style edge: *(sc, ch 3, sl st into first ch to make a picot) across the outermost row spacing picots every 2-3 stitches depending on desired decorative fringe. Fasten off leaving a long tail for sewing the petal to the brown center ring.
Info :
Each petal is worked the same. After completing Petal Rounds on all 6 petals, use the long tails to whip-stitch petal bases to the warm brown center ring made earlier. Space petals evenly around the ring so there is a small brown gap between petals, matching the sample layout. When sewing, align the base of the petal to cover the chain-2 loops and secure with many small stitches for a neat finish.
Round 8 (motif reconnected) :
After all 6 petals are attached, rejoin Mustard at a seam gap, ch 1 and sc around the base where each petal meets the ring to stabilize (approx 36 sc). Sl st to join and fasten off. Weave tails inside petal seams.
Info :
Blocking the whole large motif at this stage gives the petals their final fan-like shape. Pin each petal out, steam-block lightly or wet-block and let dry flat. Blocking will open the ridges and keep the runner flat when joined.
— Alternative Petal Technique (If you prefer to work petals in continuous rounds) :
Info :
You can instead crochet each petal in continuous spiral rounds using elongated stitches (dtr and tr) with targeted increases to create the same wedge shape. The row approach described above is easier to control and produces the sharp ridge texture visible in the images.
— Small Connector Medallion (tiny ring node used between motifs — Make as many as needed) :
Round 1 :
With Warm Brown, mr, ch 1, 6 sc into mr, sl st to join (6)
Round 2 :
Ch 1, 2 sc in each st around (12). Sl st to join. Fasten off or reserve tail for joining points. These tiny rings serve as visual anchors where the brown join-weave meets the motifs in the photograph.
Info :
Make a few of these and place at the center intersections where medallions and large petals meet in the layout. They help keep the lattice stable and look neat.
— Assembling the Runner — Join-as-you-go Webbed Lattice :
Info :
Arrange your completed motifs on a flat surface to match the desired layout before joining: in the sample there are 3 large Sunburst motifs spaced with rows of small Lace Medallions between and around them. Place small connector rings between touching motifs where the brown ch-6 loops are positioned to anchor the lattice.
Join Round 1 :
With Warm Brown, join to a chain-6 loop on a Small Medallion, ch 1, sl st into the top of the adjacent small medallion chain-6 loop, ch 6, sl st into next medallion loop; continue forming chain-6 connecting bridges between medallions and connector rings. The sl st into loops joins motifs with consistent spacing. Keep count: each bridge is ch 6 plus a sl st on each end (effectively 2 sl st joins per bridge).
Join Round 2 :
Work around the junctions adding small decorative chains: *into each chain-6 bridge work (sc, ch 4, sc) to reinforce the bridge and create small arches. This will create an even mesh of chains connecting the whole assembly. Fasten off and weave ends into the Warm Brown web.
Info :
When you meet a large petal edge while joining, attach the chain bridge to the sc edge around the petal base or to the tiny brown ring used at petal base — this hides the join and keeps edges tidy. Use pins to hold pieces while joining to prevent distortion.
Join Round 3 :
Where multiple motifs meet (three or four-way junctions), place a small Connector Medallion ring and secure each surrounding chain-6 into the ring with a few scs for a tidy node. This will create the hexagonal, open lattice seen between motifs.
Info :
Work slowly at height of joins — these determine final shape. If a gap is too large, add a ch-3 extra anchor and slip stitch it into the midpoint of the adjacent loop to reduce slack. If the mesh becomes too tight, drop to ch-4 bridges temporarily to ease tension.
— Runner Border & Final Edging :
Round 1 :
With Warm Brown, with the runner laid flat and seams secure, join at any outermost sc on a medallion or petal base, ch 1, sc evenly around the entire outer perimeter of the runner catching into outer edges of petals and medallions. Make approximately 1 sc per 3-4 mm of edge depending on yarn. Keep counts consistent; expect around 220-280 sc depending on runner size. Sl st to join.
Round 2 :
Ch 3 (counts as dc), *skip 2 sc, 5 dc in next sc (shell), skip 2 sc, dc in next sc; rep around to create even shells along perimeter. Adjust spacing to keep border flat. Sl st to top of ch-3.
Round 3 :
Change to Mustard for a final decorative edge (optional). Into each shell: (sc, ch 3, picot (ch 3 and sl st into first ch), sc) to produce a scalloped edge with picots at shell points. Fasten off and weave ends in. Block entire runner flat and let dry.
Info :
The final border unifies the motifs and conceals slight irregularities. If your runner pulls in at any section, ease tension by stretching gently when pinning for blocking and rework a tighter area with slightly larger border stitches if needed.
— Finishing Touches & Tips :
Info :
Weave all tails in securely to the back so they do not show through the lacy medallions. Use small stitches to bury ends behind ridges on petals so the front remains clean. Light blocking is essential — pin each petal so the ridges fan out naturally.
Info :
To lengthen the runner, add more rows of Small Lace Medallions and connector rings between large Sunbursts. The pattern is modular and scales linearly: add pairs of medallions per extra flower spacing for even composition.
Info :
If you want a reversible runner with a neat back, consider working the join-as-you-go bridges with a second reinforcing sc round on the back side before finishing the border. This adds a little weight but tightens the lattice edges and looks tidy from either side.
Completing this Sunburst Floral Table Runner is a rewarding finish that brings a handmade, heirloom-quality accent to your home! Each textured petal and airy medallion combines into a warm, vintage-inspired centerpiece. Take your time blocking and joining — the small extra effort makes the finished runner sing with detail. 🧶 Lay it on your kitchen table for instant charm or gift it to someone special who loves handcrafted home décor. Happy crocheting and enjoy the glow this runner brings to your space! ✨