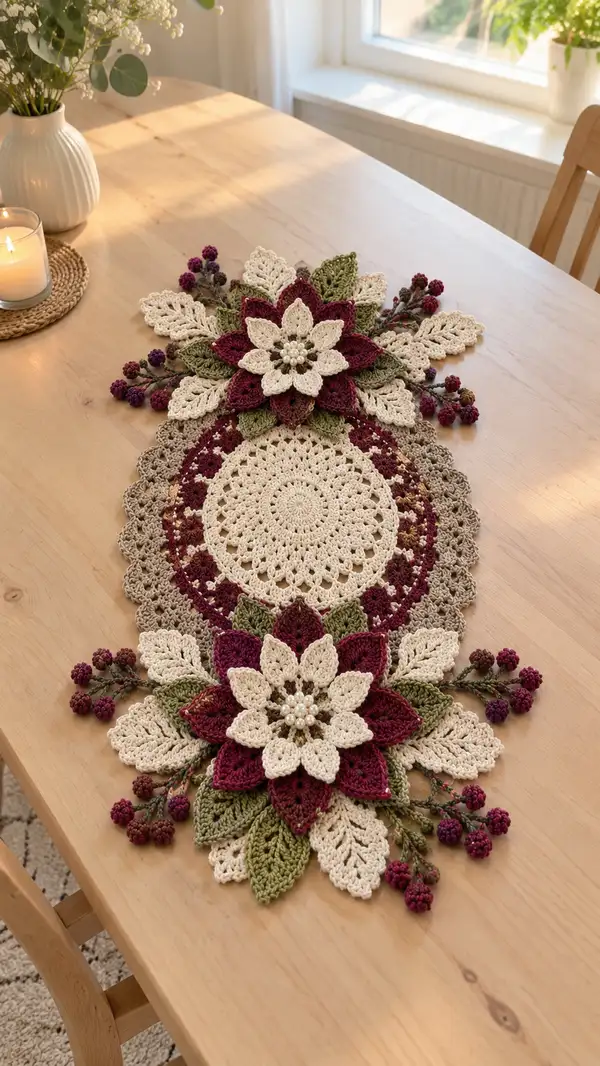
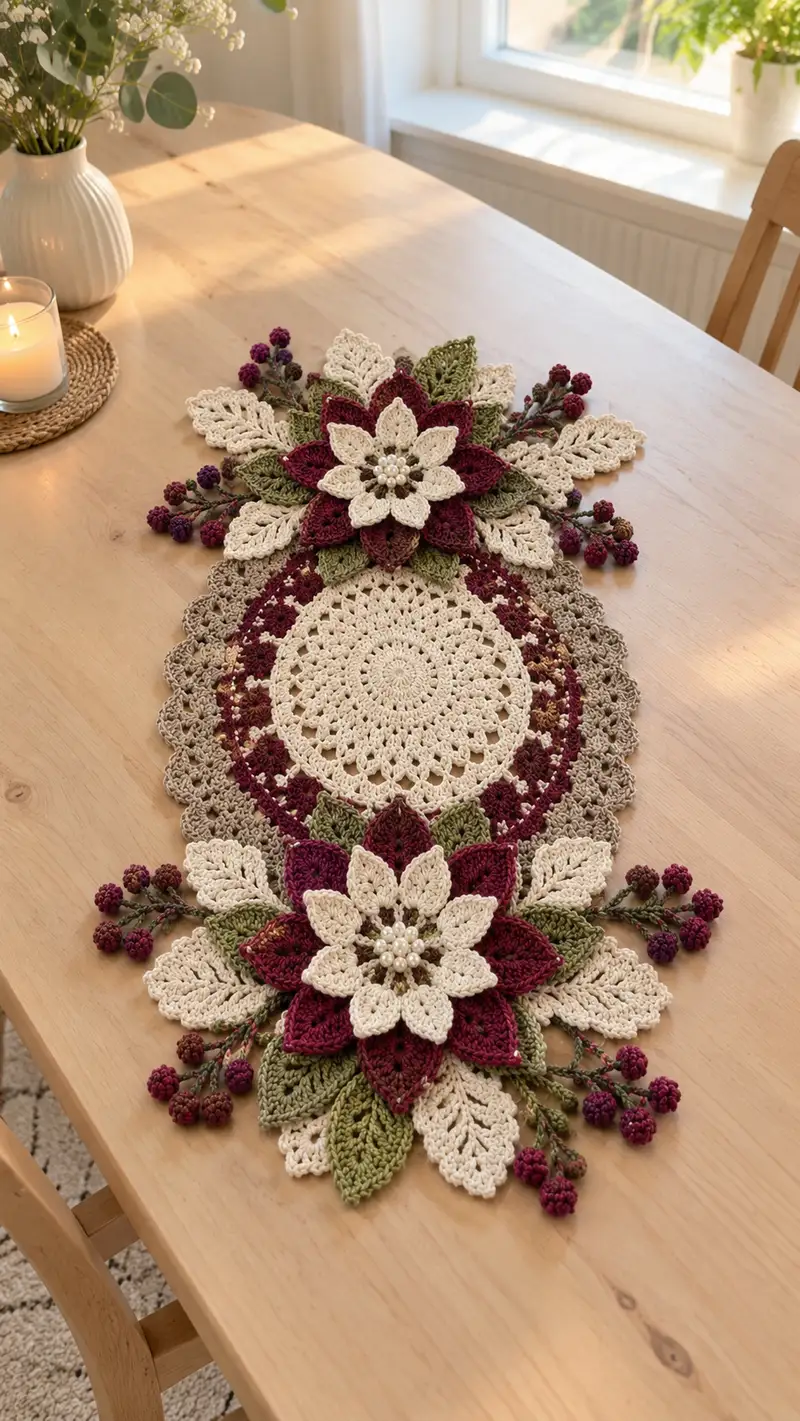
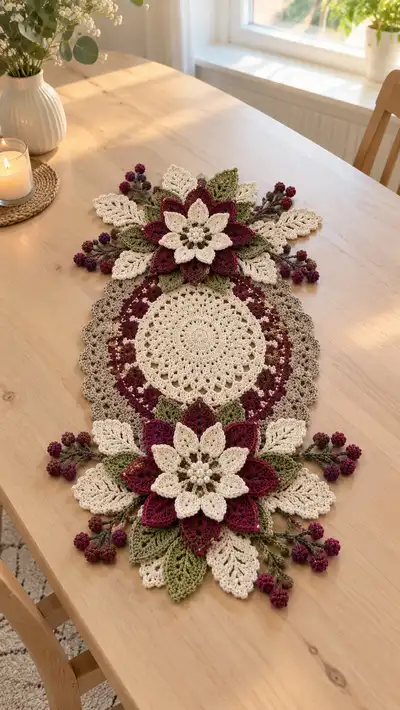
Create a stunning floral table runner inspired by vintage lace and botanical motifs. This design features a central oval medallion with layered poinsettia-style flowers, delicate leaves, and tiny berry clusters for a rich, textured centerpiece. The runner uses warm neutrals with deep burgundy and olive accents, perfect for dining tables or seasonal decor. Detailed step-by-step rounds and assembly notes guide you through making each motif and joining them into a cohesive, elegant table runner.
Progress Tracker
0% Complete
— Center Medallion :
Round 1 :
6 sc in magic ring (6)
Round 3 :
(1 sc, inc) x 6 (18)
Round 4 :
(2 sc, inc) x 6 (24)
Round 5 :
(3 sc, inc) x 6 (30)
Round 6 :
(4 sc, inc) x 6 (36)
Round 7 :
(5 sc, inc) x 6 (42)
Round 8 :
(6 sc, inc) x 6 (48)
Round 9 :
Ch1, sc in same st, *ch3, sk next st, sc in next* rep around to create openwork ring (48 sc positions and 24 ch3 loops)
Info :
Round 9 begins establishing the lacy center. Maintain an even pull on ch3 loops to keep the center flat - stretch gently as you work.
Round 10 :
Work into ch3 spaces: (sc, ch3, 3 dc, ch3, sc) into each ch3 space to produce small fans (48 fan anchors)
Round 11 :
Ch1, sc around each fan anchor stitch (count 48), placing 1 sc between fan peaks to stabilize (48)
Round 12 :
To begin forming oval texture, ch3 (counts as dc), *2 dc in next st, ch2, sk next st* rep around then join (result varies by joining; maintain overall 48 major stitches)
Info :
When forming this round use a light touch — we will expand the medallion with shell clusters that rely on a steady base. Count shells frequently.
Round 13 :
*(sc in next 2 sts, 5 dc shell in next st) x 12* (48 main points, 12 shells)
Round 14 :
Ch1, sc in each st and in each dc of the shells for a full round (approx 48 st points but more actual stitches due to shells). Maintain placement of shells as decorative anchors.
Round 15 :
*(ch5, sl st back into shell center, sc in each of next 3 st positions) around to create elongated picot arches between shells
Info :
At rounds 13-15 you are building a lace texture that will take up more yarn than previous rounds. Check the medallion lies flat; if it starts to ruffle, block after finishing central section.
Round 16 :
Work 1 sc in each ch5 apex and in the sc positions between them to tighten arches (maintain symmetry)
Round 17 :
Change to taupe/tan yarn. Info: Change to taupe/tan yarn now by attaching in any sc and carrying cream inside if you prefer neater back. Work next round in FLO for texture.
Round 18 :
1 sc in each st FLO for one round to create a ridge (this will be the inner band supporting colorwork)
Round 19 :
Switch to burgundy yarn in selected 12 evenly spaced points to begin a decorative motif: *(2 sc in next st, 1 sc in next 3 sts, join burgundy: 1 sc across next patten) rep to create 12 small color anchors
Info :
When changing to burgundy, carry other yarns invisibly or fasten off and weave in later. This round marks the start of the outer decorative ring and will contrast with the cream center.
Round 20 :
In burgundy: Create small clusters around the 12 anchors with (ch3, 3 dc, ch3, sl st) to form petal-like motifs around the medallion. Between clusters, work 3 sc in taupe to keep spacing even.
Round 21 :
Return to cream yarn. Around each burgundy cluster, work (sc, ch3, sc) into the ch3 arches to soften the contrast and create linking loops - overall count remains visually 48 anchor areas
Round 22 :
Working cream, form small shells: *(2 dc, ch1, 2 dc) into selected stitches between clusters, 2 sc in each filler st* rep around
Info :
By round 22 the medallion has a clear center and a decorative band. Keep the medallion flat by gently stretching into shape as you work. If edges cup, pin and steam-block lightly after finishing.
Round 23 :
Change to taupe and work a round of 1 sc in each st to even out the surface (this becomes a base for scalloped edge)
Round 24 :
Work small shell edging in taupe: *(sk 1 st, 5 dc in next st, sk 1 st, sl st) rep around to create scallop anchors (12 scallops)
Round 25 :
In cream, work between scallops: (sc, ch4, sc) into the sl st gaps to create open arches (12 arches)
Round 26 :
Reinforce arches with 1 sc in each ch4 loop, then 3 sc between arches to keep spacing even. The medallion should now measure approximately 30–34 cm across depending on tension.
Info :
Use this point to verify measurements. If you want a larger medallion make extra shell rounds (repeat rounds 23–26 increments) before continuing. Blocking will enlarge the final diameter slightly.
Round 27 :
Start forming the elongated oval shape: on two opposite sides only, perform increases: in a 6-st sequence on each end do (1 sc, inc) x 3 increasing width in those places while maintaining the rest of round in sc (resulting in +6 sts per end, added to base 48 for a temporary count near 60)
Round 28 :
Even round: 1 sc in each st around (approx 60) - this evens the increases and flattens the beginning of an oval form
Round 29 :
Ch3, *dc into next 2 sts, ch2, sk next st* around to create elongated lace rows; keep counts consistent and centered along long axis.
Round 30 :
1 sc in each st to finish the central medallion foundation round (approx 60) - fasten off if you choose, or carry yarn to continue into outer rings. Info: This medallion provides the central focus and foundation for the runner's joins to other motifs. Block flat before assembly.
— Outer Decorative Ring & Scalloped Border :
Round 31 :
With taupe, join at any scallop base. Ch1, sc in same, *ch5, sk 3 sts, sc in next* rep around to create larger openwork linking ring (approx 20 ch5 loops)
Round 32 :
Work 1 sc into each ch5 loop and 2 sc in each sc base to build a sturdy ring (count will stabilize around 80 by the end of the round)
Info :
This wider ring provides room to attach small leaves or decorative squares later. Keep stitches even and count at four or five points to ensure shape is consistent.
Round 33 :
In burgundy, create alternating cluster motifs: *(ch3, 3 dc cluster in next loop, ch3, sl st) then 2 sc filler* rep around to create 12 distinct burgundy flowers around the medallion (maintain approx 80 anchors)
Round 34 :
In cream, work picot loops between each burgundy cluster: *(sc, ch3, sl st in first ch of ch3, 3 sc) rep around to interlock motifs
Round 35 :
In taupe, work scallop edging: *(sk 1 st, 7 dc in next st, sk 1 st, sl st) rep around creating 12 large scallops that will become the runner's outer edge
Info :
Scalloped edges are decorative but also functional — they form clean join lines for adding the layered flowers later. Block now if needed to flatten curves.
Round 36 :
To finish border, work a round of 1 sc in each st BLO to create a defined rim (this helps when joining further motifs)
Round 37 :
Round 37 (Finishing ring): In cream, slip-stitch around to create a smooth finish, fasten off and weave in ends. Info: Reserve long tails at two opposite scallops where the floral clusters will be attached later.
— Large Layered Flower (Make 2 identical clusters) :
Round 1 :
With dark burgundy, 6 sc in magic ring (6)
Round 3 :
(1 sc, inc) x 6 (18)
Round 4 :
(2 sc, inc) x 6 (24)
Round 5 :
Ch1, *sc in next 2, (ch4, sl st back into base) in next st* rep to create petal anchors (24 bases)
Info :
Round 5 establishes the base for the first tier of larger petals. Keep petals evenly spaced around the center by counting anchors carefully.
Round 6 :
Petal round: Work into each petal anchor: (sl st, ch1, 1 sc, 2 hdc, 3 dc, 2 hdc, 1 sc, tr sl st to anchor) to form a full rounded petal — 24 petals in total. Fasten off burgundy and weave in tail.
Round 7 :
Change to cream. Attach cream behind burgundy petals near base to form second tier: ch3 and work a loop foundation of 8 dc into each petal base to prepare for inner pointed petals.
Round 8 :
Create inner pointed petals in cream: Into each 8-dc grouping work: (sc, hdc, 2 dc, tr, 2 dc, hdc, sc) to form taller, narrow petals — 24 narrow petals nested between burgundy ones.
Info :
Use a slightly smaller hook (3.0mm) for cream petals to get a crisp edge. Steam-block petals individually for a sharper point if desired.
Round 9 :
Join burgundy again to the base between petals and make small decorative picot loops (ch3, sl st) into every other base to add texture (12 picots)
Round 10 :
Form third outer row of larger overlapping petals in burgundy: Attach burgundy at outer edge and work larger elongated petals into spaces between cream petals: (ch1, sc, 3 hdc, 5 dc, 3 hdc, sc) — 12 large outer petals
Info :
Align this outer row so petals overlap the scalloped border when attached — this gives the flower its layered look. Block outer petals so they sit slightly raised.
Round 11 :
Create a textured center: with dark taupe, make a small solid cluster: 8 sc in mr, 2 rounds of sc (8, 8) then fasten off but leave a long tail for sewing center beads or pearls.
Round 12 :
Sew a bead cluster: Use small pearl beads grouped into a 7-bead circular cluster and stitch securely into center over taupe cluster. Info: Use fabric glue for extra security if beads will be handled frequently.
Round 13 :
Edge tidy: Work a thin cream scallop around all petal edges with (sc, ch2, sc) in each outer dc of petals to create a light halo and clean finish
Info :
Repeat the entire Large Layered Flower sequence to create the second identical flower. Keep a consistent tension to ensure both flowers match when joined to the medallion.
— Leaf Motifs (Make 16–20 assorted leaves) :
Round 1 :
With olive green, ch8, 1 sc in 2nd ch from hook, 1 hdc, 2 dc, 3 tr (increasing toward tip), then work down opposite side of chain: 2 dc, 1 hdc, 1 sc, sl st into base to close (leaf approx 12 sts long)
Round 2 :
Edge texture: Work BLO round with 1 sc in each stitch around the leaf edge to create a raised midrib effect. Fasten off leaving tail for attaching.
Round 3 :
Variant A (veined leaf): Ch10, work foundation similar to Round 1 but after finishing, embroider central vein with brown yarn using stem stitch; add two small hdc wings at the leaf base for dimensionality.
Info :
Make leaves in two sizes: larger leaves (approx 10–12 cm long) and smaller leaves (approx 6–8 cm). Use both olive and a lighter green for variety as in the photo.
Round 4 :
For lacy leaves (cream color): ch9, sc into chain back and form V-shaped veins by creating small ch3 loops along one side then mirror on other side before closing. Finish with a sc rim.
Round 5 :
Make total leaves: 8 larger olive, 6 medium cream, and 4 small olive for filler. Info: Leaves will be sewn around flowers and medallion edges for an organic look.
— Berry Clusters (Make multiple small clusters) :
Round 1 :
With burgundy, ch2, 6 sc in mr (6) - form a tiny berry
Round 2 :
Round 2: 6 inc (12) if you want larger berries, otherwise leave as 6. Stuff lightly with a tiny pinch of fiberfill to keep roundness.
Round 3 :
Fasten off leaving a long tail to stitch a cluster of 4–6 of these small berries onto a twisted stem. Info: Make 16–24 berries depending on desired fullness.
Round 4 :
Form berry stems: With olive yarn, ch20, sc back along chain; twist two or three of these stems together and secure with a few stitches to make a small branch. Attach 3–5 berries per branch using tails.
Info :
Arrange berries into small clusters and stitch to underside of floral clusters and between leaves to mirror the photo's composition. Slightly variegated burgundy yarn yields a realistic berry look.
— Small Rosebud Accent (Optional) :
Round 1 :
Ch6, sl st in 2nd ch from hook and in each ch across to create a tiny ruffle strip (5 sl st). Roll tightly and stitch along base to secure - a tiny bud.
Info :
Make 6–8 rosebuds to tuck among leaves as additional texture if desired.
— Joining & Assembly Preparation :
Info :
Block each motif flat and pin to dimensions before joining. The medallion will be the central piece; attach flowers at two opposite scalloped points so arrangement looks symmetrical. Use pins to mock-up placement before sewing.
Round 1 :
Position flowers: Align each large layered flower at the two long-axis scallops saved earlier (reserve long tails from Round 37). The center of each flower should overlap the taupe scalloped rim by about 1/3 of its diameter.
Round 2 :
Sewing method: Use a yarn needle and matching taupe thread to stitch from the underside of the medallion to the underside of the flower center, bringing 6–8 evenly spaced stitches through both layers. Secure with backstitch and weave in tails.
Info :
Stitch firmly but avoid pulling petals flat; maintain some lift of petals for a dimensional look. Add extra stitches through petal bases where necessary to keep the flower stable.
Round 3 :
Attach leaves: Pin leaves in natural radiating patterns around each flower (3–5 leaves per side, alternating cream and olive). Sew through the base of each leaf to secure, using ladder stitch to hide thread and keep seam tidy.
Round 4 :
Attach berry branches: Tuck berry stems between leaf bases and sew their twisted stems to the underside of the flower and medallion. Use several secure stitches so clusters remain stable when the runner is used.
Info :
When assembling, always work from the underside so decorative stitches are invisible. Keep checking symmetry by rotating the runner and viewing from multiple angles.
— Finishing Edges and Final Border :
Round 1 :
Once all major pieces are attached, trim yarn tails, then work a final decorative round around the entire runner edge: With cream, join at any outer scallop and *(ch2, 2 dc in scallop apex, ch2, sl st into next valley) rep around to create consistent scalloped edging
Round 2 :
Edge tidy: Work 1 sc in each st around entire perimeter to unify joins and hide slight gaps. If needed, add small whip stitch joins between motifs where stitches do not align perfectly.
Round 3 :
Optional beaded trim: Attach small pearls or seed beads along the inner flower circles using thin thread for subtle sparkle. Secure thread ends and hide beneath petals.
Info :
Final blocking is essential: pin entire runner into the desired oval shape, spacing scallops evenly, and steam block gently. This ensures all pieces lie flat, seams relax, and petals open elegantly.
— Measurement & Adjustment Notes :
Info :
Finished size of pictured runner approx 90–100 cm long and 30–35 cm wide after blocking based on yarn weight and tension. To lengthen, repeat central medallion outer ring pattern and add additional flower clusters or linking rings. To shorten, omit one flower and reposition a single floral cluster.
Info :
Gauge is not strict for this decorative piece, but the proportions depend on consistent use of recommended yarn weight and hooks. If your stitches are noticeably larger, try 3.0mm hook; if smaller, use 3.75mm to relax the fabric.
Info :
Throughout the project use stitch markers to locate corresponding join points and keep shape symmetrical. Keep extra motifs (leaves/berries) available to tweak fullness at the assembly stage.
Completing this table runner is a rewarding journey — intricate lacework, layered petals, and tiny berry clusters come together to form a striking centerpiece. I love seeing the petals lift after blocking and how the color contrast adds seasonal charm. The finished runner is perfect for special meals, gifts, or seasonal decor. 🧶🌿✨