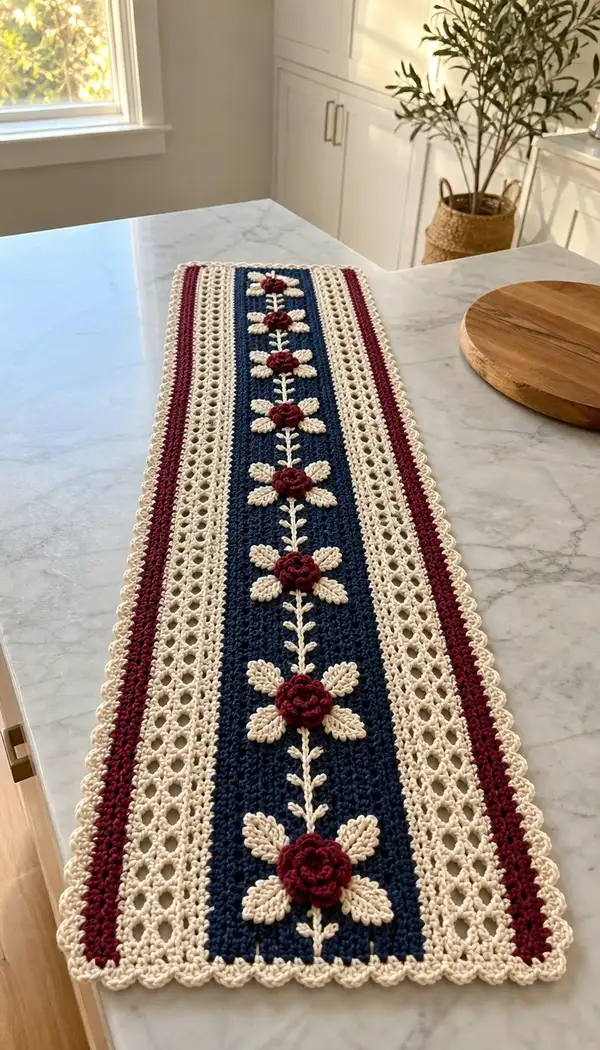
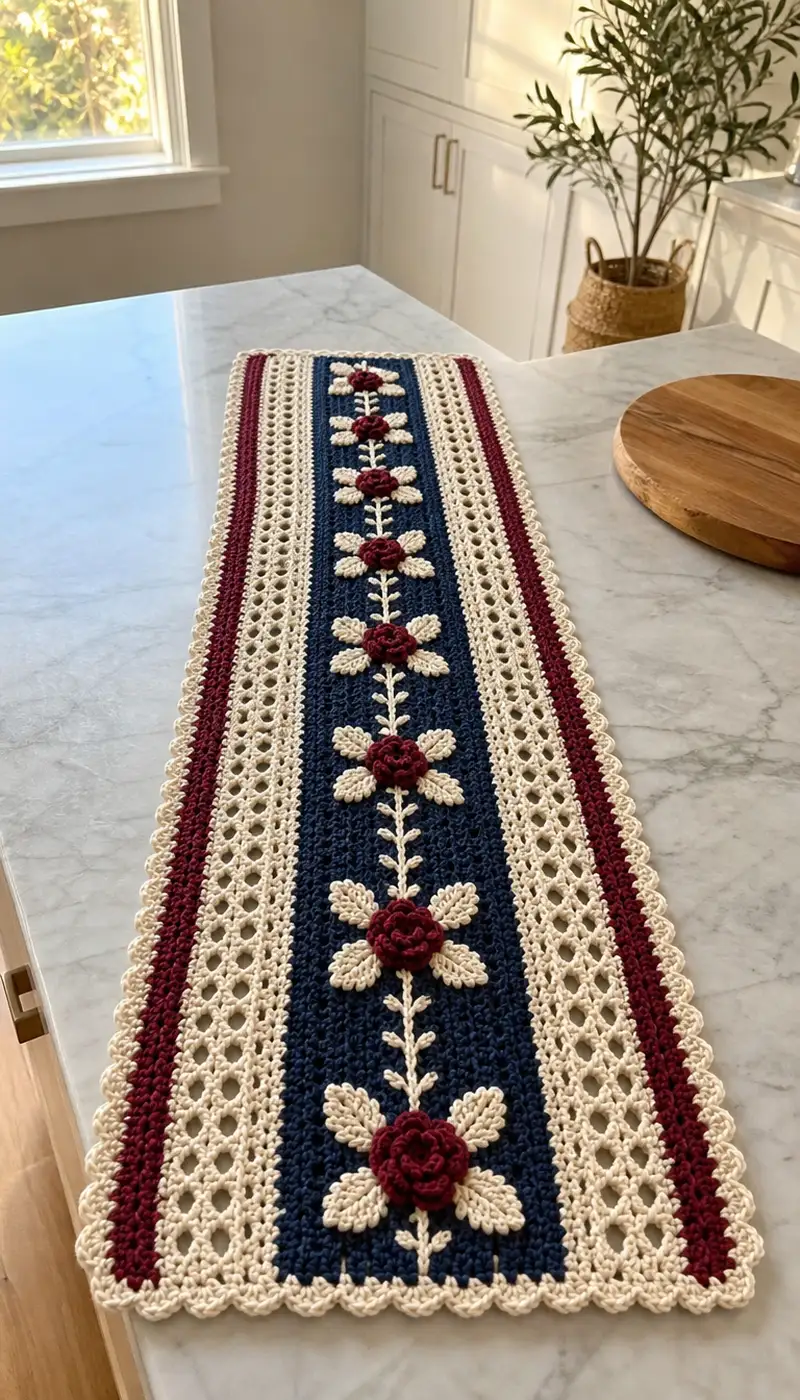
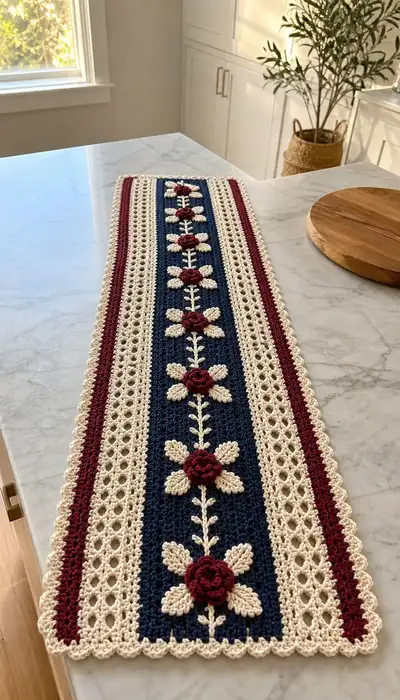
A long, elegant table runner inspired by vintage embroidered linens featuring a deep navy center stripe, cream lace panels, and burgundy roses. This pattern builds the runner in simple strips with an eye-catching 3D floral applique row and scalloped cream edging. Suitable for a centerpiece on a dining table or console, the textured lace and raised roses add a handmade heirloom look.
Progress Tracker
0% Complete
— Overview and Foundation :
Info :
This runner is made from three main strips worked to full length and assembled, then edged with a scalloped border. Optional: work full width in one piece if you prefer carrying color and joining in rows. The pattern below provides strip widths, stitch counts, and instructions to produce a runner approximately 12-14 inches wide and 54-60 inches long; adjust length by repeating center panel motif rows.
Info :
Gauge (not critical for look but helpful): 14 dc x 8 rows = 4 in (10 cm) in worsted cotton yarn using 4.0mm hook. Work tightly enough for defined lacy stitches but not so tight the fabric won't lie flat.
— Materials & Measurements :
Info :
Finished width: approximately 12-14 inches (30-36 cm). Finished length shown: approximately 54-60 inches (137-152 cm). To make longer or shorter, add or subtract repeats in the center panel rows and make the same number of repeats for side lace panels to match length.
Info :
Strip widths used in this pattern (stitch counts are working stitches across each strip): Center navy strip = 42 sts; Side lace panels (each) = 24 sts; Narrow burgundy accent stripes (each) = 6 sts. Panels will be joined to produce the full width.
— Center Panel (Navy) :
Info :
Make foundation chain 42 + 1 turning chain (or foundation dc 42) to create a center panel 42 stitches wide. This panel is worked in rows; flower vine will be added later using surface slip stitch and appliques. Work the length by repeating the textured repeat until you reach desired runner length. The pattern below includes 120 row equivalents (counted as rounds) with grouping to reach length shown; you may adjust.
Round 1 :
Ch 43, dc in 4th ch from hook (counts as dc + ch-2 turning), dc across until there are 2 ch remaining, 2 dc in last ch, turn. (42 dc)
Round 2 :
Ch 3 (counts as dc), dc in each st across to last st, 1 dc in last st, turn. (42 dc)
Round 3 :
Ch 1, sc in first st, *ch1, sk 1 st, sc in next st* repeat across to end, end with sc in final st, turn. (42 sc with ch-1 spaces)
Round 4 :
Ch 3, dc in each sc and ch1 space across, placing 2 dc in final sc, turn. (42 dc)
Round 5 :
Ch 2, hdc in each st across to end, turn. (42 hdc)
Info :
These first 5 rounds set a stable baseline and tidy edge. From Round 6 onward we will begin the textured repeat that forms a small raised background which highlights the vine and appliques.
Round 6 :
Ch 3, dc in next st, *fpdc around next st, dc in next st* repeat across to end, turn. (42 sts worked with fpdc placement creating subtle vertical ribs)
Round 7 :
Ch 1, sc in each st across (work into post of fpdc where visible for neatness), turn. (42 sc)
Round 8 :
Ch 3, dc across in each st, turn. (42 dc)
Round 9-16 :
Repeat Rounds 6-8 twice (3-row textured repeat) to establish background (this block is 9 rows including the first base rows). Maintain 42 stitches each row. (Repeat pattern: fpdc row, sc row, dc row)
Info :
Place a stitch marker in the center stitch column (st 21) to mark the vertical center for vine placement. This marker will stay until appliques are attached. For precise flower placement, you will count rows from the lower end and mark row numbers with removable markers or safety pins.
Round 17-56 :
Continue repeating the 3-row textured repeat (Rounds 6-8) for a total of 40 more rows in this section. Keep the center stitch marker in place. (Maintain 42 sts per row)
Info :
At this stage you should have worked approximately 60 rows including the base rows. Depending on desired runner length, you will make more repeats below. Aim to end the center panel with a complete repeat so the vine and applique spacing lines up nicely.
Round 57-96 :
Repeat the same 3-row textured repeat (fpdc row, sc row, dc row) for 40 more rows. Check length frequently; stop repeating when the center panel matches the desired length for your runner. For the sample runner length (approx 56-60 inches), follow the full 120-row plan across all sections as indicated in this pattern. (42 sts each row)
Round 97-100 :
Work two more complete 3-row repeats and then work one additional dc row to complete the center piece. Keep markers in place. (42 sts)
Info :
End center panel with the right side facing. Do not fasten off. You will add the vine (surface slip stitch) next and then attach appliques. If you prefer to add appliques after assembly, fasten off leaving long tails for sewing and set aside.
— Surface Vine (Cream) on Center Panel :
Info :
Use cream yarn and a 3.5mm hook for the vine to keep it slightly snappier. The vine is worked as a line of surface slip stitches down the vertical center (over the center stitch marked earlier), with small chain stems from which leaves and flowers will be positioned.
Round 1 :
With right side facing, join cream yarn with a sl st at the bottom center stitch (marker position). Ch 1, *sl st in center stitch for 2 loops up, ch 4, sl st back into same center stitch forming a tiny loop (this forms a short stem)*. Move up four rows (use yarn needle to surface slip stitch along posts if needed), repeat the stem technique every 6 rows of the center panel to create even spacing for 7 flowers across the runner length. End with a sl st and fasten off, leaving a long tail for sewing if desired.
Info :
The vine is decorative and optional; you may choose a simple embroidered chain stitch instead. Keep stem spacing consistent; for our sample runner space stems approximately 6-8 textured repeats apart depending on final length to create seven evenly spaced roses.
— Burgundy Narrow Stripe Panels (Make 2) :
Info :
These thin stripes are worked to the same length as the center panel and will be joined directly adjacent to each cream lace panel. Foundation chain 6 + 1 turning chain (6 sts) for a narrow, sturdy stripe. Work until the stripe matches the center panel length.
Round 1 :
Ch 7, sc in 2nd ch from hook and across (6 sc). Turn. (6 sc)
Round 2-120 :
Ch 1, sc in each st across, turn. (6 sc each row) Repeat until strip equals center panel length exactly. At final row, fasten off leaving long tail for seaming.
Info :
Alternatively, you can make a slightly wider stripe (8 sts) if you prefer a bolder accent. Keep stitch count even to make seaming predictable.
— Side Lace Panels (Cream) (Make 2) :
Info :
Each lace panel is worked on foundation chain 24 + 1 turning chain (24 stitches across). The open lattice pattern is a repeat of 4 rows that creates a diamond lattice similar to what is visible in the photo. Work the number of repeats until the panel length equals the center panel.
Round 1 :
Ch 25, (Row 1) sc in 2nd ch from hook and across to last ch, sc in last ch. Turn. (24 sc)
Round 2 :
Ch 3 (counts as dc), sk 1 st, *dc in next st, ch 1, sk 1 st* repeat across, end dc in last st, turn. (24 worked spaces)
Round 3 :
Ch 1, sc in each dc and ch-1 space across, turn. (24 sc)
Round 4 :
Ch 5 (counts as tr+ch2), sk 2 sts, sl st into next st to create a small V, *ch 2, sk 2 sts, tr in next st, ch 2, sl st in same st* repeat across to form open diamond lacy shapes, finish with sl st into last st, turn. (Lacy mesh repeat)
Round 5-120 :
Repeat Rounds 2-4 (the 3-row lacy repeat) until panel length matches center strip. Fasten off and block to shape. (24 sts per row)
Info :
Blocking lace panels before attaching will open the diamonds and make the final assembly lie flat. Pin to dimensions matching the center panel length and steam or wet-block lightly per yarn instructions.
— Assembly Preparation :
Info :
You should now have five strips: left cream lace, left burgundy stripe, center navy textured strip (with vine done), right burgundy stripe, right cream lace. Arrange them in order on a flat surface: cream lace | burgundy stripe | center navy | burgundy stripe | cream lace. Use blocking to square edges if needed.
Info :
Join strips using whip stitch or mattress stitch for an invisible seam, or join-as-you-go with slip stitch for a tidy crocheted seam. In the instructions below we use a simple whip stitch with long tails to create a flat join that will be covered by the final border.
— Joining Strips :
Round 1 :
With wrong sides together, align first lace panel edge and burgundy stripe edge. Using cream yarn tail and tapestry needle, work mattress stitch across entire length matching stitch-for-stitch. Sew through the same number of rows on each piece to keep joins flat. Secure and weave in ends. Repeat to join burgundy stripe to left edge of center panel using burgundy tail, and then join right side in mirror sequence.
Info :
Check join seams as you go; block lightly after joining if you notice any rippling. The final scalloped border will hide minor mismatches and secure seams.
— Burgundy Rose Appliques (Make 7) :
Info :
Each rose is a small layered spiral worked in burgundy. The petals are created by working clusters into chain loops that form a rosette with three rounds for good dimensionality. Make 7 roses spaced evenly along the center vine.
Round 1 :
Make a magic ring. Ch 1, work 6 sc into ring. Pull ring closed. (6 sc)
Round 2 :
Ch 1, (inc in next st) x 6 around (12 sc), sl st to first sc. (12 sc)
Round 3 :
Ch 3, 2 dc in same st, *sl st in next st, ch 3, 2 dc in same st* repeat around to create 6 little petal arcs. Fasten off leaving a long tail for sewing. (6 petal arcs)
Round 4 :
Using long tail and tapestry needle, roll the rosette slightly and tack through the back with a few stitches to form a 3D rosebud. Adjust fullness as you prefer. Secure and weave tail. Repeat to make 7 roses.
Info :
Make the roses slightly tight to retain shape; when sewing to the runner, place a few securing stitches through the center to anchor. If desired, use a tiny dot of fabric glue to hold shape before sewing.
— Cream Leaf Appliques (Make 14 for petals and extras) :
Info :
Leaf motifs are small 6-row tear-drop shapes worked flat and sewn in pairs around each rose to produce the flower-with-petals effect seen in the photo. Work two leaves per flower (one pair above and below the rose) or four leaves arranged as a cross depending on desired look. Make at least 14 leaves for 7 flowers (2 each) or 28 leaves for 4-per-flower look.
Round 1 :
Ch 7, sc in 2nd ch from hook, hdc in next, dc in next 2, hdc in next, sc in last, turn. (6 sts)
Round 2 :
Ch 1, sc in first st, sc in next, hdc in next, dc in next 2, hdc in next, sl st in last st; do not turn. Fold leaf slightly and slip stitch along bottom edge to create slight curve. Fasten off leaving long tail for sewing.
Info :
For more detailed leaves, work an extra round along the outer edge increasing slightly and finishing with a picot tip: ch 3, sl st into third ch for point. Make leaves uniform in size for consistency.
— Positioning and Sewing Appliques :
Info :
Mark the row numbers on the center panel where each stem was created. For 7 roses, place roses evenly spaced: bottom rose at approx row 8-10 height above bottom, then every 16-18 rows depending on final length. Use stitch markers or safety pins to tentatively place each rose and leaf set before sewing.
Round 1 :
Sew each rose onto the center navy panel centering over the vine stem. Use matching burgundy tail and whip stitch through the base of the rosette into the navy fabric. Attach two or four cream leaves around each rose using the cream leaf tails and slip-stitching or sewing through the back to hide knots. Ensure leaves sit flat and slightly under the rose for a natural layered look.
Info :
When sewing, only take a few stitches through the runner fabric to avoid puckering. If needed, tack the underside of the flower platform with a couple of deliberate stitches to anchor each piece.
— Wide Cream Border Join & Edge Preparation :
Info :
After all panels are joined and appliques attached, add a cream base border row around the entire runner to create a foundation for scallops. Work around the runner perimeter evenly, placing 3 sc in each corner to maintain corners that lie flat.
Round 1 :
With right side facing and cream yarn, join at one corner with a sl st. Ch 1, work sc evenly along the long edge inserting 1 sc in each row end across the length; when you reach the corner, work 3 sc into the corner stitch to turn, continue along the short edge, then up the opposite long side, working 1 sc in each row, and finish the perimeter with 3 sc in the final corner. Slip stitch to first sc and fasten off. Maintain consistent tension to keep border flat.
Info :
Count rows on each long side to ensure you place an equal number of sc and keep the scallops symmetrical. Use stitch markers to mark quarter points to align scallops later.
— Scalloped Edge (Cream) :
Info :
This scalloped edge is worked directly into the border base row. The scallop uses shells and picots to create the decorative vintage look seen in the photo.
Round 1 :
Join cream yarn with sl st into base border at lower right corner. *Ch 3, 4 dc in next sc, ch 1, sl st into same sc (forms a shell)*, sk 2 sc, sl st into next sc; rep across long edge. At corners: 5 dc in corner sc before proceeding along short edge to keep curve. When finished, join with sl st and fasten off. (Shell spacing: 1 shell every 3 sc approx)
Round 2 :
Work a small picot trim for definition: Join cream yarn into each shell center, *(sl st, ch 3, sl st into first ch to form picot), sl st into center of next shell*, repeat around. Fasten off and weave in ends. This creates the delicate looped edge shown in the photo.
Info :
If you prefer a deeper scallop, increase to 6 dc per shell and place sl st into base between shells. Test a 6-8 shell repeat on a swatch before working the full perimeter.
— Optional Border Variation (Burgundy Inner Line) :
Info :
For the thin burgundy accent line seen in the photo, work an extra line of sc in burgundy along the border base on either side of the lace panels before finishing with cream scallops. Join burgundy with sl st and work 1 sc in each sc of the base row directly next to the seam between lace and center panel to create a crisp stripe.
Round 1 :
With burgundy yarn, work 1 sc in each sc along the designated stripe area; fasten off and weave in ends. Work the cream scallop border outside this stripe so the burgundy shows as a narrow inset.
Info :
This inset stripe helps visually separate the lace from the center panel and mirrors the look of the runner in the photo.
— Finishing and Blocking :
Info :
After weaving in all ends, lightly wet-block the entire runner to help scallops relax and open lace. Pin edges to a flat blocking mat to exact dimensions and allow to dry completely. For cotton yarn, steam-blocking works well, or wet block with pinned pins and lay flat to dry.
Round 1 :
Check appliques: if any petals or roses seem loose, add a few invisible stitches to secure. Trim any visible tails and hide ends under nearby stitches with the yarn needle.
Info :
Press gently with a cool iron using a damp cloth between the runner and iron if needed to flatten any stubborn areas after blocking. Do not over-press as that can flatten 3D flowers.
— Variation Notes and Length Adjustment :
Info :
To make a longer runner, add more repeats of the 3-row textured center repeat and the 3-row lace repeat so all strips remain the same length. For a narrower runner, reduce the center panel width by decreasing foundation chain by multiples of the textured repeat (6 stitches) and adjust applique placement accordingly.
Info :
If you prefer the flowers crocheted directly onto the center panel as you go, leave gaps in the textured repeat for direct applique insertion; however, sewing them on afterward reduces distortion and makes spacing easier.
The finished runner is a beautiful blend of vintage charm and modern color — navy textured center, cream lace panels, and burgundy roses come together to make a striking table centerpiece. The step-by-step process and join-as-you-go friendly assembly make it a satisfying project with a heirloom finish. 🧶 Block it flat, add delicate scallops, and enjoy a custom handmade accent that will be admired every time you set a table. Happy stitching and sharing! 🌸