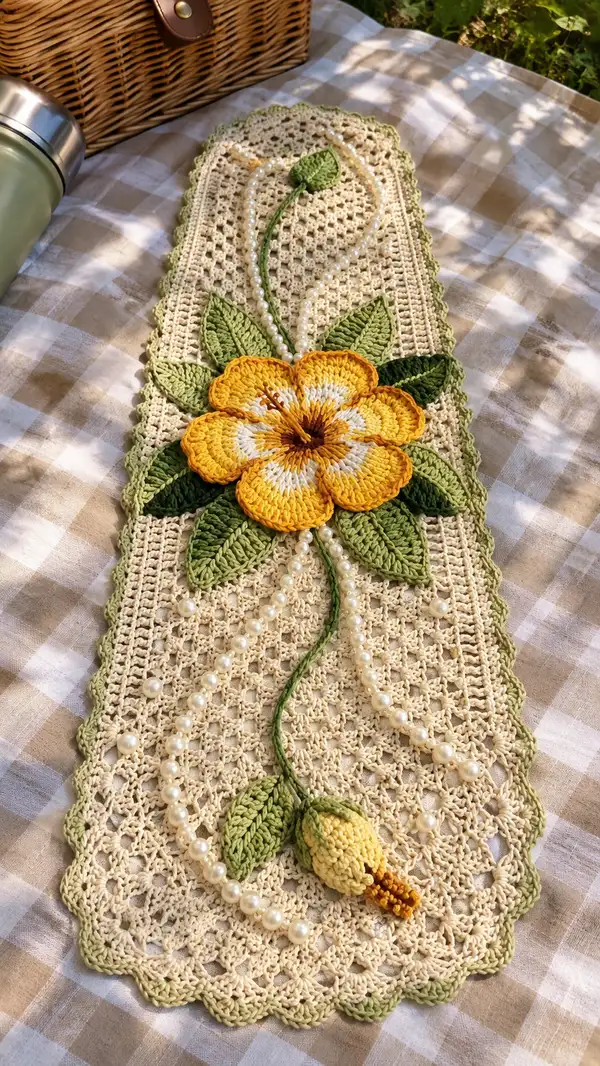
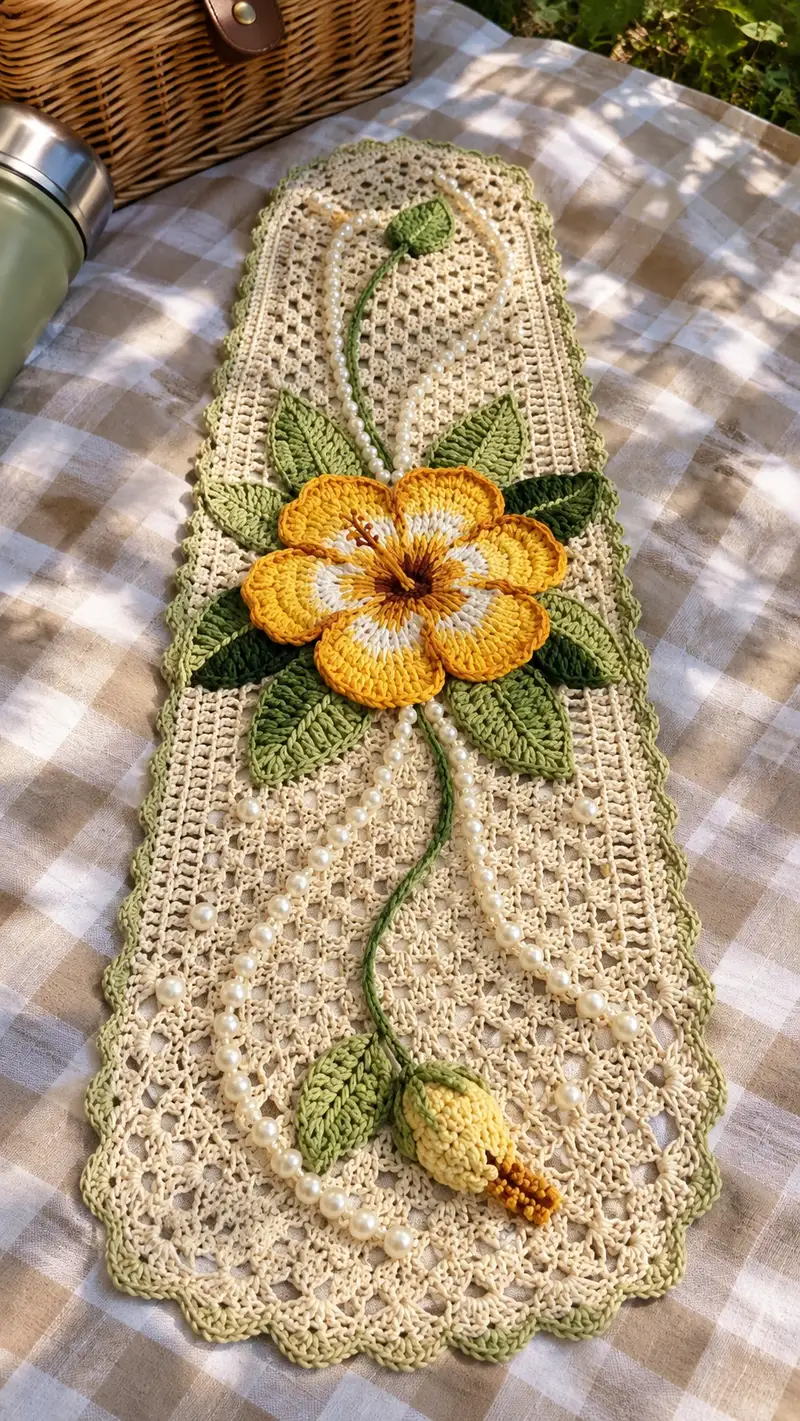
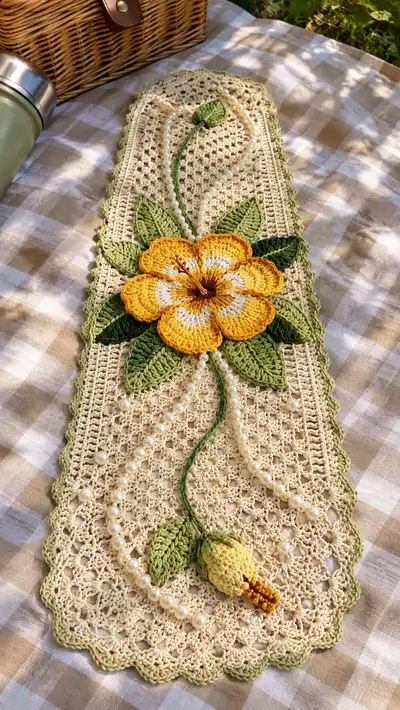
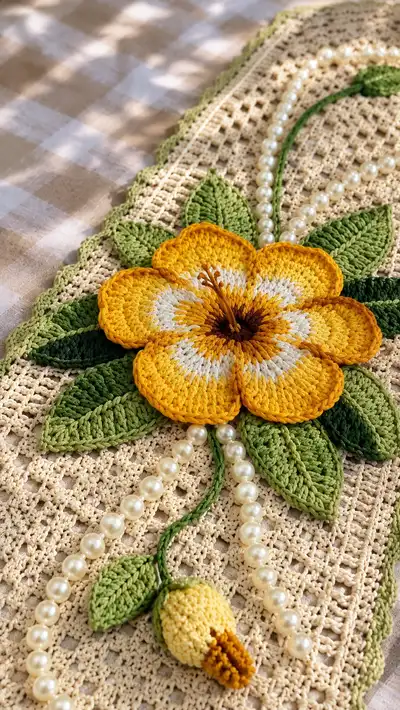
Create a charming vintage-style crochet table runner with a lace filet main panel, scalloped green border, and a layered yellow flower with sculpted leaves and bud. This pattern recreates the delicate appliqued blossom, pearl-accented tendrils, and textured mesh seen in the photo. Designed to sit across a narrow runner or center of a table, the finished piece is elegant, romantic, and handmade with cotton thread for a soft, heirloom finish.
Progress Tracker
0% Complete
— Materials & Gauge :
Info :
Gauge is not critical for this decorative runner but for proportion use a 3.0mm hook and sport/DK cotton yarn. The sample measures approximately 9" (23 cm) wide and 26" (66 cm) long from tip-to-tip of pictured runner, excluding beads. Adjust foundation chain/rows to length you prefer.
— Main Panel (Filet Mesh) :
Round 1 :
Foundation chain 121 (or any odd number to maintain repeat) (121 ch)
Info :
We will treat each 'Round' label as a row for this rectangular panel. Keep stitches even and use a stitch marker to mark the right side (RS) if desired. Chain is intentionally long to create a narrow runner similar to photo.
Round 2 :
In 4th ch from hook (counts as dc), dc in next ch, *ch1, sk 1 ch, dc in next ch; rep from * across until 3 ch remain, dc in last 2 ch. Turn. (Approx 60 dc and ch-1 sps depending on chain length)
Round 3 :
Ch3 (counts as dc), *dc in next dc, ch1, sk next ch-1 sp, dc in next dc; rep across to end, dc in top of ch3. Turn. (Maintain same number of dc and ch-1 spaces)
Round 4-7 :
Repeat Round 3 for 4 rows total to build base rectangle (maintain mesh). (Same stitch count each row)
Info :
Keep edges straight by working last dc into the final turning chain as described. Use a lifeline (or extra-marked stitch) every 10 rows if you want to ensure a perfect repeat count for long runners.
Round 8 :
Change to cream if you had been maintaining same color. Ch3, *ch1, sk ch-1 sp, dc in next dc; rep to end. Turn. (Same count)
Round 9-14 :
Continue filet mesh pattern (Ch3, dc in each dc, ch1 over each ch-1 sp) maintaining consistent tension. Work 6 rows to build height of runner before adding a denser band. (Same stitch count)
Info :
If you want a slightly stiffer central panel for applique, work the next 4 rows in 1 dc in each st (no ch-1 spaces) to create a subtle band that holds appliques well.
Round 15 :
Ch1, sc in each st across in both dc and ch-1 spaces (treat each ch-1 as a stitch for sc) to create a solid-looking band. Turn. (121 sc)
Round 16 :
Ch3, dc in each st across (121 dc). Turn. (This provides a stable rectangle row for attaching appliques)
Round 17-26 :
Return to mesh pattern (Ch3, dc, ch1 repeating) for 10 rows to create the lower portion of the runner body. (Same stitch count each row)
Info :
Measure as you go — sample used 26 mesh rows total with a central solid band. If making a longer runner, continue alternating mesh and solid bands for rhythm. Keep final panel symmetrical with the section you plan to attach the flower to near one end.
Round 27 :
Ch1, sc in each st across (121 sc) to prepare for edge rounds. Turn. (121 sc)
Round 28 :
Ch1, sc in first 2 sts, *ch2, sk 2 sts, sc in next 2 sts; rep across until last 2 sts, sc in last 2 sts. Turn. (This creates a small scalloped foundation for outer edging)
Round 29 :
Ch3, dc in next sc, *ch1, sk ch-2 sp, dc in next sc; rep across. Finish and fasten off. (Use matching cream)
Info :
Block the main panel flat before attaching border and appliques. Wet-block or steam lightly and pin to exact dimensions. Allow to dry fully to set shape and open the mesh evenly.
— Border (Scalloped Edge, Make 1 Round of Edge & 2 Rounds of Scallops) :
Round 1 :
With sage/olive green, join with sl st to any corner ch, ch1, 1 sc in same st, work 1 sc evenly along each row end for side edge (approx 26 sc along short side), 1 sc in each turning ch and along body long edge (approx 121 sc), 1 sc along other short edge; join with sl st to first sc. (Even sc all around)
Info :
Keep stitch count even on each side by placing 3 sc in each corner to avoid pulling. Mark the center of long edges for symmetry if desired.
Round 2 :
Ch1, *sk next sc, 5 dc in next sc (shell), sk next sc, sl st in next sc; rep around to create shells evenly. At corners, work 7 dc in corner sc for smooth curve. Join with sl st. (Number of shells depends on perimeter; maintain even spacing)
Round 3 :
Ch1, sl st into center of each shell, ch3, (2 dc, ch2, 3 dc) in same center (picot shell), sl st into center of next shell; rep around to make scalloped picot shells. Fasten off and weave ends. (Creates the pretty green scallop seen in picture)
Info :
Blocking after border is essential. Pin scallops to even points and steam or wet-block so scallops are uniform. If scallops look tight, increase shell size to 6 dc instead of 5.
— Large Flower (Layered Petals) :
Info :
Flower is worked in rounds with color changes to emulate the multi-tonal petals (brown center, mustard outer, pale inner rings, mustard border). Work flat in joined rounds for a layered petal effect. Use a slightly heavier gauge hook (3.0mm or 2.75mm) to make petals lie flat and sculpted.
Round 1 :
With brown, make magic ring, ch1, 8 sc in mr (8). Pull tight. (8)
Round 2 :
Inc in each st around (16). (16)
Round 3 :
(1 sc, inc) x 8 (24).
Round 4 :
Change to mustard yellow. (2 sc, inc) x 8 (32). This begins the petal base. (32)
Info :
Change to mustard for outer petal color. Join color by pulling through on last yarn over of previous round to avoid visible jump. Use a tidy invisible join if preferred.
Round 5 :
(3 sc, inc) x 8 (40). (40)
Round 6 :
(4 sc, inc) x 8 (48). (48)
Round 7 :
Change to pale cream. 1 sc in each st for 1 round to create an inner ring. (48)
Round 8 :
Change back to mustard. For petal formation: *Ch6, skip 5 sts, sl st into next st; rep around to form 8 loops. Join and fasten off. (Creates petal guidelines)
Info :
Loops mark the petal base. Next we will work each petal into a loop creating the rounded scalloped petals seen in photo. Work petals on RS to ensure even look.
Round 9 (Petal 1) :
Join mustard in one loop, ch1, (sc, hdc, 3 dc, hdc, sc) in loop; sl st to next loop. (This forms a full petal with rounded top.)
Round 10-16 (Petals 2-8) :
Repeat Round 9 for each loop around until 8 petals are formed. After completing last petal, sl st to base and fasten off. (8 petals)
Info :
For the sculpted petal edge similar to photo, use a round of slip stitches around the petal edges working into top loops only, then single crochet in BLO on final round to make raised edges that hold their shape.
Round 17 :
Join mustard again and work 1 sc evenly around petal edges (work into top-most stitch of each petal: approx 10-12 sc per petal) to even out shape. Fasten off and weave ends. (Approx 80-96 sc total)
Round 18 (Optional decorative ridge) :
With a slightly darker mustard (optional), work 1 sc in BLO around the outer edge to create a visible ridge. Fasten off and weave ends. (Gives the outlined edge seen in photo.)
Info :
Petal counts and sizes can be adjusted by changing ch loop lengths (ch5 for smaller petals, ch7 for larger) and adding or subtracting dc at petal tops for fullness.
— Flower Center Stamen :
Round 1 :
With brown, make magic ring, ch1, 6 sc in mr (6). Pull tight. (6)
Round 2 :
(1 sc, inc) x 3 (9). (9)
Round 3 :
1 sc in each st around (9).
Round 4 :
Fasten off leaving a long tail for sewing, then embroider several straight stitches with brown yarn from center to create visible stamen filaments. Knot ends underneath and secure. (Embroidered stamen)
Info :
Alternatively, make several small knotted fringe pieces from brown yarn and pull through the center to make three-dimensional stamens similar to photo using small length strands knotted and trimmed.
— Leaves (Make 8: 5 large, 3 small) :
Info :
Leaves are worked flat in rounds creating an almond shape. Use two greens: grass green for darker leaves, and light sage for lighter leaves. The leaf pattern below is for medium-large leaves; adjust by adding more increase rounds for larger leaves.
Round 1 :
With chosen green, ch6, sc in 2nd ch from hook, hdc in next, dc in next, 3 dc in last ch; now working on opposite side of foundation ch, dc in next, hdc in next, sc in next; do not join. (Approx 10-12 sts total forming a small oval foundation)
Round 2 :
Turn and work around: sc in first 2 sts, hdc in next 2, dc in next 3, hdc dec (hdc dec over next 2 sts), sc in last 2 sts. Fasten off if small leaf or continue. (Creates a more pointed end)
Round 3 :
For larger sculpted leaves, continue: join yarn at base, (sc, inc) x 2, (hdc, inc) x 2, (dc, inc) x 3, (hdc, dec) x 2, (sc, dec) x 2 to shape. Fasten off and weave ends. (Leaf shape forms with central ridge)
Info :
For the visible fine central vein seen on leaves, embroider a line of slip stitches or surface slip stitch down center with darker green. Alternatively, work FLO slip stitches during the shaping rounds to create a raised central ridge.
Round 4 :
Work a final row of sc around leaf edge if you want a crisp outline. (Edge stitch count varies per leaf size.)
Info :
Make 5 larger leaves and 3 medium leaves in two color shades. Block leaves gently to flatten and define center veins before assembling.
— Stem / Cord (Braided Cord with Leaves & Bud) :
Round 1 :
To create a flexible braided stem, chain 150 in grass green (or desired length), fasten off leaving long tail for attaching and braiding. (150 ch)
Info :
You can make the stem by crocheting an i-cord or by braiding three stranded crocheted chains. For a cleaner look, make three 50-chains, then braid and whip stitch ends to secure.
Round 2 :
Make three chains of 50 each and braid them together, securing both ends with a knot and a few whip stitches. Fasten off and weave ends into braid. (Braided cord)
Round 3 :
Attach small leaves at intervals along the braided cord by sewing through braid center and leaf base with matching thread. Secure with a few backstitches and hide ends. (Attach 2-3 small leaves)
Info :
Position the long braided stem so it drapes naturally from flower center downward across the runner. Use pins to test placement before permanent sewing. The sample shows stem draping toward the lower tip with a bud at end and pearls looped alongside.
— Bud (Small Closed Flower Bud) :
Round 1 :
With pale yellow, make magic ring, ch1, 6 sc in mr (6). (6)
Round 2 :
(1 sc, inc) x 3 (9). (9)
Round 3 :
1 sc in each st around (9). (9)
Round 4 :
Change to green for sepals: ch1, work 6 sc around base forming a slight flange, then ch6 and sl st back to create 3 small sepal points around base (work three times evenly around). Fasten off leaving tail. (Creates small sepals)
Round 5 :
Stuff bud very lightly with fiberfill to keep shape. Fold bud slightly and sew closed at base using tail, then attach to stem end by wrapping and stitching securely. (Small closed bud)
Info :
Do not overstuff the bud; keep it slightly compressible so it sits naturally on the runner and matches the proportions in the picture.
— Small Decorative Pearls (Optional) :
Info :
In the photo two strings/strands of faux pearls are arranged beneath the flower. You can purchase pre-strung faux pearl beads or sew individual pearls onto short cords. For security, stitch through each pearl and the runner mesh at several points.
Round 1 :
Cut two lengths of fine thread (approx 30-35cm each). Thread pearls onto a beading thread or fine nylon cord. Run the cord along the runner where desired and stitch through mesh every 2-3 pearls to anchor. Fasten cord ends securely on reverse side and hide tails. (Pearl string placement)
Info :
If you prefer, use small green crochet cords to create loops between pearls or sew beads directly into the mesh to mimic the cascading effect seen in the image.
— Assembly & Placement :
Info :
Arrange large flower at top third of runner with petals overlapping the mesh, leaves radiating around flower. Use pins to test placement: center flower horizontally, offset slightly toward one side along length. Ensure braided stem drapes toward lower tip.
Round 1 :
With a tapestry needle and matching thread, sew the flower base onto the main panel along the solid band area (Round 15/16 of main panel) using small whip-stitches through the base rounds of flower. Use evenly spaced stitches and do not pull too tight. (Attach flower securely)
Round 2 :
Sew leaves around flower: place large leaves underneath in a fan (5 leaves) and overlay 3 smaller leaves on top; tack each leaf at base with a few secure stitches. Add more stitches through central flower base for stability. (Attach leaves)
Round 3 :
Sew braided stem to the flower base, stitching into the underside of the flower’s foundation and through the solid band of runner to prevent shifting. Run stem downwards and sew the bud at the lower tip. (Attach stem & bud)
Info :
Hide all sewn ends under the flower or inside leaves. For longevity, apply a small dot of fabric glue to some stitches if the runner will be moved often. For heirloom pieces, avoid glue and rely on well-secured stitches instead.
— Finishing Touches :
Round 1 :
Surface-embroider veins on leaves with darker green by using long chain stitch or surface slip stitch to replicate the central veins in the photo. Add a few short embroidered stitches in brown at the flower center for stamen detail. (Embroider details)
Round 2 :
Attach pearl strings: drape alongside stem and tack in place through mesh at two or three points so pearls naturally curve. Knot cords on underside and hide knots. (Attach pearls)
Info :
Final blocking is recommended after all pieces are attached to align scallops and ensure petals and leaves lay flat. Use pins to shape and lightly steam or wet-block. Let dry completely before use.
— Sizes & Adjustments :
Info :
If you desire a wider runner, start with a foundation chain increased by the mesh repeat (add multiples of 2 or 4 ch depending on your mesh repeat). To lengthen, add more mesh rows in multiples of 6-10 rows for balanced proportions. For a table centerpiece doily instead, reduce chain and work more rounds in concentric shells for a circular motif.
This vintage floral table runner is a beautiful project that blends airy filet mesh with sculpted floral appliques to create a truly special decorative accent. Each petal, leaf, and pearl detail brings the design to life — perfect for gift giving or elevating your own table. Enjoy the relaxing rhythm of the mesh rows and the rewarding shaping of petals and leaves as they come together. Happy stitching and don’t forget to block and style your finished runner! 🧶🌼