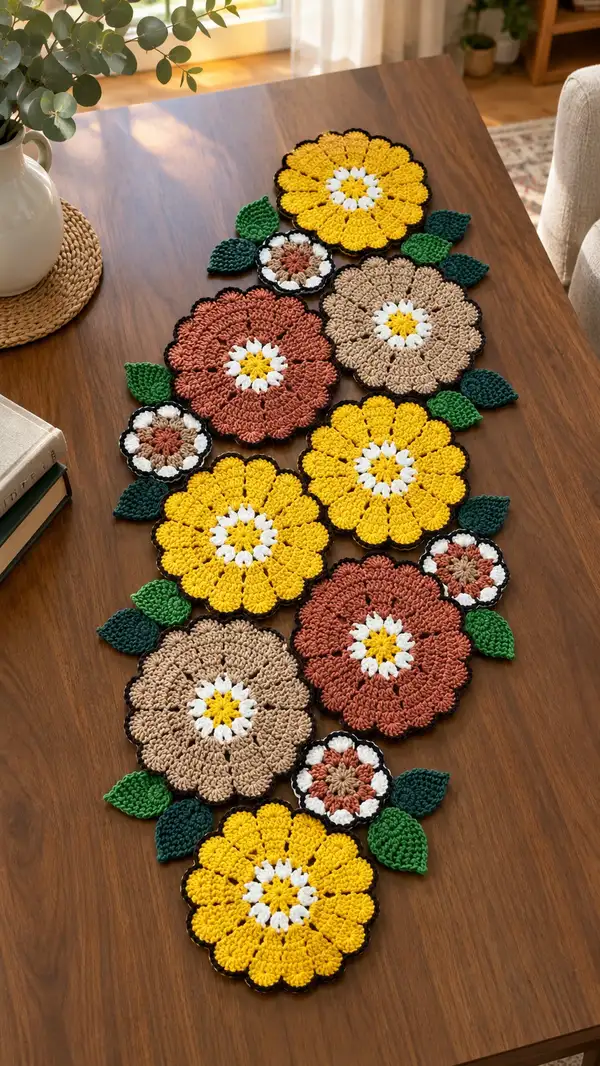
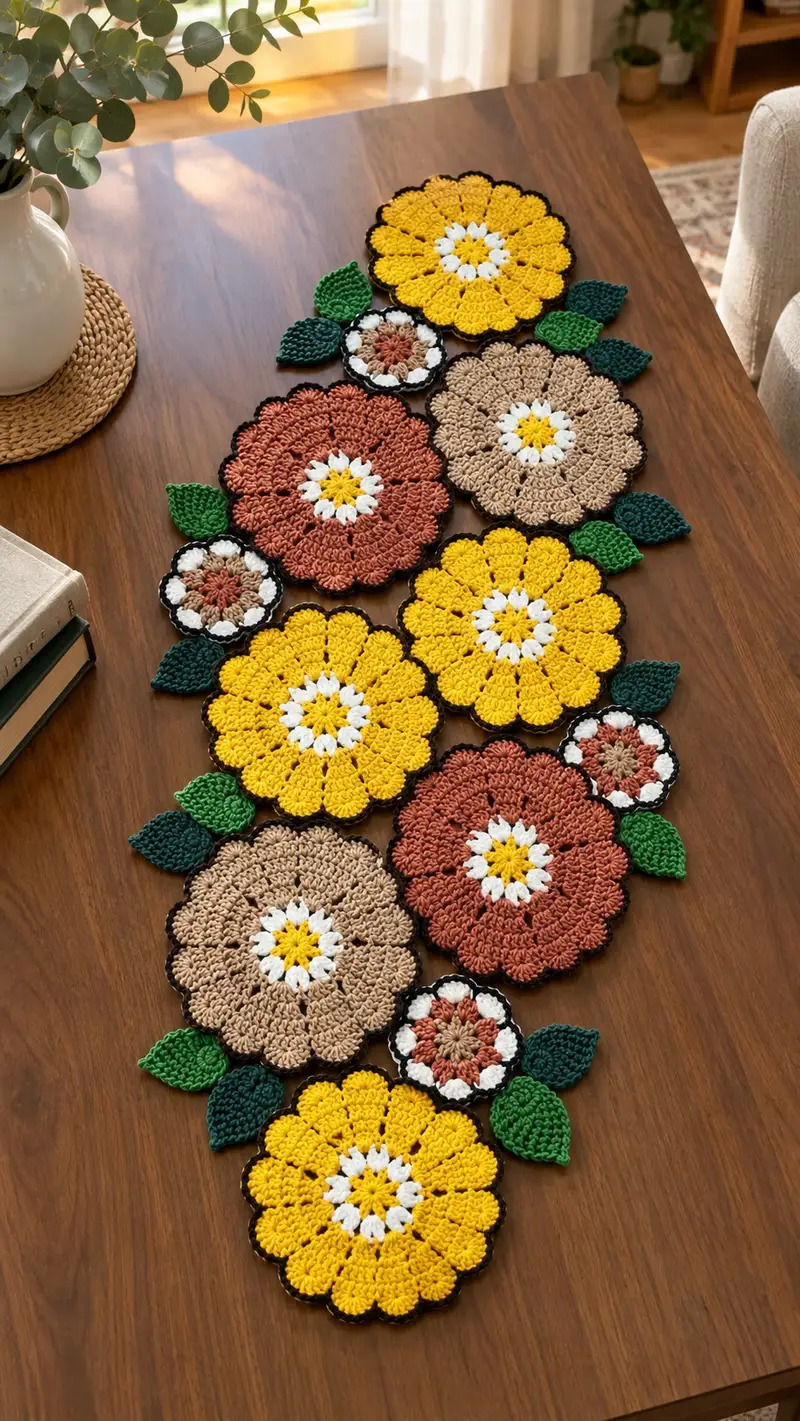
Create a warm vintage-inspired floral table runner made from joined crochet flower motifs and leaves. This pattern features large scalloped blooms in yellow, rust, and tan with crisp white centers and a dark outline, plus textured green leaves for a layered look. Works up in worsted weight yarn and is perfect for brightening a dining table or sideboard. Detailed motif instructions and a clear joining guide are included to help you assemble a long, elegant runner.
Progress Tracker
0% Complete
— Large Flower Motif (Make 5-7 depending on runner length) :
Round 1 :
6 sc in magic ring (6)
Round 3 :
(1 sc, 1 inc) x 6 (18)
Round 4 :
(2 sc, 1 inc) x 6 (24)
Round 5 :
(3 sc, 1 inc) x 6 (30)
Info :
This center is worked in white. Join color by fastening off previous color leaving 6-8" tail; weave in later. Keep tension even for the base rounds which determine petal placement.
Round 6 :
Change to white. 1 sc in each st (30)
Round 7 :
Change to yellow (or mustard center) for star: *ch 2, (3 dc cluster in next st), ch 2, sl st in next st* repeat around to create 10 small cluster points (30 base st used, clusters anchored every 3rd stitch) (10 clusters; rounds anchored to 30)
Info :
The cluster round forms a little star of white petals; keep clusters loose but secure. If you prefer embroidered center, stop here and embroider a star using yellow yarn.
Round 8 :
Change to main petal color (yellow or rust or tan). Working into spaces between clusters: *sc, ch3, sc in same space* repeat around to create 10 ch-3 loops for petals (count remains effectively 30 anchors)
Round 9 :
Work petal foundation: in each ch-3 loop work: (3 dc, ch1, 3 dc) to form full petals, sl st to next anchor between loops. After 10 petals you will have 10 petal shells (10 shells; overall stitch count variable but anchored to 30 anchors)
Info :
Petal shells create the scalloped look. Keep shells even by placing the first dc of each shell directly into the ch-3 loop center and counting dc stitches as you go.
Round 10 :
Sc around through the back loops of petals to create a base: work 1 sc in each anchor stitch and 2 sc across each shell base to bring motif into a stable circular shape (work total approx 60 sc, adjust slightly to keep petals round) (approx 60)
Round 11 :
1 sc in each st (60)
Round 12 :
(7 sc, 1 inc) x 7 then 4 sc to finish repeat evenly (67) - adjust math as necessary to maintain even spacing of petal clusters along outside edge
Info :
Rounds 10-12 are shaping rounds that expand the outer circumference before final scallop. Count carefully; you want an even number of anchors for the scalloped border.
Round 13 :
1 sc in each st (67)
Round 14 :
Change to BLO and work 1 sc in each st BLO to create a slight ridge that helps petals sit away from table (67)
Info :
Create texture using BLO on this round. This ridge reads as the underside of petals and lends structure so petals will pop. If you see any uneven points, gently block the petal with steam or pin-and-spray.
Round 15 :
Switch to dark outline color (black or dark brown). *Sk 2, 5 dc cluster across next 5 sts anchored in two sets, sk 2, sl st in next st* repeat around to create scallop points; adjust final repeat to close evenly (approx 12 scallops)
Round 16 :
Reverse scallop finish: sl st into middle of each scallop, ch1, 1 sc in same space, (ch3, sc) across scallop arcs to create decorative picot-like scallop edge. Fasten off and weave in ends.
Info :
Fasten off leaving 6-8" tail if you plan to join motifs by whip stitch; leave longer tails if using join-as-you-go technique. Lay motifs flat and block lightly if needed before joining.
— Medium Flower Motif (Make 2-4) :
Round 1 :
6 sc in magic ring (6)
Round 3 :
(1 sc, 1 inc) x 6 (18)
Round 4 :
Change to white. 1 sc in each st (18)
Round 5 :
*ch2, 3 dc in next st, ch2, sl st in next st* repeat around creating 6 small white clusters anchored to 18 base stitches (6 clusters)
Info :
This medium motif uses a simpler petal set. White clusters form the center, then an outer petal round builds the body using puff or shell stitches.
Round 6 :
Change to color (rust or tan). In each space between white clusters work: (2 dc, ch1, 2 dc) to create 6 larger petals (6 shells)
Round 7 :
1 sc in each st around, increasing 1 sc between shells to even out circumference (approx 30)
Round 8 :
1 sc in each st BLO to form a slight ridge and deepen texture (30)
Round 9 :
Change to dark outline color. *Sk 1, 7 dc in next space, sl st into next base stitch* repeat around to create scallops (approx 6 scallops)
Round 10 :
Sl st into each scallop center, ch1, sc, ch3, sc across scallop edge. Fasten off, weave in ends (approx 30).
Info :
These medium motifs are great spacers between large flowers; make sure their dark outline matches the larger motifs for a cohesive look.
— Small Accent Flower (Make 3-5) :
Round 1 :
6 sc in magic ring (6)
Round 3 :
Change to white. (1 sc, 1 inc) x 6 (18)
Round 4 :
Change to rust/tan center color. *ch2, 3 dc in next st, ch2, sl st* repeat around to form 6 tiny petals (anchored to 18) (6 petals)
Round 5 :
Turn to dark outline: 1 sc in each st around, then sl st picot edge: *sc, ch3, sl st in 3rd ch* repeat (18)
Info :
Small flowers fill tiny gaps. Keep them flatter than larger motifs by working fewer shaping increases; press gently when blocking to keep them compact.
— Leaf (Make many; mix dark & medium green) :
Round 1 :
Ch 10. 1 sc in 2nd ch from hook, 1 sc next, 1 hdc next, 3 dc next, 1 hdc next, 1 sc next, 1 sc last (work down the chain) (10 foundation sts)
Round 2 :
Working on opposite side of chain: 1 sc in first st, 1 sc, 1 hdc, 3 dc, 1 hdc, 1 sc, 1 sc. Join with sl st to first sc to form leaf (total stitches around leaf edge approx 16)
Info :
Leaves are worked flat and then shaped with post stitches later. Make a mix of dark and medium green so leaves read layered when sewn between flowers.
Round 3 :
Fasten off and weave in ends or optionally, work one more round: 1 sc in each st around in BLO to create a stem ridge (approx 16)
Round 4 :
Optional vein: With contrasting green, use sl st or embroidery to create a midrib line across the leaf. Fasten off and weave ends.
Info :
Make leaves in sizes by adjusting the starting chain (ch8 for small, ch12 for large) and keeping shape proportions consistent.
— Joining Motifs & Decorative Edge :
Info :
Plan layout on a flat surface before joining. Arrange large motifs alternating with medium and small motifs, tucking leaves into gaps to achieve the pictured cascading composition. Pin in place using T-pins if needed.
Round J1 :
Join two motifs: With right sides up, place motifs overlapping slightly where petals touch. Using dark outline color and yarn needle or crochet hook, *whip stitch through both motifs' outer rounds at intervals of every 6 sc* to secure. Repeat around each touching point until motifs are stable.
Info :
Alternatively use join-as-you-go: work final outline round on motif 2 and slip-stitch into corresponding scallop of motif 1 at each scallop center. This creates a continuous visible seam like the picture.
Round J2 :
After all motifs are joined, work a continuous decorative edge around the entire runner: 1 sc in each exposed st around, placing 3 sc across any raw edges to smooth corners (count will vary by runner size)
Round J3 :
Scallop final border: *sk 2, 5 dc in next st, sk 2, sl st in next st* repeat around entire runner to create small scallops. Fasten off and weave ends securely.
Info :
Blocking the assembled runner flat will even the joins and open petals. Pin edges carefully and mist with steam, then let motif cool dry in blocked position.
— Alternative Finishing & Scale Notes :
Info :
To scale up, add extra rounds of sc between the petal foundation and scallop rounds to increase motif diameter. To scale down, omit a growth round and keep fewer outer increases. If using cotton yarn, motifs will lie flatter; acrylic may be fluffier and require lighter blocking.
Finishing :
Weave all ends, inspect joins and reinforce any places that feel loose. Block flat and allow to fully dry before using.
Info :
If you intend to launder the runner, choose machine-washable yarn and hand-wash on gentle or use a laundry bag. Reshape while damp.
This vintage floral table runner will bring classic handmade charm to any table setting! The layered petals, crisp white centers, and deep outline create a beautiful contrast that highlights each bloom. Sewing the leaves between flowers gives a natural, organic flow that looks gorgeous in person. Enjoy arranging and joining the motifs — it’s a relaxing, creative process that yields a stunning centerpiece. 🧶🌼