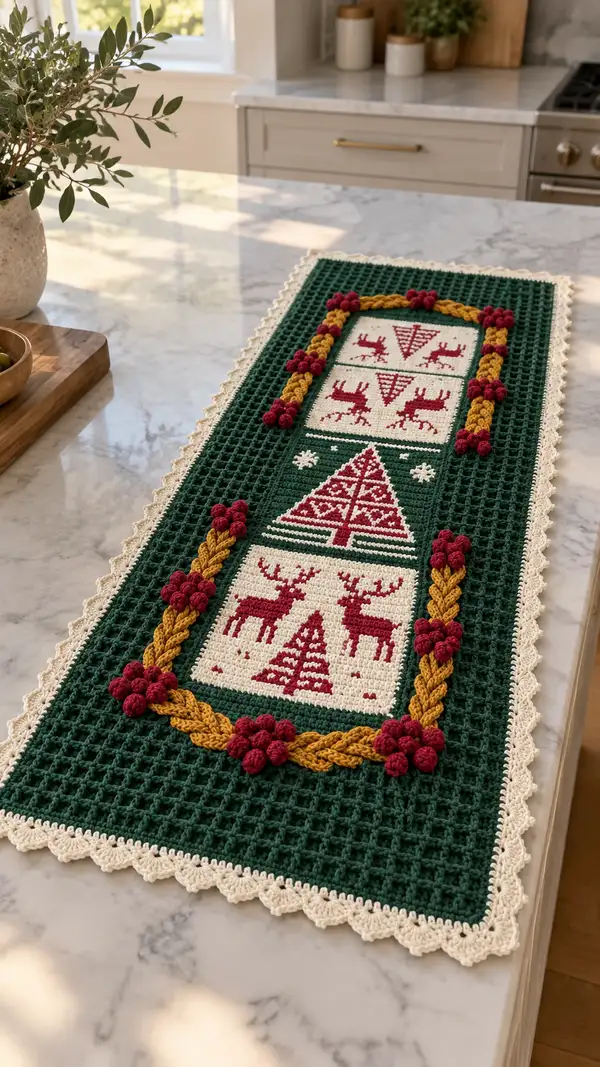
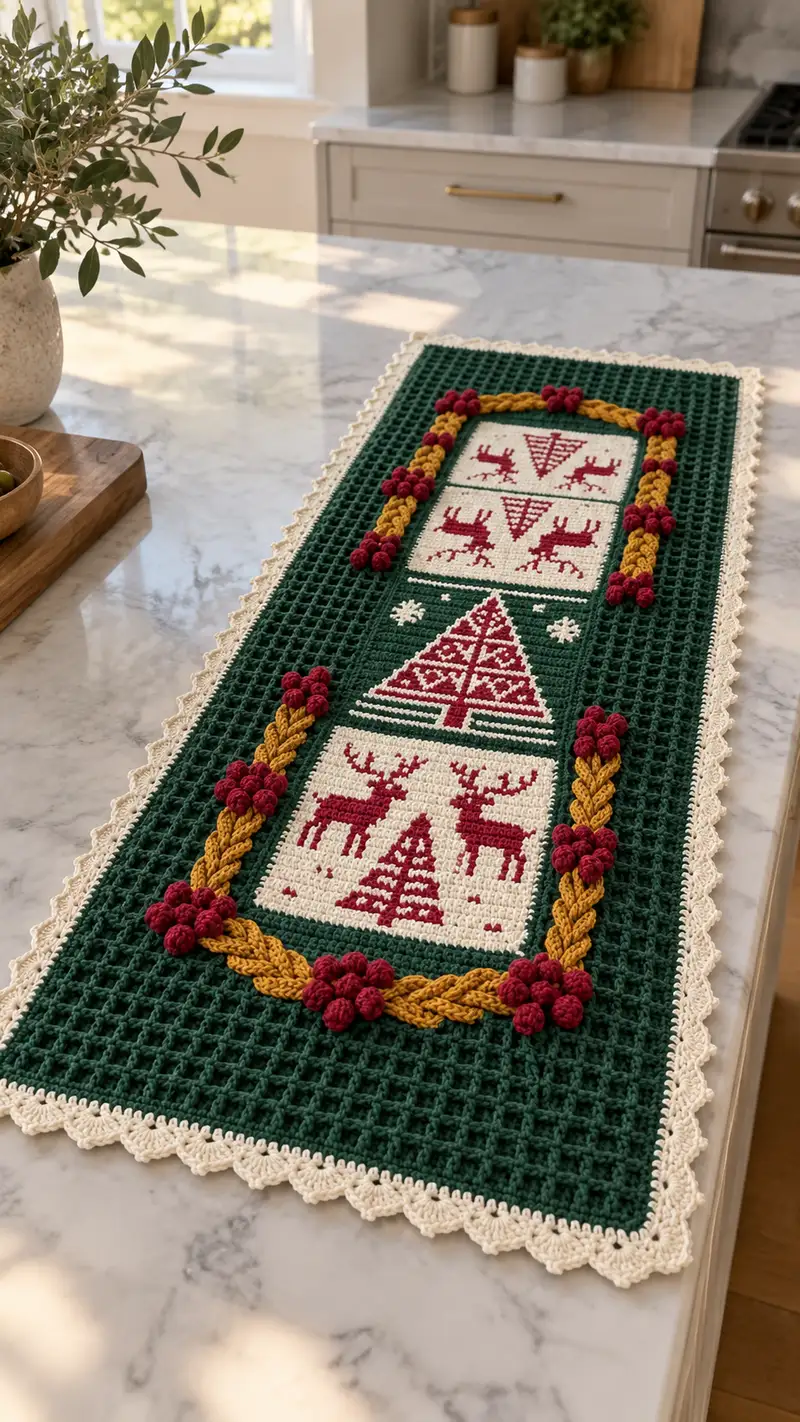
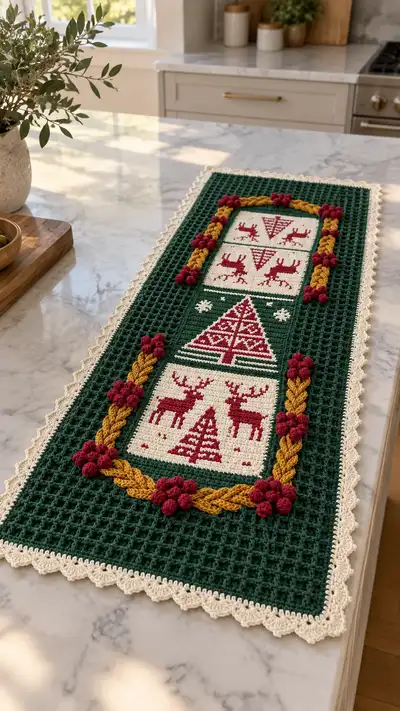
A richly textured, Scandinavian-inspired crochet table runner featuring three tapestry panels with reindeer and trees, braided golden garlands and clustered berry bobbles on a deep green waffle background. The runner is finished with a delicate cream scalloped edge for a timeless holiday look. This pattern uses tapestry single crochet for the motifs, waffle stitch for the field, and 3D popcorn clusters for berries — a perfect weekend project for confident intermediate crocheters.
Progress Tracker
0% Complete
— Notes & Gauge :
Info :
Runner finished size: approximately 12" (30 cm) wide by 48" (122 cm) long when using worsted weight yarn and 4.0mm hook. Gauge for waffle field: 12 waffle rows = 4" (10 cm); 20 sts = 4" (10 cm) in waffle pattern. Adjust foundation chain and panel counts proportionally to change final size.
Info :
This pattern is worked in sections: tapestry panels (3 separate squares), waffle field (worked flat in rows), braided garlands (3-strand crochet braid), berry clusters (popcorn clusters), and scalloped edge. Panels are stitched to the waffle field after blocking. Use stitch markers liberally and keep tapestry floats tidy on the WS.
— Materials Preparation :
Info :
Wind yarn into center-pull cakes for easier tapestry work. Prepare a printed or sketched color chart for the tapestry panels before beginning if you prefer to follow a visual guide.
— Foundation Chain & Setup :
Round 1 :
Ch 167 + 2 turning chain (foundation width). (169 sts across counting turning chs)
Info :
167 is chosen as (3 × 55) + 2 to accommodate the waffle stitch multiple and give a comfortable runner width. If you need a wider or narrower runner, change in multiples of 3 and add 2 turning chains.
— Waffle Field (Main Body) :
Round 2 :
Row 1 (RS): Dc in 3rd ch from hook (counts as first dc), dc in each ch across to last ch, turn. (167 dc)
Round 3 :
Row 2 (WS): Ch 2 (counts as first dc), *fpdc around next dc, dc in next dc; rep from * across to last st, dc in last st, turn. (167 sts, waffle foundation started)
Round 4 :
Row 3 (RS): Ch 2, *dc in next dc, fpdc around next dc; rep to last st, dc in last st, turn. (167)
Round 5-8 :
Rows 4-7: Repeat Rows 2-3 sequence to establish waffle texture. (167)
Info :
Work the waffle stitch flat by alternating FPDC rows with standard dc rows. The stitch count remains the same every row. Maintain even tension; this stitch pulls fabric in slightly so check width after 8 rows and block later to even out.
Round 9-20 :
Continue working waffle stitch in pattern for 12 rows more (total waffle rows now 16), keeping the count 167 across. (167)
Round 21 :
Row 17: Work 1 sc in each st across using Ecru if you are preparing surface for applique panels placement lines; this creates a narrow ecru guide row in the field. (167)
Info :
We place tapestry panels on top of a deep-green waffle field. For precise placement, work a couple of guide rows (in cream/ecru) to indicate where panels will be centered. These rows are optional but help with measurement and alignment.
Round 22-45 :
Rows 18-41: Continue waffle pattern for 24 more rows (total waffle rows 40). Keep workmanship even and check length compared to your planned panel placement intervals. (167)
Info :
At this point you have enough waffle background to sew on the first (bottom) tapestry panel. We'll work 3 panels stacked along the center of the runner: bottom panel (panel C), middle tree panel (panel B), top panel (panel A). Each panel will be 41 sts wide by 41 rows high, and they will be appliqued over the waffle field with ecru borders around each panel.
Round 46-50 :
Rows 42-46: Continue waffle pattern but slow down and measure: leave approximately 7-10 waffle rows between planned panels. Work 5 rows now (167).
— Bottom Tapestry Panel (Panel C - Reindeer Pair with Small Tree) :
Info :
Panel C size: 41 sts wide × 41 rows high. Work tapestry single crochet (TSC) in continuous rows or cross-row with turning chains — whichever you prefer. For clarity we use RS/WS rows and change colors by carrying or catching floats. Colors: E = Ecru (background), R = Burgundy (motif).
Round 1 :
Row 1 (RS): With E, ch 42, sc in 2nd ch from hook and across (41 sc). (41)
Round 2 :
Row 2 (WS): With E, ch 1, sc in each st across. (41)
Round 3 :
Row 3: E x41 (41)
Round 4 :
Row 4: E x6, R x1, E x27, R x1, E x6 (41)
Round 5 :
Row 5: E x6, R x3, E x23, R x3, E x6 (41)
Round 6 :
Row 6: E x5, R x5, E x21, R x5, E x5 (41)
Info :
These first motif rows begin to form the reindeer heads and the small central tree. Keep tapestry floats short and catch them every 3-4 sts on the WS to avoid long floats across the entire width.
Round 7 :
Row 7: E x4, R x7, E x19, R x7, E x4 (41)
Round 8 :
Row 8: E x4, R x3, E x3, R x6, E x18, R x6, E x3, R x3, E x4 (41)
Round 9 :
Row 9: E x5, R x3, E x2, R x6, E x16, R x6, E x2, R x3, E x5 (41)
Round 10 :
Row 10: E x6, R x3, E x1, R x6, E x14, R x6, E x1, R x3, E x6 (41)
Round 11 :
Row 11: E x6, R x2, E x1, R x7, E x12, R x7, E x1, R x2, E x6 (41)
Round 12 :
Row 12: E x7, R x2, E x1, R x8, E x10, R x8, E x1, R x2, E x7 (41)
Info :
Rows 4–12 are shaping the top halves of the reindeer with antlers hinted by blocks of red. If your tapestry floats are long, use a second color bobbin or spool to keep tension steady and avoid puckering.
Round 13 :
Row 13: E x8, R x1, E x1, R x8, E x8, R x8, E x1, R x1, E x8 (41)
Round 14 :
Row 14: E x9, R x1, E x1, R x9, E x6, R x9, E x1, R x1, E x9 (41)
Round 15 :
Row 15: E x10, R x1, E x1, R x10, E x4, R x10, E x1, R x1, E x10 (41)
Round 16 :
Row 16: E x11, R x1, E x1, R x11, E x2, R x11, E x1, R x1, E x11 (41)
Round 17 :
Row 17: E x12, R x1, E x1, R x12, E x0, R x12, E x1, R x1, E x12 (41)
Info :
Rows 13–17 center the reindeer torsos and fill the silhouette. If you prefer smaller reindeer, reduce central motif width and re-balance edge ecru counts symmetrically.
Round 18 :
Row 18: E x12, R x1, E x1, R x12, E x0, R x12, E x1, R x1, E x12 (41)
Round 19 :
Row 19: E x11, R x1, E x1, R x11, E x2, R x11, E x1, R x1, E x11 (41)
Round 20 :
Row 20: E x10, R x1, E x1, R x10, E x4, R x10, E x1, R x1, E x10 (41)
Round 21 :
Row 21: E x9, R x1, E x1, R x9, E x6, R x9, E x1, R x1, E x9 (41)
Round 22 :
Row 22: E x8, R x1, E x1, R x8, E x8, R x8, E x1, R x1, E x8 (41)
Info :
Rows 18–22 begin shaping legs and give the bottom of reindeer panels a triumphant, symmetrical appearance. Keep tension consistent and place a stitch marker at the row ends if working in continuous rounds to maintain the correct turning edge.
Round 23 :
Row 23: E x7, R x2, E x1, R x7, E x10, R x7, E x1, R x2, E x7 (41)
Round 24 :
Row 24: E x6, R x3, E x1, R x6, E x12, R x6, E x1, R x3, E x6 (41)
Round 25 :
Row 25: E x6, R x1, E x15, R x1, E x6 (41)
Round 26 :
Row 26: E x7, R x1, E x13, R x1, E x7 (41)
Round 27 :
Row 27: E x8, R x1, E x11, R x1, E x8 (41)
Info :
Rows 23–27 move the motif toward the lower border of the panel and introduce space for the small centered tree below the reindeer pair.
Round 28 :
Row 28: E x9, R x1, E x9, R x1, E x9 (41)
Round 29 :
Row 29: E x10, R x1, E x7, R x1, E x10 (41)
Round 30 :
Row 30: E x11, R x1, E x5, R x1, E x11 (41)
Round 31 :
Row 31: E x12, R x1, E x3, R x1, E x12 (41)
Round 32 :
Row 32: E x13, R x1, E x1, R x1, E x13 (41)
Round 33 :
Row 33: E x14, R x1, R x1, E x14 (41)
Round 34 :
Row 34: E x15, R x11, E x15 (41) [center triangle base implied]
Round 35 :
Row 35: E x16, R x9, E x16 (41)
Round 36 :
Row 36: E x17, R x7, E x17 (41)
Round 37 :
Row 37: E x18, R x5, E x18 (41)
Round 38 :
Row 38: E x19, R x3, E x19 (41)
Round 39 :
Row 39: E x20, R x1, E x20 (41)
Round 40 :
Row 40: E x41 (41)
Round 41 :
Row 41: E x41 (41) - Fasten off and weave ends. Block panel flat to 41 sts × 41 rows square.
Info :
Panel C complete. Block gently to square, pinning corners and edges, then steam or wet block per yarn recommendations. Repeat similar procedure for Panel B and Panel A.
— Middle Tapestry Panel (Panel B - Geometric Tree) :
Info :
Panel B is also 41 × 41 rows, worked in the same manner. Colors: E = Ecru (background), R = Burgundy (tree details). The tree is triangular and built symmetrically over 41 rows.
Round 1 :
Row 1: With E, ch 42, sc across (41) (WS). (41)
Round 2-6 :
Rows 2-6: Work 5 rows of E x41 to establish border spacing. (41)
Round 7 :
Row 7: E x10, R x1, E x19, R x1, E x10 (41)
Round 8 :
Row 8: E x9, R x3, E x17, R x3, E x9 (41)
Round 9 :
Row 9: E x8, R x5, E x15, R x5, E x8 (41)
Round 10 :
Row 10: E x7, R x7, E x13, R x7, E x7 (41)
Info :
These rows start the tree apex expanding outward. Keep symmetry by centering the tree visually and counting opposite edges to confirm equal margins.
Round 11 :
Row 11: E x6, R x9, E x11, R x9, E x6 (41)
Round 12 :
Row 12: E x5, R x11, E x9, R x11, E x5 (41)
Round 13 :
Row 13: E x4, R x13, E x7, R x13, E x4 (41)
Round 14 :
Row 14: E x3, R x15, E x5, R x15, E x3 (41)
Round 15 :
Row 15: E x2, R x17, E x3, R x17, E x2 (41)
Info :
Rows 11–15 are the wide midsection of the tree; consider adding small accent E stitches as decorative banding within the tree by switching colors for isolated stitches if you wish.
Round 16 :
Row 16: E x1, R x19, E x1, R x19, E x1 (41)
Round 17 :
Row 17: R x21, E x-1? (adjust): To maintain counts and symmetry, Row 17: E x0, R x21, E x20 (41) — instead use E x1, R x19, E x1 for continuous symmetry. (41)
Round 18 :
Row 18: E x2, R x17, E x3, R x17, E x2 (41)
Round 19 :
Row 19: E x3, R x15, E x5, R x15, E x3 (41)
Round 20 :
Row 20: E x4, R x13, E x7, R x13, E x4 (41)
Info :
Rows 16–20 shape the lower tree with stepped triangle bands. If you'd like a more detailed tree, replace some continuous red bands with patterned motifs (hearts, diamonds) by alternating a few ecru stitches in the middle of rows.
Round 21-30 :
Rows 21-30: Work 10 rows decreasing the red sections gradually to form the lower trunk shape, ending with a small trunk block centered in the middle five stitches over 2–4 rows. (41)
Round 31-41 :
Rows 31-41: Work 11 final rows of E x41 to create an ecru rim and complete panel. Fasten off and block to 41 × 41 square.
Info :
Panel B complete. Consider slight modification of rows 16–20 if you'd like more decorative bands in the tree; small color switches create a folk-art look reminiscent of Scandinavian motifs.
— Top Tapestry Panel (Panel A - Reindeer Facing Inward with Geometric Diamond)
Info :
Panel A mirrors Panel C but with slightly different antler accents and a larger diamond above the reindeer. Work the same 41 × 41 structure and block flat.
Round 1-8 :
Rows 1-8: Work 8 rows of E x41 to set the top margin. (41)
Round 9 :
Row 9: E x6, R x1, E x27, R x1, E x6 (41)
Round 10 :
Row 10: E x6, R x3, E x23, R x3, E x6 (41)
Round 11 :
Row 11: E x5, R x5, E x21, R x5, E x5 (41)
Round 12 :
Row 12: E x4, R x7, E x19, R x7, E x4 (41)
Round 13 :
Row 13: E x4, R x3, E x3, R x6, E x18, R x6, E x3, R x3, E x4 (41)
Round 14-23 :
Rows 14-23: Continue shaping reindeer body and diamond motif across 10 rows, using rhythmic banding of R and E as in Panel C but shifting a few central rows to create an alternating diamond above the animals. (41)
Round 24-32 :
Rows 24-32: Reduce red bands toward the lower section of panel, finishing with E x41 rows for margin. Fasten off and block to 41 × 41 square.
Info :
Panel A complete. Ensure all three panels are squared and the edges are neat before moving to assembly. The motifs are deliberately stylized; feel free to personalize tiny stitch counts to create small decorative motifs in the diamond sections.
— Braided Garland (Make 2 Mirrored or 1 Long Strand) :
Info :
The braided golden garland in the photo is a thick, rope-like braid made from three crocheted cords braided together and sewn in place. Each cord is ~120 cm when finished; you can make shorter segments to arc over each panel as in the photo. Use mustard/golden yarn Y.
Round 1 :
Cord 1 - Using Y, ch 6, sc in 2nd ch from hook and across (5 sc). Turn. (5)
Round 2 :
Row 2: Ch 1, sc in each st across for 120 rows to reach desired length, working tightly and keeping cord narrow. (5)
Round 3 :
Make 3 identical cords and block lightly to straighten. Braid the three cords together and sew ends together by overlapping and whip-stitching the ends to secure.
Info :
Alternatively, make the braid as an i-cord by working in continuous rounds with sc in back loop only to create a tubular cord. The braided look is achieved by three flat cords braided and sewn to keep the lying shape.
— Berry Clusters (Make Multiple) :
Round 1 :
With R yarn, make a magic ring, ch 1, work 6 dc in ring, pull tight. Sl st to first dc. (6)
Round 2 :
Work 5 dc cluster (popcorn/pop) into each stitch around to create a tight little cluster of 5–7 small bobbles; finish with sl st. Fasten off leaving long tail for sewing. Repeat to make 18–22 berry clusters for runner embellishment.
Info :
For a denser berry, work a 5-dc popcorn: (dc5 into same st, remove hook, insert hook into first dc, pull loop through, ch1) or simply work 6 dc in magic ring and cinch. Use a yarn needle to sew clusters onto the braided garland in groups of 3–5 to mimic the photo placement.
— Scalloped Border Edge :
Info :
The scalloped cream border frames the entire runner. We will work it after panels are sewn in place and the runner is blocked. Border is worked in rounds around the entire field using E yarn.
Round 1 :
With E and RS facing, join with sl st to any side at center, ch 1, sc evenly around the perimeter catching the side edges and turning rows; work 3 sc in each corner to keep edges flat. Fasten off. Count your scs; you should have a consistent sc count per side.
Round 2 :
Round 1 scallop base: *Skip 2 sc, 5 dc in next sc, skip 2 sc, sl st in next sc; rep from * around to create scallop clusters. Work 3 dc clusters in corners for smooth transition. Fasten off and weave ends.
Info :
Adjust skip counts between scallops so the scallops are evenly spaced; if the stitches don't divide evenly, slightly increase or decrease sl st placement between scallops in two places symmetrically.
— Assembly & Applique :
Info :
Arrange the blocked panels on the waffle field before stitching: panels should be centered horizontally within the 167-st width (41 sts panel + (167-41)/2 = 63 sts margin each side). Vertically space panels with ~6–8 waffle rows between each panel as in photo. Pin panels in place with sewing pins.
Round 1 :
Sew Panel C (bottom): Position the bottom edge approximately 6 waffle rows from the bottom guide row; whip stitch using ecru through the outermost sc of the panel and into the waffle field foundation sc rows so the seam is invisible. Sew every 6th stitch with a small whip stitch for a neat join.
Round 2 :
Sew Panel B (middle): Centered vertically between Panel C and A with ~8 waffle rows between. Repeat whip-stitch method to attach.
Round 3 :
Sew Panel A (top): Position and sew in the same manner as other panels, ensuring vertical symmetry along the runner's centerline.
Round 4 :
Attach Braided Garlands: Pin braided garland segments to arc around each panel as seen in the photo (one large arch around the top panel and the bottom panel with mirrored braids). Use a tapestry needle and matching Y yarn to sew the braid along its length with small, hidden stitches. Anchor braid ends under the panel edges for a clean finish.
Round 5 :
Sew Berry Clusters: Arrange berry clusters in groups of 3–5 at braided garland junctions and intersections. Sew firmly with long tails and weave ends into the braid and waffle field. Place a cluster at the top corner of the top panel, at the bottom center, and at intermediate junctions to match photo placement (6–8 groups total).
Info :
If the braid feels too floppy, gently stuff with a tiny amount of fiberfill before final sewing to give it body. Secure the stuffing ends by wrapping with a short length of yarn and running the tail through the braids before sewing down.
— Final Blocking & Finishing :
Round 1 :
Block the entire runner on a flat surface: pin straight edges and scallops, mist lightly with water or steam per yarn guidelines, allow to dry completely. This evens waffle texture and flattens appliqued panels for a professional finish.
Round 2 :
Weave in all ends on the WS carefully. Trim any stray fibers. If desired, add small dots of fabric glue under berry clusters for extra security, especially if the runner will be handled often.
Info :
Final care: hand wash gently or spot clean. Avoid machine washing to preserve crochet structure and appliqued elements. Store flat or rolled to avoid creases in the braid and scallops.
This Nordic-inspired table runner brings holiday warmth to any table with deep green waffle texture, classic cream-and-burgundy motifs, and golden braided garlands. Each element — tapestry panels, braided cords, and berry clusters — is crafted and assembled for a layered, handmade look you can be proud of. Take your time with blocking and applique and you'll end up with a heirloom-quality runner that will be enjoyed season after season. 🧶✨🎄