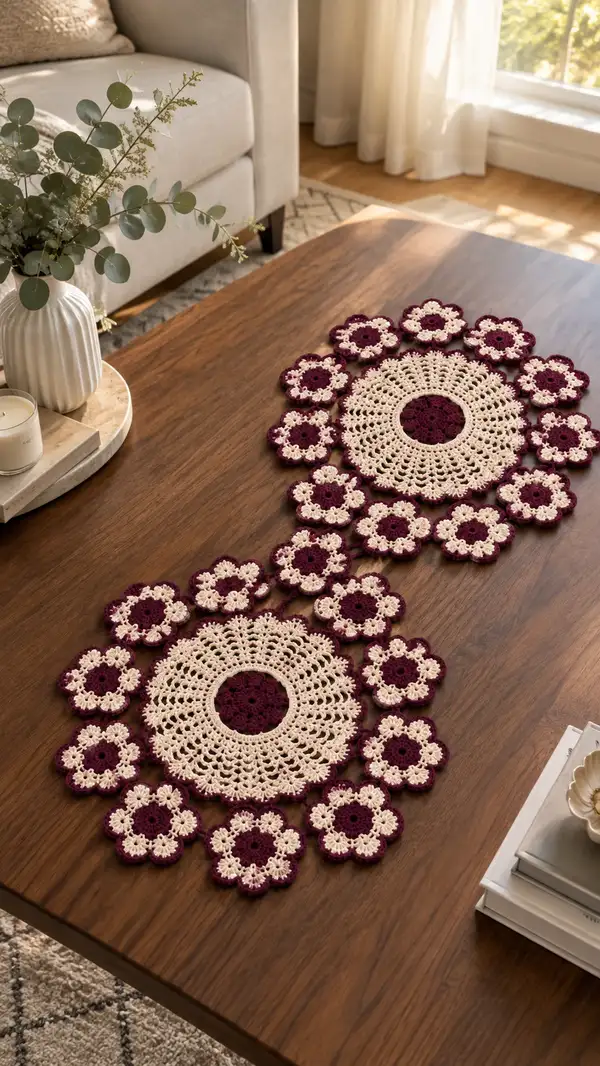
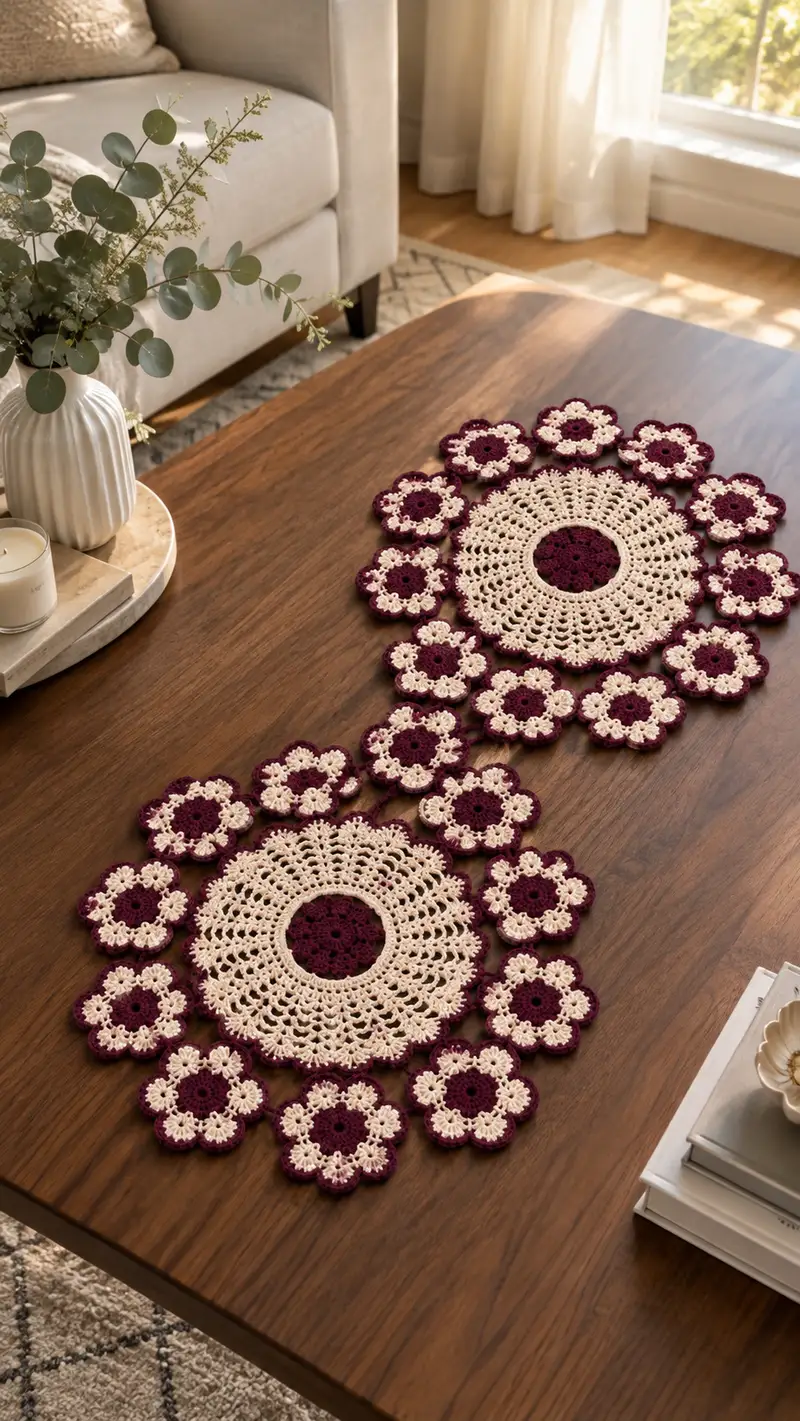
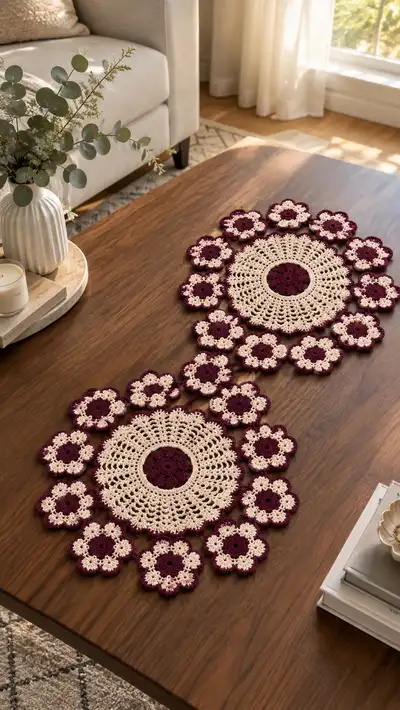
Create an elegant vintage-inspired table runner made from joined floral motifs in rich burgundy and soft cream. This pattern combines two large lacy medallions with surrounding small flower motifs for a romantic, handcrafted look. The runner lays flat and works well with worsted weight cotton for a crisp, heirloom finish. Detailed instructions guide you through each round, color change, and assembly step so you can recreate the exact look shown.
Progress Tracker
0% Complete
— Notes & Overview :
Info :
This runner is modular: make 2 large medallions and 16 small flower motifs in the order shown. Join small flowers around each medallion's edge and connect medallions with a chain of small flowers. Use color A = burgundy, color B = cream. Work right-hand method; flip for left-hand if desired.
Gauge :
Large medallion (unblocked) measures approximately 11-12 inches across using 3.5mm hook and worsted cotton. Blocked medallion will reach 12-13 inches depending on tension and blocking method.
— Small Flower Motif (Make 16-20 or as many as needed) :
Round 1 :
With color A (burgundy). 6 sc in magic ring. (6)
Round 3 :
(1 sc, 1 inc) x 6 (18)
Info :
Change to color B (cream) in last pull of Round 3 if you prefer the cream petals to begin immediately; otherwise join color B at Round 4. Carry color A loosely if working contiguous color change.
Round 4 :
Join color B in any stitch. Ch1, 1 sc in same st, *ch3, skip 1 st, 1 sc in next st* around to create ch3 loops for petals. (18 sc and 18 ch3 loops - counts shown as 36 loops total but working units are 18)
Round 5 :
*In each ch3 loop: (sc, hdc, 3 dc, hdc, sc) forming a petal. Sl st to next sc to anchor. Rep around to make 6 petals. (6 full petals)
Info :
Ensure petals are evenly stitched into each ch3 loop; keep tension consistent so petals sit flat. Use stitch marker on first petal if you need orientation for joining later.
Round 6 :
Change to color A. Sl st into base of first petal around to the outer edge. *Ch1, 5 sc around the outer edge of petal (working evenly across), sl st into valley between petals* Repeat for each petal, creating a small scalloped edge. (6 scallops)
Round 7 :
Ch2, (1 dc, ch2, 1 dc) in the top of each petal scallop to form a decorative picot arch around the flower. Sl st to join. (6 arch spaces)
Round 8 :
Working into ch2 arches: *ch1, 7 sc evenly distributed across each arch to produce a thicker outer rim*. Sl st to join and fasten off leaving a 6-8 inch tail to sew. (approx 42 outer sc total depending on distribution)
Info :
Weave in the short tails after blocking. Make the required number of small flowers. You will need 10-12 to surround each large medallion and additional 6-8 as connectors between medallions; adjust quantity to desired runner length.
— Large Medallion (Make 2 identical pieces) :
Round 1 :
With color A (burgundy). 6 sc in magic ring. (6)
Round 3 :
(1 sc, 1 inc) x 6 (18)
Round 4 :
(2 sc, 1 inc) x 6 (24)
Round 5 :
(3 sc, 1 inc) x 6 (30)
Round 6 :
(4 sc, 1 inc) x 6 (36)
Round 7 :
(5 sc, 1 inc) x 6 (42)
Round 8 :
(6 sc, 1 inc) x 6 (48)
Info :
These first eight rounds form a dense center. Keep tension tight for a solid center that will anchor the surrounding lace. Place a marker at the beginning of each round to prevent counting mistakes.
Round 9-12 :
1 sc in each st around (48)
Round 13 :
Change to color B (cream). Ch3 (counts as first dc), *skip next st, (1 dc, ch2, 1 dc) in next st (creating a ch2 loop), skip next st, 1 dc in next st* Repeat around to create 24 ch2 loops and interspersed dc anchors. (24 ch2 loops, 24 dc anchors)
Info :
Round 13 builds your first lacy ring. The number of loops (24) gives an excellent base for later shell and fan stitches. If your starting count differs, adjust repeats so you end a full round of loops evenly spaced.
Round 14 :
Into each ch2 loop: ch1, (1 sc, 1 hdc, 3 dc, 1 hdc, 1 sc) forming a small petal. Sl st to the next dc anchor and continue. After completing all 24 petals, join with sl st. (24 petals)
Round 15 :
Ch1, 1 sc in base of first petal, *ch3, skip petal, 1 sc between petals* Repeat around to create 24 ch3 spaces between petals. (24 sc, 24 ch3 spaces)
Round 16 :
In each ch3 space: (sc, hdc, 5 dc, hdc, sc) to make larger scalloped petals in cream that will form the lacy medallion surface. Sl st to join. (24 large petals)
Info :
Keep petals uniform by counting stitches carefully in each ch3 space. If stitch counts are slightly off, gently tug the petal to redistribute before moving to the next space.
Round 17 :
Ch2, 1 dc in top of each large petal, *ch3, skip to next petal top, 1 dc in next petal top* around to create an airy ring of ch3 arches. (24 arches)
Round 18 :
Into each ch3 arch: ch1, (1 sc, 1 hdc, 3 dc, 1 hdc, 1 sc) but work the 3 dc as two clusters (dc3tog spacing) to keep petals light. Sl st join. (24 secondary petals)
Round 19-20 :
1 sc in each st around (maintain stitch count corresponding to previous round layout). This evens the fabric and readies for the next lacy round.
Round 21 :
Ch4 (counts as tr), *skip next 2 sts, (5 tr in next st) forming a fan, skip next 2 sts, tr in next st* Repeat around forming larger fans separated by single tr anchors. Join with sl st. (24 fans, counts may vary depending on previous rounds)
Info :
Fans create the open, lacy look. If your fans look crowded, block gently to open them. Keep stitch count consistent by adjusting the number of skipped stitches between fans if your earlier rounds produced slightly different totals.
Round 22 :
Into each fan: sl st to center top, ch2, (1 dc, ch2, 1 dc) centered on fan top to make a decorative arch point. Join. (24 arches)
Round 23 :
Ch1, 1 sc in each st and ch-space around to stabilize the lacy round. (st count will be approx 72-80 depending on fan anchor points)
Round 24 :
Change to color A (burgundy). Ch1, 1 sc in each st around working in both loops to add a subtle border and contrast. (same st count as previous round)
Round 25 :
Ch3, *skip one st, (3 dc in next st, ch1) repeat to create a scalloped lace ring; sl st to join*. This produces an outer ring of deeper scallops for small flower join points. (approx 24 scallops)
Info :
This burgundy scallop ring is where you will attach small flowers. Space scallops evenly and count carefully; pin your small flowers in place before final sewing to ensure even spacing.
Round 26 :
Ch1, 1 sc in each st around working into scallop peaks and valleys to prepare secure join points. (same st count)
Round 27 :
*In each scallop: (sl st to peak, ch3, 1 sc into peak) creating small looped join spaces; repeat around.* Fasten off and leave a long tail for sewing. (approx 24 looped join spaces)
Round 28 :
Optionally, rejoin color B and work 1 round of picot-edge between the scallop loops: *ch3, sl st in same st, sl st into next loop* around. Fasten off. This creates an accent line between medallion and flowers.
Info :
Block the medallions flat using pins and a steam or wet-block method. Pin each scallop and petal to open the lace fully; allow to dry completely before joining motifs.
Round 29 :
For a larger finished medallion: rejoin color B and ch1, *sc in next 4 sts, ch4, skip 2 sts* around to elongate spaces. Join and fasten off. (creates additional decorative ch4 loops)
Round 30 :
If you prefer a tighter outer rim, work 1 sc in each ch4 loop then 1 round of hdc evenly across; this will reduce the drape and create a firmer edge for surface placement.
Info :
These extra rounds (29-30) are optional; include them if you want the medallion to appear fuller and to provide more secure places to sew small flower motifs. Otherwise stop at Round 27 and proceed to assembly.
Round 31 :
Decorative finishing: with color A, picot top edging across the last round to add subtle texture: *(sc, ch3, sl st into top of sc) repeat across.* Fasten off and weave in ends.
Info :
At this point you should have two identical medallions. If sizes differ slightly, re-block both to match diameter before joining. The centers will remain burgundy while the lacy body is cream; adjust colors if you desire the reverse.
— Connector Motif / Small Join Motif (Make 6-8 to connect medallions) :
Round 1 :
With color A. 6 sc in magic ring. (6)
Round 3 :
Change to color B. (1 sc, ch3) x 6 around to create 6 chain loops. (12 sc/loops)
Round 4 :
Into each ch3 loop: (sc, hdc, 3 dc, hdc, sc) making 6 small petals. Sl st join. (6 petals)
Round 5 :
Ch1, 1 sc in each st around then sl st to join. This produces a small compact connector disk. Fasten off leaving long tail for sewing. (counts approx 36)
Info :
These connector motifs are shorter versions of the small flower and are used between medallions where a smaller visual unit is needed. Make as many connectors as needed to achieve the desired gap between medallions.
Round 6 :
If you want a small ring to chain motifs together, rejoin color A and ch6, sl st to initial connector edge forming a small loop. This loop will accept a joining stitch or small ring of chain to attach to another flower.
Round 7-8 :
Optional edging: work 1-2 rounds of single crochet around edges to give the connectors more body if you plan to use them as a central join point.
Info :
Reserve longer tails on these small connectors; they will be used to sew connectors into place and to create hidden joins underneath the runner for a discreet finish.
— Assembly & Joining Plan :
Info :
Layout everything on a flat surface after blocking. Place each large medallion with its scallop joins exposed. Arrange small flowers evenly around each medallion (recommended 8-10 per medallion) and place 4-6 connectors between medallions along the runner centerline. Use pins to secure placement and adjust spacing until symmetry is achieved.
Join Step 1 :
Use a long tail from color A to sew small flowers to the burgundy scallop loops of the medallion. Use whip stitch or slip-stitch join through the back loop of the medallion scallop and the innermost base stitches of the small flower to create an invisible seam. Sew each small flower at 8-10 evenly spaced scallop loops around the medallion edge.
Info :
Sew through back loops of both motifs if you want a neater front appearance. Keep stitches small and tight; use matching color yarn for invisibility. Block again lightly after sewing to flatten seams.
Join Step 2 :
Connect the two medallions using connector motifs and small flowers in the runner path. Attach connector motifs between small flowers using short chains and slip stitches to create the curved runner shape. When connecting, make sure the right side faces up and placement is symmetrical.
Join Step 3 :
For extra security, after initial sewing use a second pass with small whip stitches along the join edges on the back side. This will prevent motifs from flaring or detaching with light use.
Info :
If you prefer a crocheted join: align two adjoining motifs, pick up 1-2 sts across both edges and work a round of slip stitches or sc through both to join directly. This produces a continuous seam but requires motifs to be the same stitch gauge.
Finishing :
Weave and trim all tails. Block the entire runner one final time, pinning the assembled runner to shape and opening all petals and scallops carefully. Allow to dry completely. If desired, apply a small amount of fabric stiffener to help the runner maintain shape on the table.
Info :
Store the runner flat or lightly rolled to avoid permanent creasing. Avoid placing very hot items directly on cotton yarn; use coasters or trivets to protect fibers and colorfastness.
Completing this vintage floral table runner is such a rewarding project—each medallion and tiny bloom builds into a gorgeous heirloom strip. The two-tone palette gives a classic, cozy feel that adds instant charm to any table. Block, join, and admire the delicate lacework you created stitch by stitch. 🧶🌸 Place it on your coffee table or gift it to someone special—this runner is full of handmade warmth and personality. ✨