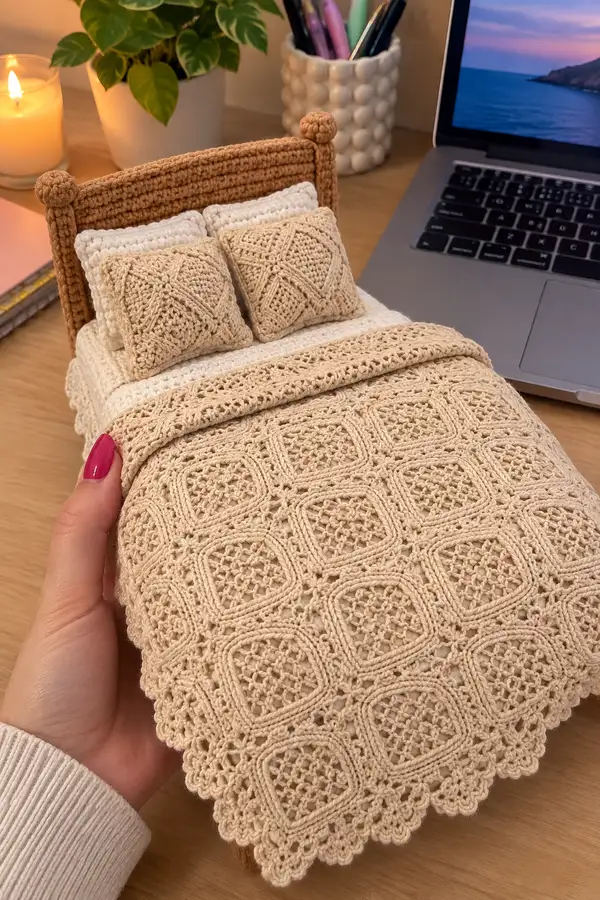
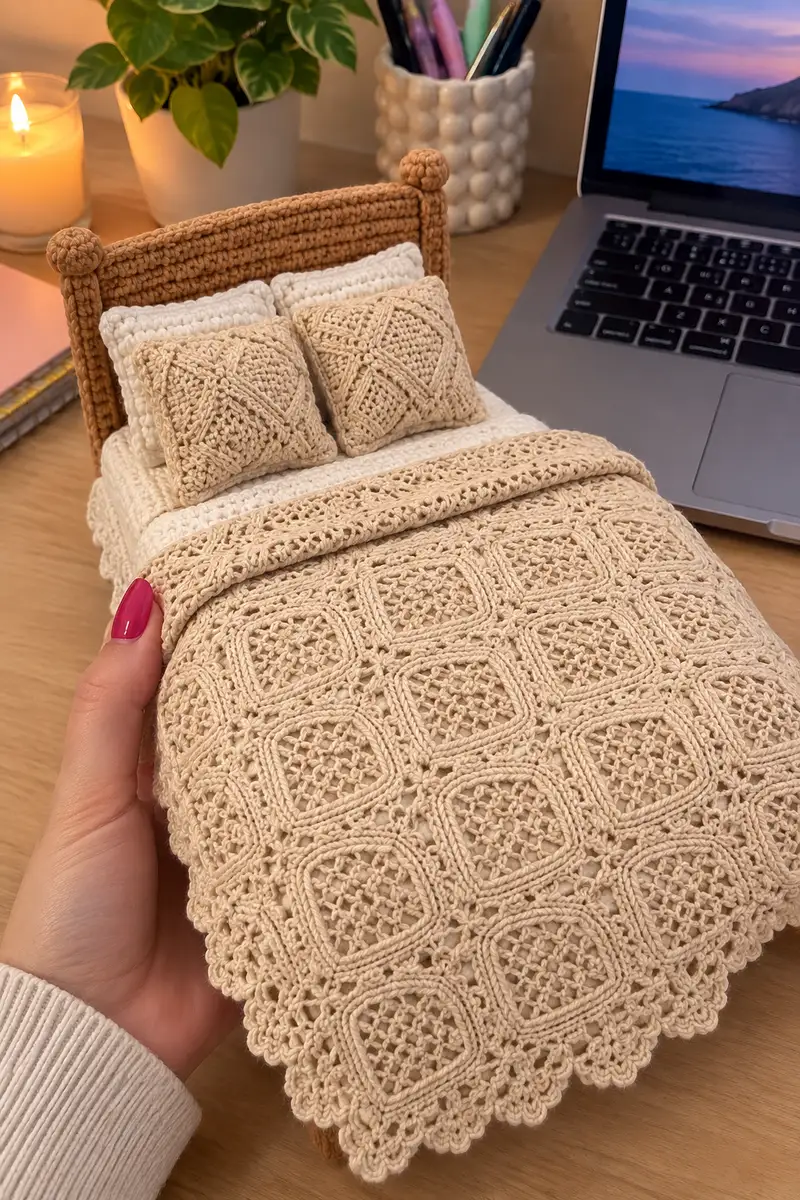
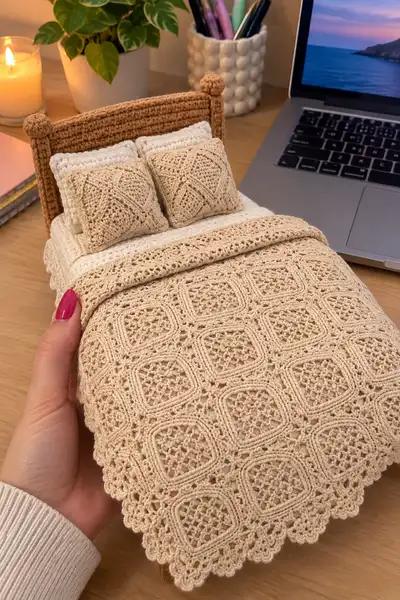
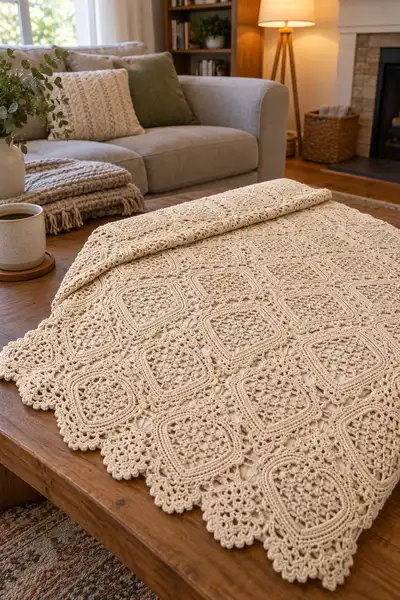
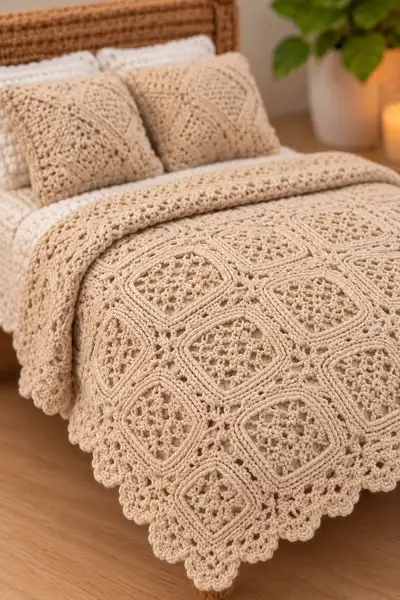
Create a timeless vintage-inspired lace blanket composed of delicate square motifs joined into a full bedspread. This pattern recreates the scalloped heart-like edging, textured openwork centers and raised rope borders in soft neutral cotton for a cozy cottagecore look. Detailed motif construction, join-as-you-go options and an ornate scalloped border are included to make a full-size blanket or scaled mini version for a doll bed.
Progress Tracker
0% Complete
— Notes & Gauge :
Info :
Sample photos use an aran/light-worsted cotton-blend yarn and a 4.0mm hook. Because this blanket is a lace motif construction, gauge is best measured by motif size. Gauge: one finished motif (after blocking) = approximately 14 cm / 5.5 in square using recommended yarn and hook. If your motif is larger or smaller, adjust hook size to match desired finished dimensions.
Info :
Decide your layout before you begin: the sample bedspread uses a grid of 6 motifs across x 8 motifs down for a twin/throw-sized spread. To make a full bedspread, increase motif count across and down proportionally. Calculate yarn accordingly: each motif uses approximately 20-30g depending on yarn weight.
— Motif (Make many) :
Overview :
Each motif is worked in the round from the center outward to form an ornate lace square with a raised rope frame and a textured mesh centre. The motif uses chain arches, cluster/puff elements, and raised rounds worked in front loop only to create the rope effect. Work motifs using the same color for the entire blanket, or alternate colors as desired.
Round 1 :
Ch6, sl st to first ch to form ring. Ch3 (counts as dc), work 11 dc into ring (12 dc) (12)
Round 2 :
Ch3, dc in same st, *ch1, sk next dc, dc in next dc* around, ending with ch1, join with sl st to top of ch3. (12 dc, 12 ch1 spaces) (12)
Round 3 :
Sl st into next ch1 sp, ch4 (counts as tr), (tr, ch1, tr) all into same ch1 sp to form a small triple cluster; *sk next dc, (tr, ch1, tr) into next ch1 sp* rep around, join to top of ch4. You will have 12 small tr clusters forming a ring (12 clusters)
Info :
Round 3 builds textured spokes that will be opened into a diamond mesh in the next rounds. Keep your tr work even; if your tr height varies, the mesh won't sit flat.
Round 4 :
Ch1, sc into same sp, *ch3, sk cluster, sc into next ch1 space between clusters* rep around to create 12 ch3 arches, join with sl st. (12 sc, 12 ch3) (12)
Round 5 :
Into each ch3 arch: *(sc, ch2, 3 dc, ch2, sc)* — this creates 12 shell arches increasing the center (12 shells, approximate stitch count 12 sc + 36 dc + chain spaces = 48 elements) (48)
Round 6 :
Ch1, sc in first sc, *ch4, sc in center dc of next shell (space directly above shell center)* rep around, ending with ch4, join with sl st. There will be 12 ch4 corner/side forming points (12)
Info :
This round opens the center into a floral-like motif. Keep chains loose for good lace drape. If chain sp tightens, use a looser tension for this round.
Round 7 :
Work into each ch4 loop: *[(2 dc, ch2, 2 dc) in loop], ch1, sk to next loop* — creating small corner clusters that will begin squaring the motif. Work 12 of these (12 corner clusters; total dc added 48) (60)
Round 8 :
Ch3, dc in next 7 sts across side to form first flat side, *(dc, ch2, dc) in corner cluster top, dc in next 7 sts across next side* rep 3 more times to form a square outline. You will work 8 dc per side between corners, and corner groups of (dc, ch2, dc). Count: 4 corners x2 dc + (4 sides x8 dc) = 8 + 32 = 40 dc plus corners = 48 total dc positions (48)
Info :
Round 8 starts to square your motif. Keep your corner ch2 spaces roomy — they are essential for later rounds that create the rounded square shape. If your sides have fewer or more dc, adjust number per side to preserve symmetry in subsequent rounds.
Round 9 :
Ch1, sc in same st, *ch5, skip 4 dc, sc in next dc* around — creating 8 ch5 mesh loops around the square (8 mesh loops; 8 sc) (8)
Round 10 :
Into each ch5 loop: *(sc, ch3, 5 dc, ch3, sc)* — this opens each side into a larger decorative arch. You will make 8 large arches, total of 40 dc across this round in the arches (8 sc + 40 dc + chain spaces) (48)
Round 11 :
Ch2, hdc in each dc across each arch, work (hdc, ch2, hdc) in each corner ch2 space from R8, continue around. This evens the sides and prepares for the raised rope rounds. Count approximately 48 hdc positions (48)
Info :
Technique :
For the raised rope effect used later, we'll work two rounds in front loops only (FLO) to create a pronounced ridge. Make sure FLO is consistent on both rounds and maintain stitch count to keep the motif square.
Round 12 :
1 sc in each st BLO (48) — work in back loops only to create a small ridge behind the future rope frame (48)
Round 13 :
1 sc in each st FLO (48) — first rope foundation (48)
Round 14 :
1 sc in each st FLO (48) — second rope round to build the raised border (48)
Info :
After two FLO rounds you will have a raised rope-like rectangle around the motif. If you prefer a thicker rope, repeat an extra FLO round; if you prefer a flatter motif, do one FLO round instead. Keeping the stitch count the same seals the rope evenly around the motif.
Round 15 :
Ch1, sc across each st (48). At each corner, work (sc, ch3, sc) into the corner space to keep the motif square and provide a chain space for the eventual join. (48)
Round 16 :
Ch3, dc in each sc across to create a neat framed row (48 dc) (48)
Round 17 :
Work a textural lattice row: *ch1, sk 1 dc, (dc, ch1, dc) in next dc* rep around — forming small diamond meshes between stitches. There will be 24 small diamond groups (24 diamonds)
Round 18 :
Ch1, sc in each st across to stabilize the lattice (48) (48)
Info :
At this stage you have completed the core motif. The next few rounds will add a decorative scalloped frame on the outside and prepare the motif for joining. Keep motifs blocked flat to the same dimensions before joining to achieve even joins.
Round 19 :
Into each of the 48 sts: *(sc, ch2, sc) in every 4th st to form 12 scallop anchors, sc in remaining sts* — final count approx 48 sc with 12 ch2 spots (48)
Round 20 :
Work scallop clusters into the ch2 anchors: *(5 dc in ch2, sl st to base)* around to create raised scallop bumps; sl st to join. There will be 12 small scallops (60 total dc plus join) (60)
Round 21 :
Ch1, sc around working 2 sc at top of each scallop to anchor them. (Approximately 72 sc after anchoring two sc at each scallop top) (72)
Round 22 :
Final decorative outline: *ch3, sk 2 sc, picot (ch3, sl st back into first ch) into next sc, ch3, sk 2 sc, sl st into next sc* rep around to create delicate picot-lace outline. Join and fasten off. (72 picot-lace points) (72)
Info :
Fasten off leaving a 30-40 cm tail if you plan to join motifs by whipstitch/sewing instead of join-as-you-go. Block motifs flat and measure before joining — aim for identical size across motifs for a clean join.
— Join-as-you-go (JAYG) Method (Option A) :
Info :
We recommend using join-as-you-go for a seamless look. Join each new motif to previously completed motifs on the right and bottom edges as you work the final rounds (Rounds 19-22). This pattern shows JAYG instructions that align with the scallop/picot outline.
Round 23 :
Begin JAYG: On a motif that is being joined on two sides, when you reach each seam point during Round 21 or 22, replace the sl st/join with: sl st into corresponding st of the adjacent motif, then sl st back into current motif to continue. Maintain picot and scallop counts to line up evenly. (This round is variable based on adjacency; total stitch counts unchanged per motif) (variable)
Info :
When joining, pin motifs in place before working the joining sl sts to ensure corner-to-corner alignment. Keep tension relaxed so the join sits flat and does not pull the lace into a ripple.
Round 24 :
If you are not joining, seam motifs after blocking: using mattress or whip stitch, sew through corresponding picot and scallop anchors at equal intervals to match motifs neatly. Fasten securely and weave tails at least 5 cm into the fabric.
— Alternative Join (Sewn Join) :
Info :
Sewn join is best for repairs or if you prefer the subtle ridge across joins. Lay two motifs RS together and align edges, then using a yarn needle and matching yarn, sew through the center loops of the final two rounds approximately every 4-6 sts. Pull gently to avoid puckering. Repeat for all joins until the desired layout is complete.
— Assembled Blanket Layout :
Info :
Sample layout (twin throw) = 6 motifs across x 8 motifs down = 48 motifs. For a full-size bedspread increase grid size. Keep an even number of motifs for symmetry along borders.
— Border Preparation :
Info :
Once all motifs are joined into a single large panel, tidy joins by working one round of sc around the entire outer edge to create a stable foundation for the scalloped border. Work into every picot and outer stitch to even the edge.
Round 25 :
On assembled panel, join yarn at any corner. Ch1, sc evenly around outer edge working 1 sc in each outer stitch and 3 sc in each corner space to keep the blanket square. Join with sl st. (Edge sc count variable depending on assembled dimensions; approximately 6-8 sc per motif side x motif count + corner increases) (variable)
Info :
After this foundation round, measure the blanket edge to estimate number of scallops you will need; aim for an odd or even number of repeats that fits the blanket proportions and motif geometry to avoid small remnant spaces.
— Decorative Scalloped Border (Worked on Assembled Panel) :
Round 26 :
Ch1, *skip 2 sc, (5 dc in next sc), sk 2 sc, sl st into next sc* rep across to create main scallops. Place 3 dc clusters in corner spaces to keep flow. Count will vary; typical small throw will have 120-160 scallops depending on motif count (variable)
Round 27 :
Ch1, sc in each st across scallop arch, in each 5-dc group work (sc, ch3, sc) in center to form small picot arches above each scallop. (Variable but even rhythm across edge) (variable)
Round 28 :
Working in front loops only around the scallops: 1 sc FLO in each sc and (sc, ch5, sc) over each scallop center to create the tall, layered scallop base. (variable)
Info :
This layered approach gives the dramatic rounded teardrop/heart shapes seen along the outer border in the photos. FLO rounds deepen the ridge and outline the scallop shapes. If you prefer a gentler scallop, do only one FLO row.
Round 29 :
Decorative picot edging: into each ch5 arch, work *(sc, ch3, picot (ch3 sl st back to first ch), sc)* — this forms a delicate picot lace rim. Work evenly to finish all scallops. Fasten off and weave in ends. (variable)
Info :
For an even more ornate edge that mimics the heart-shaped teardrops in the reference, add an extra cluster round between R27 and R28 with (hdc, dc, hdc) grouped into each scallop center before the FLO round to raise the center even more.
— Pillow Covers (Make 2 or more) :
Overview :
Plain pillow covers use the same motif but can be made with fewer rounds so each cover is a neat square. The sample photos show two small square pillows matched to the motif pattern and one textured white bolster pillow.
Round 30 :
Make motif as R1-R17 above; stop after Round 17 for pillow front if you prefer a flatter insert. Finish with one round of sc around and fasten off. Final size approximately 14 cm / 5.5 in per motif (if using same yarn/hook) — join 4 motifs (2x2) to make a 28 cm / 11 in square pillow front (variable based on motif size)
Round 31 :
Make second identical square for pillow back or use a simple crocheted rectangle in sc to match dimensions. When joining front and back, whipstitch three sides, insert pillow form and then finish the last side with a decorative crochet seam (sl st or crab stitch) to match blanket finish. (variable)
Info :
To make a pillow with a separate zippered back, sew in a small invisible zipper across the top edge and finish seam edges with a few sc for tidy appearance.
— Bed Base / Throw Layer (Optional) :
Round 32 :
If you want a flat backing or second layer for warmth, work a rectangle in sc to the dimensions of the assembled motif panel using matching yarn. Seam to the motif panel around the edge with slip stitch or whip stitch, then work the decorative scalloped border as R26-R29 on the assembled sandwich.
Info :
A backing is especially useful for bedspread use to stop the blanket from snagging on bedding and to give extra weight and warmth. Use breathable cotton or linen fabric and hand-stitch in place for a tailored finish.
— Additional Decorative Border Rounds (Optional Embellishment) :
Round 33 :
After primary scalloped border, add a rope braid: join yarn and work *1 sc, 1 hdc, 1 dc, 1 hdc, 1 sc* into each scallop valley to create a braided outer rim. Repeat if you want two rows of braid. (variable)
Round 34 :
Final finishing picot row: work picots evenly into the braid row (ch3 sl st back into first ch), spacing every 2-3 stitches to create a soft lace fringe look. Fasten off and weave ends. (variable)
Info :
Take care to keep outer rows symmetrical by starting the border at the center of a side and working outward to both corners to ensure the corner scallops match.
— Finishing & Blocking :
Info :
Light blocking is essential to coax the lace into its full shape. Wet-block or steam-block motifs and the assembled blanket on a large blocking mat, pinning the scallops and sides to square dimensions. Allow to dry completely before unpinning. Use spray starch for extra crispness if desired.
Round 35 :
Secure loose join tails by weaving them through multiple joining stitches and trimming close to fabric. Inspect entire blanket for missed join points and repair as needed. OPTIONAL: topstitch a running stitch along hidden join channels to stabilize for heavy use. (end step)
Info :
Lightly steam again after all ends are woven for a final set. If the blanket will be used on a bed, consider attaching a lightweight cotton lining to the underside to protect bedding and to prevent the lace from catching on sheets.
— Scaling & Customization Tips :
Info :
To scale larger, increase motif count. To change texture, substitute yarn weight — going down one weight (DK) will create a finer lace, and going up (chunky) will create large, bold motifs but will require pattern adjustments and larger hook sizes. Add color by alternating rows or making every other motif in a coordinating shade.
Info :
Want that antique look? Use a slight tea-staining soak on cotton motifs after blocking or choose a warm cream yarn as in the sample photos. For a modern take, make the background in dark navy or charcoal to make the lace pop.
— Pattern Notes Summary :
Info :
This pattern is intentionally modular: R1-R22 define a single motif; R23-R29 explain join-as-you-go and outer border steps; R30-R35 cover pillows and finishing. Repeat motif rounds and border repeats as needed to achieve your desired finished size. Keep notes of your motif layout to simplify joins and yarn calculations.
This vintage lace square blanket transforms simple yarn into a statement piece that looks like it came from a cherished heirloom collection. The careful combination of lace, raised rope frames and scalloped border give a romantic, cozy feel perfect for cottagecore bedrooms or thoughtful handmade gifts. Each motif is meditative to work and rewarding to assemble — you'll find the rhythm after the first few squares. 🧶 Cozy up with a cup of tea and enjoy making something beautiful and timeless. 🌿