🧶 Beautiful ✨ Detailed 💝 Adorable

Vintage Rose Scallop Table Runner Pattern

Vintage Rose Scallop Table Runner Pattern
4.6★ Rating
8-10 Hours Time Needed
3.2K Made This
✂️

Intermediate Level

Ideal for those with basic crochet experience, featuring slightly more advanced stitches and techniques to expand your skills.

⏱️

All-Day Adventure

Requires 8-10 hours, ideal for a full day of immersive crocheting.

🏡

Cozy Accent

A warm touch for your space that transforms ordinary corners into inviting nooks filled with handmade charm.

🧶 Jump to Pattern ↓

About This Vintage Rose Scallop Table Runner Pattern

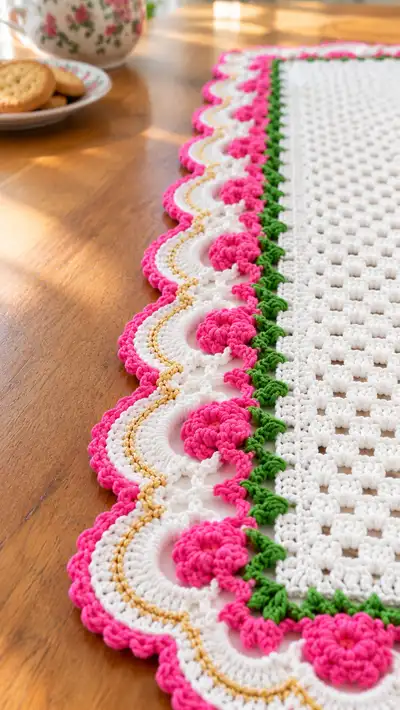
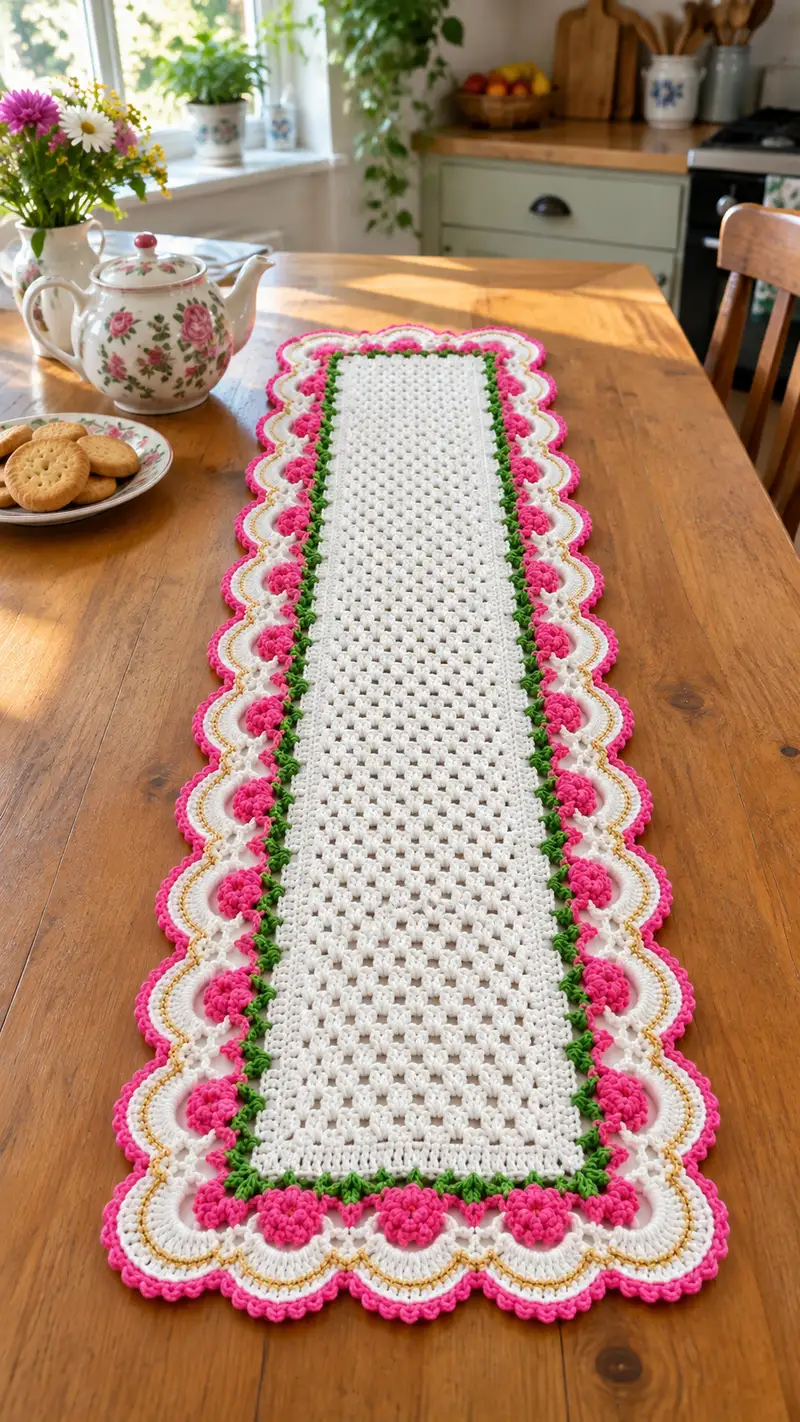
This pattern recreates a long, narrow table runner with a lacy white mesh center, a crisp green stitched inner border, rose-petal bobbles in bright pink and a layered scalloped outer edge with soft gold trim. The runner's repeated motifs make it easy to lengthen or shorten for your table, and the scalloped edging gives a beautiful, finished silhouette. The stitch choices combine classic shell work, bobbles and picots for texture and charm.
Vintage Rose Scallop Table Runner Pattern crochet pattern - detailed view of completed project

Worked in cotton-style yarn and a medium hook, the runner lays flat with a stable mesh interior and decorative layered edge. It’s an excellent gift or heirloom table accent and can be customized in color and length.

Why You'll Love This Vintage Rose Scallop Table Runner Pattern

I love how the crisp white mesh provides a simple, elegant background while the bright pink roses pop at each scallop. The layered scallop border with a subtle gold stripe feels both vintage and fresh — a tiny bit fancy without being fussy. I also enjoy that it's very customizable: change the color story and you instantly have a new mood.

Vintage Rose Scallop Table Runner Pattern step 1 - construction progress Vintage Rose Scallop Table Runner Pattern step 2 - assembly progress Vintage Rose Scallop Table Runner Pattern step 3 - details and accessories Vintage Rose Scallop Table Runner Pattern step 4 - final assembly and finishing

Switch Things Up

I absolutely loved writing this runner pattern because it gives you so many ways to customize: swap the bright pink for soft blush and the gold for silver for a wedding-ready runner, or use autumnal colors for a harvest table. You can also change the bobble size or replace bobbles with simple rosettes if you prefer a flatter surface.

I often adjust length by adding extra mesh rows until the runner suits my table—this construction is forgiving and expands easily. If you want stronger scallops for a display runner, try a smaller hook for the edge rounds or add a finishing hdc round in the back loops only for extra stability.

For a quick seasonal update, change only the accent colors: green to deep red for the holidays, or neon accents for a modern pop. The layered scallop border is purposely modular so each color can be emphasized or softened depending on your yarn choices.

Common Mistakes & How to Fix Them

✗ Failing to use a stitch marker at the beginning of each round or row will cause misplaced scallops and uneven edges; always mark your turning chain or start stitch. ✗ Skipping the blocking step often leaves the scallops puckered; wet-block or steam-block the finished runner to flatten and set the scallops properly. ✗ Changing tension between center mesh and border rounds will cause rippling; keep hook size and tension consistent or use slightly larger hook for open mesh only if needed. ✗ Not counting the foundation chain multiple correctly will produce uneven scallop placement at the ends; double-check you have the multiple recommended before beginning. ✗ Adding flower bobbles too tightly will create lumps; work bobbles with consistent height and flatten slightly as you join so the border sits flat. ✗ Carrying yarn awkwardly when switching colors can create bulk; fasten off and weave in ends, or carry thin cotton strands carefully across the back if preferred. ✗ Attaching scallops without pinning can lead to asymmetry at corners; always pin and measure scallops at corners before final rounds. ✗ Using a yarn that is too fuzzy will hide the crisp definition of shells and bobbles; use smooth cotton or cotton-blend for best result.
Vintage Rose Scallop Table Runner Pattern

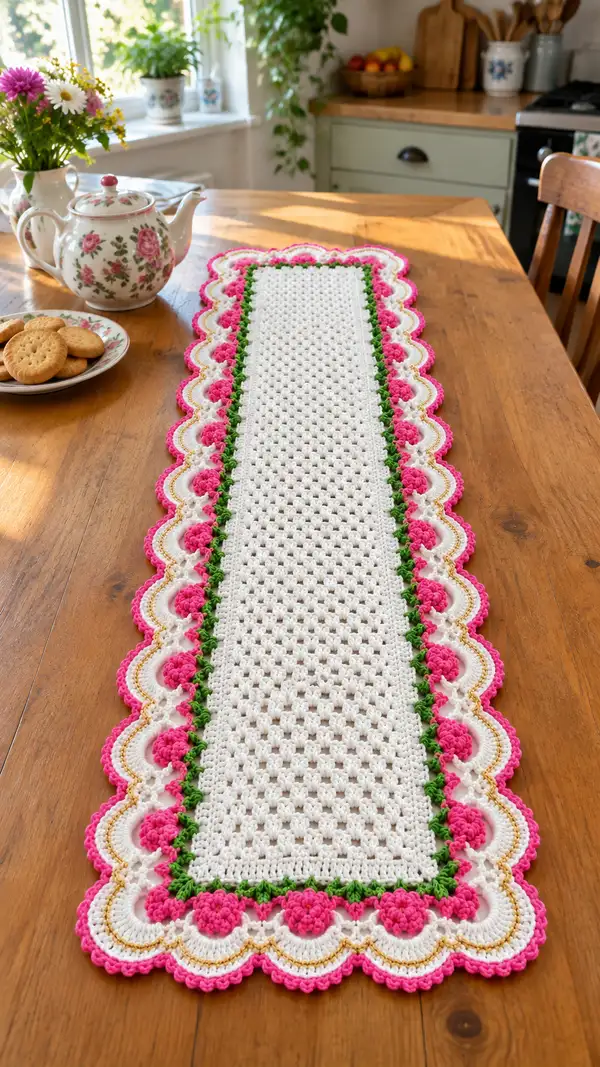
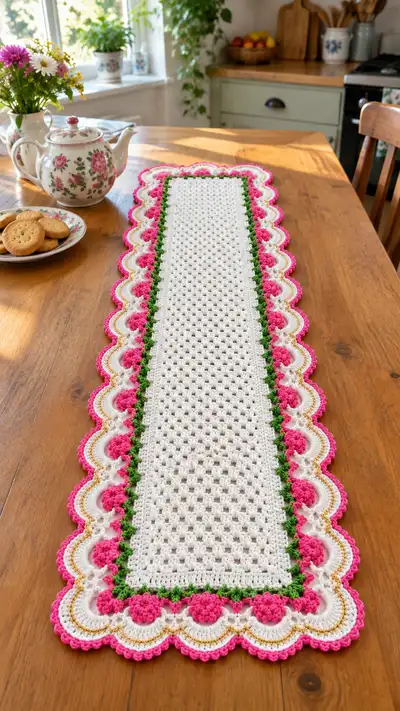
This elegant rectangular table runner features a classic lacy mesh center framed by a leafy green border, pink rose bobbles and layered scallop edging with gold highlights. Worked in cotton-style yarn, the runner has a soft, vintage vibe and dramatic scalloped edges that catch the light. Perfect for dining tables, dressers or as a pretty centerpiece accent.

Intermediate 8-10 Hours

Materials Needed for Vintage Rose Scallop Table Runner Pattern

— Main Fabric

  • 01
    Worsted weight cotton or cotton-blend yarn (#4): approximately 300-350g in main color White
  • 02
    Bright pink (accent color A): 70-90g for rose bobbles and outer scallop
  • 03
    Leaf green (accent color B): 30-40g for inner leafy border
  • 04
    Gold or mustard (accent color C): 20-30g for thin decorative stripe
  • 05
    Small amounts (10-15g each) of coordinating pink and white for finishing touches and joins

— Tools Required

  • 01
    4.0mm (G) crochet hook for main work (or hook suitable for your yarn to achieve tight amigurumi-like fabric)
  • 02
    3.5mm (E) hook for firmer edging and picots (optional)
  • 03
    Yarn needle for weaving in ends and sewing motifs
  • 04
    Stitch markers (at least 6) for marking repeats and corner zones
  • 05
    Measuring tape or ruler to control length
  • 06
    Pins and blocking mat for final shaping
  • 07
    Scissors
  • 08
    Optional: lightweight spray starch for crisp finish

Progress Tracker

0% Complete

— Notes & Special Stitches :

Info :

This pattern is written in US terms. The sample runner measures approximately 110 cm / 43 in long and 18 cm / 7 in wide after blocking. Finished size will vary by yarn and hook; to lengthen, add multiples of the foundation repeat shown. Work tightly in center mesh to prevent sagging along the border.

Info :

Special bobble (bob): dc5tog-style bobble made as 5 partial dc into same stitch leaving last loop on hook for each, then yarn over and pull through all loops, ch1 to close bobble. Flower cluster: 5-dc bobble worked into designated space.

— Foundation & Center Mesh :

Foundation :

Chain 67. (This is a multiple of 3 plus 1; you can adjust in multiples of 3 to lengthen runner while keeping scallop placement even.)

Row 1 :

Working into 4th ch from hook (counts as dc), 1 dc, *ch 1, skip next ch, 3 dc in next ch (shell made), rep from * across ending with 1 dc in last ch. Turn. (Shell count across = 22 shells, plus edge dcs; width = 67 ch)

Info :

Row 1 establishes the shell mesh. Keep edge dcs tidy; always work edge dc into first and last stitch for neatness. Count shells after row 1: 22 shells across - this will set scallop placement later.

Row 2 :

Ch 3 (counts as dc), 1 dc in same st, *ch 1, work 3 dc into center ch-1 sp of next shell, rep from * across. End with 2 dc in top of turning ch. Turn. (22 shells, even edge)

Row 3 :

Repeat Row 2. Maintain mesh rhythm by lining up shells above shells; this creates an overall stable fabric with small openings. Turn.

Row 4 :

Ch 3, dc in same st, *ch1, 3 dc in next ch-1 sp, rep across, end 2 dc in top of ch-3. Turn. (22 shells, approx 67 stitches across)

Info :

Work rows 2-7 maintaining tension. Use a stitch marker in the first shell of every 6th row to count progress and ensure straight edges. Keep turning chains consistent to avoid stepping at the edges.

Rows 5-12 :

Repeat Row 2 (1 dc cluster into each ch-1 space), keeping heads of shells stacked. After Row 12 the mesh is stable and even; width unchanged. (22 shells across; height after Row 12: 12 shell rows)

Info :

At this point, measure width. The central mesh should be flat and rectangular. If you prefer a wider runner, add sets of 3 chains to foundation chain before starting, working the same grid repeat for the full width.

Rows 13-24 :

Continue Row 2 repeat for a total of 40 rows in the center mesh (including Row 1). Maintain even tension. (Rows 13-40 = 28 additional rows.)

Info :

The sample runner uses 40 center rows to achieve the shown proportion. You can shorten to 28 rows for a small runner or lengthen by adding repeats of the mesh until the runner reaches desired length. When ready to begin border, fasten off main color if changing.

— Clean Edge & Transition Rounds :

Round 41 :

Working along long edge and across ends: Join green yarn in any corner row first dc. Ch1, 1 sc in same st, sc evenly along edge placing approximately 2 sc for every shell row on long sides and 3-4 sc along short ends to keep corners square. Place 1 sc in each end row across. Join with sl st to first sc. (Count will vary with length; sample: approx 170 sc along each long side including corners)

Info :

This round creates a tidy frame for the decorative border. Work tight sc so the green ridge sits flat against the mesh. Mark corner points for scallop placement: there will be one scallop per shell below the edge.

Round 42 :

Ch1, 1 sc in same st, *ch3, skip 1 sc, 1 sc in next sc; rep around to create small ch-3 spaces spaced between scs along edge, placing 3 ch-3 spaces across each short end to create corner arcs. Join with sl st. (This prepares point for bobble placement.)

Info :

Ch-3 loop spacing gives regular points for the rose bobbles to sit in front of the scallop shells. Ensure the ch-3 loops are evenly distributed to match interior shell spacing.

— Leafy Green Accent Row :

Round 43 :

Join green yarn if not already. Ch1, *sc in next ch-3 loop, (ch2, sc) into same ch-3 loop to create small v-stitch leaf, skip next sc, rep around. Join with sl st. (V-stitch count matches ch-3 loops; approx 44 v-stitches)

Info :

This leafy row sits between the mesh and the roses. Use slightly shorter tail joins (weave in tails on the wrong side) so green appears neat and not bulky. If you prefer, carry green along back instead of joining new balls every side.

Round 44 :

Ch1, sc in same st, *ch2, sc in next v-stitch center (through both legs), ch2, sc in next sc; rep across to emphasize small green peaks between scallops. Join. (Keeps spacing even for rose attachment)

Info :

If your green row looks too dominant, use a thinner yarn or smaller hook for these rounds. The idea is to create a thin leafy ridge that allows roses to sit forward.

— Pink Rose Bobbles (Make 22 or same as shell count) :

Round 45 :

Join bright pink in first desired ch-3 loop. Ch1, sc in same loop, *[make flower bobble] work bob in next ch-3 loop: (yarn over, insert into ch-3 loop, yarn over and pull up loop, yarn over pull through two) repeat 4 more times to make 5 partial dc loops on hook, yarn over and pull through all loops, ch1 to secure bobble. Sl st in same loop to anchor. Sc in next sc between loops. Rep from * around. Join with sl st. (Make one bobble into each designated ch-3 space; sample 22 bobbles)

Info :

Make bobbles uniformly raised to look like roses. After each bobble, flatten gently with your fingers to form petal shape and secure with sl st to anchor. If you prefer smaller roses, make 3- or 4-dc bobbles instead.

Round 46 :

Ch1, sc around each bobble and sc between bobbles to create a tidy ring: sc evenly around the bobble cluster working 6 sc around each bobble and 1 sc in the space between bobbles. Join. (This gives each rose a small white outline base for scallops.)

Info :

Work scs gently around bobbles to create consistent spacing for the next white scallop rounds. Use finger pressure to shape bobbles outward slightly as you anchor them so the scallops have space to nestle behind roses.

— First White Scallop Base :

Round 47 :

Join white yarn behind roses. Chain up 3 to count as dc, *skip 3 sc, work 12 dc into next space behind a rose (forming a large shell), skip 3 sc, sl st in next sc to anchor, rep across. Make 1 shell behind each rose and additional shells across short ends (3 shells across each short end). Join. (12-dc shells create the large scallop arc.)

Info :

12-dc shells are what define the big scalloped shape in the photo. Work shells tall and even; if needed use a slightly larger hook for shell rounds for a more pronounced scallop.

Round 48 :

Ch1, sc in same st, *ch2, sc in center of next shell (work into 6th dc of shell to anchor center), ch2, sc in sl st anchor between shells; rep across. Join. (This round sets up the gold stripe placement and trims the shell with a small chain spacing.)

Info :

Keep these scs neat as they form the inner outline between the shell and gold stripe; they are subtle but important for layered look.

— Gold Accent Line :

Round 49 :

Join gold yarn. Ch1, *work 1 sc in the space between shells, then ch5, skip 1 sc and sl st into the 6th dc (center of shell) making a light gold arc across the shell center; rep around. Join. (Gold creates a thin decorative line across each scallop.)

Info :

Use a fine tension and carry the gold behind where possible, or add a new strand for each side if you prefer no carried yarn. Gold is decorative and slightly thinner; avoid overworking to keep arcs delicate and even.

— Inner White Shell Finishing :

Round 50 :

Switch back to white. Ch3, 2 dc in same anchor, *skip next sl st, 1 sc in next sc, skip next sc, 7 dc in next ch5/gold arc (so white ruffle sits over gold), then sl st in next sc; rep around. Join. (This creates a second inner shell layered over the gold stripe; 7-dc inner shells nest inside 12-dc outer shells.)

Info :

Work the 7-dc internal arcs tall but snug so they sit inside the larger 12-dc shell and create the soft layered look visible in the photo.

Round 51 :

Ch1, sc evenly around the 7-dc arc and around the 12-dc arc where they meet, making 2 sc per 7-dc arc and 3 sc between arcs to tidy joins. Join. (This balances the connection points and gives a firm base for the outermost pink scallop.)

— Outer Pink Scallop Edge :

Round 52 :

Join bright pink. Ch3, work 14 dc into first 7-dc arc (this is larger than inner shell to form outer ruffle), skip to next 7-dc arc and repeat 14 dc across each inner arc. At corners work 22 dc to round the end. Join. (14-dc outer shells create the pronounced bright scallop seen along the edge.)

Info :

The outer pink scallop is the most visible edge detail. Keep shells even in height; use blocking pins to shape each scallop as you go if necessary. When you come to corners, use a larger shell (approx 22 dc) to naturally curve around the short end.

Round 53 :

Ch1, sc in same st, *ch2, sc in center of next outer shell (work into 7th dc of shell), ch2, sc in sl st between outer shells; rep across. Join. (Creates small picot-like spacing for final scalloped picot round.)

— Final Picot and Trim Rounds :

Round 54 :

Stay with bright pink. Ch1, *5 sc into next ch-2 space to create small ruffled picot, sl st into next ch-2 connector; rep around. At corners work 9 sc to maintain curvature. Join. (This adds a decorative scallop picot edge.)

Info :

Picots give the delicate fluted edge seen in the photograph. Count carefully at corners so the curve flows smoothly from one side to the next and the runner sits flat.

Round 55 :

Switch to white. Ch1, sc in each sc around, working 2 sc in each corner sc to square corners nicely. Join and finish off. (This tidy final white round mellows the hot pink edge and integrates it into the runner.)

Info :

After this round, add any small tidy stitches where needed to flatten small buckles. Weave in ends along the back and trim.

— Optional Reinforcement & Blocking :

Round 56 :

(Optional) If the scallops feel floppy, join a matching white thread and work one round of hdc through back loops only around entire edge to give weight and slight stiffness. Join and fasten off.

Info :

Blocking: Dampen runner lightly or spray with water, pin each scallop to blocking board to create equal arcs, allow to dry fully. A light spray starch will increase stiffness for display use.

— Variation Notes & Customizing Length :

Info :

To lengthen, add additional mesh row repeats in the Center Mesh section in multiples of 3 foundation ch patterns prior to starting border rounds. The number of scallops along each long edge will remain constant as determined by the foundation - add chains in multiples of 3 to add extra scallops proportionally.

Info :

For a narrower runner, reduce foundation chain by multiples of 3 and repeat the same border sequence; ensure the number of shell repeats equals the number of rose bobbles required for symmetrical scallops on both long sides.

Assembly Instructions

  • Block the center mesh fully before adding heavy scallops to ensure scallops lay flat. Pin the runner to dimensions desired and allow to dry completely.
  • Join rose bobbles (Round 45) to the ch-3 loops created earlier: pin each bobble in place before anchoring with slip stitch to ensure even placement.
  • When working large shells for scallops, pin the arc of each shell to the blocked position as you stitch to preserve shape and ensure uniform scallop heights.
  • For neat corners: increase shell sizes at short ends (22-dc shells recommended) and pin into a rounded corner shape before continuing the outer rounds to avoid buckling.
  • Weave in all color change ends on the wrong side, following each join with a tidy white sc round to cover and secure joins.
  • If adding optional hdc reinforcement (Round 56), work it after all decorative rounds are complete and after blocking to maintain consistent tension and final shape.
  • Trim stray threads close to the fabric after weaving in ends; do not cut too close to avoid unraveling—secure with a small knot if needed before hiding the tail.
  • If gifting, press lightly with a warm iron through a pressing cloth after blocking for a crisp, finished look (avoid direct iron on acrylic yarns).

Important Notes

  • 💡Use stitch markers consistently at the beginning of each row and at corner and scallop anchor points to avoid miscounting and maintain symmetry.
  • 💡Stuffing is not required for this project; however shaping with blocking pins is essential to achieve the even scallop profile shown.
  • 💡When changing colors, fasten off and weave in ends between rounds for a cleaner finish; avoid carrying yarn across large areas.
  • 💡If the scallops curl slightly, wet-block and pin each scallop outward to the intended shape while drying; starch lightly for more rigidity.
  • 💡Work bobbles with consistent loop height and finish them with a small ch1 to close; flatten gently to create rose form before anchoring.
  • 💡For a softer runner, choose a cotton blend with some drape; for a display runner with crisp scallops choose 100% cotton and consider optional hdc reinforcement.
  • 💡When working long repeats, count shells every 6-8 rounds to ensure your stitch count remains consistent and edges stay even.
  • 💡Keep a small scrap of paper to mark every group of shells so you can check symmetry visually as you progress.

Completing this vintage rose scallop runner is so satisfying—each scallop and bobble adds personality and charm that transforms a simple table into a lovingly styled vignette. With careful blocking and tidy joins, the scalloped edge becomes the star, while the crisp white mesh keeps the look fresh and timeless. 🧶🌸 I hope making this brings you as much joy as placing it on your table does to me when I host tea. Share a photo when it’s finished; I’d love to see your color variations! ✨

You ask,

we answer.

FAQs

What is the finished size of this table runner?

Based on the specified yarn and hook, the sample runner measures approximately 110 cm (43 in) long and 18 cm (7 in) wide after blocking. Adjust foundation chain and mesh rows to customize length and width.

Can I use different yarn weights for this pattern?

Yes. Use yarn of a different weight but adjust hook size accordingly (generally 1-2 sizes larger for drapier results and 1-2 sizes smaller for stiffer scallops). The final size will change proportionally.

Do I need to block the runner?

Blocking is highly recommended. It evens out the mesh, shapes the scallops and sets the bobbles into rose forms. Pin each scallop and allow to dry fully for the best finish.

Can I make this runner longer or shorter?

Absolutely. To change length, add or remove repeats of the center mesh in multiples of the foundation repeat (multiples of 3 chains recommended) and then work the same border sequence.

How do I avoid sagging between scallops?

Work the green border rounds with firm tension and consider the optional hdc round (back loops only) to add subtle reinforcement if scallops tend to droop.

How much yarn will I need?

Approximately 300-350 g white, 70-90 g bright pink, 30-40 g green, and 20-30 g gold for the sample size. Exact amounts vary with yarn brand and size.

Can I substitute embroidered flowers instead of bobbles?

Yes. If you prefer a flat finish for frequent use, embroider flower motifs or make small layered appliques and sew them on instead of raised bobbles.

What hook size should I use to replicate the sample?

A 4.0 mm (G) hook produced the sample's density and scallop shape. If your gauge differs, move up or down a hook size to achieve the similar drape and firmness.