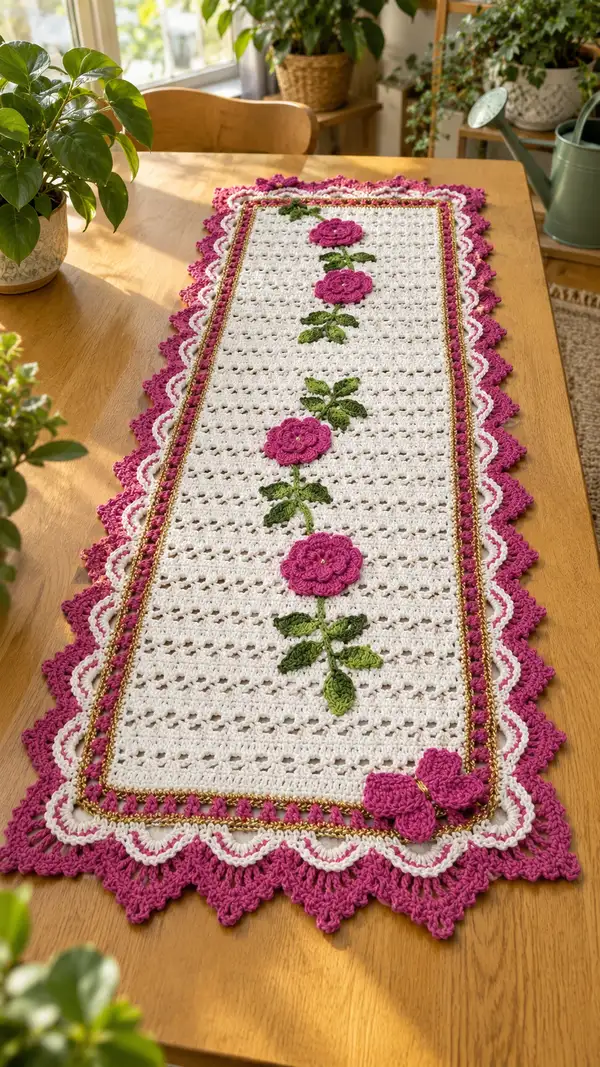
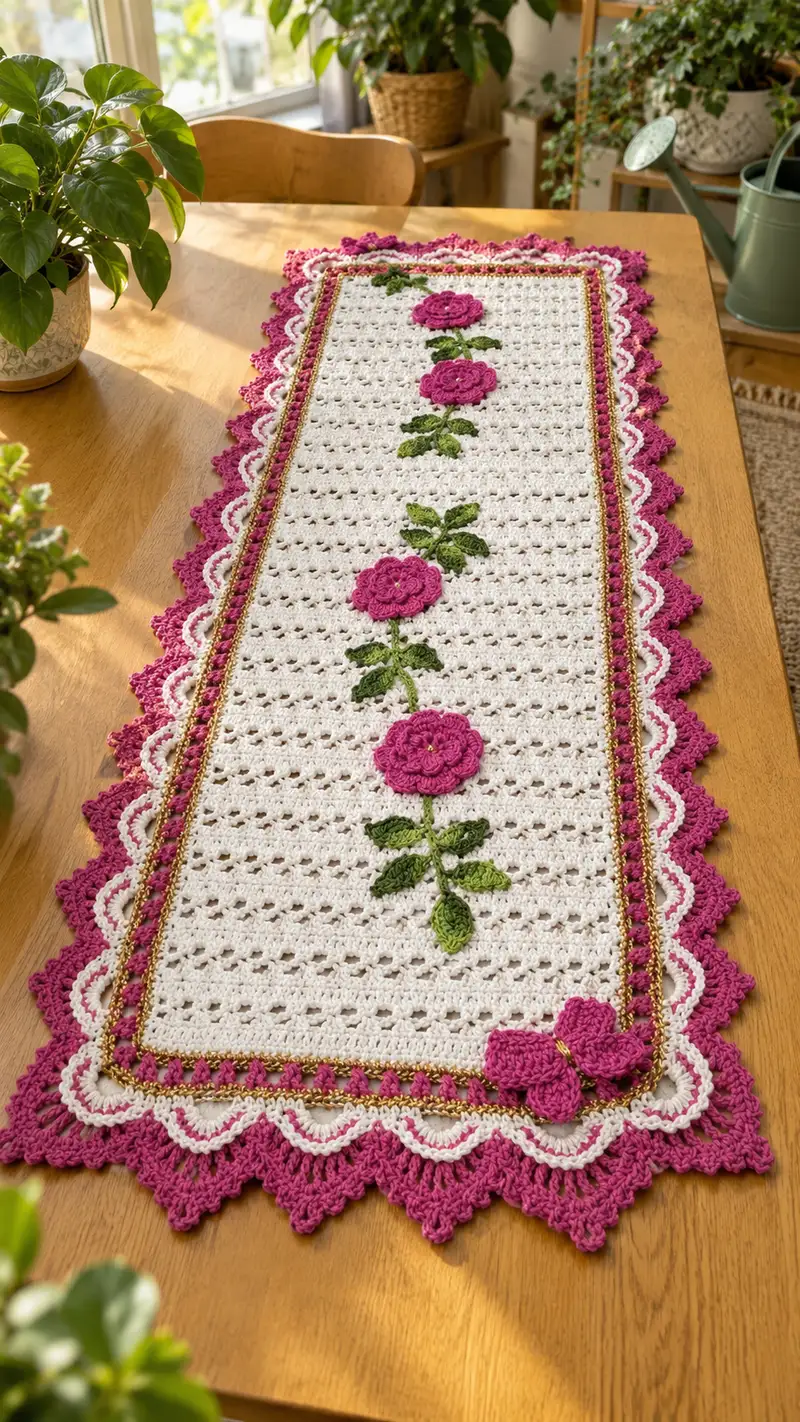
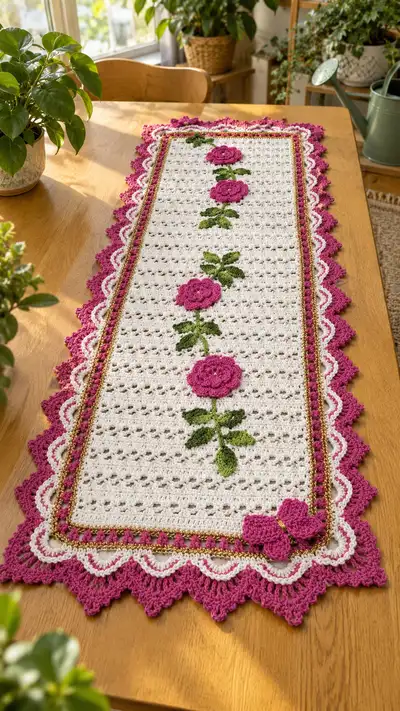
This elegant rectangular table runner features a crisp white openwork center panel, a central column of raised magenta roses with textured green leaves, and a layered scalloped border in magenta, white and metallic gold. The design combines delicate lacy stitches, raised floral applique9s and a decorative outer scallop for a classic, handmade centerpiece. Perfect for dining tables, sideboards or as a special gift to brighten any home.
Progress Tracker
0% Complete
— Materials & Gauge :
Info :
Gauge is approximate for a firm lacy fabric: 18 dc x 8 rows = 4 inches in pattern stitch with 3.5mm hook and DK cotton. Match gauge if you want the same finished size. Adjust hook to obtain correct tension.
— Center Panel (work flat in rows) :
Info :
Foundation: The center panel is worked in a repeat of a 6-stitch open cluster that creates the small eyelet texture shown. The runner photographed measures approximately 12.5" wide by 48" long. To match this width, foundation chain is ch 121. This is 'multiple of 6 + 1'. If you want a different width, use any multiple of 6 plus 1.
Round 1 :
Ch 121. Row 1: Dc in 4th ch from hook (counts as first dc), *sk 2 ch, (dc, ch 1, dc) in next ch (this forms a V-shell), sk 2 ch, dc in next ch; rep from * across to last ch, turn. You will create 1 dc between each V-shell. Maintain consistent counts; the number of main stitches across remains equivalent to width (121 bases of stitches and chains).
Round 2 :
Ch 3 (counts as dc), turn. Dc in first st, *sk next st, (dc, ch 1, dc) in next st, sk next st, dc in next st; rep from * across to end, dc in top of turning ch. (Pattern repeat established - maintain this sequence in all center rows)
Round 3 :
Repeat Row 2 across (121 stitch-spaces across). Ensure V-shells align vertically with the V-shells below to create uniform eyelets.
Info :
Keep a stitch marker at the first and last stitch of each row for easier counting and later border attachment. Block the center panel before applying applique9s and borders for best results.
Round 4-40 :
Repeat Row 2 for 37 additional rows (so that you have worked a total of 40 body rows including Row 1). Maintain consistent tension. After Row 40, the center panel length will approximate the photographed length; if you want a longer runner, continue repeating Row 2 in even numbers to preserve symmetry.
Info :
Measure frequently during these even rows. Place temporary pins at the center line every 8-10 rows to keep applique9 alignment straight when you later attach roses and stems.
— Rose Motif (Make 5 identical roses) :
Info :
Each rose is worked as a layered circular applique9 with textured petals and a small central button-like puff. Work each rose flat, then block lightly to shape petals. Use magenta yarn and 3.0-3.5mm hook.
Round 1 :
With magenta, make MR, 6 sc in magic ring. Pull ring closed. (6)
Round 2 :
Inc in each st around. (12)
Round 3 :
(1 sc, inc) around. (18)
Round 4 :
(2 sc, inc) around. (24)
Round 5 :
(3 sc, inc) around. (30)
Info :
Rounds 1-5 create a firm base for the petal layers. Keep stitches tight so the rose holds shape. You may stuff slightly under the center if you want a raised look, but only a pinch of stuffing is needed (or none) for a flat applique.
Round 6 :
*Ch 3, sl st in next st to create a small picot-petal base; rep from * around entire round (30 ch-3 loops). This will provide anchor points for petal rows.
Round 7 :
Working into each ch-3 loop: (sc, hdc, 3 dc, hdc, sc) in each loop around to form first petal row. Join with sl st. You will have 30 petals in the first petal circle; they will overlap slightly making dense petals.
Round 8 :
Ch 1, sl st around to the back side of the petals and work slip stitches evenly to round the petal base; this secures the first petal layer.
Round 9 :
Second petal row: Into the space at the base of every second petal, work (sc, hdc, 5 dc, hdc, sc). This creates a larger outer petal ring. Join. (15 larger petals)
Round 10 :
Ch 2, work a decorative cluster across the top of each outer petal: (2 dc, ch 1, 2 dc) in the center of each petal to create a ruffled edge. Sl st to join.
Round 11 :
Fasten off, leaving a 10" tail for sewing. Weave tail through back of rose and draw gently for slight cupping. Block gently into desired rose shape and press dry if necessary.
Info :
Create 5 roses identical in size. If you prefer a tighter rose, use a 3.0mm hook and work slightly closer petal spacing (skip every 3rd petal for outer rounds). Label roses 1-5 for placement when sewing to center panel: Roses are evenly spaced along the center axis.
— Small Central Puff (Optional for rose center) :
Round 1 :
With a contrasting light magenta or gold bead: MR, 8 sc in MR; pull tight (8). Fasten off leaving tail for attaching into rose center and sewing a small bead or seed bead into the center for sparkle.
Info :
Secure a small seed bead or French knot with embroidery thread in the center of each rose for the look from the photo. Sew through several times to lock bead in place.
— Leaf Motif (Make 10-12 leaves total, 2 per rose cluster plus extras) :
Info :
Leaves are worked flat in two colors of green if desired to create a variegated look. Use forest green as main color and an accent lime green for highlights, worked in surface slip stitches or by changing color on the last round.
Round 1 :
With green, ch 10. Row 1: Sc in 2nd ch from hook, hdc in next, dc in next 2, hdc in next, sc in next 2, sl st in last. Turn to work down the other side of the chain: sc in next 2, hdc in next, dc in next 2, hdc in next, sc in last stitch. Fasten off. (This forms a small almond-shaped leaf approx. 1.5" long)
Round 2 :
For a textured ridge: Join contrasting green to the center spine (backbone) and work a surface sl st along the center from base to tip to mimic a vein. Fasten off; leave a 6-8" tail for sewing.
Info :
Make at least 10 leaves: 2 leaves near each rose cluster and a few small filler leaves for the ends/edges. Vary leaf orientation for a natural look when sewing to the center panel.
— Stem Construction (Surface Crochet) :
Info :
Stems are added by surface crochet after the center panel is complete and blocked. Use two strands held together of green for a slightly raised rope-like stem. The surface crocheted stem will flow between roses, connecting leaves and motifs.
Round 1 :
Work surface slip stitch: With RS of center panel facing up, attach green yarn with a sl st at the center of the panel where you wish the first rose stem to begin (use pins to mark start and stop). Surface sl st evenly along the centerline between rose positions to create the stem. For a rope stem, work a chain bump: insert hook from front to back through fabric, pull up a loop, yarn over and pull through to front, then sl st in next insertion—this gives a slightly raised chain effect.
Round 2 :
Continue surface chain until you reach each rose position. When you reach a leaf attachment point, make a small loop (ch 3) anchored with a sl st, then continue. Fasten off neatly at ends. Weave tails through the back.
Info :
Practice the surface crochet technique on a scrap to keep tension even. You may also sew stems using the tail of yarn with an embroidery-style stem stitch, but surface crochet gives a cleaner raised look.
— Attaching Roses and Leaves :
Round 1 :
Position a rose at the marked center points along the vertical axis of the center panel. Space roses evenly; in the pictured runner five roses are centered with approx. 8-9 rows of center panel between each rose center. Pin roses in place with fine pins through the back of the panel and the rose back.
Round 2 :
Sew roses to panel using the long tail and a tapestry needle. Use small whip stitches around the base of the rose, passing through the back loops of the center panel stitches and the inner rounds of the rose. Aim for 12-16 evenly spaced attachment points to keep the rose flat and secure. Leave a small cavity if you want a slightly raised center.
Round 3 :
Arrange leaves on each side of the stems near each rose. Sew leaves by the base only so the tips lift slightly for a realistic look. Use a few small invisible stitches to anchor. Weave all tails into the back of the panel and trim.
Info :
When attaching, keep the same orientation for each rose for a tidy column. Check center alignment by folding the panel lengthwise and ensuring roses line up along the fold before sewing.
— Inner Gold Decorative Row :
Info :
This narrow metallic chain row runs directly around the center panel edge to produce the gold line seen in the photo. Work after the center panel is blocked and motifs sewn.
Round 1 :
With metallic gold thread held doubled if needed, attach with sl st into the corner stitch on RS. Work 1 round of slip stitches evenly along the very edge of the center panel, keeping stitches small and neat. At corners work 3 sl st to ease the turn. Fasten off and weave ends to back. The metallic should sit slightly on top of the white fabric.
Info :
If using a delicate metallic thread, work over a strand of cotton for strength or use a beading needle to add seed beads occasionally for sparkle.
— Magenta Bobble Border (Inner border) :
Info :
This small bobble row creates the first magenta ring seen between the gold and white scallop. Work in magenta yarn using a slightly smaller hook (3.5mm to 3.0mm).
Round 1 :
Attach magenta with a sl st in the edge stitch just outside of the gold row. Round 1: *Ch 3, sk 1, bobble in next st (bobble: (yo, insert, yo pull through) x4 times to create a 5-loop cluster, then yo and pull through all loops, ch 1 to seal), ch 1, sl st in next st; rep from * around. Work 3 sl st in corners to turn neatly. Join and fasten off. The bobbles should be approximately 6 mm tall and sit between the gold and the scallop.
Info :
Maintain even spacing. If bobbles are inconsistent in height, adjust tension or use a hook a quarter size larger for the bobble loops only.
— White Scallop Border (Middle scallop) :
Info :
The white scallop provides a crisp lacy ring around the runner, contrasting the magenta outer scallop. Work in white with hook matching center panel (3.5mm).
Round 1 :
Attach white yarn with sl st to the edge of the magenta bobble row. Round 1: Ch 1, sc evenly along edge to create a neat base round; place 3 sc in each corner space to help turn. Join. Count stitches so scallops align with bobble spacing.
Round 2 :
Work scallops: *Sk 1 sc, (3 dc, ch 1, 3 dc) in next sc (shell), sk 1 sc, sl st in next sc; rep from * around. At corners work (3 dc, ch 2, 3 dc) in corner spaces to make larger corner shells. Join and fasten off.
Info :
Blocking the scallops after this round helps them sit crisp and even before the final magenta outer border is added.
— Outer Magenta Lace Border (Deep scallop) :
Info :
This final border recreates the layered deep scalloped points in magenta and gives the runner its dramatic edge. Work with 3.5mm hook and magenta yarn. This border is made of clusters, shells and picots to form pointed scallops.
Round 1 :
Attach magenta in the back loop of the white scallop base with a sl st. Round 1: Ch 1, sc in same st, *ch 5, sk 2, sc in next 3 sc (creates small picot arches), rep from * around. Join. This creates a lacy base for the large shells.
Round 2 :
Round 2: *Work (sc, hdc, 7 dc, hdc, sc) into each arch (use ch-5 arches as each shell base). This forms the large pointed scallop. Join.
Round 3 :
Round 3 decorative points: In each 7-dc shell, work *(tr, ch 1, tr) in the center dc to form a central point; then ch 2 and sl st at shell edges to accentuate point. Join and fasten off.
Info :
For sharper points, work an extra treble cluster in the center of some shells. Count shells to ensure even distribution; if your shell count does not align with the runner corners, you can add or omit a shell at each end to balance the design.
— Corner Bow / Large Rose Accent (Optional decorative corner) :
Info :
The photographed runner features a larger layered bow/flower in one corner built from the same rose pattern but worked slightly larger and secured at the corner. This provides an eye-catching finish. Make 1 larger rose as corner accent.
Round 1 :
Follow the Rose Motif instructions but increase base rounds to Round 6 = (4 sc, inc) to reach 36 and use a 3.0mm hook for tighter petals, then add an extra outer petal row: (sc, hdc, 7 dc, hdc, sc) in each outer loop to create a larger flower. Fasten off and block into shape.
Round 2 :
Sew to corner by anchoring the back of the large rose to the magenta lace border base, covering intersection stitches. Add a short ribbon or a small strip of magenta crocheted band behind the rose to simulate a bow tail if desired.
Info :
Be sure to securley attach this accent with multiple passes of yarn to avoid loosening at the corner; consider backing the rose with a small felt circle for extra stability if the runner will be laundered often.
— Finishing Touches :
Round 1 :
Weave in all ends from the back of the runner. Gently steam block the entire runner to even out scallops and set shape; pin scallop points to blocking board until dry.
Round 2 :
If desired, add a few hand-sewn seed beads into the gold row for sparkle using a beading needle. Use small, consistent beads placed every 6-8 bobbles for subtle shine.
Info :
Press gently; do not overheat cotton and metallic threads. If metallic has loose ends, knot and glue the knot against the back fabric with a dab of clear fabric glue for security.
This vintage rose table runner brings a classic, handmade charm to any table. With its delicate lacy center, raised magenta roses and layered scalloped border, it makes a beautiful heirloom accent for dining spaces. Each step—blocking, applique9 attachment and careful edging—adds to the sense of craftsmanship and pride in your finished piece. 🧶 Add metallic thread or beads for a little extra shine and enjoy a stunning centerpiece you made yourself. Happy stitching! 🌷✨