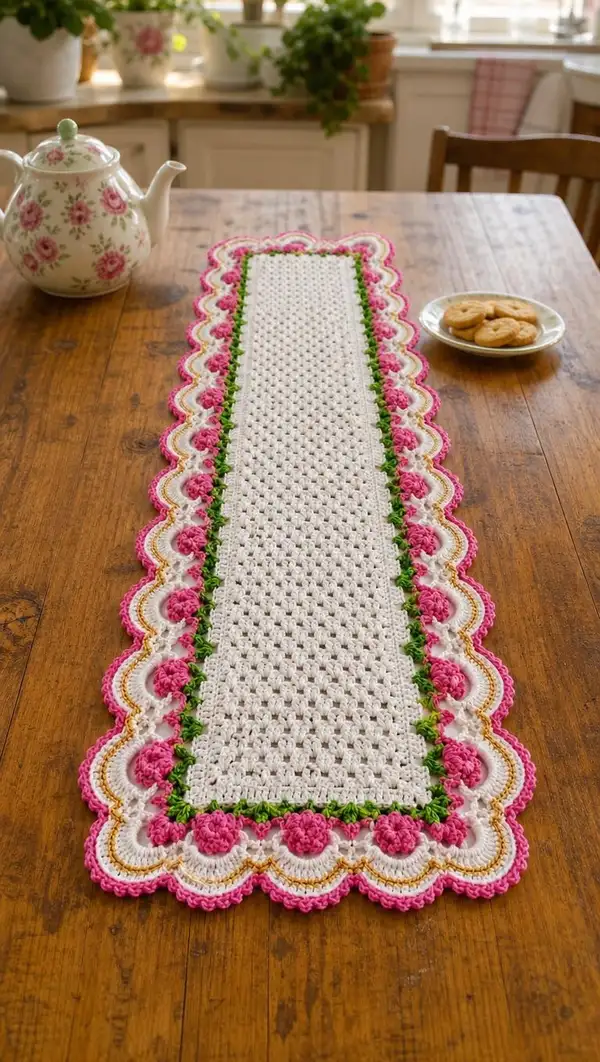
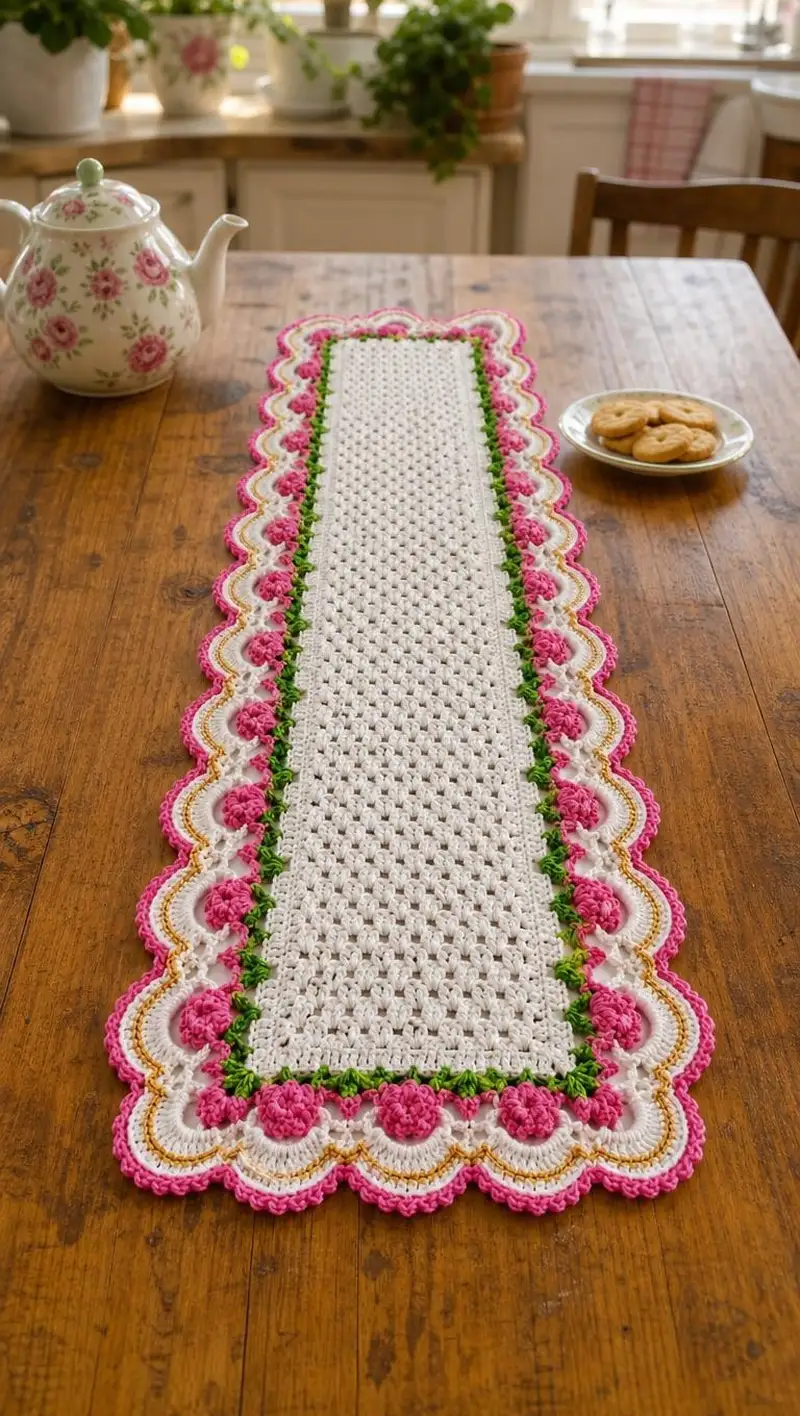
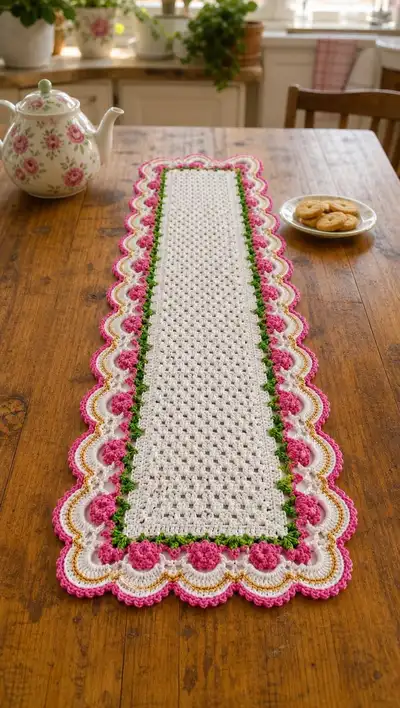
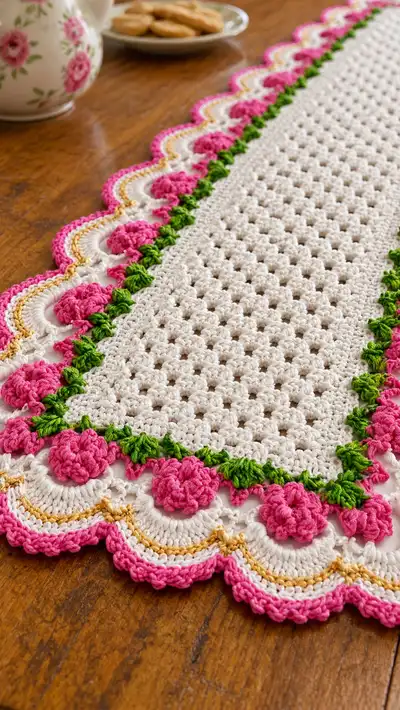
A long, elegant rectangular table runner with vintage-inspired rose scallop edging. Worked in a crisp off-white center with a lively green leaf row, bright pink rosettes and a gold accent scallop; perfect for a farmhouse or cottage table. The narrow runner blends an open textured center with layered decorative edging for a timeless, handcrafted look.
Progress Tracker
0% Complete
— Notes & Gauge :
Info :
This pattern is worked flat in rows; for clarity each row is labelled as a 'Round'. Gauge: 18 sts x 12 rows = 10cm in sc/tucked mesh using 3.5mm hook. Blocking at the end will open the center mesh and shape scallops. The runner pictured measures approximately 90cm x 18cm; measurements will vary with yarn/hook. Keep tension consistent and use a smaller hook for crisp edges if your stitches are loose.
Info :
Notes on terminology: US crochet terms used throughout. When instructions say 'repeat across' it means across the full width of the work unless specified. Colors are abbreviated: MC = Main Color (off-white), P = Pink, G = Green, O = Gold (metallic/mustard). Join new color by pulling through last yarn over of previous stitch and work over tails while crocheting the next 2-3 sts to secure.
— Foundation & Base Panel (Center) :
Round 1 :
Ch 123 (foundation chain). Turn. (123)
Round 2 :
MC: 1 sc in 2nd ch from hook and in each ch across. (122 sc). Turn. Info: Using sc for the first row creates a tidy foundation edge to build the textured mesh on.
Round 3 :
Ch 1, 1 sc in first st, *ch 2, sk 2, 1 sc in next st; rep from * across to last st, 1 sc in final st. (122 sc + 30 ch-2 spaces approx — pattern repeat counts remain consistent across rows). Turn.
Round 4 :
Ch 2 (counts as first hdc), hdc in same st, *ch 1, sk next ch-2 sp, [1 hdc, ch1, 1 hdc] in next sc (forming a V into the sc below); rep from * across, ending with 2 hdc in final st. This creates an open V-mesh fabric that will form the body of the runner. (122 active stitches across, mesh spaces evenly spaced)
Info :
From this point maintain the same stitch count across the panel - the pattern works in a 3-stitch module across the width (one mesh module per 3 chains). Place stitch markers at each long-side edge (first and last sc of each row) to help keep straight edges and count repeats when attaching the border later.
Round 5 :
Ch 1, 1 sc in first st, *ch 2, into the ch-1 space work 1 sc; into the next V (hdc, ch1, hdc from previous row) work 1 sc in the ch-1 space; rep from * across, finishing with sc in last st. (122)
Round 6 :
Ch 2, 1 hdc in first st, *ch1, into next ch-2 sp work (1 hdc, ch1, 1 hdc) making a V across the center, rep from * across, end with 1 hdc in final st. (122)
Info :
Alternate Row 5 and Row 6 repeat to create the textured mesh. The V-stitch/hdc arrangement gives the runner a neat, slightly raised texture that reads like small diamond-shaped mesh. Keep the turning chains consistent: ch1 for sc rows, ch2 for hdc rows.
Round 7-30 :
Repeat Rounds 5-6 alternately (this is 24 rows of mesh). Maintain stitch count (122). After Round 30 you will have a long rectangular central panel approximately runner length minus border allowance. Info: At rows 16 and 24 optionally mark your midway points to check length symmetry and prepare for placing border scallop anchors later.
Info :
Shape note: This runner is designed to be a long narrow rectangle; do not increase or decrease while working the center panel. If you prefer a wider runner, increase foundation chain by multiples of 3 and adjust border repeat counts accordingly.
Round 31 :
Work a tidy top edge: Ch 1, 1 sc in each st across working evenly into the top of each V and sc below, keeping last stitch sc. (122)
Round 32 :
Ch 1, 1 sc in each st across for one more tidy round (122). Fasten off MC and weave in ends on the wrong side. Info: Block center panel lightly to open mesh and square edges before adding multi-layered border. This provides even spacing for scallop repeats.
— Green Leaf Row (Border Base) :
Info :
Join G (leaf green) at a short side corner or the long side edge depending on preference. This green row sits directly along the long edges inside the scallop row and forms small triangular leaves between rosettes. We will work around the entire rectangle in joined rounds; keeping stitch counts consistent around corners is crucial. The pattern below is written as if you will work around the long sides first, then short ends, keeping the same number of repeats per long side (41 repeats assumed). If you changed foundation chain, adjust the number of repeats so each long side has equal repeats and corners have 3-4 stitches reserved for turning.
Round 33 :
With G join at the top-right long-edge corner on the outermost sc: ch 1, 1 sc in same st, then work 1 sc in each st across the edge of the panel for the full long side (approx 122 sc along long sides combined; you will work around the corner then across the next long side, so end with 1 sc in corner). Join with sl st to first sc. (Perimeter sc count variable by foundation; keep consistent)
Round 34 :
Ch 1, *ch 3, sk next 2 sc, sc in next sc (creates small ch-3 loop), rep across long side to corner. On corner work (sc, ch3, sc) to turn smoothly; continue along remaining long side and short ends in same manner; join with sl st. Info: This row creates regularly spaced ch-3 loops which will act as anchors for the green leaf clusters and next rosette placement.
Round 35 :
Ch 1, into each ch-3 sp along the long sides work a tiny leaf cluster: *(sc, ch 1, 3 dc in same sp, ch1, sc) in each ch-3 sp; rep across. On corners keep (sc, ch1, 3 dc, ch1, sc) in corner ch-3. Join with sl st. Info: Work the 3 dc as close together as possible to create a triangular leaf; these small green clusters will visually sit between each pink rosette after the next round.
Round 36 :
Ch 1, 1 sc in each st and in each leaf cluster top to tidy edge. Join with sl st. Fasten off G and weave in ends. (Perimeter tidied)
Info :
At this stage you should have a visible green frill hugging the outer edge of the center panel. Count the green leaf clusters along one long side — this is the number of rosette placements your scallop row must match. If you need to adjust, block and reposition a stitch or two to evenly space scallops later. Typical count for foundation ch=123 is 41 leaf clusters per long side.
— Pink Rosette Row :
Info :
Join P (bright pink) at the long side edge where you prefer the first rosette to start (we recommend starting in the middle of a long side and working outwards for even mirror symmetry). Each rosette is worked into a small 5-7 stitch arc formed by the previous rounds. We'll create a raised 9-stitch puff/cluster that sits neatly on top of the scallop row.
Round 37 :
Join P with sl st into the center of the first leaf cluster or the ch-3 loop meant for rosette base: ch 1, *into next base sp work: (ch 2, [yo, insert hook into same sp, yo, pull up loop] x 3 times, yo and pull through all loops on hook to form a 3-loop puff — finish by ch 1 and sl st into same sp) making a full 3-puff rosette. Rep across each anchor point along the long side. Each rosette occupies one leaf anchor. Join with sl st at end of side. (41 rosettes per long side typical)
Round 38 :
Ch 1, sc in each st between rosettes across the top of this row to tidy base, working small sc into the top of each puff to secure it. On corners work 1 sc in each corner space and continue around full perimeter placing rosettes at the same intervals on the short ends as needed. Join and fasten off P on completion of full round. Info: Make sure rosettes sit evenly; if any puff is too tall, remove and rework with smaller loops.
Info :
Technique tip: Puffs are created by making 5 partial yo loops (yo, insert, yo pull-up) depending on the puff height you desire — instructions above use three partial loops to make approachable rosettes; increase partial loops to 5 for fuller roses but be mindful that too-full puffs can crowd the scallops.
— Preparatory Round for Scallop Anchors :
Round 39 :
Re-join MC (off-white) at the outermost edge of the green row: ch 1, 1 sc in each st across the long edge and short ends to create an even platform for the scallops (this is a tidy single crochet round around the entire perimeter). Join with sl st. Info: This creates a crisp white background for the large scallops and hides G and P join tails beneath it.
Round 40 :
Ch 2, *skip 2 sc, in next sc work (1 shell foundation = 1 sc, ch1, 1 sc) to create anchor loops spaced every 3 sc; rep across long side and around corners equally; join with sl st. Info: These anchors determine scallop repetition; we will work our large scallops into these anchors so spacing is even.
Info :
Count your anchors along each long side and short end. For foundation ch=123 you should have approximately 41 anchors along each long side — this will translate to 41 scallops around each long side repeated with symmetrical corner treatment. If numbers differ slightly, adjust the count by adding or removing single crochet tidy rounds before starting scallops to even the spacing.
— Large Scallop Shell Border (Multi-layered) :
Info :
The large scallop is built in layers: first a tall white shell foundation creating the outer arch, then a gold accent row worked into the shell valley, then an inner pink scallop row that curls inward. Each scallop is worked into the anchor loops placed on Round 40; sc counts below assume one scallop per anchor across long sides and short ends equally.
Round 41 :
Join MC in first anchor loop: ch 3 (counts as first dc), work 17 dc evenly into the anchor loop (or across the 7-9 sc base reserved for the scallop depending on spacing) to form a large arch (total 18 dc including ch-3). Skip next 2 anchors, sl st into next anchor to attach scallop base, rep across to end of side and around rectangle, making a scallop into each anchor. Join with sl st to first dc. Info: The large white shell forms the main rounded edge.
Round 42 :
Ch 1, sc in same st, *3 sc across the top of each scallop (spaced to maintain shape), then between scallops make (1 sc, ch 3, 1 sc) in the anchor valley to define arches; rep across. Join with sl st. (Perimeter sc count variable). Info: This row frames each scallop and produces a small channel for the gold accent in the next round.
Round 43 :
Join O (gold) with sl st into the ch-3 valley between scallops where you created the anchor. Ch 1, *work 1 sc in valley, ch 5, sl st into 3rd ch of ch-5 to create a short decorative loop, sl st back to valley; rep between each scallop across long sides and around corners. Join with sl st and fasten off O. Info: The gold accent is a thin highlight that sits in the shell valley and reads like a decorative braid — work loosely for sheen without bulking the scallop edge.
Info :
Because metallic threads can be slippery, crochet the gold accent with one strand of metallic/embroidered yarn held double with the MC for extra stability if your yarn is very fine. Alternatively, work the gold row first and then couch a metallic embroidery thread into the loops after crocheting if you prefer sewing the accent for cleaner tension control.
Round 44 :
Re-join MC into the top of the first scallop: ch 1, in same st work (1 sc, ch 2, 5 dc, ch2, 1 sc) to create a smaller inner scallop that sits on the shell top; rep into each large scallop across the perimeter. Join with sl st. Info: These layered shells create the petal-like indentation and the 'double scallop' look from the photo.
Round 45 :
Ch 1, 1 sc in each sc and dc across, placing 3 sc into each 5-dc mini-shell peak to maintain curvature. Join and fasten off MC. This tidies the top of the inner scallop before the final pink picot edge.
Info :
Take a moment to pin scallops into place while the fabric is damp (light mist, not soaking) to shape the curves uniformly. Blocking ensures scallops all sit at the same depth and keeps the runner from wobbling at the edge.
— Pink Scallop Picot Edge (Final Framing Row) :
Round 46 :
Join P at base of first inner scallop: ch 1, *sc in first st, [ch 3, sl st in 3rd ch to form picot] in top of each mini-shell peak across the long side, work 3 sc into mini-shell valleys for neat joining; rep across entire perimeter. Join and fasten off P. Info: These pink picots form the delicate ruffled tip visible in the photo and are the finishing flourish for each scallop peak.
Round 47 :
Optional double-edge for extra firmness: Join P again and work 1 sc evenly across the top of the picots, placing 3 sc into each picot to create a thicker, ruffled border. Join with sl st and fasten off. Info: This extra round reinforces the delicate picot row and enhances the scallop outline.
Info :
If you would like a more pronounced ruffle similar to the photo, add a second round of larger picots (ch5, sl st in 5th ch) worked into each earlier picot peak and then finish with 1 sc round to stabilize the edge. Be aware this will increase the depth of the edge by a few millimetres.
— Final Finishing Rounds & Border Tidying :
Round 48 :
Weave any remaining loose ends from the pink and gold rows through the back of the scallops into the nearest sc rows and trim. Use a small tapestry needle to secure the gold tail by sewing it into the back loops of the gold accent row to prevent slippage. Info: Metallic yarn rewiring — stitch gold tail into the white backing at least 3 times and knot if needed; then bury the tail inside the scallop for a clean finish.
Round 49 :
Light blocking: Pin the runner into shape on blocking mat with scallops pulled gently outward so each scallop measures uniformly. Spritz lightly with water and leave to dry completely. This step ensures scallops and rosettes sit as pictured. Info: Do not over-stretch; aim for natural, slightly rounded scallops that lie flat without buckling the center mesh.
Round 50 :
Final inspection: Check all rosettes and green leaf connections for stability; reinforce any loose puffs by making one sc through their base from the wrong side and knotting the working yarn, then weave in ends. Add a few holding stitches through the back of each scallop to secure edges if the runner will be laundered frequently.
Info :
Allow the runner to rest for at least 24hrs after blocking before folding or storing. The layered scallops will relax slightly and hold their shape better if given time to settle. If you plan to machine wash, place runner inside a mesh laundry bag and use delicate cycle; hand washing is preferred for metallic accents.
— Alternative Notes & Size Adjustments :
Info :
To make a shorter or longer runner adjust the number of mesh repeats (foundation chain) in multiples of 3. Each added multiple will require you to add an extra scallop repeat along the long side. Keep corner treatments symmetrical by adding/ removing single crochet tidy rows before scallops to distribute spacing evenly across both long sides.
Round 51 :
If you prefer a denser center (less open mesh), replace V-stitch rows (hdc-based rows) with alternating rows of sc/hdc for the first 20 rounds of the center. This will add thickness and create a more substantial runner suitable for frequent tabletop use. Continue border instructions as written. Info: Denser centers will require slightly more yarn and may slightly change scallop spacing — re-count anchors before scallop round.
Round 52 :
Optional linen stitch variation: For a woven texture on the center, after Round 2 work 2-row linen stitch blocks across the panel until desired length, then rejoin the green row and border as written. Info: Linen stitch gives a flatter, more substantial surface and reads beautifully with a decorative scallop edge.
Info :
Final color matching tip: if your gold is slightly darker than pictured, consider alternating one round of light mustard before adding metallic to visually warm the scallop valleys. A single narrow contrasting round tames bold metallic by grounding it on the white shell.
Round 53 :
Edge reinforcement: Using leftover MC, work a slip stitch invisibly along the inside of the scallops on the wrong side to tack the scallop base to the panel. This will reduce lifting in use. Weave ends and finish. Info: Only do this if runner will be used frequently; invisible stitching is best done with the runner slightly damp and pinned.
Round 54 :
Final weave and trim: Pull all tails through to the wrong side using a yarn needle; weave each tail through at least 4 cm of fabric in a different direction to secure. Use small trimming scissors and be careful not to nick the metallic thread. Your runner is now complete. Info: Store flat or rolled to preserve scallops and puffs.
This beautiful runner brings a handcrafted vintage charm to your table — every scallop and rosette stitched with love. The layered border gives drama without heaviness, and the bright pink and green details add a cheerful touch to a classic white center. I hope making it brings you as much joy as having it displayed on your table! 🧶🌸🍽️