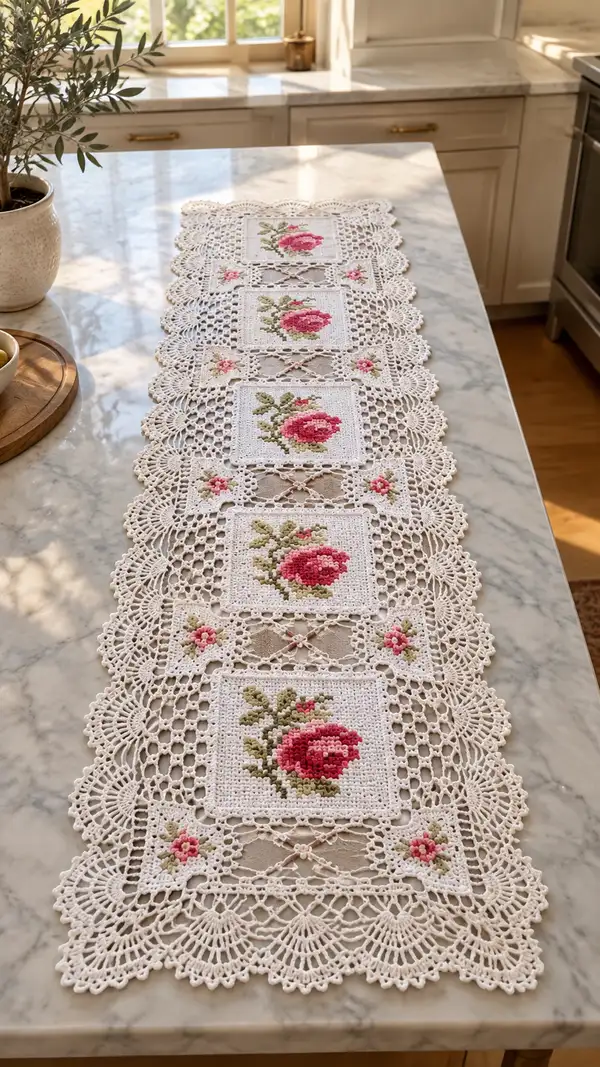
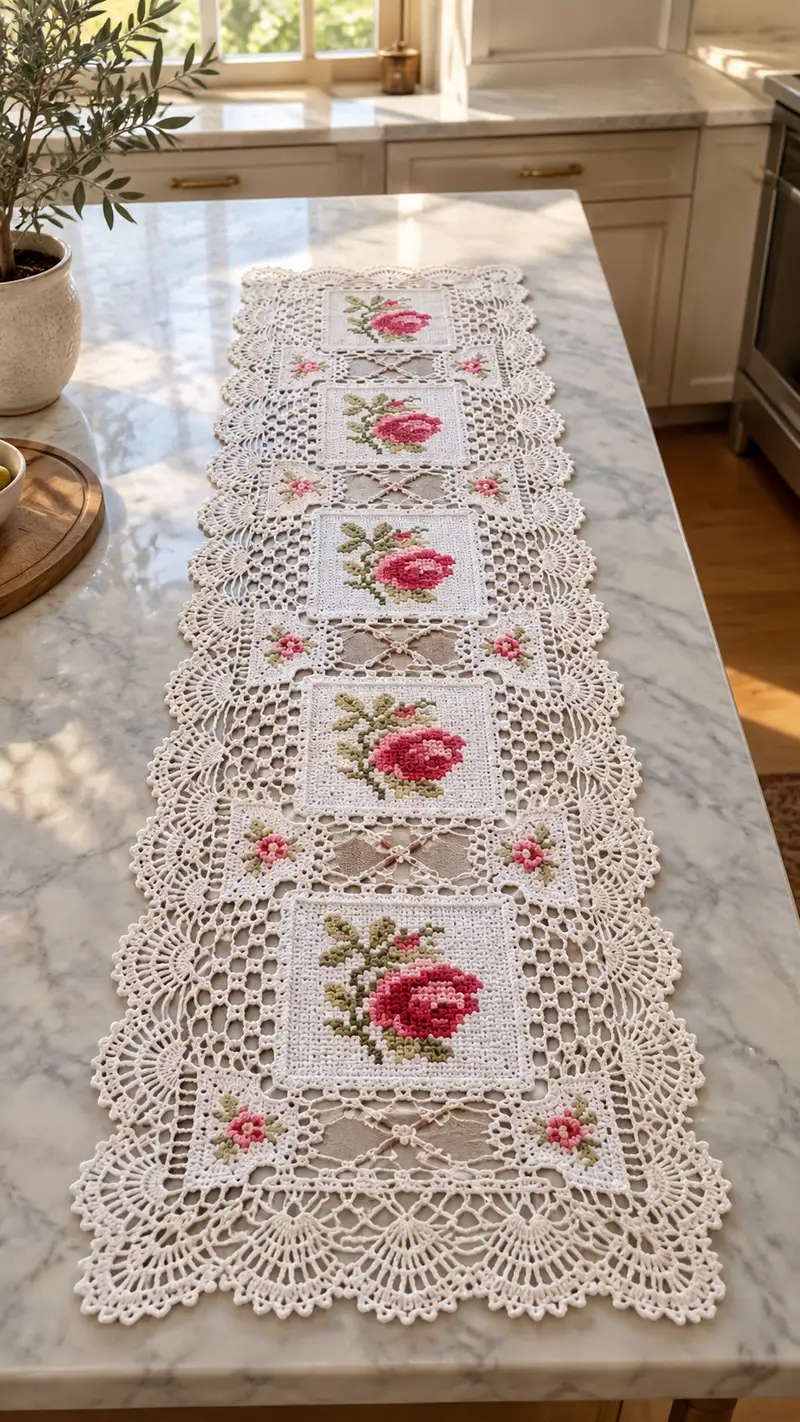
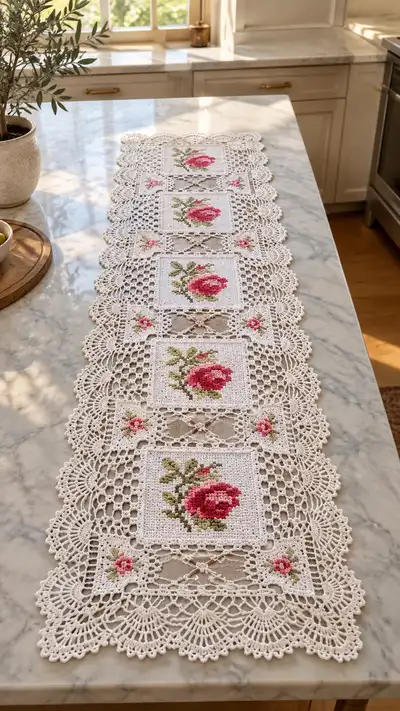
Create an elegant vintage-inspired table runner featuring five embroidered rose squares joined with airy filet lace and a scalloped fan border. This pattern recreates the delicate cream lace, soft pink rose motifs, and open lattice connectors shown in the photo. Detailed instructions include motif construction, colorwork guidance for the roses, joining panels, and the full ornate edging — perfect for a special dining table accent.
Progress Tracker
0% Complete
— Materials & Gauge :
Info :
Use size 10 crochet cotton and a 1.75mm hook for a crisp, vintage lace feel. Gauge is not critical for motif shape but aim for approximately 8 sc = 1 inch when making dense background panels so the rose embroidery sits with correct proportions.
— Preparation & Colorwork Notes :
Info :
This runner uses modular square panels with surface colorwork (tapestry-style) for the rose motifs. If you prefer, you can embroider the roses afterwards onto a plain crocheted square using stranded embroidery floss or fine thread. To carry multiple colors while crocheting, wind small bobbins for each shade and carry unused colors behind the work, securing floats every 6-8 sts.
— Main Rose Square (Make 5 identical panels) :
Info :
Each main square measures approximately 6.5-7 inches (pre-block) and is made as a solid textured square suitable for surface crochet/embroidery. Work the square in rounds to create a sturdy background for the rose motif. Use cream thread for the square background and switch to pinks/greens when indicated for the rose color blocks.
Round 1 :
Ch4, join with sl st to form a ring, ch3 (counts as first dc), work 2 dc into ring, ch2, *3 dc into ring, ch2* repeat 2 more times, join with sl st to top of ch3 (12 dc, 4 ch2 corners)
Round 2 :
Sl st into next 2 sts to arrive at corner ch2 sp, ch3, 2 dc in same corner ch2 sp, ch2, 3 dc in same corner (first corner made), *sk next 3 dc, 3 dc in next ch2 sp, ch2, 3 dc in same ch2 sp* repeat around, join (each corner has 3-dc group, each side formed of 3 dc groups) (36 dc, 4 ch2)
Info :
From this round onwards you are building a classic square with corners at the ch2 spaces. Keep stitch tension even. The total visible fabric count will grow but counts are reported as number of dc per round (excluding corner ch2s which remain corner markers).
Round 3 :
Ch3, dc in each dc across side until corner, in corner sp work (3 dc, ch2, 3 dc), continue around, join (approx 48 dc plus 4 corners)
Round 4 :
Ch3, work 1 dc in each st to corner, in corner (3 dc, ch2, 3 dc), cont around, join (approx 60 dc)
Round 5 :
Repeat Round 4 increasing dc count on each side by working dc into each dc across; corners remain (3 dc, ch2, 3 dc) (approx 72 dc)
Info :
We will continue adding rounds until you reach a square panel large enough to host the rose grid. After round 6 you will begin working linen-stitch-style rounds (alternating sc and ch) to create tighter fabric for tapestry colorwork.
Round 6 :
Ch1, switch to SC if you want denser fabric: SC in each dc across each side, in corner work (sc, ch2, sc) to maintain square corners, join (approx 72 sc)
Round 7 :
1 sc in each st around, work (sc, ch2, sc) in each corner to keep shape (approx 72 sc)
Round 8 :
1 sc in each st around (approx 72 sc)
Info :
Switching to SC rounds helps form a solid background for surface crochet or embroidered cross-stitch squares. If you prefer tapestry crochet, continue in SC and change colors stitch-by-stitch following the pixel rose chart supplied in the pattern PDF or adapted from the photo.
Round 9 :
1 sc in each st around (approx 72 sc)
Round 10 :
1 sc in each st around (approx 72 sc)
Round 11 :
1 sc in each st around (approx 72 sc)
Round 12 :
1 sc in each st around (approx 72 sc)
Info :
At this stage you have a square block suitable to carry out the rose motif. Decide whether to do the coloring now (tapestry crochet) or to embroider after finishing the square. For in-round tapestry, change yarn color at the end of the previous stitch and carry the unused color along the back, catching it under the next sc every 5-6 stitches to prevent long floats.
Round 13 :
Begin colorwork rows: working in SC, follow rose grid for Round 13 across the RS. Change to deep rose shade for pixel clusters representing the center of the flower. Maintain approx 72 sc for the round, counting colorblocks into those stitches (72)
Round 14 :
Continue SC in color sequence per chart. Use light pinks and medium pinks to build petals across the front. Keep stitch counts constant (72)
Round 15 :
Continue SC in color sequence per chart. Introduce green shades for small leaves as charted; work each sc in the chosen color (72)
Info :
If embroidering later, work these rounds in plain cream SC and embroider the rose using a cross-stitch or surface crochet technique onto the finished square. For tapestry crochet, be meticulous with color changes and weave in ends later through the back of the fabric.
Round 16 :
SC in each st in background cream where chart indicates background; work color blocks in place for petals and leaves (72)
Round 17 :
SC round, finishing edges of the motif. Keep counts steady (72)
Round 18 :
SC round for evenness and to stabilize the motif panel before adding the decorative frame (72)
Round 19 :
Change to a more open stitch to form the inner lace frame: ch1, *sk next 2 sc, dc in next sc, ch2* around the sides; in corners work dc,ch2,dc in corner position. Join (creates an even openwork frame) (st count varies by ch spaces)
Round 20 :
Ch3, 2 dc in each corner ch2 sp, across each side work (ch1, sk next dc, 2 dc in next dc) to create a small scalloped frame; join (approx 72 dc groups)
Info :
These open rounds create a decorative framed square that will later join to lattice connectors. Keep the frame symmetrical so joins line up precisely with neighboring panels.
Round 21 :
Working a picot-style border for neatness: Ch1, sc in each st across, at corners sc, ch2, sc; every 6th st make a picot (ch3, sl st into top of ch3) to add tiny decorative points. Join (approx 72)
Round 22 :
1 sc around the entire panel in cream to firm the edge (72)
Round 23 :
Switch to a lace joining round: ch5 (counts as tr+ch2), *sk 2 sts, tr in next st, ch2* repeat across side; in corners work (tr, ch2, tr) in corner sp; join (creates long mesh loops for later joining) (approx mesh loops per side varying)
Round 24 :
Sc evenly around to stabilize mesh loops; place small marker at exact center of each side for aligning joins later (72)
Round 25 :
Final neat finishing round: Sl st into each st around, finish off and weave ends. Block square flat, pinning corner points and sides for a precise square.
Info :
Make 5 identical main rose squares. Block them well: dampen and pin to a flat surface, stretching gently until the sides are equal and the motif centers. Allow to dry before joining to maintain shape.
— Small Corner Floral Squares (Make 8) :
Info :
These smaller squares sit between main panels at the corners and contain a tiny 5-7 stitch flower. They are worked in fewer rounds and match the same cream background.
Round 1 :
MR, ch3 (counts dc), work 2 dc into MR, ch2, *3 dc into MR, ch2* repeat once more, join (12 dc, 4 ch2)
Round 2 :
Ch1, sc into each dc across, in corner work (sc, ch2, sc), continue around (approx 12 sc)
Round 3 :
SC round in cream to make a small dense background (approx 12)
Round 4 :
Colorwork: use light pink to embroider a 5-stitch flower center on WS or by tapestry technique; the round itself stays 12 sc (12)
Round 5 :
Finish with a decorative frame: ch2, dc in each st across sides and (dc,ch2,dc) in corners to square up (approx 16 dc)
Round 6 :
Sl st around to finish and weave ends. Block small squares to match the main panels.
Info :
Make 8 of these small corner squares. They will be used to provide decorative corners between the main rose panels and the fan border attachments.
— Lattice Connector Panels (Make 6 long connectors) :
Info :
These are long narrow panels that join the main squares and create the airy openwork seen in the image: a diamond/criss-cross lattice with small picot intersections. Make 6 connectors for a 5-panel runner (connectors sit between and at each end).
Round 1 :
Ch36 (or length to match side of square from blocked pieces), sl st to join if making a loop or work foundation row of sc across depending on your preference for a flat strip (36)
Round 2 :
Ch3, dc in next 3 sts, *ch3, sk 3, dc in next 3* across to last 3 sts, dc in last 3 sts to finish row forming block segments (approx 9 dc groups)
Round 3 :
Ch5 (counts as tr+ch2), *tr in center of next dc group, ch2* repeat across to create vertical posts for lattice; at the end sl st to join (approx 12 tr)
Info :
We will now create diamonds by working diagonal chains connecting offset posts. Keep tension even so the lattice lays flat; block strips before joining to keep geometry accurate.
Round 4 :
RS: ch1, sc in base posts, ch3, sk 1 post, sc in next base post across to form connecting points (approx 36 sc/ch3 loops)
Round 5 :
Ch3, tr in top of post, ch2, sl st into ch3 loop below to form a small crossed X motif; repeat across creating the criss-cross lattice (st count varies)
Round 6 :
Sc round across to tidy joins and provide sturdy edges for sewing to squares; work (sc, ch1) along both long edges to ease in later joining (approx 72 sc)
Round 7 :
Work decorative picot-row: *sc 4, picot (ch3 sl st to top of ch3)* across both long sides; finish off and block to length (final count per side varies)
Info :
Make 6 connectors: 4 long connectors between the five main panels and 2 shorter end-connector strips (measure after blocking to match the exact distance between the square panels you're using).
— Decorative Fan Border (Work around entire assembled runner) :
Info :
The ornate fan/shell border is built after you join panels and connectors together. Work the border in rounds around the whole runner, adding large fan scallops and smaller picots to recreate the photo's elaborate edge.
Round 1 :
With assembled runner pinned flat, join cream thread at a midpoint on a long side with a sl st, ch1, sc evenly around entire runner edge including between squares and connectors (count will vary by size, estimate approx 500-600 sc for full runner)
Round 2 :
Ch3, *skip next 4 sc, 9 dc in next sc (shell), sk next 4 sc, sl st in next sc* repeat around to create large shells spaced evenly; at corners work 12 dc shells to turn the corner smoothly (shell repeat count and total shells depend on overall length)
Round 3 :
Ch1, sc in each dc across shell body to firm up scallops, in shell center work a small picot cluster (sc, ch3, sl st into top of ch3) for additional detail (st count varies)
Round 4 :
Ch3, 3 tr in each shell arch, ch2, 3 tr in same arch to create layered fans; in between fans work small loops of ch5 anchored with sl st to create a lacy bridge (st count varies)
Info :
Work slowly and pin after each repeat when working the first long side so the shells remain even in size. If you have fewer shells than the photo, reduce spacing; if you have more, shrink spacing. Symmetry at the corners is essential for a flat runner.
Round 5 :
Ch1, sc into each stitch across to make shell bases crisp; at outer edge of each fan, work (sc, picot, sc) to create little points between shells. Join and finish round (count varies).
Round 6 :
Working from the RS, create an outer lace row: *ch7, sl st into shell tip, ch3, sl st into shell tip adjacent* to form outer loops. Join and fasten off. This creates the looped outer edge that is later shaped into scallops.
Round 7 :
With smaller hook (optional 1.5-1.75mm) pick up each outer loop and work 5 dc into loop, sl st into base, repeat to accentuate scallop depth. Finish off and weave ends.
Info :
The photo shows deep fan scallops with a delicate picot point at the tip. If you prefer a subtler edge, reduce the number of dc in each fan or omit outer loop amplification. Block meticulously to form the finished scalloped outline.
— Outer Scalloped Edge (Final Finishing Rounds) :
Round 1 :
Rejoin cream thread at a corner. Work 1 sc into each st for 2 rounds to firm the edge and even out any join irregularities (approx 200-300 sc)
Round 2 :
Ch3, 12 dc in one stitch (large fan), sk 6, sl st in next st, *ch3, 12 dc in next st, sk 6, sl st in next st* repeat around the entire perimeter to form deep fans (total fans will match runner sides) (fan size is variable)
Round 3 :
Ch1, sc in each stitch across fan bodies and into fan tips, where you will add a tiny picot for decoration every third fan (picot = ch3 sl st into top of ch3) (count varies)
Round 4 :
Ch2, 6 tr in each picot base to build height, anchor with sl st; repeat across to create a more pronounced scalloped outline. Fasten off and weave in ends.
Info :
Finish with a final blocking session while wet to shape shells and define lace. Use stainless pins to hold each fan tip to the blocking mat at even intervals for a classic crisp scalloped finish.
— Assembly & Joining :
Info :
Before joining, ensure all panels and connectors are blocked to identical sizes. Plan layout: arrange panels and small squares as photographed with main panels aligned down the center and small floral squares tucked in corners. Use pins to hold before stitching.
Round 1 :
Lay panels RS up. Use a whip stitch (or mattress stitch) with matching cream thread to join main squares to lattice connectors. Work through the back loops of both pieces for an invisible seam. Secure ends and weave in tails.
Round 2 :
Sew small corner floral squares into corner positions between main panels and connectors. Use tiny whip stitches and ensure the small flowers face outward and are centered in the corner gaps.
Info :
For a neat result, join one seam at a time, pressing lightly with steam or spritzing and pinning the seam flat as you go. Add temporary tacking stitches every 1 inch to preserve alignment before permanent sewing.
Round 3 :
Once all panels and connectors are joined, crochet 2 rounds of sc around the entire assembled runner (as described in the Decorative Fan Border section) to create a solid base for the shell edge.
Info :
After final assembly and the shell border are complete, steam-block the whole runner: pin each scallop and corner carefully to open the lace, then lightly steam or wet block until dry. This gives the crisp, vintage lace look shown in the image.
— Optional Embroidery & Finishing Details :
Info :
To increase dimensional detail, embroider small French knot centers on the tiny flowers using a contrasting color (e.g., pale yellow). Add subtle shading with single-strand embroidery in the leaves for more realism. Tidy all ends into the backside and trim close.
Round 1 :
If you wish to add raised petals, use bullion stitches or piled surface crochet along with the tapestry colorwork. These advanced finishes are optional and should be practiced on a sample square first.
Info :
Final quality check: check for loose ends, re-block if necessary, and press the runner into shape by hand. Store flat or rolled (not folded) to protect scallops.
This vintage rose table runner brings classic charm and artisanal detail to any table setting. Each rose panel and lacy fan edge works together to create a delicate heirloom accent you'll be proud to display. Take your time, enjoy the meditative rhythm of tiny stitches, and admire how the runner blossoms under careful blocking. 🧶 Pin and share your finished piece — it makes a perfect gift or keepsake for years to come! 🌹✨