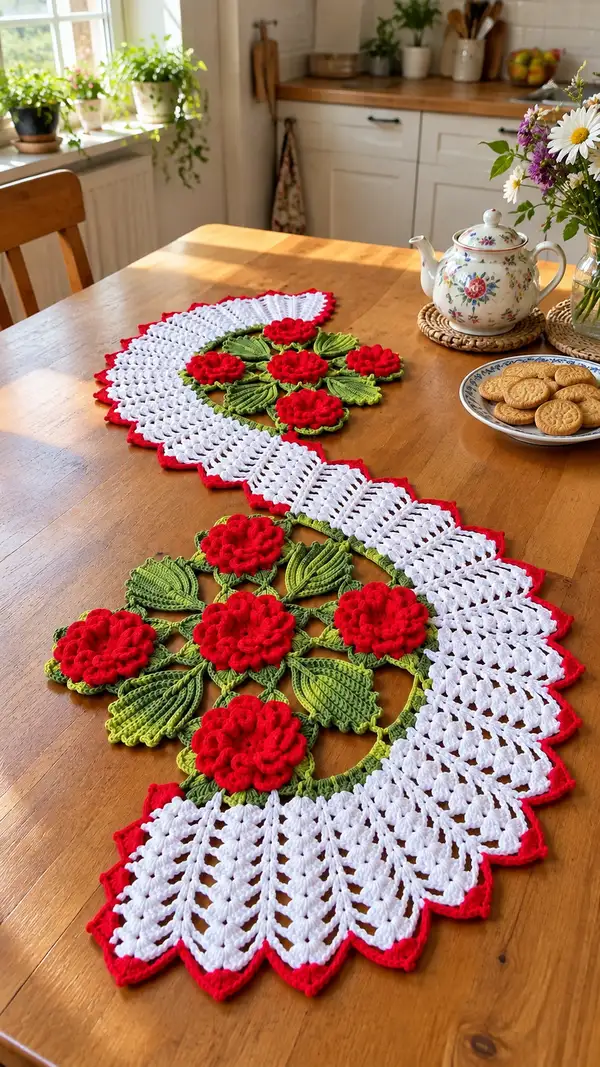
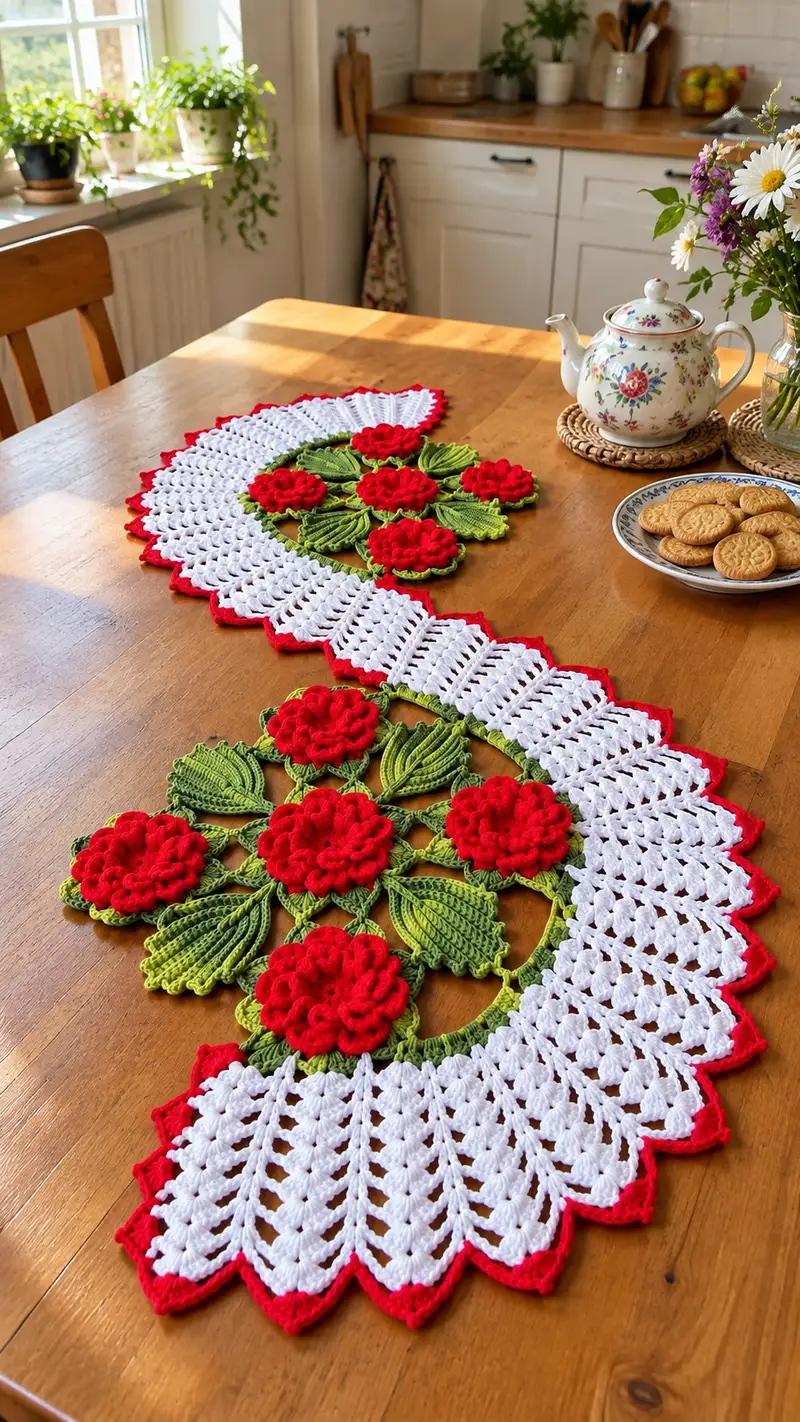
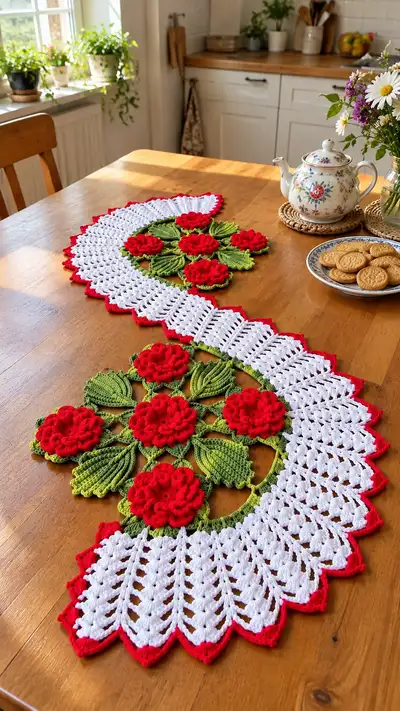
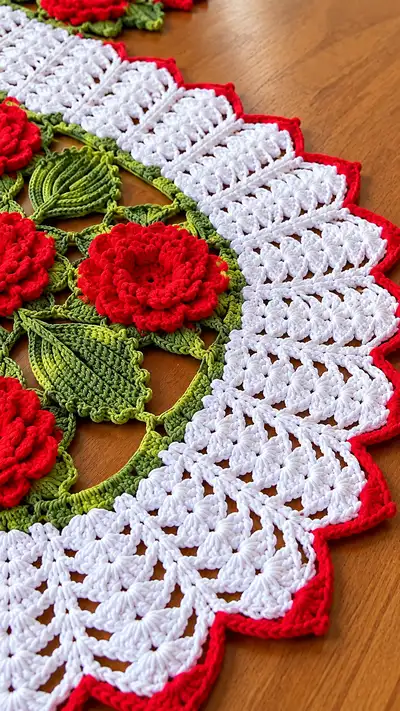
A charming vintage-inspired table runner featuring bold red 3D roses, sculpted green leaves and a wide white lacy fan border with a bright red scalloped edge. This runner is designed as modular motifs joined into a long S-shaped runner—perfect for a table centerpiece. The pattern uses worsted weight cotton for crisp stitches and shows clear layered petals, raised veins in leaves, and an airy shell lace border.
Progress Tracker
0% Complete
— Overview :
Info :
This pattern is modular. You will make: Rose motifs (7 in the pictured runner but adjust as desired), Leaf motifs (14), Small connector motifs (7), Circular motif ring (1 per group), White fan panels to attach along the border, and a red scalloped edging. The runner pictured is composed of two large floral medallions joined end to end with white fans making an S-shape. Work each motif flat, block, then join by slip stitch and whip stitch.
— Rose Motif (Make 7) :
Round 1 :
6 sc in magic ring (6)
Round 2 :
Inc in each st around (12)
Round 3 :
(1 sc, inc) x 6 (18)
Round 4 :
(2 sc, inc) x 6 (24)
Round 5 :
(3 sc, inc) x 6 (30)
Info :
These first rounds form the tight center of the rose. Use a smaller hook (3.0mm) if you prefer an extra compact center. Keep tension firm so the center stays dense.
Round 6 :
1 sc in each st around (30)
Round 7 :
1 sc in each st around (30)
Round 8 :
*ch 2, 3 dc into next st, ch 2, sl st into next st* repeat 10 times around forming ten tiny petal groups (30 sts base, 10 petals)
Info :
Use a contrasting stitch marker to mark the first petal group so you keep count. When working petals, insert hook deeply into the base stitch to anchor petals securely.
Round 9 :
Working behind the petal groups, join with sl st to the base and sc in each base stitch (30) to prepare for the next petal layer
Round 10 :
*(sc in next st, ch 1, 5 dc cluster in next st, ch 1, sc in next st) skip one st between repeats* repeat 10 times (30 sts base, 10 larger petals)
Round 11 :
Rotate work and using BLO of the base round, sc around to anchor the layer (30)
Info :
Round 10 creates the first full petal layer. Anchor it firmly in Round 11 so petals stand up. You can slightly pull on petals to fan them outward for a fuller rose.
Round 12 :
*In the top of each 5-dc cluster make (sl st, ch 2, 3 dc, ch 2, sl st) to form ruffled edging on each petal* repeat 10 times (visual count 10 petals)
Round 13 :
Working behind the petals, sc in each base stitch (30)
Round 14 :
*3 sc in the base of each large petal cluster to build height and anchoring (30 base area becomes 30 groups of 3 sc = 90 sc counted as group anchors; maintain counts by treating as 3 sc into 10 petal-bases = 30 sc overall counted around)
Info :
Round 14 builds a strong foundation for the second petal tier. When working 3 sc in each petal base, place them evenly so the petal tiers stack without crowding.
Round 15 :
*Working into the 3-sc group for each petal base make a layered petal: (ch 2, 3 tr cluster, ch 2, sl st) into the middle sc of each 3-sc group* repeat 10 times (10 raised petals)
Round 16 :
Anchor petals with sc around in the spaces between petals and in the remaining base stitches. Aim for 30 sc total around spacing evenly (30)
Round 17 :
Repeat Round 12 style edging for a final ruffle: in each raised petal make (sl st, ch 2, 3 dc, ch 2, sl st) to produce full petals (10 petals)
Round 18 :
Sc around entire rose base in even rounds for a tidy back and to create a flat joining edge: 1 sc in each base st around (30)
Round 19 :
Work a final round of slip stitches in the back loops only to produce a slightly ridged joining edge: 1 sl st in each st BLO (30)
Round 20 :
Fasten off leaving 10-12" tail for sewing. Weave tail through back loops and secure. Repeat for each rose motif (7 shown). (final joining edge 30)
Info :
Block each rose lightly on a small circular template so the back lays flat; pin petals individually if needed to open them slightly. Do not over-stretch petals as they will flatten.
— Leaf Motif (Make 14) :
Round 1 :
Ch 10, sl st into 2nd ch from hook, sc in next, hdc in next, dc in next, (tr in next 3 ch) working back down the other side: dc, hdc, sc, sl st into last st to form a closed leaf base (counts variable, base edge = 18 stitches around edge)
Info :
The leaf is worked in rows around a central chain to form a spindle leaf. This foundation chain length (ch10) gives medium-leaf size; increase to ch12 for larger leaves or ch8 for smaller.
Round 2 :
Work a round of sc all the way around the leaf edge to create a firm border (approx 18 sc)
Round 3 :
Working in BLO of the sc round, make ribbing: *fpdc around next 2 sts, bpdc around next 2 sts* repeat around to create alternating ribs (approx 18 ribs visual)
Round 4 :
Repeat Round 3 to build deeper ribs: work fpdc and bpdc pairs in same sequence (approx 18 raised ridges)
Info :
Use front post and back post double crochet working into the body of the leaf to create clear ridges that look like veins. Keep tension even so ridges lie flat.
Round 5 :
Decrease the number of base sc along the tip by working sc2tog across the tip area to form a pointed leaf tip; work evenly around giving a smooth taper (approx 16 sc)
Round 6 :
Round of sc around leaf in FLO to give a slightly scalloped inner edge (approx 16 sc)
Round 7 :
Picot edging: *(sc, ch 3, sl st in 3rd ch) in every 3rd st* repeat around to create small decorative points (approx 6-7 picots)
Round 8 :
Fasten off leaving 8-10" tail for sewing; block leaf with gentle curve toward center for natural shape
Info :
Stitch tails should be left long to securely attach leaves to the green joining ring. When blocking, curve the leaf so the center ribs are raised slightly.
— Small Connector Motif (Make 7) :
Round 1 :
6 sc in magic ring (6)
Round 2 :
Inc in each st around (12)
Round 3 :
1 sc in each st around (12)
Round 4 :
Work a round of small loops for joining: *(ch 4, sl st into next st)* repeat 6 times producing 6 ch-4 loops
Round 5 :
Fasten off leaving tail for joining to ring (12)
Info :
These small connector motifs sit at points where leaves and roses meet; use their loops to join to fan panels or the green ring. Pin them in position before final joining.
— Central Joining Ring / Lattice (Make 2 medallion rings) :
Round 1 :
Ch 60, join with sl st into first ch to make a large ring (60)
Round 2 :
Work 1 sc in each ch around (60)
Round 3 :
*(ch 3, sk 2, sc) around* wait to complete 20 chain-3 loop spaces for petal/leaf placement (20 ch-3 spaces)
Round 4 :
In each ch-3 space work (sc, ch 3, sc) to make 20 little beaded arches for attaching leaves and connectors (40 sc counted as groups)
Round 5 :
Round of sc around, placing increased sc in arch bases to supply sturdy attachment points; target 60 sc around by making (1 sc in base sc, 2 sc in arch bases) to maintain even distribution (60)
Info :
Mark 7 evenly spaced attachment points on the ring to hold roses and connectors. The pictured medallion uses 7 roses spaced with leaves in between; adjust spacing for your motif count.
Round 6 :
Work a decorative ring: *(ch 5, sl st into base sc)* repeat evenly around to create open loops for attaching additional leaf stems (approx 12 loops)
Round 7 :
Sc around in BLO to give a slightly raised inner ridge for the fan to sit against (60)
Round 8 :
Fasten off leaving a long tail for joining fan panels and sewing leaves/roses in place (60)
Info :
When sewing roses and leaves to the ring, position petals to face outward and stitch through the back loop/first round of the rose base to secure a flush join. Use the connector motifs to bridge gaps as needed.
— Fan Panel (Make multiple segments; pictured runner uses 12 panels across both sides) :
Round 1 :
Join white yarn to a point on the green ring where fan will attach with sl st. Ch 3 (counts as dc), work 1 dc into same join and continue across in rows building the fan outward: Row foundation length should be multiple of 6 + 1. For this pattern we work foundation rows of 13 shell columns across each panel.
Row 2 :
Turn, ch 3, *skip 2, (5 dc) into next st, skip 2, dc into next st* repeat across creating shell columns. Count: 13 shell groups and 12 spacing dcs between.
Info :
Each fan panel is worked in straight rows (not rounds), then joined to the ring along the inner row. Work a swatch of one panel to determine the number of rows needed for desired fan height.
Row 3 :
Ch 3, turn, in each shell from previous row work (dc in each of the 5 dc), and in the spacing dc work (dc, ch1, dc) as a small arch; this opens the fan and maintains even width. Keep a total shell count of 13 each row.
Row 4-11 :
Repeat Row 3 eight times to build fan height. You should end with 9 rows of shells total (including Row 2 base). Each row remains visually 13 shells across.
Info :
Block each panel flat so shells align. If you prefer more drape, replace some dc with hdc on outer rows. Keep panel heights consistent for a clean edge.
Row 12 :
Work an outer shaping row to create scalloped ridges: *in each shell work (ch 1, 3 dc, ch 1, sl st) across the top center of each shell* this produces small peaks across the outer edge (13 peaks)
Row 13 :
Finish panel with a round of sc across the very tip row to tidy loops: 1 sc in each stitch and across each peak chain (approx 13*5 + spacing sts = approx 70 sc)
Info :
Attach each finished fan panel to the green ring by matching inner edge stitches to the ring's inner scs. Use long tails and mattress stitch or sl st join depending on desired seam visibility.
Row 14 :
When joining to ring, work sl st through fan base and ring base every sc to avoid gaps (if ring has 60 base sc and panel inner row has 30 sts, space sl sts evenly 1 in 2 ring sc to distribute tension).
Info :
The runner pictured uses panels worked separately and sewn along alternating sides of two long medallions; you can also crochet fan panels directly onto a long chain if you prefer continuous joining.
— White Fan Full Border (If making continuous border rather than separate panels) :
Round 1 :
Join white yarn to the inner ring and ch 4, *(skip 2 sc on ring, 5 dc cluster in next, ch 2, sc in next sc)* repeat around forming shell clusters across entire ring; target 20 shell clusters per medallion inside area (counts based on ring size)
Round 2 :
Ch 3, turn, work dc across each shell cluster and create new shells in the top of each cluster for height. Ensure approximately the same number of shells as previous round.
Round 3-9 :
Repeat building rows of shells outward by working full shells into the center of each shell from previous row. Each row increases the visual width of the fan; maintain 7-9 rows for a deep border like pictured.
Info :
For mathematical accuracy: if your starting ring gives 20 shell bases, keep 20 shells per row — shells maintain count, but stitch totals grow by (shell stitches - spacing stitches) each row. Blocking is crucial to open shells evenly.
— Outer Red Scalloped Edging :
Round 1 :
Attach red yarn to outermost shell tip with sl st. *Into each outer shell work (sc, ch 2, 5 dc, ch 2, sc)* repeat around across each outer shell tip to create big scallops (if 26 outer shell tips, make 26 scallops)
Round 2 :
In each scallop tip work a single round of sc across to smooth the tip and anchor points: 1 sc in each stitch across scallop and into ch-2 spaces (approx 8-12 sc per scallop)
Info :
Red edging contrasts sharply and hides any irregularities in shell spacing; carry red yarn carefully or attach fresh to each scallop to maintain clean color lines.
Round 3 :
Optional: add picot points between scallops by working *(sc, ch 3, sl st in 3rd ch) between scallops* for sharper points (approx number equal to scallops)
Round 4 :
Fasten off and weave ends under the red round using a yarn needle for a tidy edge
— Assembly & Joining Rounds :
Round 1 :
Layout: arrange 2 medallion rings with their floral groups as in photo (an S-shaped assembly). Place fan panels so they fill the outer curves. Pin all motifs before joining.
Round 2 :
Join roses: using long tails and matching green thread whipstitch each rose base to the ring at the marked positions. Make 6 secure passes through base of rose and ring (no stitch count needed; ensure secure join).
Round 3 :
Join leaves: position each leaf in the gap between two roses. Use mattress stitch through the leaf back loops and ring arches. Place 2-3 stitches along the leaf base to secure (use tails from leaves).
Round 4 :
Attach small connector motifs to ring and leaves to bridge gaps. Use sl st or whipstitch through connector loops to leaf tips and ring arches. Ensure connectors sit flush to prevent gaps (no numeric stitch count; attach at each loop).
Info :
When joining, prefer invisible mattress stitch for a flat seam. Sew on the wrong side of rings and then flip motif to the right side. Keep joins snug but not puckered.
Round 5 :
Attach fan panels: with RS facing, align inner row of each fan panel to the ring inner scs. Use a whipstitch or sl st every 2nd sc of fan to ring sc; for uneven counts distribute sl sts evenly. After attaching one fan, check curvature before attaching the next.
Round 6 :
Complete all fan panels for both medallions. When fans meet between medallions, overlap slightly and sew edges together using ladder stitch for a smooth join.
Round 7 :
Trim and weave in all tails: pass each tail through a few stitches on the backside and trim close. For cotton yarn, dampen and press edges once tails are woven in to hide ends more effectively.
Round 8 :
Final edging: work the red scalloped edging around the entire outer border, slipping into the fan outer tips and joining each scallop at evenly spaced intervals. Make sure scallops line up across joined seams.
Info :
Blocking and final shaping: soak the assembled runner lightly and pin to the desired S-shape on a blocking mat, gently stretching each scallop evenly. Let dry completely before removing pins to hold shape.
— Optional Decorative Details :
Round 1 :
Add small embroidered veins on leaf faces using long green embroidery thread; weave through several post stitches to avoid pulling.
Round 2 :
Add tiny French knot centers to roses using a small amount of yellow or darker red thread for depth (optional drill)
Info :
Optional color gradients: use variegated green or hold two greens together to give leaves subtle shading before working the picot edge.
Completing this runner is such a rewarding, hands-on experience — the lush red roses and sculpted green leaves make a classic, eye-catching centerpiece! Each motif you crochet and block becomes a small sculpture, and as you join them the runner takes on elegant movement and flow. The bright red scalloped edging gives a polished finish that frames the lacey white fans beautifully. Enjoy the pride of placing your handmade runner on the table and sharing it with guests! 🧶🌹