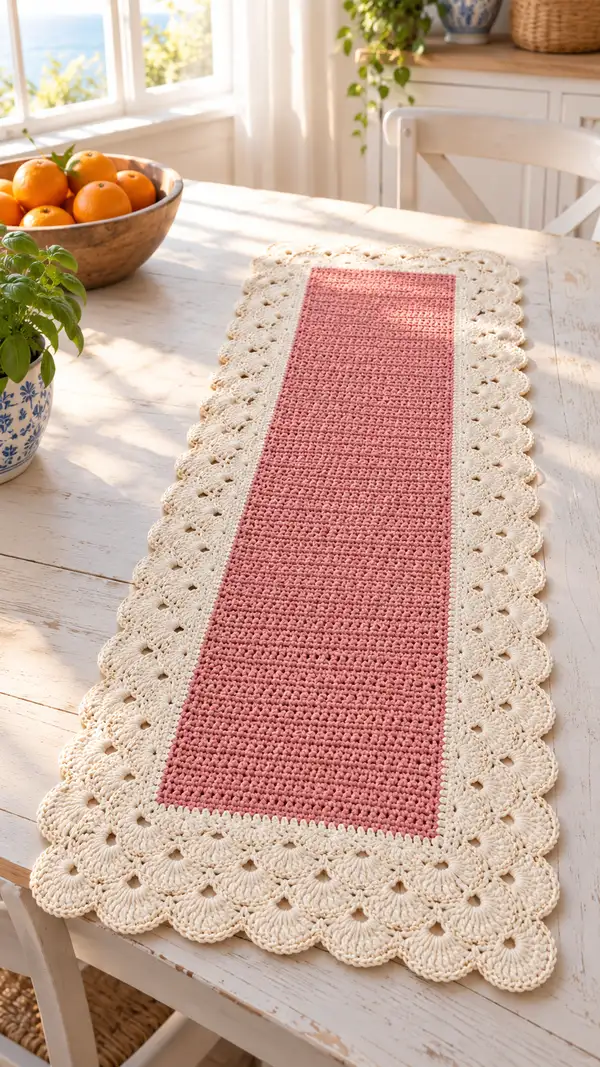
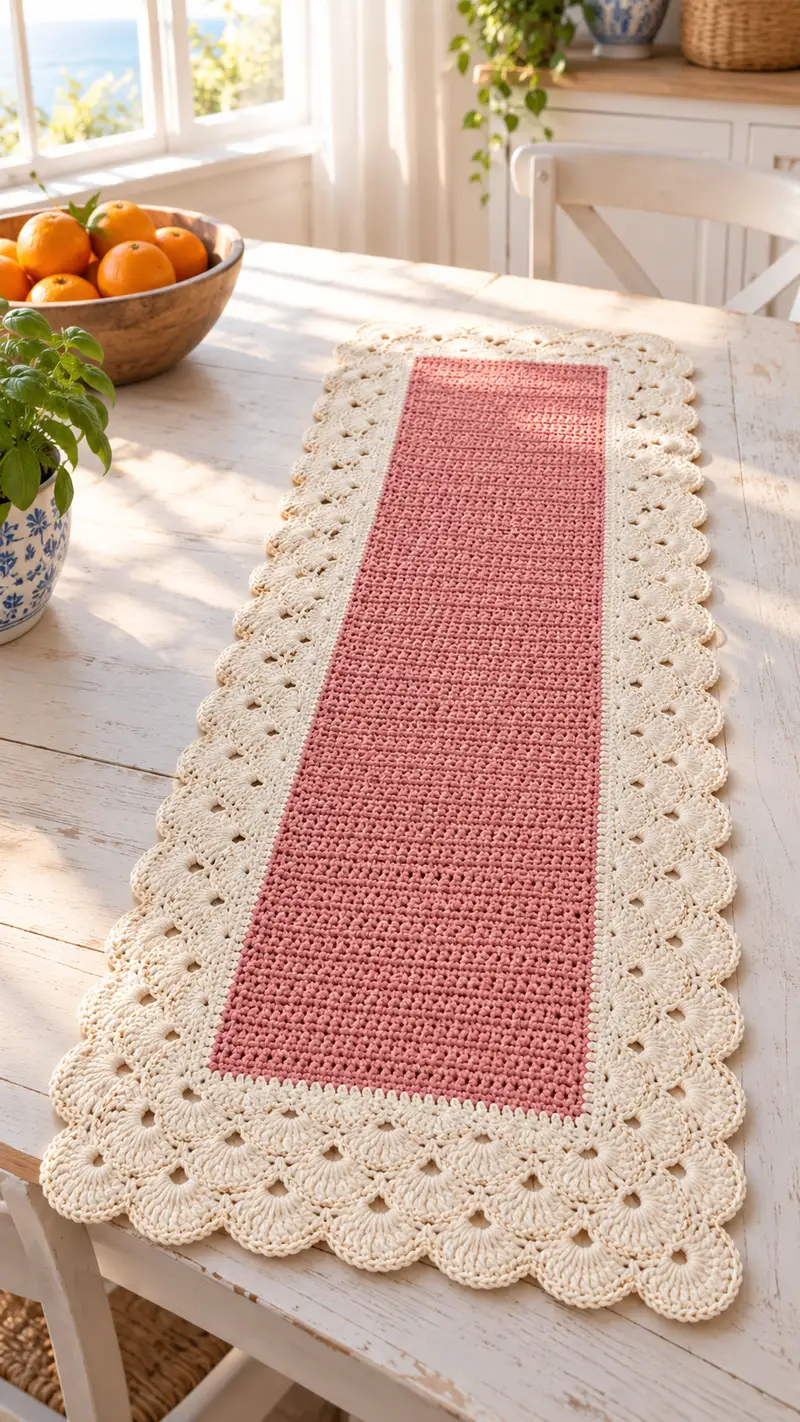
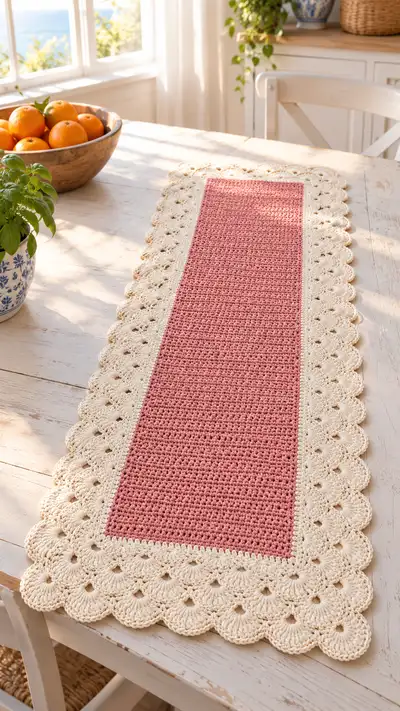
Create a charming scalloped-edge table runner with a textured dusty-rose center and a soft cream scallop border. This pattern combines a tight, durable textured stitch for the center panel with a lacy shell edging for a classic, vintage-inspired look. The runner is ideal for dining tables, sideboards, or as an elegant seasonal accent. Detailed row-by-row instructions and helpful tips make this approachable for intermediate crocheters.
Progress Tracker
0% Complete
— Finished Size & Gauge :
Info :
Finished sample measures approximately 14" (35.5 cm) wide by 48" (122 cm) long. Gauge for center panel: 14 hdc x 8 rows = 4" (10 cm) using 4.5 mm hook and worsted cotton. Adjust hook size to match gauge and preferred drape.
— Notes Before You Begin :
Info :
This runner is worked flat lengthwise starting with a foundation chain that determines the width. The center panel is worked in half double crochet texture rows. After completing the center, you will work a narrow joining round in cream and then proceed with the scalloped shell border worked along the long sides and short ends. Use stitch markers to mark short end corners after the center panel to help with an even border placement. Block the center panel lightly before adding the scallops when possible to ensure scallops sit evenly.
— Foundation & Center Panel :
Row 1 :
With Dusty Rose yarn, ch 101 (this is the foundation chain; 101 sts gives a generous 14" width after working hdc rows) (101)
Row 2 :
Hdc in 3rd ch from hook (counts as first hdc and turning ch2), hdc in each ch across, turn (101)
Row 3 :
Ch 2 (counts as hdc), hdc in BLO of each st across, turn (101)
Row 4 :
Ch 2, hdc in each st across (FLO on alternate rows only if desired for more pronounced ribs), turn (101)
Info :
We are using a subtle texture by alternating a BLO row then a full hdc row. This gives a compact, slightly ribbed fabric that stays flat and resists curling. Ch 2 counts as first hdc for each row.
Row 5 :
Ch 2, hdc in BLO of each st across, turn (101)
Row 6 :
Ch 2, hdc in each st across, turn (101)
Row 7 :
Repeat Row 5 pattern: ch 2, hdc in BLO each st across, turn (101)
Row 8 :
Ch 2, hdc in each st across, turn (101)
Info :
Place a stitch marker in the first and last stitch of this row to mark the short-end corners for later border alignment. These markers will help you maintain placement for scallops at the ends when you join with cream yarn.
Row 9-100 :
Repeat Rows 5-8 (ch 2, hdc BLO row; ch 2, hdc full row) in sequence until you have completed a total of 100 rows including Rows 2-8. This creates an even, textured center panel approximately 48" long (100 rows) (101)
Info :
If you want a shorter or longer runner, adjust the number of center panel rows in multiples of 4 to keep the texture and border spacing predictable. For every 4 rows you add, length increases roughly 3/8" to 1/2" depending on tension.
— Finishing Center & Preparing for Border :
Row 101 :
After final center row, ch 1, sc evenly across the top edge of your last row (across the 101 hdc), turn to work along the long side edge in the round, do not fasten off (101 + turning)
Row 102 :
Working along the side edge: sc evenly down the side edge (place approx 1 sc for every row of your center; if you worked 100 rows, place 100 sc), sc 3 in the corner last st, sc evenly across foundation chain edge (101), sc 3 in corner, sc evenly up opposite side edge (100), sc 2 into the final top corner to join to first sc—join with sl st (this creates a neat rectangular edge to anchor the shell rounds)
Info :
On the edge round, count stitches as you work to ensure even spacing. Aim for roughly equal spacing top-to-bottom on long sides so shell clusters will distribute evenly. If necessary, add or subtract a few sc along the sides to reach an even count divisible by your shell repeat (see next section). Place three sc in each corner to maintain a nice square corner and allow shells to sit well.
— Join Round in Cream (Setup for Scallops) :
Info :
Join Cream yarn with sl st to any side sc about 10 stitches from the corner. Work a single round of cream in sc to create a contrast ridge and provide a stable base for shell clusters. This round also neatly hides the Dusty Rose edge and gives a crisp transition.
Round 1 :
With Cream, join with sl st, ch 1, sc in same st and in each sc evenly around the entire rectangle, placing 3 sc in corners, join with sl st to first sc (approx 402 sc depending on side counts)
Info :
Exact stitch counts depend on your side counts; what's essential is that you work a continuous sc round and maintain 3 sc in each corner. If you have an odd/even mismatch, add 1-2 extra sc along the long side to make the count work out for shell repeats. Mark the centers of each long side with a removable marker to orient your shell pattern later.
— Scalloped Shell Edging: Setup & Repeat Notes :
Info :
The scalloped shell edging is worked in two rounds of cream to build depth, followed by a final scallop shaping round. Shell = 5 dc in same st (5-dc shell) worked into spacing points created by an interleaving round. The pattern below assumes you will place shells evenly along each long side and place half-shells into corner groups so edges join smoothly. If your counts differ slightly, space shells evenly and use 2-ch spaces between shells to keep them regular.
Round 2 :
Ch 3 (counts as dc), *sk 2 sc, dc in next sc; ch 2; rep from * along the long side only (work across the long side scs only), when you reach the short end corner, leave approx 2 sc and work a triple increase of dc clusters in corner adjustment as directed below; fasten off at last corner. (Place dc clusters spaced along long side; exact count depends on side length)
Info :
This round creates 2-ch spaces where the shells will be anchored. On short ends, allow for extra dc clusters to maintain pattern continuity. If you prefer, work this as a continuous round around the whole rectangle ignoring corner special instructions, but placing shells only on long sides is how the sample was constructed.
Round 3 :
Join Cream at start of a long side 2-ch space, ch 3 (counts as dc), into each 2-ch space work (5 dc) shell cluster, *sk next 2-ch sp, sc into next sc (between 2-ch sps) to anchor; rep across long side. At each corner, work (sc, ch2, sc) into the 3 sc corner group to bridge to the short end shells. Fasten off and weave in ends
Info :
At this stage you will have a line of 5-dc shell clusters along each long side. Check that shells align across both sides. If shells appear too tight, block the runner gently. If your shells are too wide and overlap, reduce from 5-dc to 4-dc shells next time or space shells with an extra sc between anchors.
— Shell Round Detailed Step-by-Step (Work Each Long Side) :
Step A - Anchor Round :
With Cream, join with sl st into the base sc at the long side approximately two sc from the corner. Ch 1, sc in same base sc, *ch 2, sk 2 sc, sc in next sc; rep across the full long side until you are two stitches from the opposite corner. End with sc, ch 1. Do not fasten off. (This creates ch-2 anchor loops for shells)
Info :
Work the anchors gently and count the anchor loops. Aim for 18-22 anchor loops per long side depending on your runner length; this will produce evenly spaced scallops. If you have fewer anchors, shells will be larger; if you have more, they will be finer and more delicate.
Step B - Shell Placement Round :
Turn to work shell round: Join with sl st to first ch-2 loop, ch 3 (counts as dc), work 4 dc into same ch-2 loop (total 5 dc = shell), sk next ch-2 loop, sl st into the next sc between anchors to settle base; rep across long side. At the corner, work a special corner shell: sk to the corner sc, sc 3 in corner sc group (3 sc), ch 2, sc 3 to form a round corner, then continue shells down next long side. Fasten off at end. (Shell clusters: 5 dc each; corner groups: sc 3, ch2, sc3)
Info :
Count shells as you go. If you have 20 anchor loops, you will place 10 shells (every other loop) if you skip one loop between shells; adjust to preference. For the sample runner, spacing was roughly 1 shell every 2 anchor loops which yields bold scallops similar to the photo.
— Optional Second-Layer Shells for Depth :
Info :
To get the fuller layered scallop look from the image, work a second row of shells offset between the first shells so that the second-tier shells fill gaps and create the petal-like layers. This is optional but recommended for a more textured antique scallop effect.
Second Layer Round 1 :
With Cream, join behind any shell on the first layer at the mid-point of the 5-dc shell using sl st at the 3rd dc of a shell, ch 3 (counts as dc), work 5 dc into the space between two base shells (this fills the valley), sl st into the next midpoint of the next shell to anchor; rep around both long sides and short ends as desired; fasten off. (Creates layered scallop effect)
Info :
Working into midpoints makes the scallops appear thicker and more petal-like. Use your fingers to fan shells outward as you stitch so each layer sits slightly above the previous. Block after finishing this round to permanently shape scallops.
— Short-End Finishing (Corners & End Scallops) :
Info :
Short ends require gentle shaping so scallops don't bunch. After you complete long-side shells, work small fan shells on short ends: place (3 dc, ch 2, 3 dc) into central ch space across the end, separated by sc anchors. This yields neat end scallops that echo long-side shells.
End Round :
With Cream, at each short end, identify the center sc. Into that sc, work (3 dc, ch 2, 3 dc) to create a semicircular fan. On each side of this fan sew sc anchors evenly to tie it to adjacent long-side shells. Repeat on both ends. Fasten off and weave in ends. (3-dc fans on ends)
Info :
If your ends feel tight, add an extra sc or single-dc bridge at the end seam to ease tension. You can also work a final border of sc around the entire piece to tidy up any uneven edges before blocking.
— Final Edging & Clean-Up Rounds :
Final Round 1 :
With Cream, join with sl st anywhere and work a neat finishing round: sc in each dc and sc across the scallops, placing (sc, sl st) around the edge to create a tidy perimeter stitch; place 2 sc in each valley where two shells meet to even the edge. Join with sl st and fasten off. Weave in all ends securely. (This tidy round tidies scallop edges)
Info :
Use a yarn needle to feed ends back through the backs of the shells so there are no visible tails. Trim neatly. If desired, add a small row of slip stitch around each scallop ridge to define petals, using a slightly smaller hook (4.0 mm) to get crisp stitches.
Blocking :
Lightly mist the runner with water and pin scallops out on a blocking board to set shape. Use rustproof pins to pin each scallop point and edge evenly. Allow to dry fully before removing pins. Blocking dramatically enhances shell definition and flattens small bumps.
Info :
For cotton yarn, blocking is particularly effective and will make the scallop shells sit properly while preventing future curling. If you do not wish to block, you can still steam-block lightly with an iron using a cloth between iron and fabric, but do not press down directly on yarn.
— Customization Guidance :
Info :
To lengthen: add sets of 4 center rows in Dusty Rose per extra 3/8"–1/2" length wanted. To widen: increase the foundation chain in multiples of 2 to keep symmetry for ch-2 shell anchors. To change shell size: reduce shells from 5-dc to 4-dc for finer scallops or increase to 6-dc for very bold scallops. Replace half-double crochet center with single crochet for denser fabric or double crochet for a lighter drape.
Info :
When changing colors mid-border, break yarn and rejoin with a clean knotless join or use a tiny sl st connection to avoid bulky joins at visible edges. Always weave ends into the backs of shells or under sc rounds to keep the front clean.
— Troubleshooting Common Issues :
Info :
If scallops pull inward, check that you placed 3 sc in each corner and that shells are not packed too closely. If scallops are floppy, consider using a slightly smaller hook for the shell rounds or adding a second-layer shell as instructed. For uneven shell spacing, remove the shell row and re-space anchor loops to be even; it’s worth redoing for a symmetrical look.
This elegant scalloped table runner brings a timeless handmade charm to any table setting. The combination of a textured dusty-rose center and delicate cream scallops creates a piece that's both functional and decorative. Each scallop is shaped to give a soft, vintage-inspired finish that looks wonderful year-round. I hope making this runner becomes a lovely, relaxing project that brightens your home! 🧶🌿