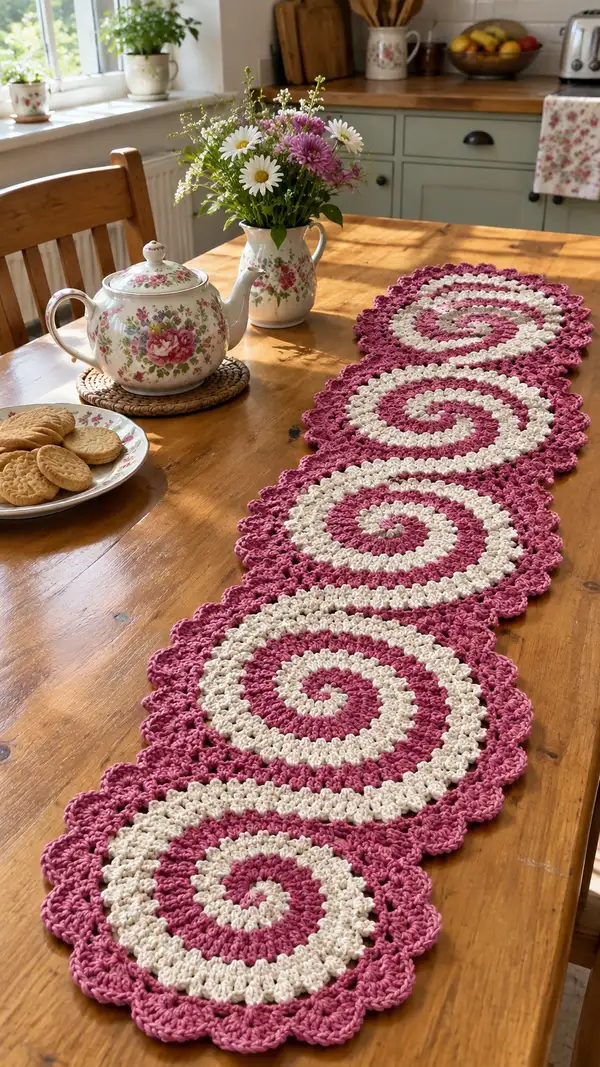
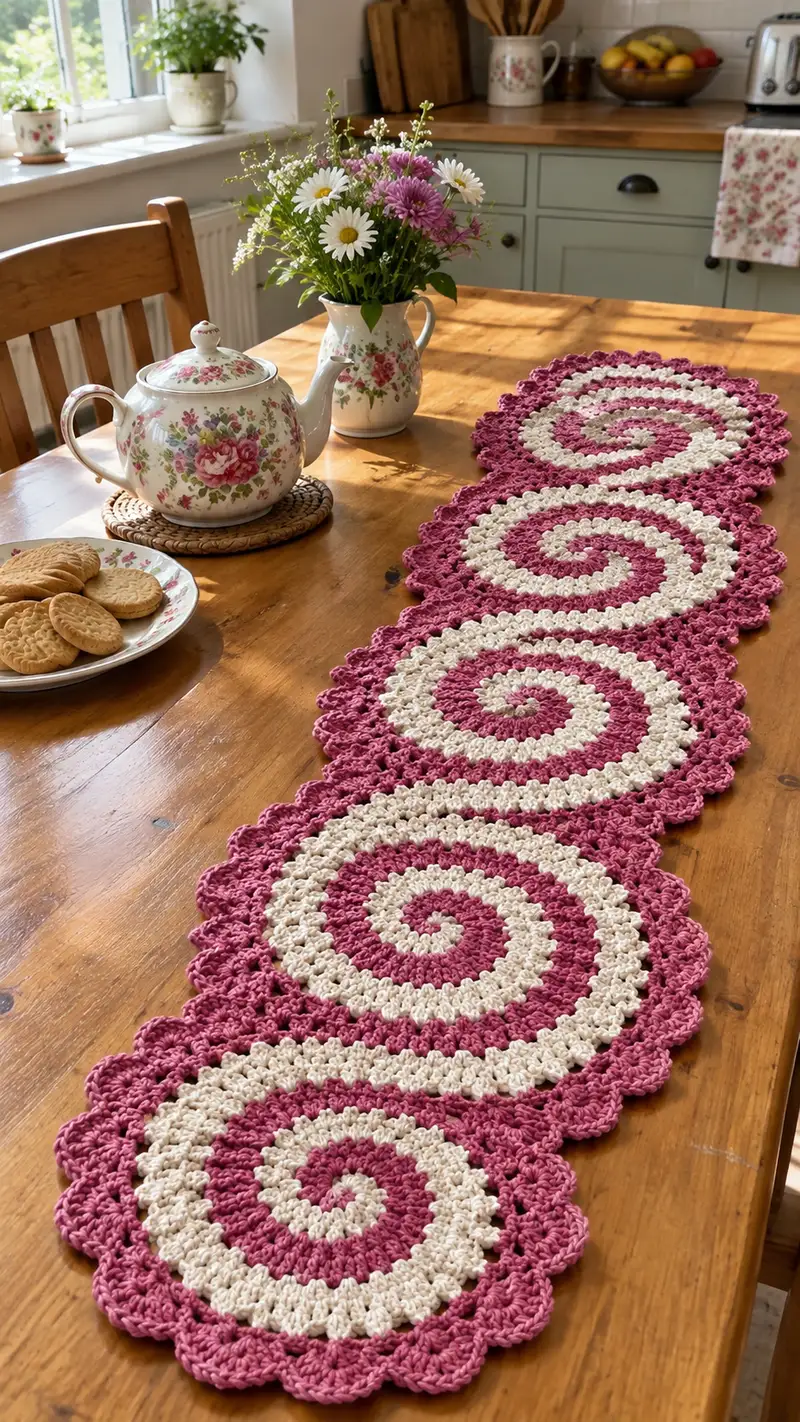
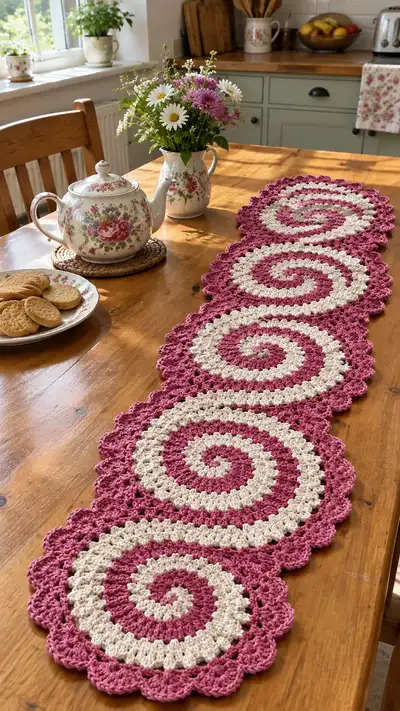
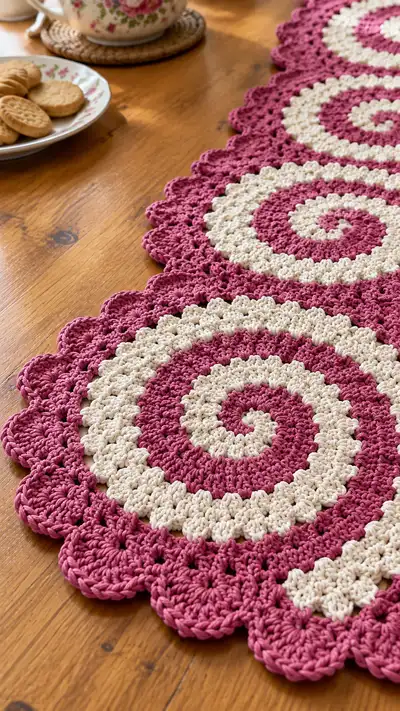
Create a charming spiral circle table runner made from four joined circular motifs with alternating rose-pink and cream bands, finished with a scalloped edge. This runner features textured V-stitch and shell detailing that lay flat and make a lovely kitchen or dining table accent. The pattern uses moderately simple stitches but requires careful color changes and joining for a polished finish.
Progress Tracker
0% Complete
— Overview :
Info :
This pattern describes a single circular spiral motif and then repeats it to create four identical motifs which you will join to form a table runner. Each motif is worked flat in the round and features alternating color bands (Rose and Cream) followed by a scalloped edge. Carefully follow color changes and placement instructions to reproduce the spiral look. Use stitch markers for round starts and pin motifs before joining to keep scallops aligned.
— Motif 1 (Make 1) :
Round 1 :
Make magic ring, 6 sc in ring (6)
Round 3 :
(1 sc, inc) x 6 (18)
Round 4 :
(2 sc, inc) x 6 (24)
Round 5 :
(3 sc, inc) x 6 (30)
Round 6 :
(4 sc, inc) x 6 (36)
Round 7 :
(5 sc, inc) x 6 (42)
Round 8 :
(6 sc, inc) x 6 (48)
Info :
At the end of Round 8 you will have 48 stitches. This is the stable base count for motif rounds going forward. Keep a marker at the beginning of round to maintain sequence. This round completes the small domed beginning; switch to texture rounds next.
Round 9 :
Change to Rose-pink. *3 sc, shell in next st* rep x12 (48). (Shell = 3 dc, ch1, 3 dc in same st) Note: Shell is worked into one stitch to preserve count.
Info :
Work shells into the stitch designated; each repeat uses 4 base sts (3 sc + 1 shell-stitch base) giving 12 repeats of 4 = 48 total base points. This preserves the round stitch count while creating a textured band.
Round 10 :
1 sc in each st across (48)
Round 11 :
Change to Cream. *3 sc, shell in next st* rep x12 (48)
Info :
Alternate colors every two rounds to form bold contrasting spiral bands. Carry the unused yarn neatly across the back if you plan to avoid weaving too many ends, or fasten off and weave in ends for a cleaner finish.
Round 12 :
1 sc in each st (48)
Round 13 :
Change to Rose-pink. *2 sc, shell, sc* rep x12 (48) (worked as: 2 sc in next two sts, shell in next st, 1 sc in next st)
Round 14 :
1 sc in each st (48)
Round 15 :
Change to Cream. *1 sc, shell, 3 sc* rep x12 (48)
Info :
These alternating arrangements change the visual rhythm of the round and create the illusion of a spiral when multiple motifs are placed side by side and when color placement is offset. The shell remains worked into a single base stitch to maintain stitch count consistency.
Round 16 :
1 sc in each st (48)
Round 17 :
Change to Rose-pink. *shell in next st, 3 sc* rep x12 (48)
Round 18 :
1 sc in each st (48)
Round 19 :
Change to Cream. *3 sc, shell in next st* rep x12 (48)
Round 20 :
1 sc in each st (48)
Info :
At this point you should see clear concentric bands in alternating colors. If you want a stronger spiral effect, offset round starts slightly for motifs that will be joined — instructions for offsetting motif starts are given later in the joining section.
Round 21 :
Change to Rose-pink. *2 sc, shell, 1 sc* rep x12 (48)
Round 22 :
1 sc in each st (48)
Round 23 :
Change to Cream. *1 sc, shell, 2 sc* rep x12 (48)
Round 24 :
1 sc in each st (48)
Round 25 :
Change to Rose-pink. *shell, 3 sc* rep x12 (48)
Round 26 :
1 sc in each st (48)
Info :
Rounds 9-26 create the broad textured banding visible in the motif. If your rounds begin to ripple or cup, block lightly or adjust hook size: tighten tension slightly if fabric is too loose or use a smaller hook for the scalloped edge rounds.
Round 27 :
Change to Cream. *2 sc, shell, 2 sc* rep x12 (48)
Round 28 :
1 sc in each st (48)
Round 29 :
Change to Rose-pink. Work in BLO for a subtle ridge: 1 sc in each st BLO (48)
Info :
Working the round in BLO creates a faint ridge which helps define where the scalloped edge will begin and gives a neat base for shells. If you prefer a flat edge skip BLO and work regular sc.
Round 30 :
Change to Rose-pink (if needed). *sc in next 2 sts, shell in next st (shell = 5 dc in one st), sk 1 st* rep x12 (48) Note: This sets scallop spacing (each scallop uses 3 base sts effectively: 2 sc + shell base)
Info :
Scallop pattern is established so that each scallop occupies 3 base stitches (2 sc plus 1 shell base). With 48 base stitches you will create 16 scallops evenly spaced around the motif. Keep tension even so scallops are similar in size.
Round 31 :
In same color: Into the shell of previous round, work: sl st into center of shell, ch1, (1 sc, ch1, 5 dc, ch1, 1 sc) all into center of shell to build a raised scallop; *sk next 2 base sts, into next shell repeat scallop* rep x16 (16 scallops)
Round 32 :
1 sc evenly around over scallops to tidy edge (48 sc) if desired to neaten; or fasten off after Round 31 for a more lacy edge
Info :
Weave in ends for this motif or leave long tails if you plan to join motifs directly with a whip stitch using the tail. Block motif lightly to shape scallops gently outward and ensure motifs are identical before joining. Repeat Motif 1 to make Motifs 2-4, taking care to keep identical stitch counts and scallop shapes.
— Motif 2 (Make 1, Replicate Rnds 1-32) :
Round 33-64 :
Repeat Motif 1 Rounds 1-32 exactly. Important: To produce a staggered spiral visual when motifs are joined, start Motif 2 by shifting the round-start by 3 base stitches. Practically: after completing Round 8, move your round marker 3 stitches forward so the first shell on Motif 2 sits offset to Motif 1. This offset positions colored bands differently and makes the joined runner show a sweeping spiral effect.
Info :
Mark the offset by placing a little removable marker or safety pin under the starting stitch placement before continuing. This small shift will create the subtle swirl alignment that appears in the photo when motifs are laid in sequence.
— Motif 3 (Make 1, Replicate Rnds 1-32) :
Round 65-96 :
Repeat Motif 1 Rounds 1-32 exactly. For Motif 3, offset the round-start by 6 base stitches relative to Motif 1 so the banding aligns as seen in the photo. This further enhances the sweeping spiral when assembled.
Info :
Each motif should measure approximately 10.5-11 inches (26-28 cm) across when using worsted cotton and 4.0mm hook. If your motif is larger or smaller, you can reduce/increase the number of rounds before scalloping to achieve the desired diameter.
— Motif 4 (Make 1, Replicate Rnds 1-32) :
Round 97-128 :
Repeat Motif 1 Rounds 1-32 exactly. Offset the round-start by 9 base stitches relative to Motif 1 for the final motif to maintain the spiral motion across the runner when all four are placed in a row.
Info :
Block all four motifs identically before joining. Lightly mist cotton motifs and use pins to shape scallops so edges are consistent. Allow to dry flat. Consistency of size is crucial for neat joining.
— Joining Motifs (Seam method and rounds) :
Round 129 :
Lay Motifs flat in desired order. With RS facing up, align scallops where motifs meet. Use Rose-pink yarn and tapestry needle to mattress stitch through the back loops of adjacent scallop bases. Join from center outward for stability.
Info :
Alternatively, you may use slip-stitch join: place motifs right sides together, work sl st through front loop only of both motifs along the designated seam area for a neat join. For the photographed runner a visible decorative join that emphasizes the scallops is used—use whip stitch with matching yarn if you prefer a robust seam.
Round 130 :
Join Motif 1 to Motif 2: Align so rounds and scallops meet evenly. Begin at the outer scallop meeting point and work 16 anchor stitches spaced evenly. Sew each shell base making sure you pick up both motif edges in the same place (approx 16 connection points across the overlapping join). Fasten off securely.
Round 131 :
Join Motif 2 to Motif 3 in the same manner. Work from outer edge inward or vice versa, keeping tension consistent so the runner lays flat (no puckers or gaps). Fasten off securely after completing seams.
Round 132 :
Join Motif 3 to Motif 4 the same way. After all joins are complete, press gently with steam or use very light blocking spray to allow seams to relax and become less visible.
Info :
If slip-stitch joining, use the same yarn color as the outer scallop to create a continuous edge. If sewing join, use blind/stitching method and then topstitch with a few visible slip stitches if you want the join to read as part of the decorative edge.
— Runner Final Edge and Finishing Rounds :
Round 133 :
With Rose-pink and RS facing, attach yarn at the seam junction at one scallop. Ch1, sc evenly around entire outside edge of assembled motifs picking up both motif edges where they meet; aim for approx 6 sc per scallop peak or 3 sc per scallop base to produce an even base count—work evenly to total approximately 192 sc around runner (this number may vary slightly by tension)
Info :
When sc-ing around a multi-motif runner, keep stitches evenly spaced. If you run out of space between scallops adjust to 2 sc in tighter areas and 3 sc in larger gaps. The purpose is to create uniform foundation for the final scalloped trim.
Round 134 :
*Sk next 2 sc, into next sc work (5 dc, ch2, 5 dc) to create a large decorative shell, sk next 2 sc, sl st into next sc* rep across edge to create larger scallops; adjust repeats until you reach the starting point and sl st to join
Round 135 :
Switch to Cream if you want a two-tone edge accent. Into each large shell work: sl st into center, ch1, (1 sc, ch1, 7 dc, ch1, 1 sc) to build a bold scallop. Fasten off and weave ends.
Info :
Edge rounds are decorative and forgiving; if you prefer smaller scallops do (3 dc, ch2, 3 dc) shells instead. Blocking at the end will set the scallops to lay outward and give the runner a clean finished look.
Round 136 :
Weave in all ends on the WS using a tapestry needle. Trim any excess yarn close to work. If desired, add a final tidy sl st round in matching color to stabilize scallops.
Info :
Lightly steam-block on a flat surface with pins to shape scallops and ensure the runner lies flat. For cotton yarn do not press directly; use a damp cloth and low steam. Let dry fully before using on table.
— Variation Notes & Size Adjustments :
Info :
To make a shorter runner use 3 motifs, to make longer add more motifs repeating the motif creation and joining instructions. To change motif diameter adjust the number of increase rounds prior to establishing the 48-stable base; each extra increase round (patterned increases) will add roughly 1-1.25 inches (2.5-3 cm) to the motif diameter depending on yarn and tension. For a denser runner use a slightly smaller hook for the motif rounds and a slightly larger hook for the scalloped edge if you want more pronounced scallops.
Info :
Color change tip: When changing colors every two rounds, carry the yarn up the inside of the work every other round to minimize ends. Bring the new color through in the stitch where the round begins and twist yarns together at color join to lock ends for a cleaner finish.
Info :
Counting recap: Motif rounds 1-32 (32 rounds each) x 4 motifs = 128 rounds. Joining and edging rounds add approximately 8 more numbered finishing rounds to bring the overall pattern over 135 distinct rounds for a thorough, repeatable process.
This spiral circle table runner brings cozy charm to your dining table with handcrafted texture and delicate scalloped edges. Each circular motif is a little work of art, and together they form a flowing, spiral-inspired runner that brightens any space. The pattern is versatile; make more motifs for a longer runner or change colors to match seasonal decor. 🧶✨ Give yourself a relaxing weekend project and enjoy the satisfaction of arranging your handmade runner on the table. Happy stitching! 🍵