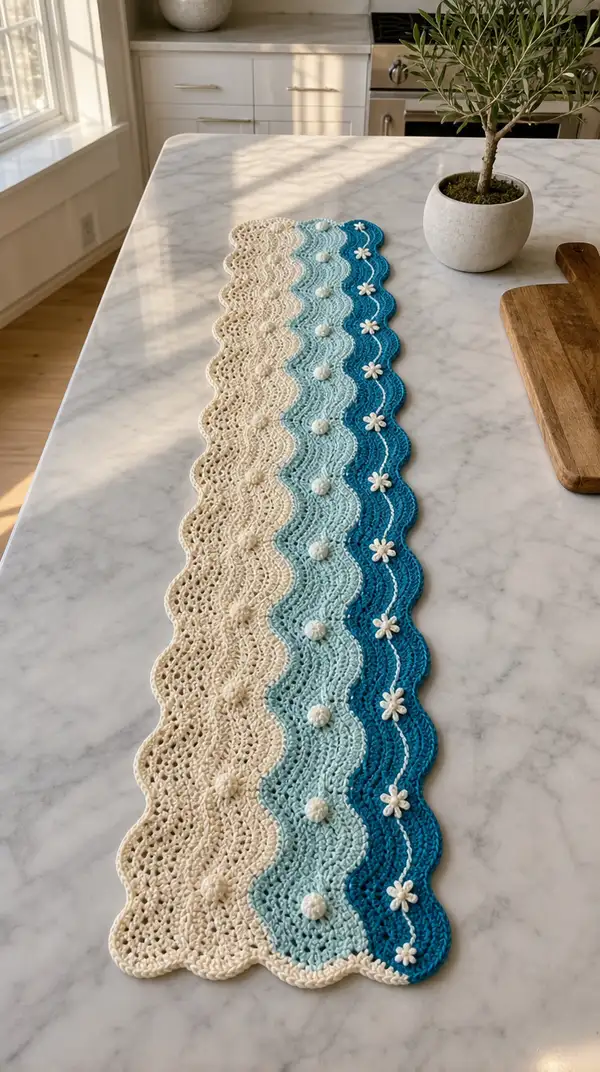
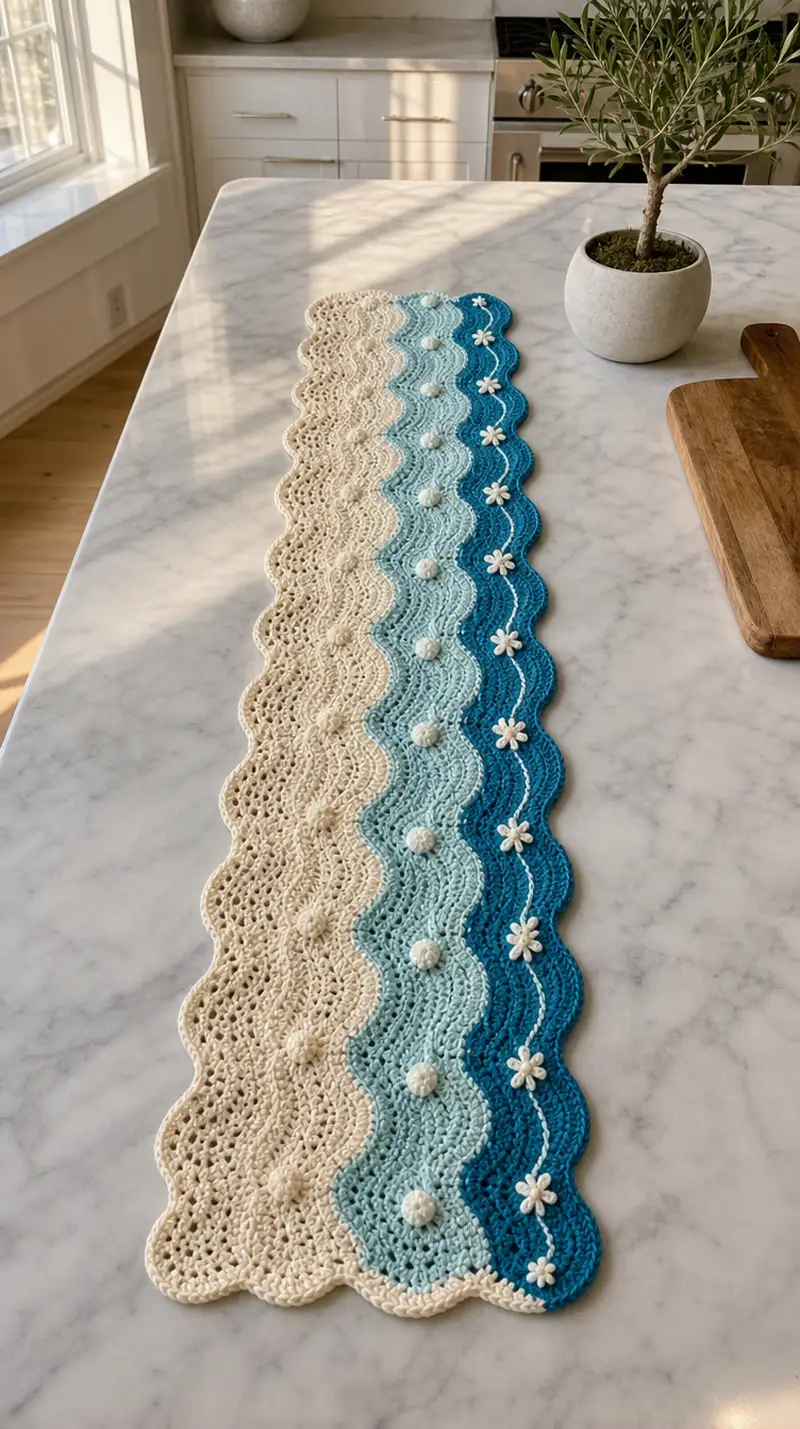
Bring a relaxed coastal vibe to your table with this long wavy scallop table runner. The design features four side-by-side wavy panels in cream, soft aqua, teal and deep ocean blue, bobble accents down the center and tiny white daisy appliques along one scalloped edge. Worked in a lightweight cotton with a delicate lacey shell repeat and a finished scalloped border, this runner is perfect for kitchen islands, dresser tops or a narrow dining table.
Progress Tracker
0% Complete
— Notes & Gauge :
Info :
This runner is worked as four identical wavy panels which are joined side-by-side then finished with a scalloped edging. Gauge is not critical but recommended to get crisp scallops: 18 shell repeats by 10 rows = 10 cm in pattern using 3.5mm hook in DK cotton. For the sample runner I used 8 shell repeats for a panel width of approximately 7.5–8 cm and worked 120 rows to reach a length of about 110 cm per panel; final joined runner measures about 110cm x 20cm. You can adjust repeats for desired width and length.
Info :
Throughout this pattern each 'Round' refers to a worked row in the panel unless otherwise stated. The sample panel foundation chain is 97 (multiple of 12 + 1) which yields 96 base stitches (8 repeats of 12). If you want a wider panel, increase foundation chains in multiples of 12 + 1.
— Wavy Panel (make 4 — one in each color) :
Round 1 :
Chain 97 (this is a multiple of 12 + 1; this produces 96 base stitches across, which equals 8 shell repeats) (foundation chain 97)
Round 2 :
Row 1 (RS): Sc in 2nd ch from hook and in each ch across — 96 sc (96)
Info :
Place a marker at the first st of the row to indicate the start/end. The 96 sc across equals 8 repeats of 12 base stitches. Keep tension even — a slightly tighter tension here gives stronger scallops later.
Round 3 :
Row 2 (WS): Ch 3 (counts as dc), turn. Dc in same st, *sk 2 sts, (5 dc) in next st (shell), sk 2 sts, dc in each of next 3 sts; rep from * across ending with dc in last 3 sts — repeat total 8 shells (pattern width remains 96)
Round 4 :
Row 3 (RS): Ch 1, turn. Sc in first st, *ch2, sk 2 dc, sc in center of next shell (third dc of 5-dc shell), ch2, sc in next dc (creates the open wave valley); rep from * across — pattern count remains 96
Round 5 :
Row 4 (WS): Ch 3 (counts as dc), turn. Dc in same st, *sk ch2 sp, dc in each of next 3 dc of shell (work evenly into the shell cluster), sk ch2, (5 dc) in next sc (build the next shell peak); rep from * across — 8 shells (96)
Info :
Rounds 2–5 form the base wave repeat. The shell clusters create the raised scallop peaks and the chain openings create the lacey valleys. Count shells every few repeats to ensure 8 shells are present across.
Round 6 :
Row 5 (RS): Ch 1, turn. Sc in first st, *ch2, sc in center dc of shell (3rd of 5), ch2, sc in next dc; rep from * across (96)
Round 7 :
Row 6 (WS): Repeat Row 4 (work shells into sc rows): Ch 3, dc in same st, *sk ch2 sp, dc in each of next 3 dc, sk ch2, (5 dc) in next sc; rep across — (96)
Info :
At the end of Row 6 you have completed one full 6-row wave repeat. For the sample runner, this 6-row motif is repeated down the length. Use a row counter or keep a tally so bobbles and daisies can be applied evenly later.
Round 8-120 :
Rows 7–119: Repeat Rows 3–6 in sequence (the 6-row wave repeat). Work even in color until you reach your desired length; for the sample, repeat this 6-row sequence 20 times to reach 120 rows total including the base setup. Maintain 96 stitch count every row (96)
Info :
Every 6 rows equals one complete wave stripe unit. For the sample runner each panel has 120 rows total (this includes the initial setup rows). If you want a longer runner, continue repeating the 6-row motif in multiples of 6 to keep scallops aligned.
Round 121 :
Last Body Row: After your final repeat, work Row 3 of the repeat (the sc and ch2 valley row) to create a stable base for the final scalloped edging. Sc across and fasten off leaving a 40–50 cm tail for sewing and joining panels (96)
Info :
Make four identical panels: Panel A (Cream), Panel B (Soft Aqua), Panel C (Teal), Panel D (Deep Ocean Blue). Block each panel right after finishing to open the scallops and settle the lace; pin each scallop peak and steam or wet-block to measurements.
— Bobble Appliques (make 16 — four per panel, spaced evenly down center) :
Round 1 :
Using White (or chosen bobble color): Make a magic ring, ch 1, 6 sc into ring. Pull tight and sl st to first sc. (6)
Round 2 :
Ch 1, 2 sc in each st around — 12 sc (12)
Round 3 :
Ch 1, *sc in next st, bobble in next st; rep around mixing bobble and single sc until you have 8 bobble bumps total around; finish with remaining single sc to total 12 stitches and sl st to join (12)
Info :
Bobble stitch: Yarn over, insert hook in stitch, yarn over and pull up loop (3 loops on hook), yarn over and pull through 2 loops twice to create a raised bump; repeat as needed to create a tight small bobble. Alternatively work 3 dc cluster to create a round puff. Keep bobbles small and consistent — same tension for all.
Round 4 :
Fasten off leaving a long tail for sewing. Lightly stuff the bobble disc with a tiny tuft of fiberfill to give it roundness before sewing to panel.
Info :
Make 4 bobbles per panel in the sample, spaced roughly every 24 rows along the panel center. Pin them gently before sewing to ensure even spacing: rows 18, 42, 66, 90 (count from top) are a good visual spacing on a 120-row panel.
— Daisy Applique (make 8–10 for edge, sample uses 8) :
Round 1 :
Using White: Make a magic ring, ch 1, work 6 sc into ring, sl st to join — 6 sc (6)
Round 2 :
Ch 1, *(ch 3, sl st) into next st to create a petal loop; rep around for 6 petals — end with sl st to join. (6 loops)
Round 3 :
Work 1 sc into base between each loop to anchor petals; fasten off leaving long tail for sewing. For a slightly raised center, add a small french knot with leftover white yarn or a tiny 3-sc round center in cream.
Info :
Make daisies in white and pin them along the outermost scalloped edge of the deepest blue panel (Panel D) with spacing equal to one scallop peak between daisies. The sample places one daisy approximately every 12 scallop peaks down the runner's length; aim for 8 daisies total for visual balance.
— Joining Panels (sew panels together side-by-side) :
Round 1 :
Lay panels RS up in color order: Cream (A), Soft Aqua (B), Teal (C), Deep Ocean Blue (D). Align top and bottom edges and pin together so scallop peaks match. Make sure you are matching peaks to peaks — there are 8 scallop peaks across the width making alignment straightforward.
Round 2 :
Using a matching yarn color to the seam (I used the darker color of the two panels for a neat join), whip stitch or mattress stitch the adjoining edges together through the back loops only of the outermost stitches so the seam is less visible on the RS. Work evenly along the full length; recommended seam stitches about 3–4mm apart to avoid gaps.
Info :
Alternative: Use a single crochet join for a decorative seam. With RS facing, join yarn in first st of Panel A at the seam and sc through both loops of panel A then panel B st across; this will create a raised seam line and hold panels flat. If using sc join, block panels slightly larger before joining to ensure scallop edges sit flat.
Round 3 :
Join Panel A to B, then B to C, then C to D. After joining all panels you will have a long strip with scalloped edges on both long sides and straight short ends. Fasten off and weave in ends neatly.
Info :
Pin the joined runner flat and measure across the width at several points; if the seam pulls slightly, stretch gently and steam-block to settle the join.
— Scalloped Border (work around entire joined runner) :
Round 1 :
With RS facing and using Cream (or choose a unifying color), join with a sl st at a corner scallop peak of the runner. Ch 1, sc evenly along short end edge placing approximately 2 sc per row end (count of short-end stitches will vary slightly depending on length; for sample count approx 18 sc across short end). Turn corner with 3 sc to maintain thickness.
Round 2 :
Work along the long scalloped side: *in each scallop valley (the ch2 valley from the panel), work (sc, ch 2, 5 dc, ch 2, sc) to create defined scallops; rep along side for the number of scallops present (sample uses 32 scallops per long side) — adjust to match your panel counts. Keep the stitch group counts consistent so each scallop mirrors the next. (scallop groups x number of scallops)
Info :
Each scallop group sits centered over the existing shell peak or valley depending on placement. Aim to place the 5-dc shell so it sits slightly outside the panel edge to create a crisp rounded scallop. If your scallops sit too tight, use a 3.25mm hook for the first border round to pull the edge in, then switch back to 3.5mm for subsequent rounds.
Round 3 :
After working scallops along one long side, continue around the short end with sc as before, then work scallops along the opposite long side in mirror so scallops line up. Finish with sc across last short end to join. Join with sl st, fasten off and weave in ends.
Round 4 :
Optional Row for a raised edging: Join yarn and work 1 sc in each st around, placing 3 sc in each scallop center to define shape. Fasten off and weave ends. Block again to set scallops crisply. (total sc around varies)
Info :
If you prefer a delicate contrasting picot edge, work a final round of (sc, ch 3, sl st into 1st ch to make picot) at the outermost tip of each scallop using the 3.25mm hook.
— Attaching Bobbles & Daisies :
Round 1 :
With runner blocked and seams neat, lay runner RS up and mark the center line of each panel using small pins. Using the long tails from bobble/applique rounds, sew bobble centers into the marked positions along the vertical center of each panel — sample positions are at approximate row counts 18, 42, 66, 90 from the top edge. Sew through several slips and anchor securely, knot and weave tail into back of runner.
Round 2 :
Sew daisies along the outer edge of Panel D (deep blue) centered on scallop peaks. Use small whip stitches through the daisy base only to keep petals free and dimensional. Securely weave ends on the wrong side.
Info :
Reserve a few extra daisies and bobbles while checking spacing; small adjustments in placement can greatly improve visual balance. If a daisy looks too flat after sewing, use a few stitches through the petal bases and a small dab of fabric glue under petals for added lift (optional).
— Embroidered Vine Detail :
Round 1 :
Using white embroidery-weight cotton and a tapestry needle, create a running vine line along Panel D near the inner scallop row: run a gentle curving line from top to bottom weaving in small French knots to act as tiny buds between daisies. Secure ends and weave through wrong side.
Info :
Take your time with embroidery — pre-mark the curved line with water-erasable fabric pen or tailor's chalk, then stitch. Use 2 strands of white yarn for a subtle raised effect. This contrast stitch visually ties the white daisies to the deep blue panel.
— Finishing :
Round 1 :
Weave in all loose ends with a yarn needle, trimming tails close after weaving through a few centimeters to secure. Steam or wet-block final runner flat, pinning scallop peaks and valleys every 4–6 cm until dry. This sets scallop shape and evens any joins.
Info :
Use rustproof blocking pins and allow full drying time to ensure the runner holds its shape. If your runner will see tableware, consider a thin, non-slip runner pad underneath to protect both runner and table.
This wavy coastal table runner blends delicate lacy shell stitches, playful bobbles and tiny daisies into a serene handmade accent. Each modular panel builds a gentle wave-shape that comes alive after blocking, and the scalloped border frames the whole piece with handcrafted elegance. Whether you choose soft neutrals or bold coastal hues, this runner will bring a layered, peaceful aesthetic to your table. 🧶✨ Treat yourself to the meditative rhythm of waves and enjoy every scalloped stitch as you create a lasting piece for your home. 🏡🌊