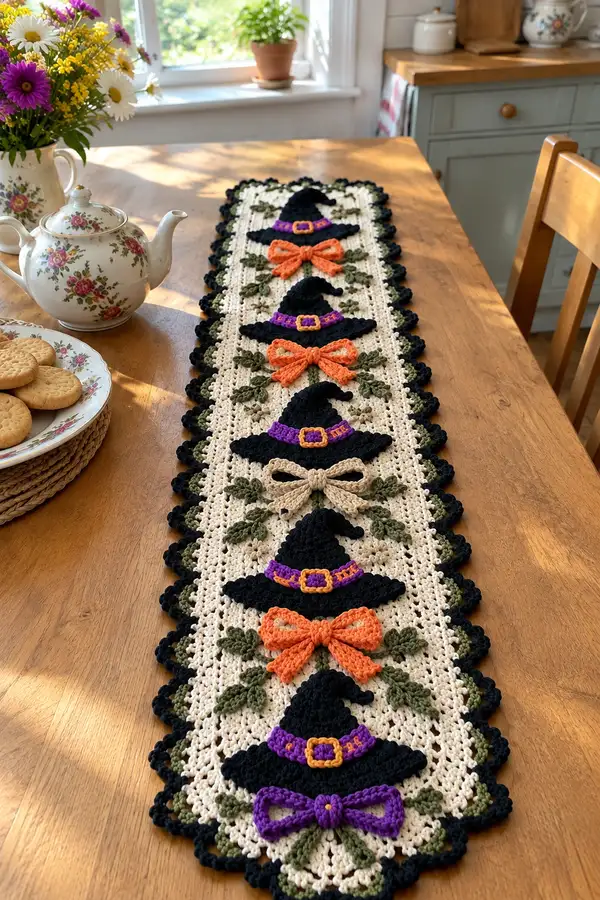
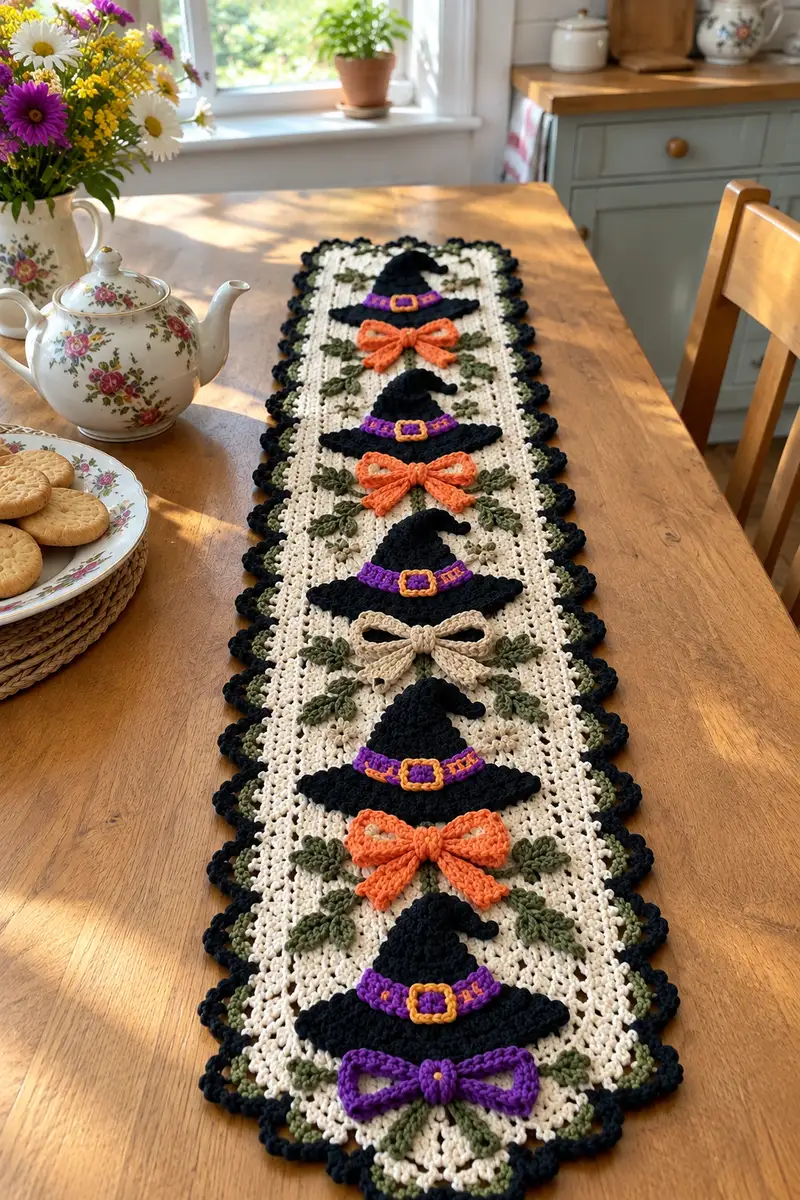
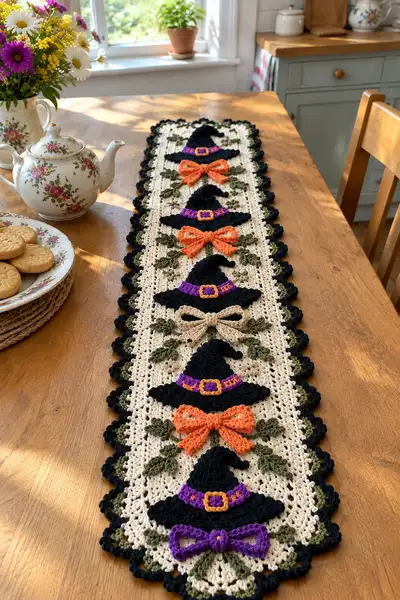
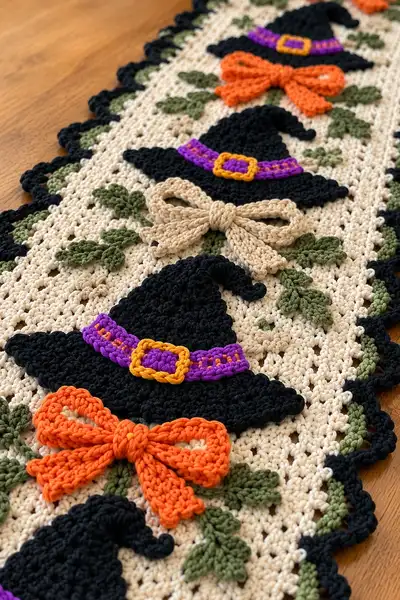
This long, elegant Halloween table runner features a repeating row of 3D black witch hats, playful bows and leafy sprigs set on a creamy lacy background with a scalloped black edge. Each hat is accented with a purple band and golden buckle while contrasting bows in orange, beige and purple add charming pops of color. The runner is made from worsted cotton to give a clean, slightly rustic finish – perfect for autumn tables and cozy seasonal décor.
Progress Tracker
0% Complete
— Materials & Gauge :
Info :
Yarn: worsted weight cotton. Hook: 3.5mm for main panel, 3.0mm for appliques if you prefer crisper edges. Gauge for background mesh: approximately 8 shells = 10 cm/4 in across with 3.5mm hook and suggested yarn. Swatch and adjust hook for your tension to ensure motif spacing.
— Preparation :
Info :
Work panel flat in joined rounds to create a rectangular runner base. The pattern below produces a runner with five central motif repetitions (hat + bow + leaves). To make runner shorter or longer, add or remove motif repeats in multiples indicated in the panel repeat notes.
— Main Panel (worked in rounds along length) :
Round 1 :
Foundation chain: ch 121, join with sl st to first ch to form a ring being careful not to twist (121 ch).
Info :
This chain gives room for five hat motifs spaced evenly; if you want more or fewer, adjust chain in multiples of 24 +1. Place marker at the ch-1 join to mark round start.
Round 2 :
Ch 3 (counts as dc), (sk 2 ch, 3 dc in next ch) around working 3-dc shells into every third chain. Join with sl st to top of ch-3. Final shell count: 40 shells (120 sts effectively).
Round 3 :
Ch 1, sc in same st, *ch 2, sc in center of next shell (between shells)*; rep from * around, join with sl st to first sc. This creates a lacy ladder of ch-2 sps along the length.
Round 4 :
Ch 3, 2 dc in same sp (creating first shell), *sk ch-2 sp, 3 dc in next ch-2 sp*; rep to end, join with sl st to top of ch-3. Shell count remains 40.
Info :
Rounds 2-4 create the fundamental shell/granny mesh. Keep your tension even to ensure the runner lies flat. Use stitch marker at the first shell of each round to verify alignment of shells vertically.
Round 5 :
Ch 1, sc in same st, *ch 2, sc in center of next shell*; rep around, join. (40 sc positions for anchors)
Round 6 :
Ch 3, (2 dc in same sp), *3 dc in next ch-2 sp* around; join (40 shells).
Round 7-10 :
Repeat Rounds 3-6 (i.e., two rounds of sc/ch-2 mesh, then one shell round), creating stable height. After Round 10 you will have a short band of mesh to anchor motifs. (40 shells each shell round)
Info :
At the end of Round 10 confirm shell count and spacing: there should be 40 shell spaces which we will use to align the central motif columns. Mark the start location and also mark every 8th shell to identify motif centers (40 shells / 5 motifs = 8 shells per motif).
Round 11 :
Ch 3, dc in same st, *sk next ch-2 sp, 3 dc in next ch-2 sp*; rep to end, join. (40 shells)
Round 12 :
Ch 1, sc in same st, *ch 2, sc in center of next shell*; rep around, join. (40 sc anchor points)
Round 13-20 :
Repeat Rounds 11-12 four times (alternate 1 shell round, 1 sc ladder round) to build the panel height. After Round 20 the panel will have a stable torso portion for appliques. Keep counts consistent: 40 shells per shell round; 40 sc anchors per ladder round.
Info :
Place temporary stitch markers into the center of the eighth shell, sixteenth, twenty-fourth, thirty-second and fortieth shells - these mark the five motif centers. Attach appliques later to these centers (see applique placement instructions).
Round 21 :
Ch 3, 3 dc in same sp, *ch 1, sk next shell, 3 dc in next shell*; rep to end, join. This begins an open scalloped texture—shells are separated by a ch-1 space to add lacy effect. Shell count remains 40.
Round 22 :
Ch 1, sc in same st, *ch 3, sc into top of next shell*; rep around, join. (40 sc anchor points)
Round 23-28 :
Repeat Rounds 21-22 three times, building a taller mesh that will visually sit beneath the hats. This band provides a little more openwork to let the appliques sit proudly on the surface.
Info :
Block the panel lightly after Round 28 to help keep the mesh flat. When ready, proceed with a final even band where appliques will be sewn. Keep the five center markers in place to guide placement.
Round 29 :
Ch 3, shell worked 3 dc in same sp, *3 dc in each ch-3 sp across*; join (40 shells). This even shell round gives a consistent spine for applique stitches.
Round 30 :
Ch 1, sc in each shell top across (work 3 sc into the top of each 3-dc shell) to create a solid anchor row. (120 sc — 3 sc per shell × 40 shells)
Info :
This 120-sc row is very handy for sewing appliques to: the 3 sc per shell offers dense stitch 'posts' to pick into. Make sure this row sits centered on your design vertically.
Round 31-36 :
Repeat Rounds 21-28 pattern (open shells with ch-1 or ch-3 ladder rows) to mirror the upper half of the runner and prepare the top edge for scalloped trim. Maintain 40 shells each shell round.
Round 37 :
Ch 1, sc in same st, *ch 2, sc in center of next shell*; rep around, join—this neat ladder row smooths the top before border work. (40 sc anchors)
Round 38 :
Ch 3, 2 dc in same sp, *3 dc in next ch-2 sp* around, join. (40 shells). This anchors the top and matches the bottom shell height.
Round 39 :
Ch 1, sc in same st, *ch 3, sc in next shell top*; rep and join. (40 sc actions)
Info :
At the end of Round 39 fasten off cream yarn leaving a long tail for a later invisible join if you prefer to weave up a finishing row. The main panel is complete and measures roughly 92-100 cm long depending on yarn and tension when using the specified chain; width approximately 20-23 cm.
— Scalloped Border (worked in rounds around panel edge) :
Info :
We will add a black scalloped border around the entire runner. Work along the sides and across the short ends with consistent scallops. Begin by joining black yarn to any outer shell top on the long edge; ensure corners have extra shells to turn.
Round 1 :
Join black yarn with sl st to any ch-3 top on the outer edge, ch 1, sc evenly along edge spacing 1 sc per shell top or per 4 rows if necessary; work 3 sc into each short-end corner shell to allow turning. (Approx 240 sc around full perimeter — count will vary with blocking).
Round 2 :
Ch 3, *sk next sc, sc in next sc, ch 2, 5 dc in next sc (scallop made)*; rep across long edges, at ends continue scallops evenly to match corner shape. Join with sl st to top of ch-3. Final scallop count around border will be approx 80 small scallops (20 per long side, 10 per short end) depending on your spacing.
Round 3 :
Ch 1, sc in same st, *3 dc in next scallop center, sc in next space*; rep around. This deepens scallops and gives a defined black edge.
Round 4 :
Ch 1, sl st into each st across to clean up edge if necessary, otherwise fasten off and weave ends. Border is secure and decorative.
Info :
If you prefer a double-tone scallop with olive trim, pick up olive yarn and work a small picot or single crochet row just inside each outer scallop: join olive, ch 1, sc into the top of the inner dc of each scallop across the long sides repeating at corners, then fasten off.
— Appliques: Witch Hat (Make 5) :
Info :
Each hat is worked flat as a small apque in black, then a separate band and buckle are worked in purple and gold. The hat is made from top point to brim with shaping to create the shepherd's hook curl at the tip.
Round 1 :
With black, ch 6, turn. (6 ch)
Round 2 :
Starting in 2nd ch from hook: sc in next 4 ch (4 sc). Do not turn; work along opposite side of foundation chain: sc in remaining 4 ch back to start. Join with sl st to first sc. Total sts: 8 sc (work evenly across both sides).
Round 3 :
Ch 1, 2 sc in first st, sc in next 6 sts, 2 sc in last st (10 sc). Shape begins slightly rounded.
Round 4 :
(1 sc, inc) x 5 across (15 sc).
Round 5 :
(2 sc, inc) x 5 (20 sc).
Round 6 :
(3 sc, inc) x 5 (25 sc).
Info :
Rounds 3-6 form the tapered cone of the hat. Keep stitches flat by not increasing too aggressively beyond Round 6 — the hat top should taper and then maintain for a short length before curving into a brim.
Round 7 :
Sc in each st around (25 sc).
Round 8 :
(4 sc, inc) x 5 (30 sc). Slight outward shaping toward base of the cone.
Round 9 :
Sc in each st around (30 sc).
Round 10 :
(5 sc, inc) x 5 (35 sc). The top will now be broad enough to start forming a shallow point and curl.
Round 11 :
Sc in each st around (35 sc).
Round 12 :
(1 sc, dec) x 11, sc 2 (24 sc). Begin descending slightly to shape top curve toward curl.
Round 13 :
(2 sc, dec) x 6, sc 6 (18 sc).
Info :
To make the hat tip curl, after Round 13 leave a short tail of unworked fabric and create a short raised spiral curl by chaining 4 and slip stitching back along the chain into the base, then sew the chain to the outside of the hat tip to create a little shepherd's crook. Alternatively, work 3 sc decreasing spiral to curl inside.
Round 14 :
Fasten off leaving long tail for sewing. Block gently to shape tip curl and flatness at the brim area. Hat top measures approximately 6-7 cm tall before brim (depending on yarn tension).
— Hat Brim (worked flat in the round) :
Round 1 :
Join black at base edge of hat top (where Round 11 met Round 12) with sl st, ch 1, sc evenly around the last round of the cone to create a firm join line. Count around and obtain the number of sts matching the cone's final round (generally 18-35 depending on your decreases); use this to shape brim evenly. (example 24 sc)
Round 2 :
Ch 3 (counts as dc), 2 dc in same st, *3 dc in next sc* around; join (If 8 groups repeated, total dc groups = number of sc/3 approximately). This produces a broad flat brim with slight waviness.
Round 3 :
Ch 1, sc in each dc around (approx 72 sc if every dc worked as single). This flattens the brim edge and increases density for sewing and attaching the band later.
Round 4 :
Ch 1, sl st into each st around to tidy edge, fasten off and weave in ends. Brim should measure roughly 9-11 cm across from tip to brim edge depending on yarn and hook.
Info :
Make 5 hat tops and brims. When you block the hat components, pin the brim to a circular template to keep consistent diameter so hats look uniform across the runner.
— Hat Band (purple) :
Round 1 :
With purple, ch 22, join to form small ring (22 ch). This will become a flat band that wraps around hat base (adjust length for your hat size: should fit closely around the hat where brim meets cone).
Round 2 :
Ch 1, sc in each ch around, join (22 sc). If too tight or loose, adjust ch foundation accordingly. Fasten off leaving tail to sew band to hat.
Info :
Sew band around hat where brim meets cone, centering at the front of the hat. Use small, even stitches to secure; the band should sit smoothly without puckering the hat base.
— Buckle (gold/yellow) :
Round 1 :
With gold, ch 8, join with sl st to form small ring (8 ch).
Round 2 :
Ch 1, sc in each ch around (8 sc). Join, then ch 1 and make 8 sc around again to create depth (8 sc). Fasten off leaving long tail to sew over band center as a small square buckle. Alternatively sew two rounds of slip stitch to form a flat square look.
Info :
Sew the buckle centered on the purple band. Optionally catch a tiny bit of purple beneath the buckle to make it look inset. Use gold to embroider a tiny center hole if desired.
— Bow Applique (Make 5 — color variations: orange, beige, purple alternately) :
Info :
Bows are three-dimensional loops sewn to the panel beneath each hat brim. Each bow is worked as two loop petals plus a small knot strip and tails. Light stuffing inside loops gives them lift if desired.
Round 1 :
With chosen bow color, ch 18, turn.
Round 2 :
Work back along chain: sc in 2nd ch from hook and next 15 ch (16 sc). Do not turn. Continue along opposite chain side: sc in next 16 ch back to start. Join with sl st to first sc. Total 32 sc around the oval foundation.
Round 3 :
Ch 1, (sc, hdc, 2 dc, hdc, sc) in first 8 sc to form a loop petal, sl st to join center; fasten off petal. Repeat separate for second petal: make another identical oval petal (so you will work two oval petals total and join later to form a double-loop bow). If you prefer, make both petals from the same foundation chain but this method allows more consistent shaping.
Round 4 :
Make two petal pieces total. For tails: ch 18, sc across returning and fasten off leaving tail to sew. For knot: ch 6, join and sc 6 around for a narrow band to wrap around bow center.
Info :
Assemble bow by overlapping two loop petals with their centers aligned, place tails beneath, then wrap the knot band around the center snugly and sew or tack it closed. Add a tiny dab of stuffing in each loop before closing to get the 3D look. Secure by weaving ends under the knot band.
Round 5 :
Sew bow to panel beneath each hat center using the 120-sc anchor row for secure picking points. Leave slight gap between bow top and hat brim so the hat appears to hover just above bow.
— Leaf Sprig (Make 10-15 sets) :
Info :
Each leaf sprig consists of a short chain stem and 3-4 small leaf clusters worked into the chain and sewn into the background around hats and bows. Use olive green yarn.
Round 1 :
Ch 8. (8 ch stem)
Round 2 :
Starting in 2nd ch from hook: (sc, hdc, 2 dc, hdc, sc) in next ch to form a small leaf cluster. Slide down to next ch position and repeat leaf cluster on alternating sides of the chain at positions 3 and 5. Fasten off leaving long tail for sewing. Each sprig will have 3 leaf clusters along the short stem.
Info :
Sew sprigs to the panel flanking each bow and hat — two mirrored sprigs per motif (one left, one right) to frame the bow. Use small tack stitches to secure center of leaf clusters into the mesh openings created by Round 30 anchor row.
— Small Decorative Dots and Accent Flowers (Optional) :
Round 1 :
With beige or cream, ch 4, join to a little ring, 6 sc into ring, sl st, fasten off. Make small flowers or dots and scatter between hats for extra texture. Use small French knots with embroidery thread for tiny dot centers if desired.
Info :
Use optional accents sparingly; they look best when evenly distributed and not competing with the main hat-and-bow motifs.
— Finishing & Assembly :
Info :
Block the main panel flat and pin down the positions where appliques will be placed (use the center markers from Round 10). Place each hat centered on its 8-shell motif area and pin into place. Position bow beneath each hat, then arrange leaf sprigs to frame each bow symmetrically.
Round 1 :
Sew each hat brim to the anchor row (Round 30) with small whip or mattress stitches; pick up the 3 sc per shell posts to make a strong invisible seam. Leave tip and upper cone slightly raised for 3D effect.
Round 2 :
Sew the purple band around the base of the cone with small invisible stitches; sew the gold buckle to the band front center. Sew band tails to band back if needed to hide ends. Repeat for each hat.
Round 3 :
Sew bows on beneath each hat, securing knot tightly. Sew tails to the mesh using a few stitches to anchor; avoid sewing through the entire bow loop to preserve 3D shape. Add light stuffing if loops need lift before closing knot.
Round 4 :
Sew leaf sprigs either side of each bow using small stitches through leaf centers into the anchor row. Arrange leaves at slightly alternating angles for natural look. Trim excess tails and weave in all ends neatly on the wrong side. Optionally add a small dab of fabric glue under buckles for extra security.
Info :
After sewing all motifs in place, give one final blocking to ensure edges are flat and seams blend. Steam-block lightly or pin out on a damp mat and allow to dry fully.
— Alternate Color & Size Notes :
Info :
To make a shorter runner for a small table, reduce initial foundation chain by subtracting 24 chains per motif removed (adjust multiples of 24 +1). To enlarge, add multiples accordingly. To create a placemat or small table mat use the hat applique instructions and make a smaller background panel sized to your placement.
Info :
If using acrylic or other fiber, gauge will differ and the fabric will drape differently. Cotton gives crisp lace definition and holds shape for appliques best.
This witch hat table runner brings autumn charm to your home with hand-stitched appliques and a cozy lacy background. The layered hats, bows and leafy sprigs give delightful dimension and personality to your table setting. I love how it feels festive yet elegant — a perfect seasonal accent for tea time or dinner. 🧶🍂 Add it to your holiday rotation or gift it to a friend who loves handmade seasonal decor! 🎃