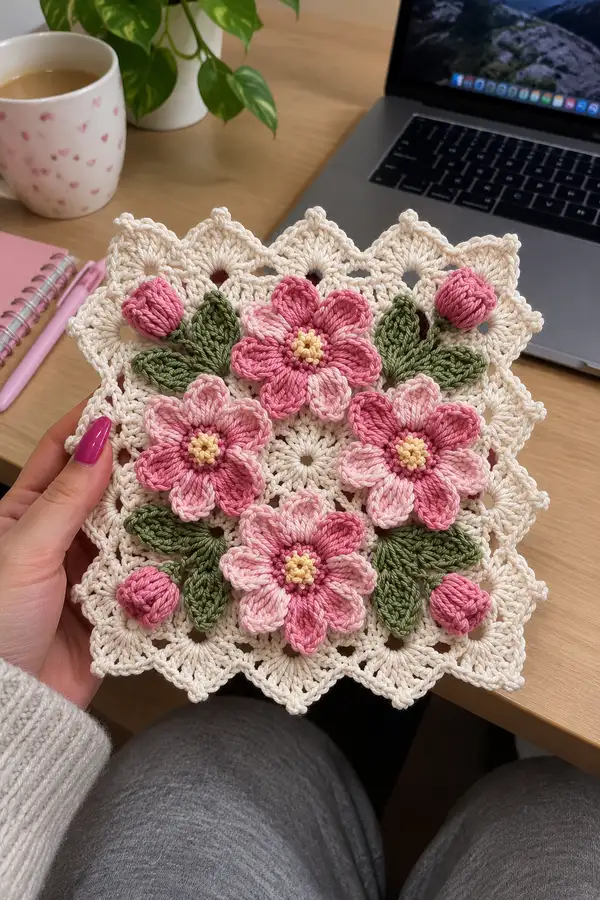
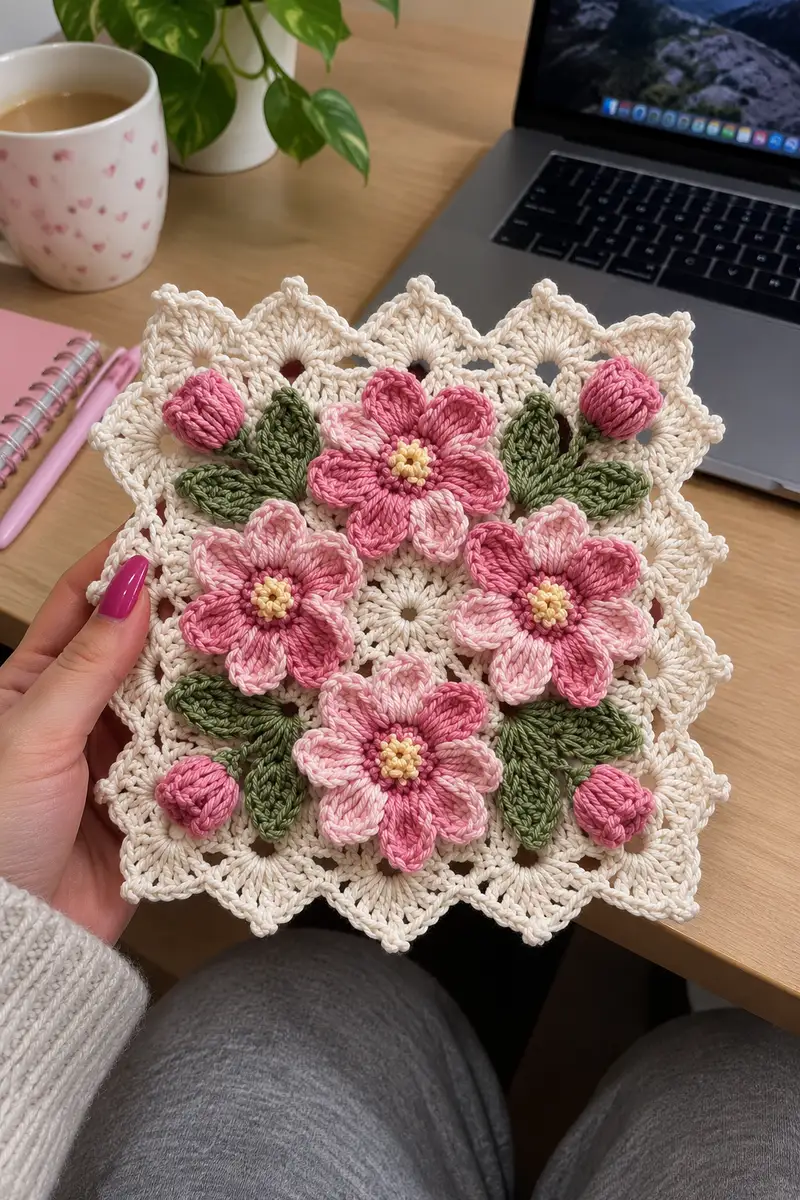
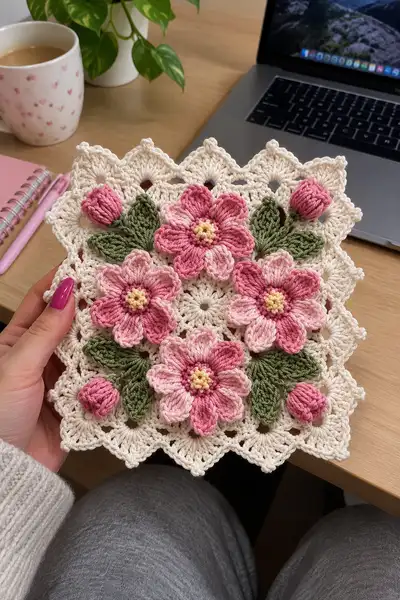
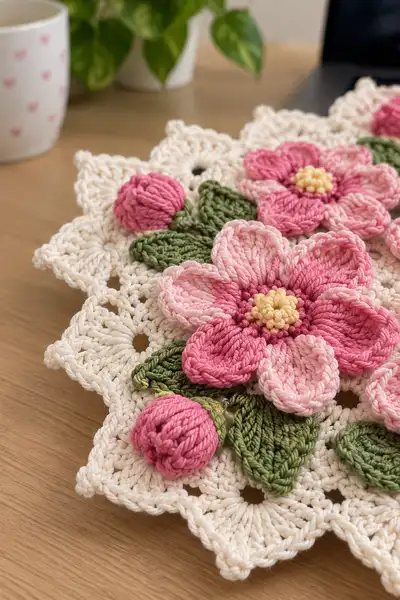
A delicate square doily decorated with raised 3D roses, buds and textured leaves in soft pinks and cream. This decorative panel features layered petal clusters, popcorn-style buds and an elegant scalloped border. Perfect for tabletops, framed art, or a pretty coaster, it combines classic crochet stitches with dimensional applique. The finished piece in the photo shows three full flowers, three buds and multiple leaves on a lacy cream square base.
Progress Tracker
0% Complete
— Materials & Notes :
Info :
Use 100% cotton or cotton blend for crisp stitch definition and good blocking. Tension should be slightly firm so petals hold their shape and the background lies flat. I used a 3.5mm hook for the background and 3.0mm for petals and buds. Exact gauge is not critical, but final square in the photo measures approximately 18cm (7") across.
Info :
Puff stitch (pst) used for petals: yarn over, insert hook, yarn over, pull up loop (repeat 4 times total into same stitch), yarn over and pull through all loops on hook, ch1 to close puff. Popcorn (pop) for centre: work 5 dc in same st, remove hook, insert into first dc, grab loop, pull through to create popcorn, ch1 to secure.
— Center Motif :
Round 1 :
6 sc in magic ring (6)
Round 3 :
(1 sc, 1 inc) x6 (18)
Round 4 :
(2 sc, 1 inc) x6 (24)
Info :
Switch to cream yarn for the lacy center ring. Keep rounds firm but not tight so subsequent rounds lie flat.
Round 5 :
(3 sc, 1 inc) x6 (30)
Round 6 :
Ch3 (counts as dc), *sk 1, dc in next, ch1; rep from * around to create small chain spaces, join with sl st to top of ch3 (15 dc, 15 ch1 sps)
Info :
This round creates small loop spaces that become anchors for the first ring of petals. Keep your stitch counts exact to maintain symmetry.
Round 7 :
*Into each ch1 sp: (1 sc, ch2, 1 sc) ; rep around, join (15 shell spaces)
Round 8 :
Working into the ch2 sps: (2 dc, ch2, 2 dc) in each ch2 sp to enlarge petal bases. Join (15 shells)
Round 9 :
Ch1, sc in same, *ch4, sc in middle of next shell; rep around to form picot-looped ring, join (15 ch4 loops)
Info :
These ch-loops will be used to stitch the small yellow centres and anchor the larger layered petals later. Fasten off cream and set center aside until background is made.
— Background Square Base :
Round 1 :
Join cream to any ch4 loop from center with sl st, ch1, 6 sc into same loop to create a corner cluster (6)
Round 2 :
*Ch3, sk next ch4 loop, 6 sc into next ch4 loop; rep * around to create 5 more corner clusters; after last cluster: ch3 and join to first sc to form square framework (6 clusters)
Info :
We are building a star-like base turning the round motif into a stylized square foundation. Maintain equal tension on ch3 corner chains so corners sit flat.
Round 3 :
Ch3 (counts as dc), in the ch3 corner loop work: (2 dc, ch2, 3 dc), *skip to next corner ch3: (3 dc, ch2, 3 dc); rep for each corner, join to top of ch3 (4 corner shells)
Round 4 :
Work along each side between corners: *(ch1, sk 1 st, dc) across side space to create a delicate mesh; in corner ch2: (3 dc, ch2, 3 dc); rep around, join
Round 5 :
Ch1, sc evenly along side spaces to tidy mesh (approx 12 sc per side), in corner ch2 work (sc, ch3, sc) to maintain corner point, join
Info :
Change hook to 3.5mm if needed. This round begins the even expansion; keep counts per side consistent so the square remains balanced.
Round 7 :
Ch3 (counts as dc), *in next 4 sts: dc; in corner sp: (3 dc, ch2, 3 dc); rep around to continue building sides. Join
Round 8 :
Ch1, sc in same, *(ch3, sk 2 sts, sc) across side spaces to create airy lacy holes; in each corner (sc, ch3, sc). Join
Round 9 :
Work shell clusters into each ch3 across the sides: into each ch3 make (2 dc, ch2, 2 dc). Corners remain (3 dc, ch2, 3 dc). Join
Info :
At this stage the square is taking shape; block lightly if desired to flatten the backbone before adding petals appliques. Leave long tail to stitch centre secure if needed.
Round 10 :
Ch1, sc evenly around entire square, placing (sc, ch3, sc) in each ch2 corner space to keep corners sharp. Count should be consistent on each side (approx 24 sc per side depending on tension)
Round 11 :
*Working in the BLO: 1 sc in each st across one side to create a ridge; in corner ch3 spaces: (sc, ch3, sc); rep around. Join (BLO creates subtle texture beneath appliques)
Round 12 :
Ch3, *dc in next 3 sts, ch1; rep across side; in corners: (3 dc, ch2, 3 dc) ; join
Round 13 :
Sc around to tidy edges and prepare surface for sewing flowers. Fasten off and weave in ends. The background square should now be a symmetric lacy panel large enough to hold three large flowers with spacing as shown.
Info :
Placement suggestion: arrange three large flowers in a triangular formation with buds tucked into two corners and leaves filling gaps. Make sure the center motif remains visible in the square center.
— Large Flower (Make 3) :
Info :
Each large flower is worked in rounds and uses two shades of pink for a gradient. Work centre cluster in yellow, then make two layered petal rounds: inner smaller petals then outer larger petals using puff stitches for height. Use a 3.0mm hook for tighter petals.
Round 1 :
With yellow yarn: 6 sc in magic ring (6)
Round 3 :
Work popcorn centre: *5 dc in same st, remove hook and reinsert into first dc, pull loop through to close pop, ch1; rep into every second stitch to create 6 small popcorn clusters; join (6 pops)
Info :
Popcorn clusters create the slightly raised yellow center. Leave a long tail to sew the flower centre to the background later.
Round 4 :
Join dark pink in a st between popcorn clusters: ch1, sc into same st, *ch3, sc in next space between pops; rep around to create 6 ch3 loops; join (6 loops)
Round 5 :
Into each ch3 loop work petal base: (sc, ch1, sc) to create small petal anchors; join (6 petal anchors)
Round 6 :
Switch to light pink: into each petal anchor make a puff petal: *pst (4 loops) into same anchor, ch1 to close; rep for 6 petals (6 puff petals). Fasten off light pink and weave tail to back of petal to tidy
Info :
Ensure each puff stitch has consistent loops; pull up loops to roughly same height before closing to make petals even. Use a smaller hook (3.0mm) for neat puffs.
Round 7 :
Join dark pink behind first petal base and work a row of sc around the petals, anchoring them to create a stable ring: *sc through the base of petal, sc in space between petals; rep around, join (12-18 sc depending on gaps)
Round 8 :
Outer petal round: join light pink to the top of any petal, *ch1, into same top space: (pst 5 loops) close with ch1 to form larger outer petal; rep around making 6 outer puff petals. Join and fasten off (6 large petals)
Info :
After outer petals are complete, steam-block or gently shape petals with fingers so each sits flat and rounded. Weave in tails neatly to the back and leave long tail for sewing to panel.
Round 10 :
Optional decorative ridge: join dark pink and work crab stitch (reverse sc) around the tips of outer petals to define edges. Fasten off and weave in ends.
Round 11 :
Make 3 identical flowers. For variation, shift inner/outer color roles to create slightly different gradients.
— Small Bud (Make 3) :
Round 1 :
With dark pink: 6 sc in magic ring (6)
Round 2 :
(1 sc, 1 inc) x3 (9)
Round 4 :
Switch to lighter pink: work 3 rounds of sc to build height (3 rounds of sc) (9)
Info :
Bud shaping uses clusters worked in rows to create a rounded closed bud. Keep stitches small and compact. Use only a tiny bit of stuffing (or none) to keep bud firm but flat to sew.
Round 6 :
Into front loops only around: (1 sc in each FLO) to create ribbing texture for petals to wrap; fasten off leaving tail to sew and gather the base to form rounded bud (gather through base and pull tight)
Round 7 :
With green, make small calyx: ch6, join to form small ring, work 6 hdc in ring, sl st to join. Fasten off leaving tail to sew calyx to the base of bud. Make 3 buds.
— Leaf (Make 6) :
Round 1 :
With green: ch10, sc in 2nd ch from hook, hdc in next, dc in next 3, hdc, sc, then work along opposite side of chain: sc, hdc, dc in next 3, hdc, sc, sl st to join (14-16 sts total lengthwise)
Round 2 :
Ch1, sc around entire leaf in BLO to create a defined ridge; in tip work (sc, ch3, sc) to shape point. Fasten off leaving long tail for sewing.
Info :
Make leaves with consistent shape; after sewing to panel, lightly press them with a warm iron through a cloth for a flatter look or shape with fingers for dimension.
— Assembly Prep :
Info :
Arrange pieces on the blocked background before sewing: place one large flower at top center, two at lower left and right to create a triangle. Tuck buds into two corners and position leaves around each flower. Pin pieces in place then sew through the background with matching yarn tails using invisible whip stitch or backstitch.
Info :
Use a yarn needle and the long tails left on flower centres and petals to anchor pieces. Sew centres first, then tack petals down in several places. Sew leaves and buds by stitching through the base and a few stitches onto the background only, not through petals, so they sit slightly raised.
— Border Scallop Edge :
Round 1 :
Join cream at any side stitch: ch3, *skip 1, 5 dc in next, skip 1, sl st; rep along each side; at corners work (5 dc, ch3, 5 dc) into corner sp to keep scallop shape; join
Round 2 :
Work a polished picot edge: *sc in each dc across scallop, at scallop tip: (sc, ch3, sc) ; rep around and fasten off. Weave in all ends and trim close.
Info :
Blocking the finished square after assembly helps petals and leaves sit how you want. Pin scallops out evenly and mist lightly or use shaping steam. Dry flat.
Info :
Final check: trim stray yarn tails and secure by weaving them through several stitches on the back to avoid unraveling when handling or washing.
— Finishing Touches & Variations :
Info :
Optional: add a few French knots or tiny seed beads to the flower centres for sparkle (sew securely). To make a larger panel, create multiple squares and join them with slip-stitch seams, matching flower placement for a repeating motif.
Info :
Alternate leaf shapes: work elongated leaves or use a raised centre rib by working FLO and BLO rounds to create more texture. You can also slightly stuff flowers with thin batting for a plumper look before sewing down.
Finishing this floral square is such a joy — every petal and leaf brings the design to life! The layered petals and puffy buds create beautiful depth and texture that make the piece feel handmade and special. It's perfect as a small framed art piece, a delicate tabletop accent, or combined with more squares for a larger project. 🌸 Pin your placement before sewing and enjoy the slow process of building dimension — the result is incredibly satisfying. Happy stitching and enjoy gifting or displaying your pretty creation! 🧶✨