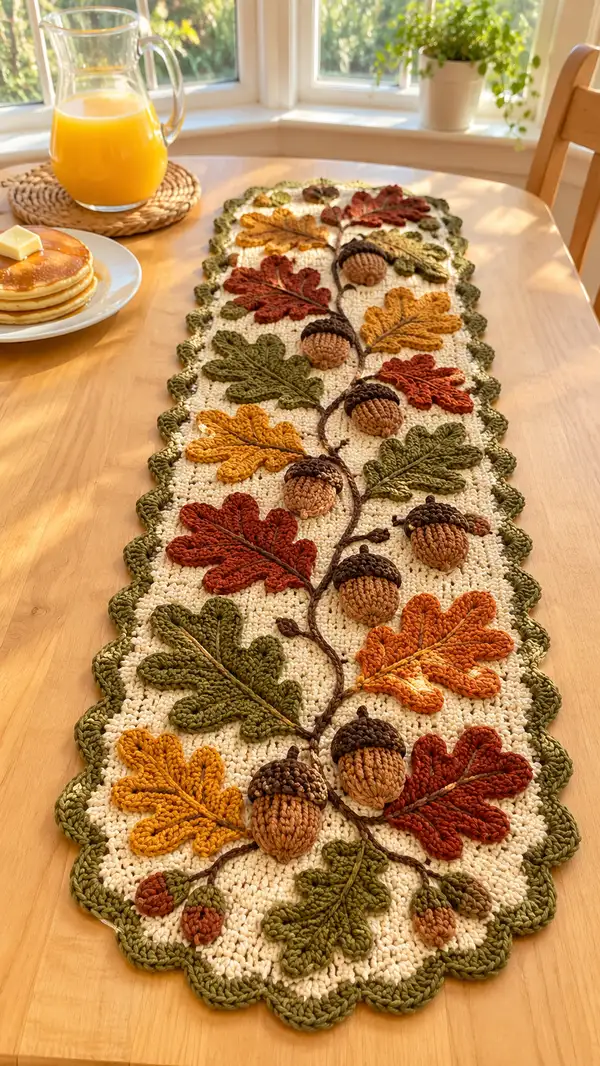
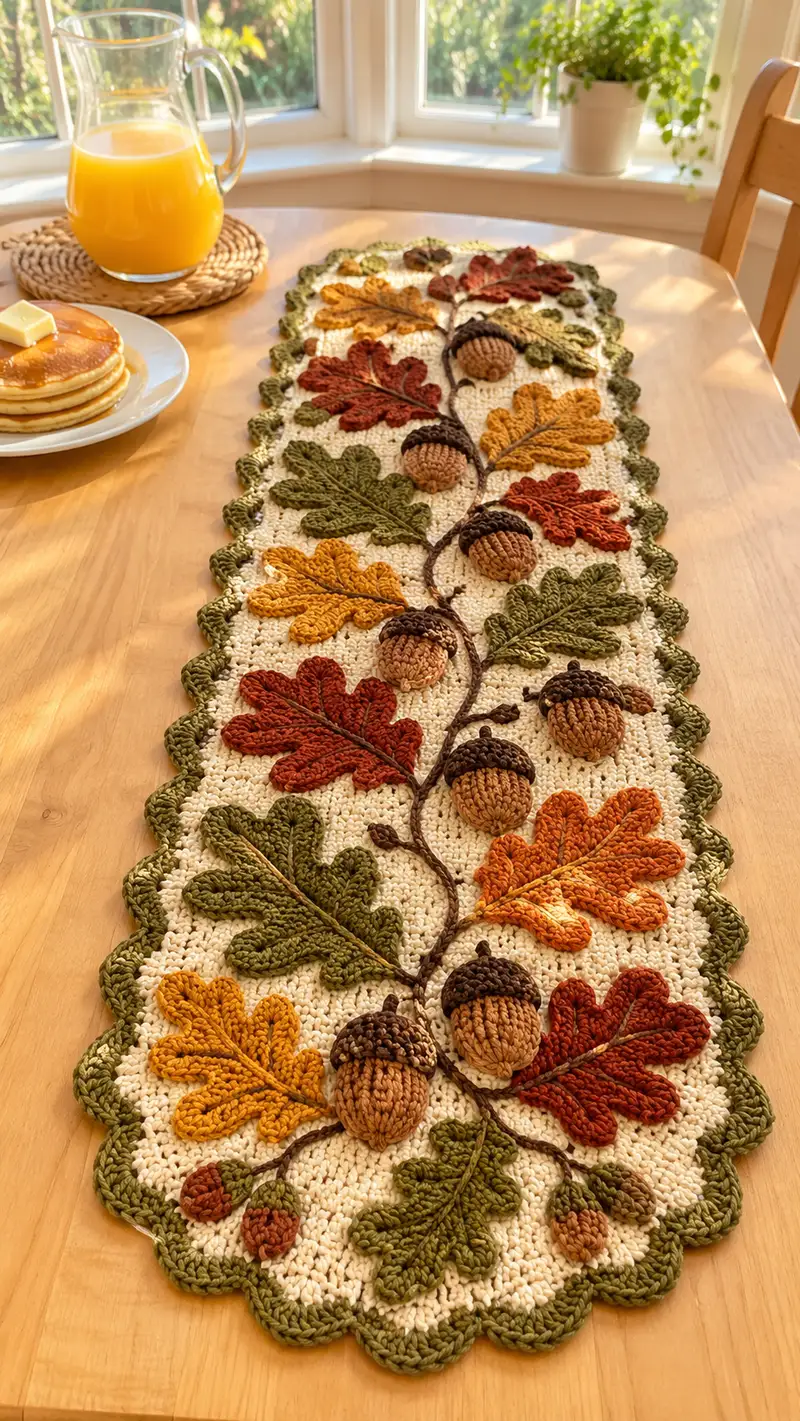
Create a warm, autumn-inspired table runner featuring sculpted 3D acorns, layered oak leaves, and a scalloped green border. This pattern uses textured stitches and surface embroidery to mimic a climbing vine across a cream background. Perfect for fall tables, the runner showcases rich mustard, rust, olive and brown tones with raised appliques for a cozy handmade centerpiece.
Progress Tracker
0% Complete
— Base Panel :
Round 1 :
With cream yarn, ch 71 (this yields a working width of approximately 12-14 inches depending on tension). Join with a sl st to form a loop being careful not to twist foundation chain. Ch 1 does not count as a stitch for this pattern (71)
Round 2 :
Round 1 (working in continuous rnds for seamless edges): 1 sc in each ch around, join with sl st to first sc, place marker at first sc to mark start (71)
Round 3 :
1 sc in each st around (71)
Round 4 :
Change to hdc to create a slightly denser body: 1 hdc in each st around (71)
Round 5-8 :
1 hdc in each st around (71). Maintain even tension to keep panel flat. (71)
Info :
Work the base panel in the round (continuous spiral) to avoid visible seam lines. Use a stitch marker at the first stitch and move it every round. The width and length of the runner are determined by the number of rounds; you can add or subtract hdc rounds to reach desired length.
Round 9 :
1 hdc in each st for 10 rounds to create the main neutral field where appliques will sit (71)
Round 10-18 :
Continue 1 hdc in each st (71). At the end of round 18 your panel will be long enough to begin central motif placement in many runner sizes; continue to round 28 for a standard long runner. (71)
Info :
If you prefer a denser background (to support heavier 3D acorns), substitute 1 sc in each st for rounds 4-18 instead of hdc. Blocking the panel flat after completion will help remove any small waves from continuous spiral work.
Round 19-28 :
1 hdc in each st around (71). Final round 28 finish with a sl st and fasten off leaving a long tail for joining the scalloped border later. (71)
Info :
Mark the center line of your runner along its length with removable stitch markers or pins. This center guide will help you evenly space the vine and appliques. Plan the spacing so acorns fall in the middle third of the width and leaves radiate left and right.
— Oak Leaf (Make 12 total; 3 sizes shown) :
Info :
Make leaves in four colors: olive, mustard, rust, and burnt orange. This pattern makes a medium sized leaf; adjust scale by adding or omitting rows for small/large variants. Work each leaf flat in rows. The stitch counts below create a medium leaf about 4.5-5 inches long when worked with 4.0mm hook and worsted yarn.
Round 1 :
Make a foundation ch 16. Row 1: in 2nd ch from hook, sc, sc, hdc, 3 dc, hdc, sc, sc, (this forms the tip) then continue symmetrically back across chain: hdc, 3 dc, hdc, sc, sc. Turn. (15)
Round 2 :
Ch 1, sc in each stitch across, working 2 sc in the center tip stitch to create a plump tip (16)
Round 3 :
Ch 1, sc 3, hdc, dc 3 into next 3 sts, tr 2, dc 3, hdc, sc across; at the tip work (sc, inc, sc) to widen tip slightly (18)
Round 4 :
Ch 1, sc across working increases at each lobe point: (sc 2, inc) x 6 to form 6 lobes on one side, then mirror on return across the foundation (24)
Info :
Oak leaves have lobed edges; this shaping uses increases (inc) and short clusters of taller stitches for rounded lobes. Work loosely on taller stitches (dc/tr) to keep lobes relaxed, and use sc for the leaf 'vein' center later with surface slip stitch.
Round 5 :
Ch 1, sc in each st across maintaining the outline; at lobes work 2 sc in the base st of the taller cluster to define the indents (24)
Round 6 :
Ch 1, 1 sc in each st BLO across to create a slight ridge along the leaf midline (24)
Round 7 :
Ch 1, sc across decreasing around some lobes: (sc 3, dec) x 6 to shape the outer contour (18)
Info :
For a smaller leaf variant: stop at round 5. For a larger leaf, repeat rounds 4-6 an extra time, adding 6 sts each repeat to expand lobes proportionally. Block each leaf flat and hold the shape with pins while damp or with steam for a clean finish.
Round 8 :
Ch 1, sc around the entire leaf evenly, slip stitch to close and fasten off leaving a 14-18 inch tail for sewing to the base panel (18)
Info :
Using the long tail, sew the leaf to the panel using a running stitch around the base of the leaf, then use surface slip-stitch embroidery in contrasting yarn to create a central midrib running from base to tip. Option: add small vertical stitches radiating outward from the midrib to suggest veins.
— Leaf Variation: Raised Midrib (Optional) :
Round 1 :
After leaf is sewn, with contrasting yarn, work a surface slip stitch along the midline: insert hook at leaf base on RS, sl st to tip, working in small increments to create a raised ridge. (no change in st count)
Info :
Alternatively embroider the midrib using chain stitch with a yarn needle for a more organic ridge; this option requires a few extra minutes but creates a very realistic raised vein that catches light and shadow.
— Acorn Nut (Make 7-8 acorns) :
Info :
Acorn nuts are worked in the round using light brown/tan yarn. Use 3.5mm hook for a dense stitch fabric. Stuff lightly as you decrease to maintain a plump but not over-stuffed shape. Each acorn is about 1.5-2 inches tall when finished.
Round 1 :
MR, 6 sc in MR (6)
Round 3 :
(1 sc, inc) x 6 (18)
Round 4 :
(2 sc, inc) x 6 (24)
Round 5 :
(3 sc, inc) x 6 (30)
Round 6 :
1 sc in each st around (30)
Info :
Begin stuffing very lightly from this point so the nut holds a rounded shape. The acorn nut tapers as you decrease—stuff gradually until it's firm but still squeezable.
Round 7 :
(3 sc, dec) x 6 (24)
Round 8 :
(2 sc, dec) x 6 (18)
Round 9 :
(1 sc, dec) x 6 (12)
Info :
At round 10 the nut is nearly closed. Fasten off leaving a yard of tail to attach to the acorn cap. DO NOT over-stuff; acorns should sit slightly soft to the touch but retain shape.
Round 11 :
Use yarn tail to sew the opening closed with a running stitch or drawstring method. Weave tail through closing sts, tighten, and secure. Hide tail into work. (closed)
Info :
Optionally brush the surface lightly with a dry brush or comb to fuzz the surface for a slightly more natural look, especially when using acrylic that benefits from a brushed finish. Leave the outer surface smooth if you prefer crisp stitches.
— Acorn Cap :
Round 1 :
With dark brown yarn and 3.5mm hook, MR, 6 sc in MR (6)
Round 3 :
(1 sc, inc) x 6 (18)
Round 4 :
1 sc in each st (18)
Round 5 :
Work in BLO: 1 sc in each st BLO around to create a neat edge and cup-like rim (18)
Round 6 :
Surface texture: sl st around working 2-3 sl st in alternating sts to create a textured cup look (18)
Round 7 :
Optional bobble row: *ch 1, [yarn over, insert, yo pull up, yo pull through 2] x2 to make a small bobble, sl st in next st; rep across* (creates nubbly cap). Fasten off leaving long tail for sewing to nut. (18)
Info :
Fit the cap over the closed nut and adjust by easing the cap rim slightly with your fingers. Sew through both cap and top of nut using mattress stitch or whip stitch, catching the nut's closure stitches to anchor the cap. Add a short stem by sewing a short loop of brown yarn at the center top.
— Small Acorn Buds (Make 4 pairs) :
Round 1 :
MR, 6 sc in MR (6)
Round 3 :
1 sc in each st around (12)
Round 4 :
Dec across to 6 sts (6), fasten off leaving tail for sewing. Stuff minimally. (6)
Info :
These tiny buds are used near the leaf bases and along the vine for visual interest. Sew caps as miniature versions of the main cap pattern by working one round fewer and using fewer bobbles.
— Scalloped Border :
Info :
Border is worked with olive green yarn. Join olive to any stitch on the edge of the base panel with a sl st, evenly spacing scallops along the long sides and ends. This edge uses shells of dc to create rounded scallops that echo the leaf shapes.
Round 1 :
Attach olive yarn, ch 2 (counts as hdc). *sk 2 sts, 5 dc in next st, sk 2 sts, hdc in next st; rep from * around, adjusting spacing so that scallops sit evenly. Join with sl st. (number varies based on panel circumference)
Round 2 :
Sl st to center of first shell, ch 1, sc in same st, *ch 3, sc in center of next shell; rep across. This creates the picot wave between shells. Fasten off and weave ends. (no fixed count)
Info :
If your scallops bunch, adjust by adding or reducing the number of shells slightly. Stretch and pin the panel as you sew to ensure scallops sit flat. For a firmer edge, add a second round of sc around the entire edge before working shells.
— Vine Stem and Surface Embroidery :
Info :
The vine is worked using a surface slip stitch technique with dark brown yarn. You may crochet a thin cord and sew it in place, or do a surface chain/loop for a raised stem. Follow the center guide line for placement.
Round 1 :
With dark brown, attach at one short end center. Using a yarn needle and long length of yarn, work surface slip st from one end to the other forming a wavy vine that curves left and right down the runner's length. Keep vine about 6-10 sts wide from center depending on desired look. (no stitch count)
Round 2 :
Where acorns are to be placed, create small offshoot stems: bring yarn up at vine point, ch 4-6 leaving cord on surface, fasten down and continue vine. Pin acorns and leaves to check spacing before sewing. (no stitch count)
Info :
To achieve a raised, rope-like vine, make an i-cord or 3-chain crocheted cord and sew it to the surface with small invisible stitches. This approach gives depth and shadow underneath leaves and acorns.
— Placement & Applique Sewing :
Info :
Lay out leaves and acorns on the pinned runner first. A balanced layout alternates leaf colors and keeps acorns centered along the vine. Use pins to hold each piece until satisfied. Typical layout: 12 leaves in six pairs (left/right), 7 acorns staggered along the center line, and four tiny buds near ends.
Round 1 :
Sew leaves down by working a small running or whip stitch around the leaf base using the long tail. Make sure the stitches capture the base of the leaf and secure it to the fabric without pulling it flat—allow slight lift at lobes for a 3D effect. (no stitch count)
Round 2 :
Sew acorn nuts to vine offshoots: place nut under the cap, position on vine, then sew through both cap rim and nut closure stitches, anchoring into the base panel below to prevent swinging. Secure with several passes. (no stitch count)
Info :
When sewing the acorns, ensure the seam through the nut does not distort the spherical shape. Use small, evenly spaced stitches and hide knots inside the back of the panel where possible. For extra hold, attach a small piece of felt beneath the nut before sewing.
— Extra Textural Details :
Round 1 :
Embroider leaf midribs with contrasting shade: bring yarn up at leaf base and use surface slip stitch or chain stitch to the tip, adding short stitches radiating out from the midrib at each lobe. (no stitch count)
Round 2 :
Add tiny embroidered veins using a small length of darker yarn; work 2-3 tiny stitches on each lobe to suggest natural veining. Knot and hide tails. (no stitch count)
Info :
These fine embroidered lines make leaves read as oak at a glance. Use a finer hook or smaller tension for embroidered stitches to keep them neat. Alternatively, use a thin tapestry needle and stranded cotton for very fine veins.
— Finishing Touches :
Round 1 :
Weave in all ends on the wrong side of the runner using a yarn needle. Trim ends close to fabric. Block the entire runner gently: pin edges and leaves to shape, then mist lightly with water or use steam to set shapes. Allow to dry completely. (no stitch count)
Round 2 :
Check all attachment points and reinforce with a few extra stitches where the acorns or larger leaves may experience stress from handling or tableware movement. Final pressing and trimming complete the project. (no stitch count)
Info :
Optional protective backing: if you plan to use the runner under heavier items, you may slip a length of quilted felt under the runner and tack it down at a few points to preserve work and prevent slipping. This is especially useful for surfaces that might snag the applique edges.
Info :
While the above sections include many rounds and row-by-row shaping instructions, please remember to adapt counts for the exact size you want. The modular approach (panel + appliques) allows you to expand the runner by adding additional base rounds and more leaves/acorns to lengthen for larger tables.
This woodland table runner brings the warmth of fall to your home with layered oak leaves and sculpted acorns in rich seasonal tones. Each appliqued leaf and 3D acorn is an opportunity to practice shaping and embroidery while creating a durable centrepiece that evokes a stroll through an autumn forest. The modular construction makes customization easy—change colors or scale to suit your table. 🍁🧶 Enjoy the cozy satisfaction of handmade decor and share your finished runner to inspire others. Happy stitching!