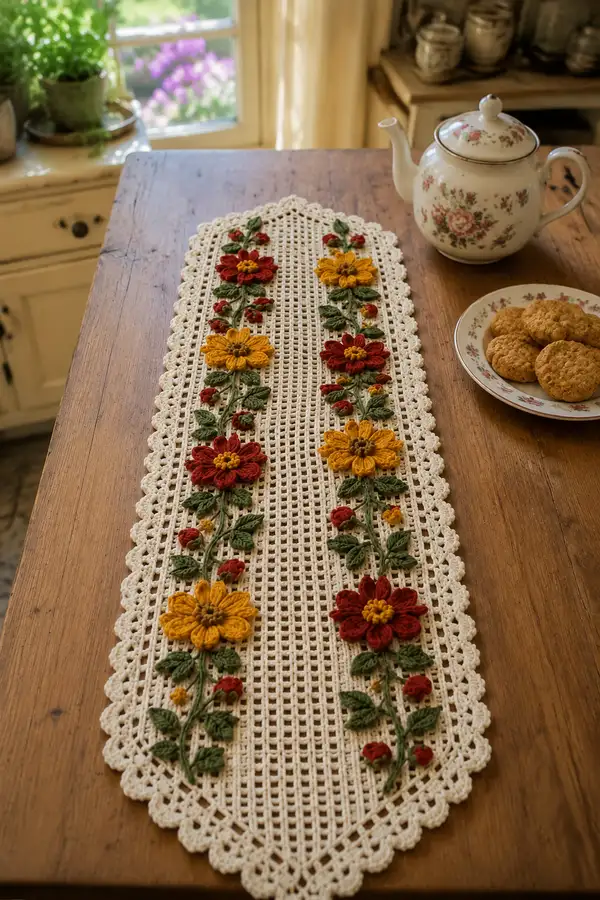
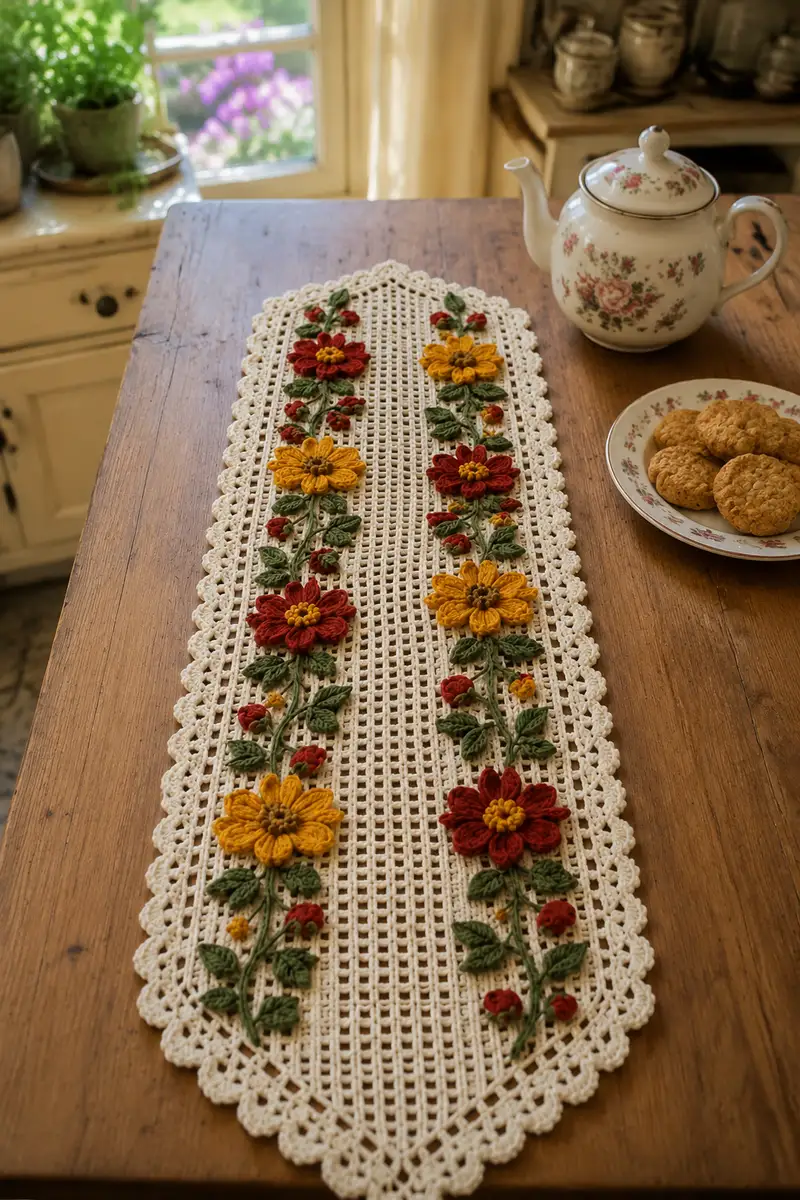
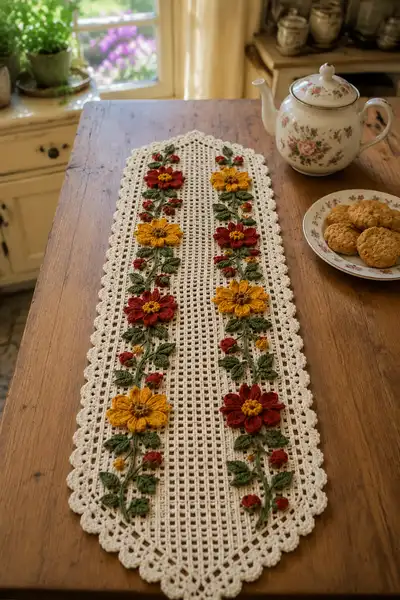
Create a vintage-inspired autumn table runner featuring an open filet mesh center, scalloped lace border, and richly textured 3D flowers, leaves and buds in warm fall tones. This pattern guides you through a long filet foundation, detailed applique flowers and stems worked separately, then sewn in place for a dimensional, heirloom-quality runner. Perfect for a harvest table or cozy tea time display.
Progress Tracker
0% Complete
— Notes & Gauge :
Info :
Gauge for mesh: 10 open squares (mesh boxes) across = approx. 4 in (10 cm) using 3.5mm hook and DK cotton. Final runner length in photo ~38-40 inches (97-102 cm). Adjust foundation chain and repeat rows to reach your desired length.
— Foundation & Filet Mesh Panel :
Row 1 :
Ch 152 (this is foundation chain for entire runner width; this number = 3n+2 and produces 50 open mesh boxes across the width). Turn.
Row 2 :
Dc in 4th ch from hook (counts as first dc), *ch 2, skip next 2 ch, dc in next ch; rep from * to end—end with dc in last ch. You will have 51 dc and 50 ch-2 mesh spaces across (51 dc; 50 open boxes).
Info :
Place a stitch marker in the turning ch at the end of this row to mark Row start. The mesh is worked in rows; each row has 51 dc stitches (counting the turning dc).
Row 3 :
Ch 3, turn, dc in first dc, *ch 2, skip next ch-2 space and work dc in next dc; rep from * to end (51 dc; 50 open boxes).
Rows 4-10 :
Rep Row 3 (51 dc; 50 open boxes each row). Keep tension even to produce square mesh.
Info :
At this stage the runner is short; keep checking width and straightness. Use blocking pins to ensure edges are straight before continuing long runs. Carry the background color yarn loosely on the wrong side if you plan to work surface slip-stitch later.
Rows 11-20 :
Rep Row 3 (51 dc; 50 open boxes each row).
Info :
We will position flower columns relative to the mesh boxes. In this scheme the two floral columns sit centered over mesh columns: left column centered over mesh boxes 12-17 area, right column centered over boxes 34-39 area. Mark these approximate vertical column positions on the right-side wrong side with removable markers every 12 rows to help placement later.
Rows 21-30 :
Rep Row 3 (51 dc; 50 open boxes each row).
Info :
If you want a shorter runner, stop when you reach desired length and proceed to Border section. For the version pictured, continue until you have a total of 120 mesh rows (this creates the long narrow runner proportion shown).
Rows 31-40 :
Rep Row 3 (51 dc; 50 open boxes each row).
Rows 41-50 :
Rep Row 3 (51 dc; 50 open boxes each row).
Info :
Every 10 rows check the alignment of your markers for the flower columns and adjust if necessary. Use a tapestry needle and a length of waste yarn to temporarily baste through marked boxes if you prefer a visual guideline when attaching flowers later.
Rows 51-60 :
Rep Row 3 (51 dc; 50 open boxes each row).
Rows 61-70 :
Rep Row 3 (51 dc; 50 open boxes each row).
Info :
The mesh background is intentionally open to show the table beneath and let the appliques sit on top. Maintain consistent turning chains for even rows. If your counts drift, unravel to the last known good row and rework.
Rows 71-80 :
Rep Row 3 (51 dc; 50 open boxes each row).
Rows 81-90 :
Rep Row 3 (51 dc; 50 open boxes each row).
Info :
When you reach row 90, decide where your first large flower will be placed lengthwise. The photo shows flowers spaced roughly every 12 rows; mark 6-8 flower centers per column depending on runner length.
Rows 91-100 :
Rep Row 3 (51 dc; 50 open boxes each row).
Rows 101-110 :
Rep Row 3 (51 dc; 50 open boxes each row).
Info :
Final mesh rows. Review your counts and correct any drift before edging. Blocking now will make the edging work more predictably—wet-block to shape scalloped ends if preferred.
Rows 111-120 :
Rep Row 3 (51 dc; 50 open boxes each row). Fasten off and weave in ends on the wrong side, leaving the panel ready for border and appliques.
— Scalloped Lace Border (work around entire panel) :
Info :
We work the border around the entire rectangular mesh panel. Work along long sides first then short pointed ends. Use cream yarn and 3.5mm hook. Keep stitches loose enough so scallops lay flat.
Round 1 (Attach) :
With cream yarn and RS facing, join with sl st to any corner turning ch. Ch 1, sc evenly around the entire panel working 1 sc into each dc along long edges and 1 sc into each ch-2 space and 3 sc into each corner chain area. Total sc around will vary but should be even; aim for neat distribution with no ruffles.
Round 2 :
Ch 3 (counts as dc), *skip next sc, (3 dc in next sc, ch 1, sl st in next sc) to create shell clusters; rep from * along sides. At short ends, work (3 dc, ch 2, 3 dc) into the tip to create pointed finish. End with sl st to top of ch-3.
Info :
This round forms the base for the scallops. Space shells evenly so scallops align across both long edges. On the photo scallops are moderately sized — approximately 1 scallop per 6 mesh boxes.
Round 3 :
Ch 1, sc around working 2 sc in center dc of each shell from previous round to reinforce. At short ends, sc evenly around the pointed tip, working 3 sc into the outermost dc clusters to round the point. Join with sl st and fasten off. Weave in ends.
Info :
Optional: Work an additional decorative picot round by sc around and working (sc, ch 3, sl st) into every other sc to create small scallops if you prefer a more lacy edge.
— Flower Components Overview :
Info :
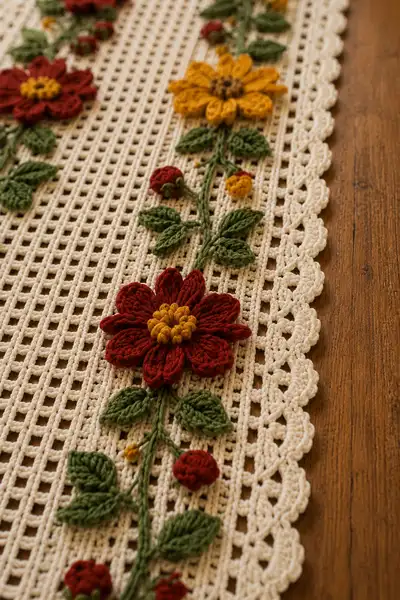
You will make: 10 Large layered flowers (5 each color alternating down both columns), 8 Small button-style flowers/buds, many leaves (approx. 36 leaves), and several tiny bud stitches. The flowers are worked flat in rounds and petals shaped by post stitches for texture. Use 3.0mm hook for petals for slightly tighter texture.
— Large Layered Flower (Make 10 total; approx. 8 petals each) :
Round 1 :
With chosen petal color (Mustard or Deep Red), MR, ch 1, 8 sc in MR (8). Pull tail to close. Join with sl st to first sc.
Info :
This small round forms a base circle; count = 8 sc. Keep MR center small but not puckered; weave tail through back and secure or leave for sewing later.
Round 2 :
Ch 1, (1 sc in next st, ch 3, sl st in same st) x 8 around — this forms 8 small loops for petal foundations (16 points including sc). Fasten off petal-color tail; join contrast or same color for petal loops if desired (but we stay same color).
Round 3 :
Join yarn in front loop of a ch-3 loop, ch 1, [Work (1 hdc, 2 dc, 1 hdc) all worked in the same ch-3 loop], sl st into next ch-3 loop to anchor petal; rep around to make 8 petal shells. After last petal sl st to base, fasten off and weave tail to back. You should have 8 rounded petals (petal row done).
Info :
Petals are puffier if you use post or cluster stitches. To create deeper shaped petals, use front post dc around the petal base on Round 3 instead of regular dc.
Round 4 (Optional layer) :
To make a second petal layer and add depth (as in photo), join second color or same color behind first layer: MR behind existing base by inserting hook through back loops of base sc and ch 1; make 8 sc in MR, close; ch 1, (ch 4, sl st in same st) x 8 to make longer loops, then form larger petals by working (1 hdc, 3 dc, 1 hdc) into each loop and sl st to next. Fasten off and weave in ends. This creates a layered flower with inner and outer petals.
Round 5 (Center) :
With Warm Brown or Bright Yellow for center, MR, ch 1, 10 sc in MR (10), pull tight; ch 1, round 2: (dec) x 5 to create a textured small popcorn center — or alternately work 10 small bobble stitches (yarn over 3 times, pull through 2 loops each) and secure. Fasten off leaving long tail for sewing center to petal base.
Info :
Sew the center to the petal base by using the tail to stitch through the back of the petal round, cinching the center so petals curve slightly upward. Use small, neat stitches to sew multiple anchoring points (4-6 stitches) through petals and center to secure the layer.
— Small Rosette Bud (Make 8-12) :
Round 1 :
With Deep Red or Mustard, MR, ch 1, 6 sc in MR (6). Join with sl st. Fasten off leaving tail for sewing. This creates small closed rosettes used as buds.
Info :
You can accent some buds with one or two tiny yellow french knots (embroidery) to mimic partially open centers.
— Leaves (Make approx. 36) :
Round 1 :
With Olive Green, ch 8. In 2nd ch from hook sc, hdc in next, dc in next 2, hdc in next, sc in next. Ch 1, turn and work along opposite side of foundation chain: sc, hdc, dc, dc, hdc, sc in corresponding stitches. Sl st to base of starting ch. This forms 1 elongated leaf. (Total stitches per leaf = 12-14 depending on counting). Fasten off leaving tail for sewing.
Info :
For veins, use surface slip-stitch: with contrasting slightly darker green, run a surface sl st down leaf center with a small yarn needle to make a ridge vein. Leaves photographed show a raised center vein for realism.
Alternate Leaf (Textured) :
MR, ch 1, 6 sc in MR (6), do not close. Work 1 sc in next st, hdc, dc, hdc, sc to shape; finish with picot tip (ch 3, sl st into top). This smaller leaf is used near buds.
Info :
Leaves are worked in a single flat piece; press lightly when blocking to set shape before sewing onto runner.
— Stems & Surface Embroidery :
Info :
Stems are done with surface slip-stitch (also called surface crochet) using Olive Green. You will stitch stems directly onto the mesh after appliques are positioned or stitch stems first then attach appliques over them to conceal ends.
Round/Step 1 :
With RS facing, join Olive Green at the mesh box where the base of a flower will sit using a sl st. Ch 1, then insert hook into the next dc or ch-2 space and work a surface slip stitch by pulling up a loop and sl st to next space — effectively creating a continuous raised line. Work stems by following your marked pathway along the mesh boxes, occasionally making tiny branches by ch 2-3 and anchoring back into mesh. Fasten off and weave ends.
Info :
Work stems with slightly looser tension than regular stitches so they sit as raised cords. If you prefer rope-like stems, chain a length and overlay it with long single crochet stitches placed into the mesh to secure and create bulk.
— Attaching Appliques & Flower Placement :
Info :
Lay the mesh panel flat and position your flowers and leaves before sewing. In the reference, two parallel columns of flowers run the length of the runner: each column contains five large flowers spaced approx. 12 mesh rows apart with several buds and pairs of leaves between. Use pins to place and adjust spacing.
Step 1 :
For each large flower, place the flower center over the chosen mesh box (marking will help). Using the long tail from the flower center, stitch through the mesh around 6-8 anchor points (through back loop of mesh dc or through ch-2 box bars) to secure. Make sure petals sit naturally — use small stitches to anchor petal tips if needed without flattening them.
Step 2 :
Sew each leaf near its stem junction: align leaf base and sew through 4-6 stitches to hold secure. For buds, sew base to mesh with a few tight stitches so they hold shape. Conceal thread on the wrong side and weave in securely.
Info :
Sewing tip: use a blunt tapestry needle to avoid splitting yarn and to pass through multiple mesh bars at once. Sew with matching yarn color so tiny stitches blend in.
— Small Raised Buds (Clustered) :
Round 1 :
With bud color, MR, ch 1, 5 sc in MR, pull to close (5). Fasten off with long tail and sew to mesh. Optionally, add a tiny bright yellow french knot on top for highlight.
Info :
Buds can be used singly or in clusters (2-3 close together) to mimic the photo. Secure them tightly as small pieces are more likely to get knocked loose.
— Decorative Petal Stitch Variation (Layer shaping) :
Round 1 :
When working the outer petal layer, make petals using elongated puff/petal stitches to mimic the tall, sculpted petals in the picture: ch 3, YO insert hook into loop, YO pull up long loop to about 1.5x normal length; repeat 3-4 times in same space then draw through all loops and sl st to secure. This creates a tall petal; anchor edges with sl st to base.
Info :
Use this technique for the outer petal layer for dramatic raised petals. Work on second layer only; do not overstuff with yarn otherwise the flower flattens.
— Finishing & Final Blocking :
Info :
After all appliques are sewn, wet-block the entire runner laid flat on blocking mats. Pin scalloped border and floral elements where desired and allow to dry overnight. Blocking evens mesh, sets petals and ensures the scalloped border lays flat.
Step :
Trim any remaining ends on wrong side, weave all tails securely through multiple stitches to prevent unraveling. If the runner will be laundered regularly, secure applique stitches with a few drops of fabric glue on the knot ends on wrong side (test glue on scrap first).
Info :
For a very stable attachment, after sewing appliques, go around the base of each flower with small invisible whip stitch securing through several mesh bars on the wrong side.
— Variation Ideas :
Info :
Make a single-color runner by using same-color petals for a tonal look; or change flower palette for different seasons. You can shorten the runner by reducing mesh rows in multiples of 12 to keep motif spacing consistent.
This autumn floral runner brings seasonal warmth and vintage charm to any table with its textured 3D flowers and delicate lace border. Each petal and leaf is handcrafted and sewn with care, giving the runner rich dimensional detail that invites touch. The airy mesh background highlights the blossoms while keeping the piece light and elegant. Enjoy arranging it as a centerpiece or gift it to someone who loves slow-crafted, handmade home decor. 🧶🍂