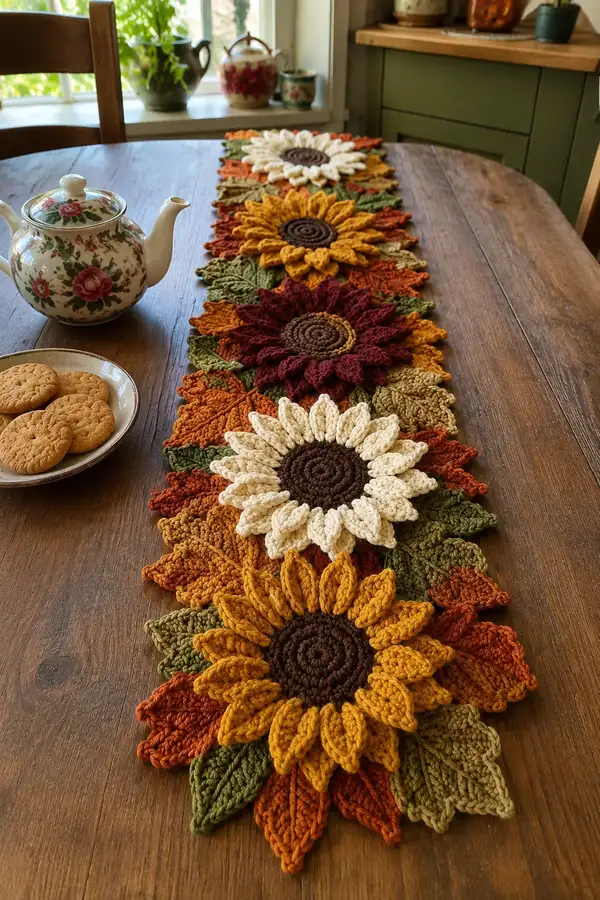
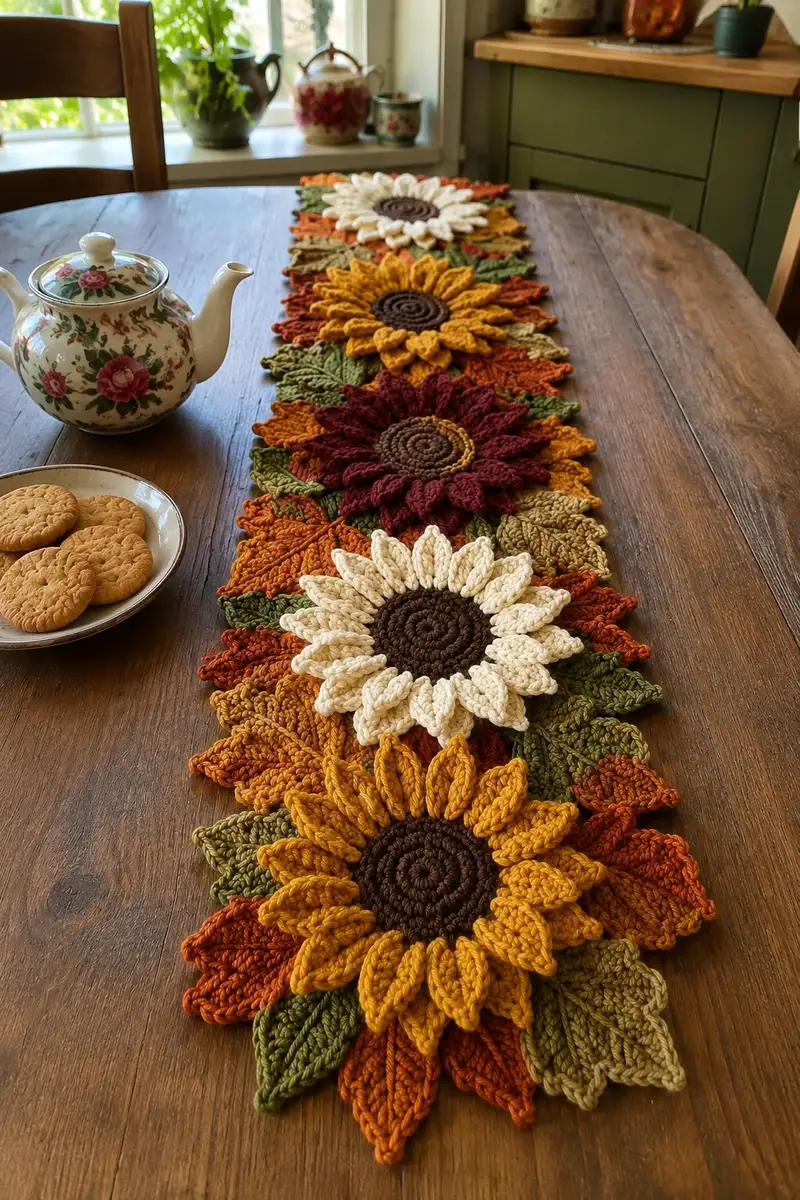
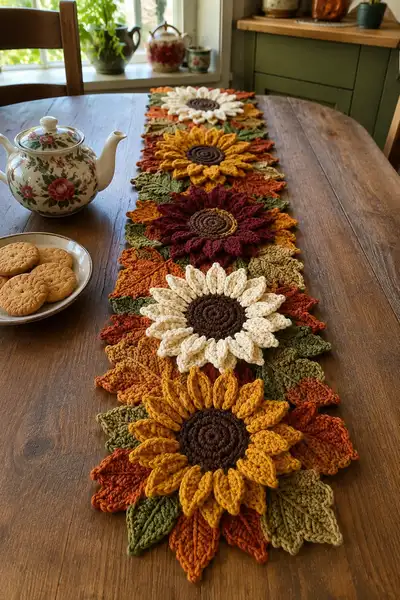
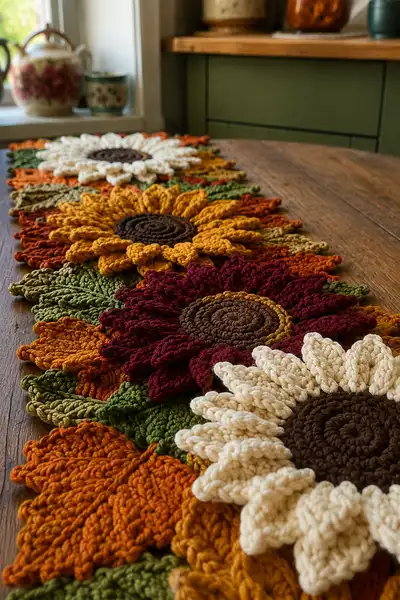
Create a warm, autumnal table runner featuring layered sunflower motifs surrounded by textured maple-style leaves. This pattern uses worsted weight yarn and simple stitch shaping to build realistic sunflower centers, raised petals, and sculpted leaves that join together into a long runner. The finished runner showcases rich fall tones — gold, rust, burgundy, olive, cream and chocolate — with a sturdy but soft hand, perfect for a dining table centerpiece.
Progress Tracker
0% Complete
— Overview :
Info :
This pattern is written in rounds and sections for one sunflower motif, one leaf motif and joining elements. Make four sunflower motifs and multiple leaf motifs, then join in a linear arrangement to create a long runner. Gauge is flexible; tension should be tight enough to produce crisp petals. Pattern assumes worsted weight yarn and a 3.5mm hook. Stitch counts given after each round are final counts for that round.
— Sunflower Center (Make 4) :
Round 1 :
6 sc in magic ring (6)
Round 3 :
(1 sc, 1 inc) x 6 (18)
Round 4 :
(2 sc, 1 inc) x 6 (24)
Round 5 :
(3 sc, 1 inc) x 6 (30)
Round 6 :
(4 sc, 1 inc) x 6 (36)
Round 7 :
(5 sc, 1 inc) x 6 (42)
Round 8 :
(6 sc, 1 inc) x 6 (48)
Info :
Change to dark chocolate brown for the center if not already using it. Keep tension consistent. This creates a 48-stitch round which will be used as the base for petal spacing. For smaller centers, stop at round 7 (42 sts).
Round 9 :
1 sc in each st around (48)
Round 10 :
1 sc in each st around (48)
Round 11 :
1 sc in each st around (48)
Info :
Work rounds 9-11 firmly to build a slightly raised, dense center. Do not stuff; keep center flat. If you prefer a slightly domed center, you can add a thin circle of batting under the center later before attaching petals.
Round 12 :
FLO: 1 sc in each st (48)
Info :
Finish center and fasten off leaving a long tail for whip-stitching the center to the petal base later if you prefer sewing petals on rather than crocheting them around the center. If you plan to crochet petals directly onto the center, keep working without fastening off.
— Petal Spacing & Preparation :
Info :
We will make 16 main petals around the center. With 48 stitches, place a marker every 3rd stitch to mark 16 evenly spaced anchor points: (48 sts / 16 petals = 3). Move markers as needed and remove the marker after anchoring the petal. Change to your petal color (mustard/gold, burgundy or cream) before beginning Round P1.
— Petal Round Series (Primary Petal Layer) :
Round P1 :
*Insert hook in next marked st, ch 1, work 1 sc to anchor, ch 6, sl st in 2nd ch from hook, 1 hdc in next ch, 1 dc in next ch, 1 hdc in next ch, sl st into the same anchor st; rep from * around for 16 petals (16 anchor points used, petals: 16)
Round P2 :
Attach yarn behind first petal base if needed; *work into the chain loops: sl st in the last sc anchor, ch 2, (3 dc cluster over the petal chain loop) sl st back into anchor; rep around (16 clusters). This round creates a fuller petal body (no overall stitch count change, base anchors remain 48)
Round P3 :
Working behind petals, 1 sc in each st around across the center back (48). This secures petals down and strengthens the join.
Info :
If you prefer puffed, sculpted petals (as seen), switch to a puff technique: yarn over, insert hook in chain loop, pull up loop three times, yarn over and pull through all loops on hook to complete a puff. Use 3-5 puff loops for chunky petals. Keep a consistent number of puff loops per petal for even texture.
Round P4 :
For puff petals: *At each petal base, make 6 puff stitches into the chain loop (yarn over, insert, pull up four times, yo & pull through all loops), ch1 and sl st to anchor; rep around (16 petals, each composed of 6 puff stitches)
Round P5 :
Secure the back of petals with 1 sc in each center back stitch (48) to stabilize petals and create a flat seam behind the petal layer.
Round P6 :
Optional second petal row: Change to a contrasting petal color for depth (Info below). *Between each first-layer petal, ch 3 and work 1 dc cluster into the base (anchored between petals), sl st to next base; rep around to form an alternating second row (16 clusters)
Info :
For layered petals like in the photo, work a staggered row of petals that sit between the first petals. Change color before Round P6 to create variety (e.g., mustard front petals, deeper orange behind). Carry the unused color along the back and catch it with sc rounds to hide ends.
Round P7 :
Work 1 sc in each st behind the second petal row to secure (48)
Round P8 :
Edge the petals: *Ch 1, sl st between petal bases to create a tidy boundary; rep around. Fasten off and weave in ends, leaving long tails if you will sew centers together later
Info :
At this stage you have one completed sunflower motif with a dense center and layered sculpted petals. Make 4 identical motifs following these rounds and color choices, alternating which color is front and which is back to create visual variety along the runner.
— Petal Detailing (Optional Raised Ridge) :
Round D1 :
Using same petal color, join at base of one petal, ch 1, work 8 fpdc evenly across petal surface to create a raised ridge, sl st to anchor; rep for each petal to add veining detail across 16 petals (work 8 fpdc per petal). This does not change center stitch count (48)
Round D2 :
1 sc around the entire motif in BLO to create a subtle border and tuck down any loose petal edges (48)
Info :
Use FLO or BLO as directed to cause ridges or tuck-ins. This is how the petals in the photo appear sculpted; work FPDC ridges on petals for a pronounced look.
— Small Accent Ring (Optional) :
Round AR1 :
Attach a highlight color (mustard or tan) at one point of the center, ch 1, sc in same st, *ch 2, skip 2 sts, sc in next st; rep around to add a dotted accent ring — you'll have 16 small chain arches (48 sts base unchanged)
Info :
This small accent ring was used in the photo on one motif to give a highlight around the center. Use sparingly for contrast. Fasten off and weave ends under the back of the center.
— Maple-Style Leaf Motif (Make many) :
Round L1 :
With leaf color A (olive), ch 6, sl st in 2nd ch from hook, 1 hdc, 1 dc, 1 hdc, sl st back to start to form first point. Join ends into a small ring: ch 1, 6 sc in loop (6)
Round L2 :
Inc in each st around (12) (12)
Round L3 :
(1 sc, 1 inc) x 6 (18)
Info :
We will shape an elongated leaf with lobes; keep these rounds compact because the leaf will be elongated by shaping and post stitches in later rounds.
Round L4 :
1 sc in each st around (18)
Round L5 :
Switch to BLO: 1 sc in each st BLO (18) to create a ridge on the leaf centerline
Round L6 :
*Ch 6, work back along the chain: (sl st, sl st, hdc, dc, hdc) into the chain, sl st into next base st; rep for 6 leaf lobes around. This creates 6 lobes per leaf. The base is still 18 anchor sts.
Round L7 :
Work 1 sc in each anchor st to secure lobes (18)
Round L8 :
Working in FLO, make central vein: *ch 1, fpdc around the corresponding base st to form a raised vein; rep across the central line of the leaf (18 fpdc)
Round L9 :
1 sc around leaf edge, placing 2 sc at sharp points to ease curvature and create a flat border (approx 22 edging sts)
Info :
Alternate leaf colors (olive, moss, light tan, rust) to achieve the layered look from the photos. Make approximately 6-8 leaves for each sunflower motif to surround it fully — you can stagger them for a natural overlapping effect.
Round L10 :
Block each leaf lightly to set shape; place pins along the lobes and steam lightly or damp-block for an hour until dry.
— Secondary Leaf Variant (Pointed Maple Leaf) :
Round ML1 :
Ch 5, sc in 2nd ch from hook, hdc, dc, ch 1, turn to form central stem; sc 6 into first ch loop to form a small rounded base, join to form a ring: 6 sc (6)
Round ML2 :
Inc in each st (12)
Round ML3 :
(1 sc, 1 inc) x 6 (18)
Round ML4 :
1 sc around (18)
Round ML5 :
*Ch 8, sl st back along chain to create a pointed lobe, sl st into next base st; rep around to create 6 major points (points: 6)
Round ML6 :
Secure base with 1 sc around (18)
Info :
For the maple-esque shapes in the photo, make several of these pointed leaves in burnt orange and tan. Vary sizes by increasing or decreasing the chain lengths for lobes.
— Leaf Veining and Texture :
Round V1 :
Using contrasting green or tan, embroider a central vein using yarn needle: run a surface slip stitch from base to tip, making small sl st segments to form veins; this does not alter stitch count but adds definition
Round V2 :
Optionally work small raised ridges with BPdc along the leaf's backbone: *bpdc around base st, rep to form a ribbed feel (counts unchanged)
Info :
Veining is key to the realism in the photo. Use surface crochet for crisp veins, or use a narrow hook and lighter yarn for subtle raised veins.
— Joining Motif Panels (Connector Squares) :
Round J1 :
Make a small square connector in rust/orange. Ch 4, join to form ring, ch 1, 8 sc in ring (8)
Round J2 :
Inc in each st around (16)
Round J3 :
(1 sc, 1 inc) x 8 (24)
Round J4 :
1 sc around (24)
Round J5 :
Switch to olive green, work 1 sc in each st BLO to create a slight ridge (24)
Info :
Make enough connector pieces to place between your sunflower motifs (for photo layout we used 3-4 connectors between motifs and additional connectors at the ends for a balanced look). These small squares also make it easy to join leaves and motifs with slip stitches or whip stitch so edges align.
— Runner Layout & Plan :
Info :
Plan your layout before joining. The photographed runner stacks four sunflower motifs end-to-end separated by clusters of leaves and small connector pieces. Typical layout: [Sunflower motif] + [clustered leaves + connectors] + [Sunflower motif] repeated. Measure your table and decide motif spacing — each sunflower motif (with surrounding leaves) measures roughly 9-10 inches in diameter when made as written; adjust by hook or yarn weight to scale up or down.
— Joining Motifs (Slip Stitch Join Method) :
Round JN1 :
Place two sunflower motifs right sides up, overlap their outermost leaf edges slightly where you want them joined. Using yarn and a blunt needle, mattress stitch or whip stitch through the back loops of corresponding sc rounds to join securely; or use sl st through connector pieces for a decorative raised seam. No stitch count changes in motifs, but mark 16 even join points across each seam to keep petals aligned.
Info :
Pin motifs together so petal edges interlock naturally. Join using slip-stitch crochet for a subtle ridge, or sew for an invisible seam. If using slip stitch, join with RS facing and work through both motif loops with sl st to create a neat seam.
Round JN2 :
When joining leaves around motifs, overlap leaf tips by 1-2 rows and catch only a few stitches per leaf to preserve movement; catch stitches every 4-6 sts to hold shape without flattening.
— Edge & Border (worked after joining all motifs) :
Round E1 :
With a neutral color (tan or warm rust), 1 sc evenly around the entire runner edge, placing 2 sc at points to ease corners and maintain flatness. Work sc into outer loops of petals and leaves; count approx 240-300 sc total depending on runner length (this is approximate; count your stitches)
Round E2 :
FLO: 1 sc in each st around to create a rope-like border (same count as E1)
Round E3 :
Decorative picot row: *sc in next st, ch 3, sl st in 3rd ch from hook to create a small picot, skip 2 sts, sc in next st; rep around. Adjust spacing evenly to have symmetrical picots along the border (final count will vary)
Info :
This edging offers a finished look. For a simpler finish, omit the picot row and do two neat sc rounds. After edging, fasten off and weave ends carefully under the border rows.
— Optional Extra Texture Rows (If you want a longer runner) :
Round X1 :
Create filler strips in rust or olive: ch 30, turn, sc in 2nd ch from hook and each ch across (29), ch 1, turn; rep 6 rows to form a 6-row strip. Edge with sc and join between motifs to increase runner length. Each strip is approx 4-5 inches long depending on gauge.
Round X2 :
Join strips to motif edges using sl st into outer edge loops and then whip stitch to secure if needed. Adjust number of filler strips to reach desired runner length.
Info :
Use these strips to customize length. They also act as tidy connectors and allow you to shift motifs slightly for a staggered look like in the photographs.
— Blocking & Finishing :
Info :
Block each motif and leaf individually prior to joining, or lightly steam-block the whole runner after assembly. Pin each petal and leaf to ensure even spacing, and allow to dry completely. Weave in ends on the back; if any petals or leaves are loose, tack them down with a few invisible stitches along their bases.
Round F1 :
Final inspection: run your hand across the runner and feel for any loose loops or gaps. Add small whip-stitches from the back to anchor any lifting leaves or petals. Trim and secure all tails.
Info :
For a slightly stiffer runner, press with a gently diluted starch spray from the back only. Avoid heavy starch as it can make yarn feel crisp and brittle. Store flat to preserve shape.
Crocheting this sunflower maple table runner is a deeply satisfying way to bring autumn warmth to your home! Each layered sunflower and sculpted leaf adds texture and personality, transforming your table into a cozy seasonal vignette. The step-by-step instructions and modular motifs make the project approachable and easy to customize. Grab your favorite fall yarn colors and enjoy making something beautiful to treasure. 🧶🍂