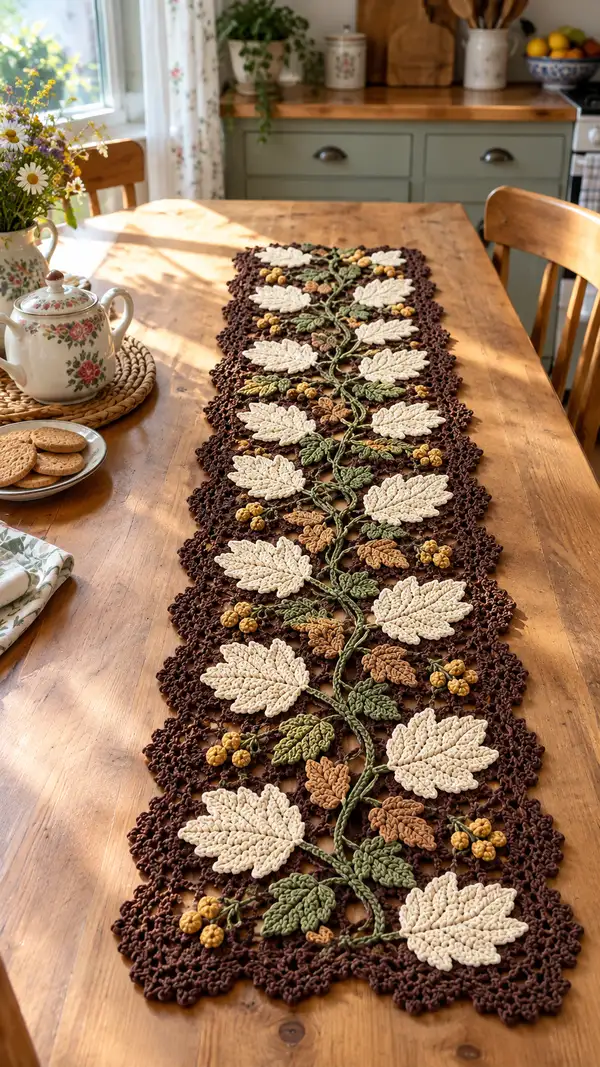
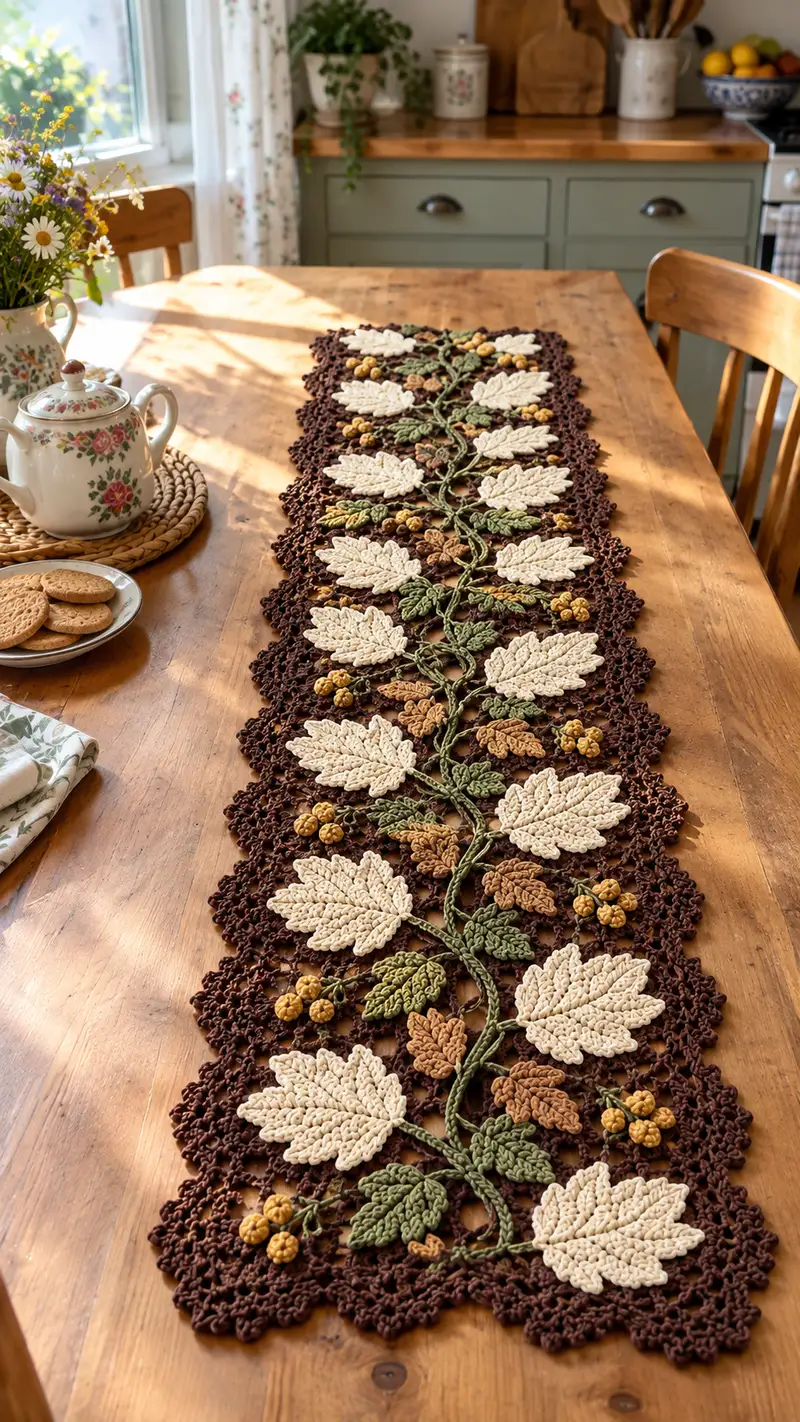
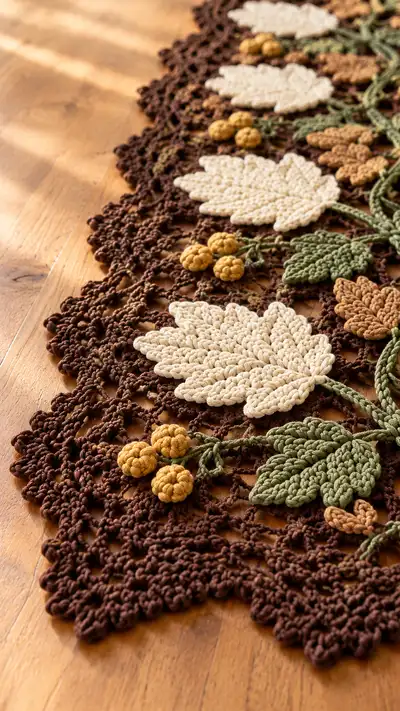
A warm, vintage-inspired table runner featuring a trailing vine of textured cream leaves, olive leaf clusters, golden berry bobbles, and a deep chocolate lace background. This elegant autumn centerpiece uses modular motifs joined into a long runner with scalloped edging. The combination of raised leaf stitches and open lace gives visible depth and a handmade heirloom look.
Progress Tracker
0% Complete
— Notes and Construction Overview :
Info :
This runner is constructed from three basic element groups: large raised leaves (cream), small textured leaves (olive and caramel), and berry bobble clusters (mustard). These motifs are worked separately and appliqued or join-as-you-go onto a repeating chocolate lace mesh panel that forms the runner base. The vine is a crocheted cord placed and sewn onto the mesh to visually connect the leaf motifs. Use cotton or cotton-blend worsted weight yarn and a 4.0 mm hook for a sturdy but defined fabric. Work tightly enough that motifs keep their shape while still lying fairly flat against the mesh.
Info :
Gauge is not critical for length, but stitch density matters for motif spacing and fitting into the lace holes. Block mesh panels before assembly to ensure consistent motif placement. Pin heavily and sew motifs with small, matched stitches through the underside of the mesh to keep the top surface clean.
— Runner Size Estimate :
Info :
Finished runner in sample measures approximately 36-40 inches (92-102 cm) long by 10-12 inches (25-30 cm) wide after blocking. Adjust length by adding or subtracting mesh repeats. The pattern below gives motif counts for a 36-40 inch runner (10 large leaves per side row connected via vine repeats).
— Large Leaf (Make 10) :
Round 1 :
ch 14, 1 sc in 2nd ch from hook, 1 sc in next 11 ch across (12)
Round 2 :
ch 1, turn, 1 sc in each st across (12)
Round 3 :
ch 1, turn, (1 sc, 1 hdc) in first st, 1 hdc in next 2 sts, 1 dc in next 2 sts, 1 tr in next 2 sts, 1 dc in next 2 sts, 1 hdc in next 2 sts, 1 sc in last st (12) — shaping begins
Round 4 :
Working down opposite side of foundation chain: 1 sc in last st, 1 hdc in next 2 sts, 1 dc in next 2 sts, 1 tr in next 2 sts, 1 dc in next 2 sts, 1 hdc in next 2 sts, 1 sc in last st; sl st to first sc to close (24)
Round 5 :
ch 1, 1 sc in same st, (1 sc, inc) across next 6sts along one side to create ridge shaping; mirror on opposite side: work symmetric increases along each side so total equals (36)
Info :
To achieve the raised ribbed veins, at the end of Round 5 you will work front post trebles (FPtr) along the center line of the leaf. Plan placement before continuing. These FPtr create the central vein definition.
Round 6 :
Work around leaf edge: *1 sc in next 3sts, 1 hdc in next 2sts, 1 dc in next 4sts, 1 tr in next 4sts, 1 dc in next 4sts, 1 hdc in next 2sts, 1 sc in next 3sts* (36)
Round 7 :
ch 1, 1 sc in each st BLO across entire round to create a defined edge (36)
Round 8 :
Work veins: ch 1, *FPtr around post of designated st to form center vein* repeat 6 times down center; sl st to edge to secure (no change)
Round 9 :
Decorative scallop: *(sc, ch2, sl st in next st) across outer perimeter to build small scallop points* (36)
Round 10 :
Reverse work lightly: 1 sc in each st across; help flatten leaf by lightly blocking into shape (36)
Info :
Leave a 6-8 inch tail of yarn for sewing. Block leaves lightly with steam or spray to open stitches and set shape. If you prefer a thicker leaf, work rounds 5-7 in a smaller hook (3.5 mm) to tighten the fabric.
Round 11 :
Optional raised lobes: along each side make 3 small lobes by making (ch3, 3 dc in same st, sl st) at even intervals; fasten off leaving long tail (36 plus lobes)
Info :
If you want each leaf to have a subtle cupped shape, steam lightly while pinning edges down and allow center to remain slightly convex. This mimics natural leaf curvature when sewn to the vine.
— Small Textured Leaf (Make 18 olive; Make 12 caramel) :
Round 1 :
ch 10, 1 sc in 2nd ch from hook, 1 sc in next 8 ch (9)
Round 2 :
ch 1, turn, 1 sc in each st across (9)
Round 3 :
ch 1, 1 sc, 1 hdc, 1 dc, 2 dc in center, 1 dc, 1 hdc, 1 sc across opposite side (9 then mirrored = 18)
Round 4 :
Work around perimeter: 1 sc in each st to form neat edge; sl st to join (18)
Round 5 :
Surface texture: working FLO, 1 sc in each st for a ribbed surface (18)
Round 6 :
Make small center vein: ch 6, sl st along chain to form a twisted cord, attach cord centrally with sl st at base; fasten off leaving tail for sewing (no stitch count change)
Info :
Small leaves are stacked in groups around the large leaves; vary placement so some small leaves overlap the large leaf base and some attach to the vine directly for a natural cluster look.
— Tiny Acorn / Caramel Leaf Accent (Make 12) :
Round 1 :
mr, 6 sc in mr (6)
Round 3 :
(1 sc, inc) x6 (18)
Round 4 :
1 sc in each st (18)
Round 5 :
Change to BLO: 1 sc in each st BLO to create cup for acorn top (18)
Round 6 :
Surface detail: finish with a round of sl st for a tidy edge; pull center closed slightly and fasten off leaving tail to sew onto mesh.
Info :
Sew acorn cups near base of small leaf clusters and position consistently along the vine so they appear as natural seed pods. You can stuff the acorn lightly with a tiny amount of fiberfill to give slight 3D volume but keep flat overall.
— Berry Bobble Cluster (Make 30 clusters; each cluster has 3 bobbles) :
Round 1 :
mr, ch 1, 6 sc in mr (6)
Round 2 :
1 sc in each st (6)
Round 3 :
Bobble round: (bobble - make 4 dc cluster) in each st across to form bumpy surface; total 6 bobbles (6)
Round 4 :
Fold bobble circle in half and sl st the base to form a small berry; fasten off leaving long tail for sewing (no stitch count)
Info :
For a fuller cluster, make three berries and sew them together at their base in a triangular cluster before stitching to the vine. Do not overstuff; a tiny dab of fiberfill or just natural fullness of stitches suffices.
— Vine Cord (Make 1 cord long enough for runner) :
Round 1 :
ch 220 (adjust to length needed for your runner; sample uses 220 chains), sl st in 2nd ch from hook and each ch back (219) — this creates a firm cord
Round 2 :
Alternatively, for thicker vine: ch 220, then sc in BLO of each chain, working back along chain to form a 3-row cord for thickness (219)
Info :
Shape vine by gently twisting and blocking into a slightly irregular, natural curve before sewing. The cord can be sewn along the mesh at chosen points and the leaves/berries sewn directly to the cord and/or to the mesh for stability.
— Chocolate Lace Mesh Panel (Make 6 repeats to reach sample length) :
Round 1 :
With chocolate, ch 30, join with sl st to form a ring, ch 3 (counts as dc), 23 dc in ring (24)
Round 2 :
ch 3, dc in same st, *ch 3, sk 1, 2 dc in next st* rep to end, join (24 clusters, 24 ch-3 sps)
Round 3 :
ch 4 (counts as tr), tr around each pair of dc from previous round creating vertical loops: tr, ch1 across to next cluster until end (24 tr columns)
Round 4 :
Ch 1, *sc in top of tr, ch 5, sk tr column* repeat across forming elongated mesh; join (24 ch-5 loops)
Round 5 :
In each ch-5 loop work: (sc, ch3, 3 dc, ch3, sc) to make floral lattice openwork. Join and fasten off (24 motif arches)
Info :
Repeat Rounds 1-5 horizontally to form a horizontal strip of mesh. To lengthen the runner, crochet additional strips and join them with a seam of sc along adjoining chains or join-as-you-go using sl st joins at the last pass of the mesh round. Make 6 mesh repeats for sample length, adjusting to fit table.
Round 7 :
After vertical repeats are joined, work one round of sc around the entire assembled mesh to tidy edges: 1 sc in each open chain and 2 sc in each corner for neatness (counts vary by mesh size)
Info :
Block the entire mesh flat, ensuring each ch-5 arch lays open and even. This makes it far easier to position leaves so their base tucks into mesh holes and can be sewn through multiple loops for secure attachment.
— Joining Motifs to Mesh (Join-as-you-go guidance) :
Info :
Lay the blocked mesh panel flat. Position the vine cord down the center as a guideline. Place large cream leaves alternately on either side of vine, spacing them evenly (sample: one large leaf every 3 mesh arches). Use pins to secure in final desired placement before sewing. Small leaves, acorn caps, and berry clusters should be arranged in natural clusters around the large leaves and along the vine.
Round 2 :
To sew: with yarn tail from motif and a yarn needle, mattress stitch the motif base through the mesh arches and through the back loops of the motif edge for a hidden seam. Aim to pick up 6-10 mesh loops across the base of each large leaf for a stable attachment.
Info :
Attach vines by sewing through the cable/cord and into mesh at frequent intervals (every 1-2 inches) so that the cord does not lift away from the mesh. Secure ends with a small discreet knot on the underside and weave tails through several stitches before trimming.
— Scalloped Border and Finishing Edge :
Round 1 :
Working around entire runner edge with chocolate, ch 1, 1 sc in each st and around each open ch sp, placing (3 sc) in corners for bulk; join (counts vary)
Round 2 :
ch 3, skip 1, *5 dc in next st (shell), skip 1, ch1, sc in next st, ch1* repeat around to create shells; join (shells spaced by sc)
Round 3 :
ch 1, sc in top of each shell, picot on every second shell to give tiny points: *sc, (ch3, sl st in 3rd ch), sc*; join and fasten off
Info :
For a deeper scallop (sample look), repeat Round 2 with larger shells (7 dc) before adding picot points. Block scalloped edge carefully with pins to open shells and set points for a crisp finished look.
— Extra Decorative Surface Loops and Attachments :
Round 1 :
To make little connecting tendrils: ch 20, sl st down chain to create a twisted rope, attach at both ends to vine or leaves as needed; make 6-8 tendrils across runner
Round 2 :
Optional beading: with small thread and matching needle, string micro beads and stitch onto leaf centers for a dew-drop effect (use only washable-safe beads)
Info :
When stitching motifs, strive to sew from the underside of the mesh picking up only lower loops and underside of motif base. This hides stitches and keeps the top surface smooth. Use small backstitches to secure vine and make inconspicuous knots on the underside only.
— Blocking, Pressing and Final Shaping :
Info :
Block the completed runner flat on a large blocking board: stretch gently to required width, pin scalloped edges evenly, and spray lightly with water. Allow to dry fully. For cotton, a gentle steam press from the wrong side can further flatten and set the surface; avoid direct contact with bobbles and raised leaves.
Round 2 :
Final finishing: trim ends, weave in remaining tails securely, and give a final light steam if needed to set shapes. Check underside seams for loose threads and reinforce where necessary.
Info :
Congratulations: your assembled runner should display alternating cream leaves along a central vine, with small olive and caramel leaves, acorn cups, and mustard bobbles creating dimensional fall clusters on a chocolate lace backdrop. Adjust motif positions if any appear too sparse before fully securing.
This autumn runner brings a warm, handcrafted centerpiece to any table — full of texture, layered leaves, and tiny bobble berries that catch the light. Each carefully placed motif and stitch builds into a piece you can be proud to display. 🧶 The final blocking brings all the lace and raised motifs to life, creating a cozy, heirloom-ready runner perfect for fall gatherings. Enjoy every stitch, and share your finished runner to inspire others! 🍂✨